|
General Disclaimer: (HV) (DC) injury or death hazard, use at your own risk, may void warranty. |
Difference between revisions of "Template:PriusPlus High Power Schematic"
Jump to navigation
Jump to search
(Initial Template) |
m (Unprotected "Template:PriusPlus High Power Schematic") |
||
| (6 intermediate revisions by the same user not shown) | |||
| Line 1: | Line 1: | ||
| − | [[Image:EAA-PHEV-PRIUS- | + | [[Image:EAA-PHEV-PRIUS-HighPowerSchematicV2d 060410.jpg|thumb|center|500px| |
| − | '''High Power Schematic''' | + | '''High Power Schematic 2d. 2006.04.10''' ''( Click to Enlarge )''<br> |
| − | ''( Click to Enlarge )'' | + | The diagrams below are outdated and useful only for reference.<br>Although wiring details have changed, these CalCars diagrams should give an idea of a way to lay out the battery box. |
| − | ''( [http://www.forsites.com/CalCars/EAA-PHEV/EAA-PHEV-PRIUS+HighPowerSchematicV1b_060126.png | + | ---- |
| − | + | [[Image:EAA-PHEV-PRIUS-HighPowerSchematicV2c 060321.jpg|50px]] [[Media:EAA-PHEV-PRIUS-HighPowerSchematicV2c_060321.jpg|2c.]] | |
| + | [[Image:EAA-PHEV-PRIUS-HighPowerSchematicV2b_060319.jpg|50px]] [[Media:EAA-PHEV-PRIUS-HighPowerSchematicV2b_060319.jpg|2b.]] | ||
| + | <br>This is the second version by Ron Gremban. | ||
| + | ---- | ||
| + | [[Image:EAA-PHEV-PRIUS-HighPowerSchematicV1a 060116.png|left|50px]] [[Media:EAA-PHEV-PRIUS-HighPowerSchematicV1a 060116.png|Version 1.]] ''( [http://www.forsites.com/CalCars/EAA-PHEV/EAA-PHEV-PRIUS+HighPowerSchematicV1b_060126.png source] )''<br><br><br> | ||
---- | ---- | ||
[[Image:priusplushv.png|png thumbnail|left|50px]] | [[Image:priusplushv.png|png thumbnail|left|50px]] | ||
| Line 14: | Line 18: | ||
[http://autos.groups.yahoo.com/group/eaa-phev/message/34 yahoo] | [http://autos.groups.yahoo.com/group/eaa-phev/message/34 yahoo] | ||
[http://www.forsites.com/CalCars/EAA-PHEV/EAA-PHEV-PRIUS+HighPowerSchematicV1a_060116.png source]) | [http://www.forsites.com/CalCars/EAA-PHEV/EAA-PHEV-PRIUS+HighPowerSchematicV1a_060116.png source]) | ||
| − | </i> | + | </i><br><br><br> |
| − | |||
| − | <br><br> | ||
---- | ---- | ||
[[Image:priusplushvd.png|left|50px]] | [[Image:priusplushvd.png|left|50px]] | ||
Latest revision as of 09:04, 15 October 2007

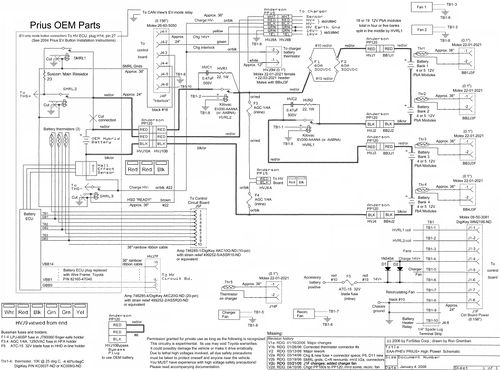
High Power Schematic 2d. 2006.04.10 ( Click to Enlarge )
The diagrams below are outdated and useful only for reference.
Although wiring details have changed, these CalCars diagrams should give an idea of a way to lay out the battery box.
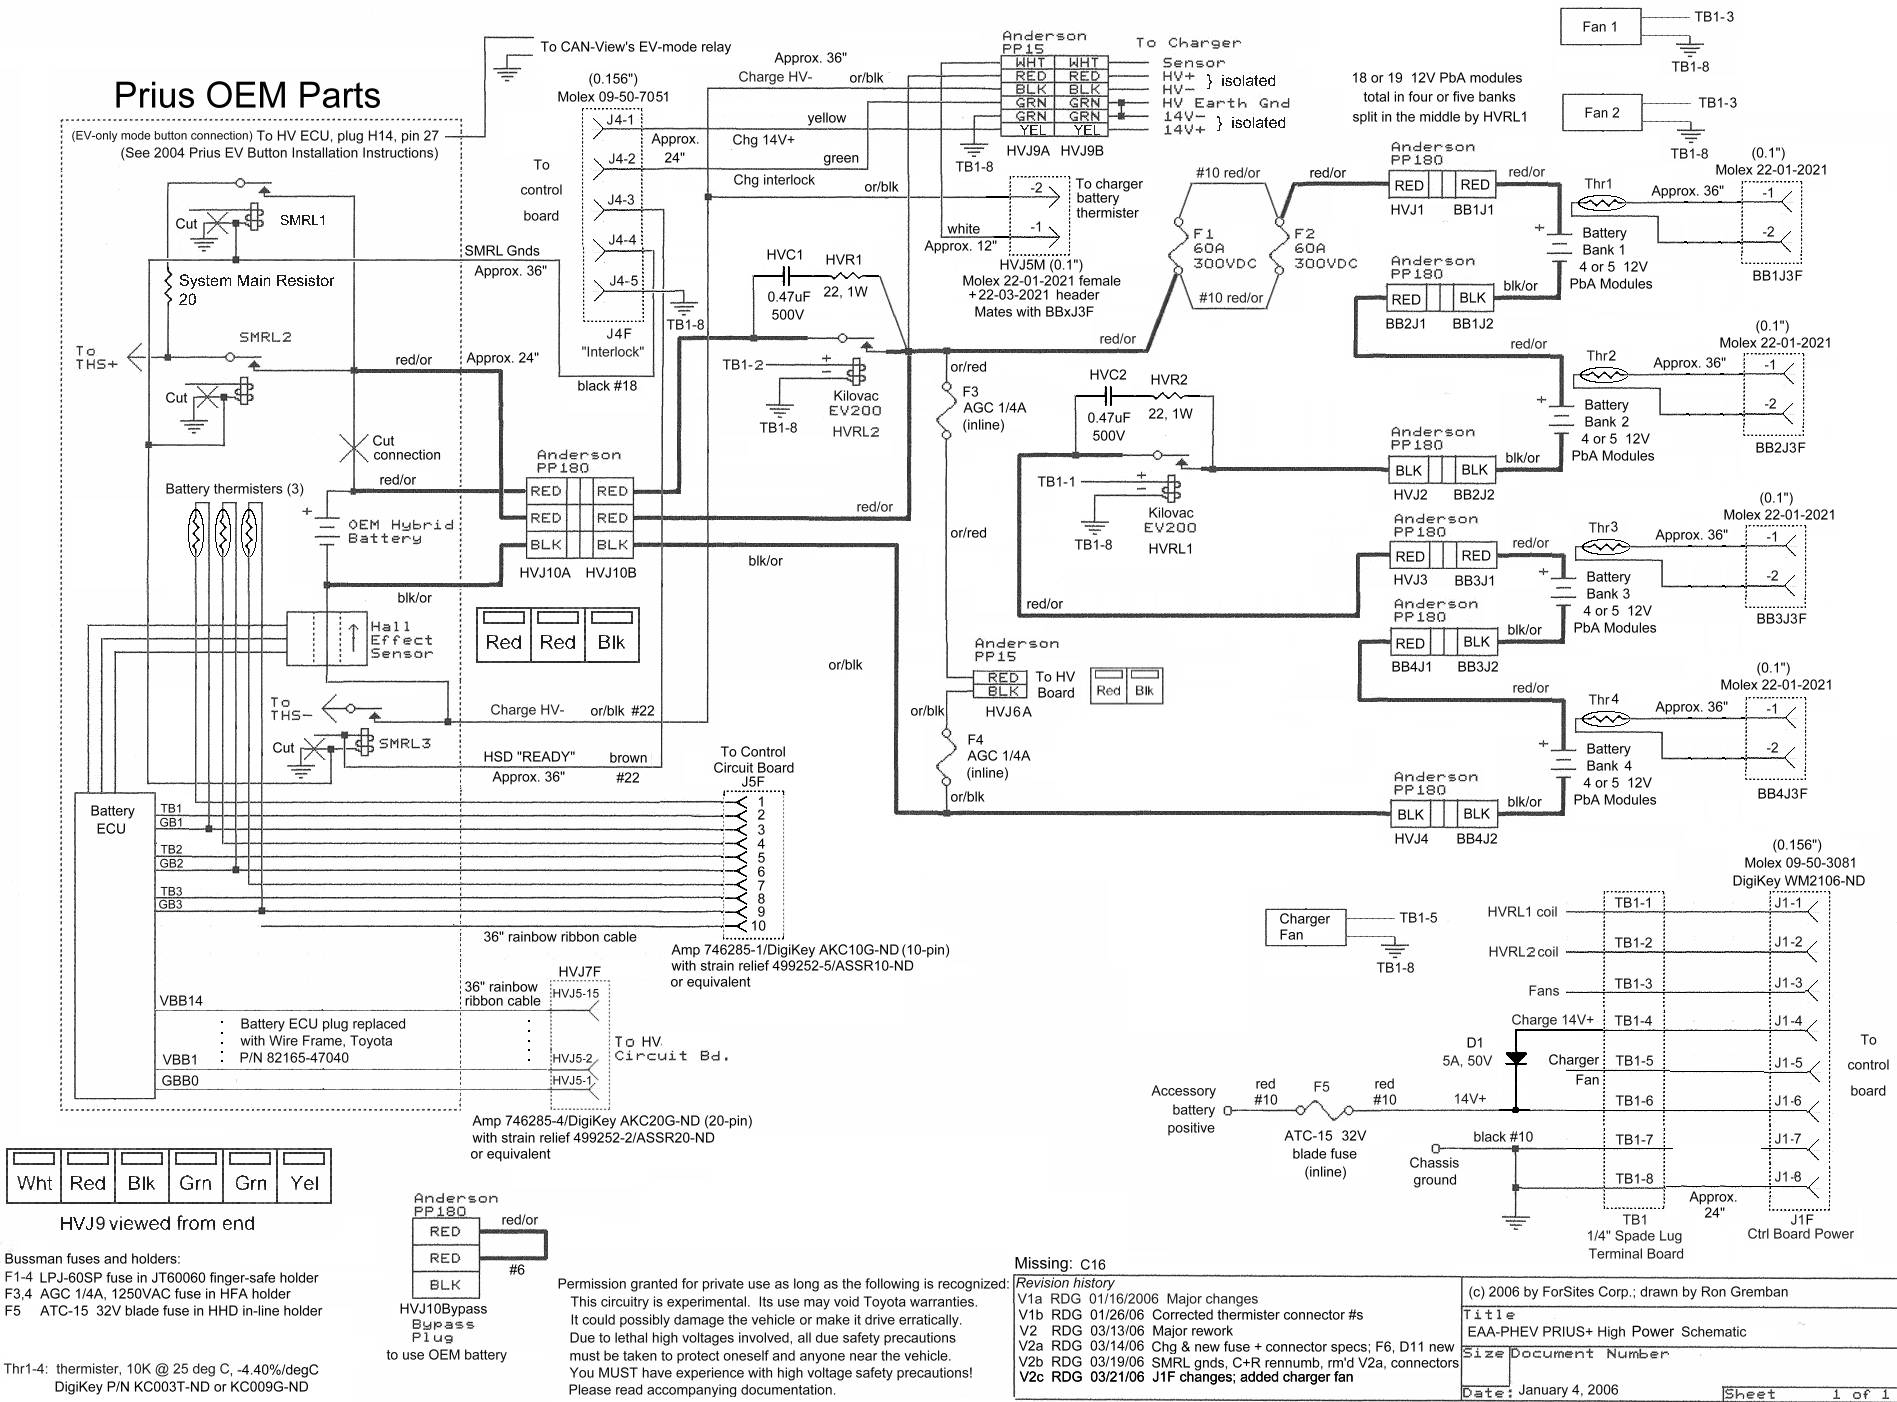
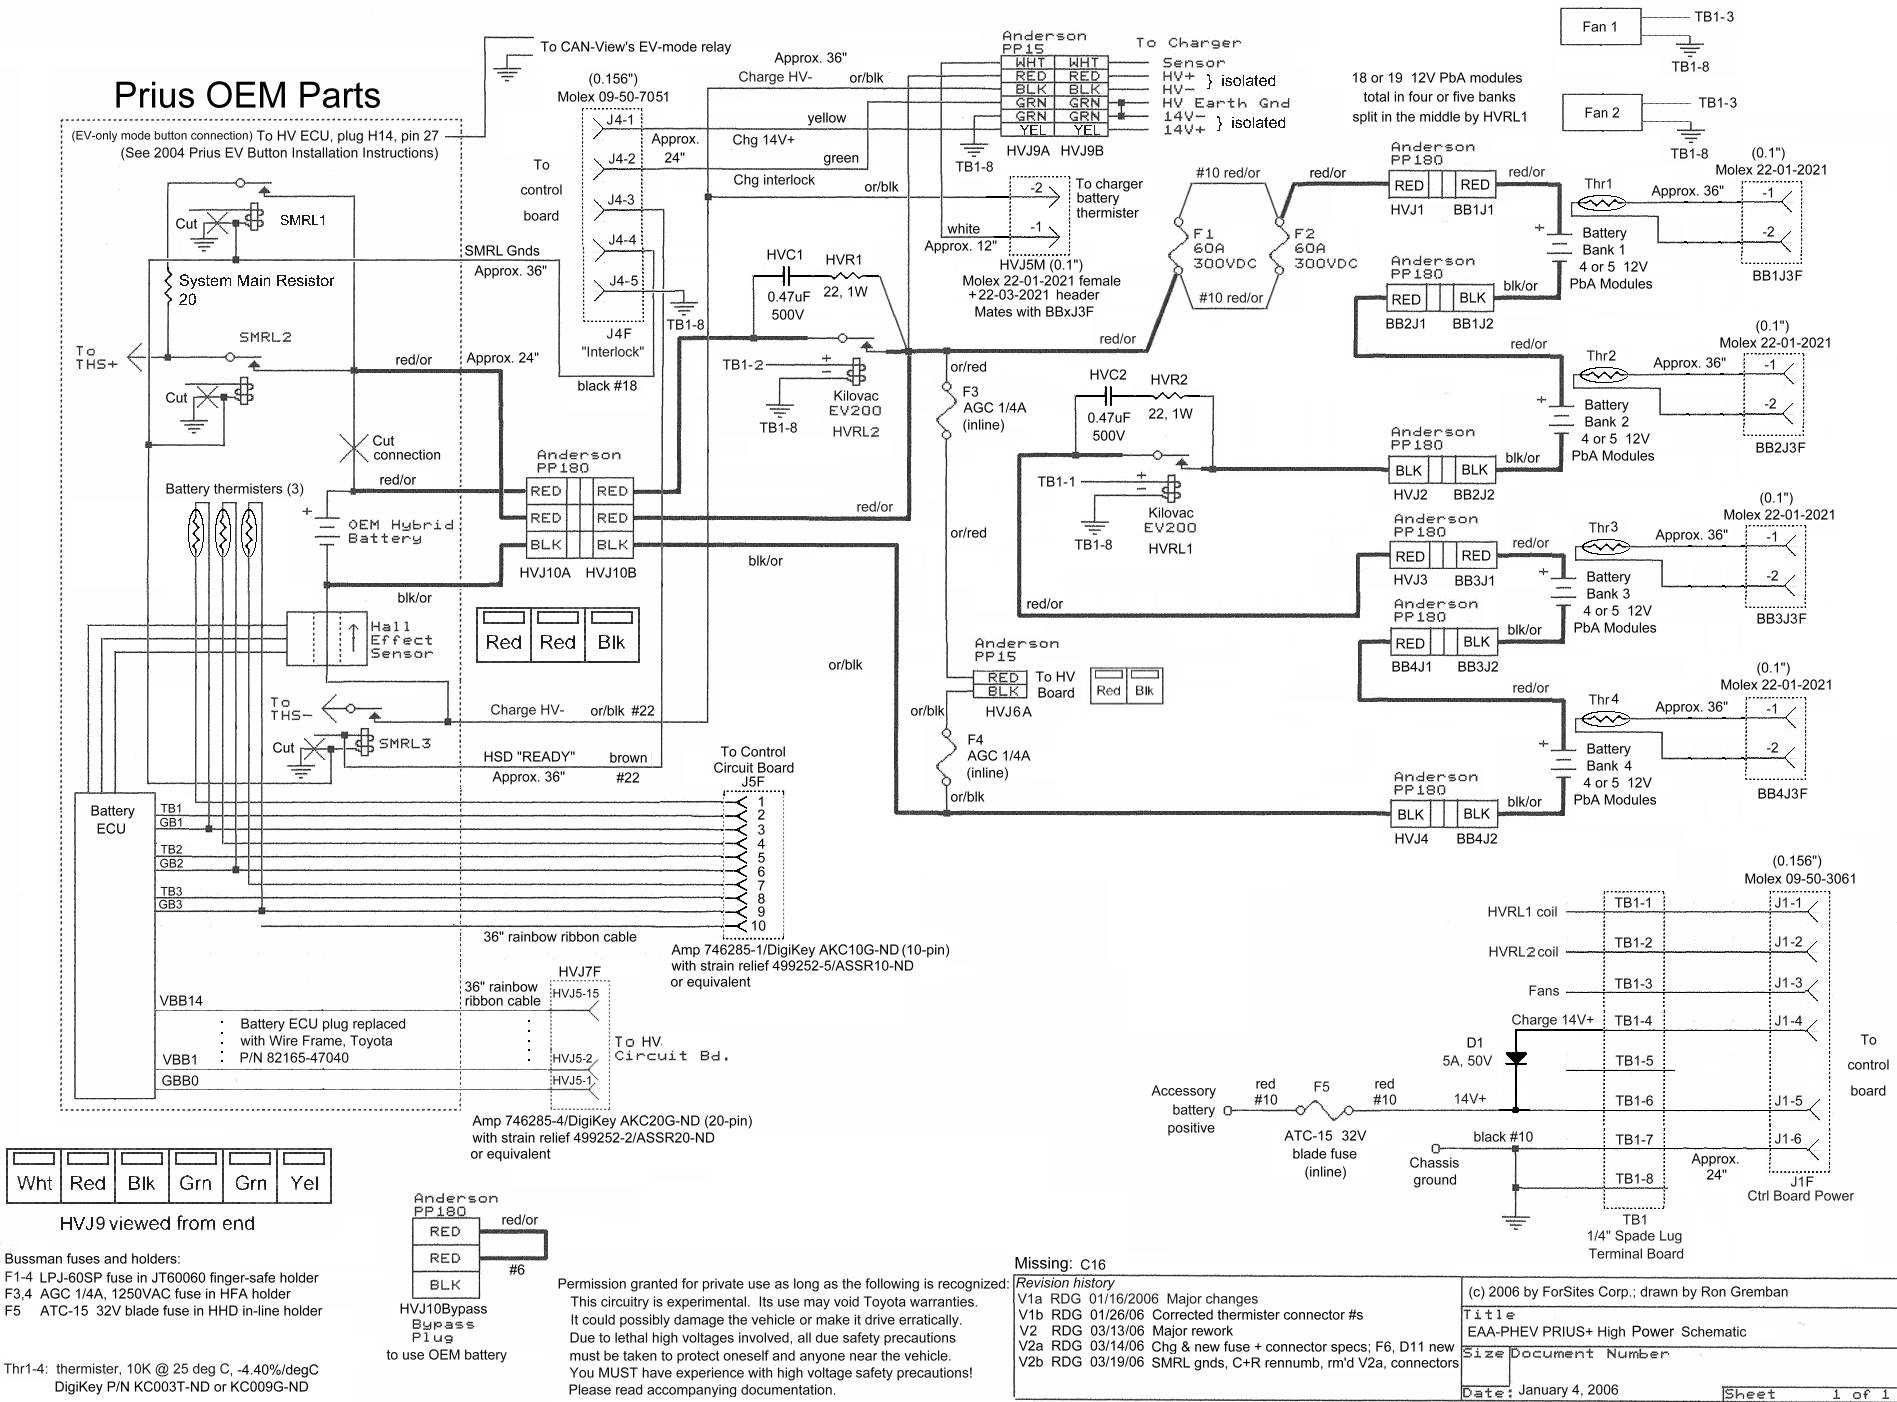
 2c.
2c.  2b.
2b.
This is the second version by Ron Gremban.
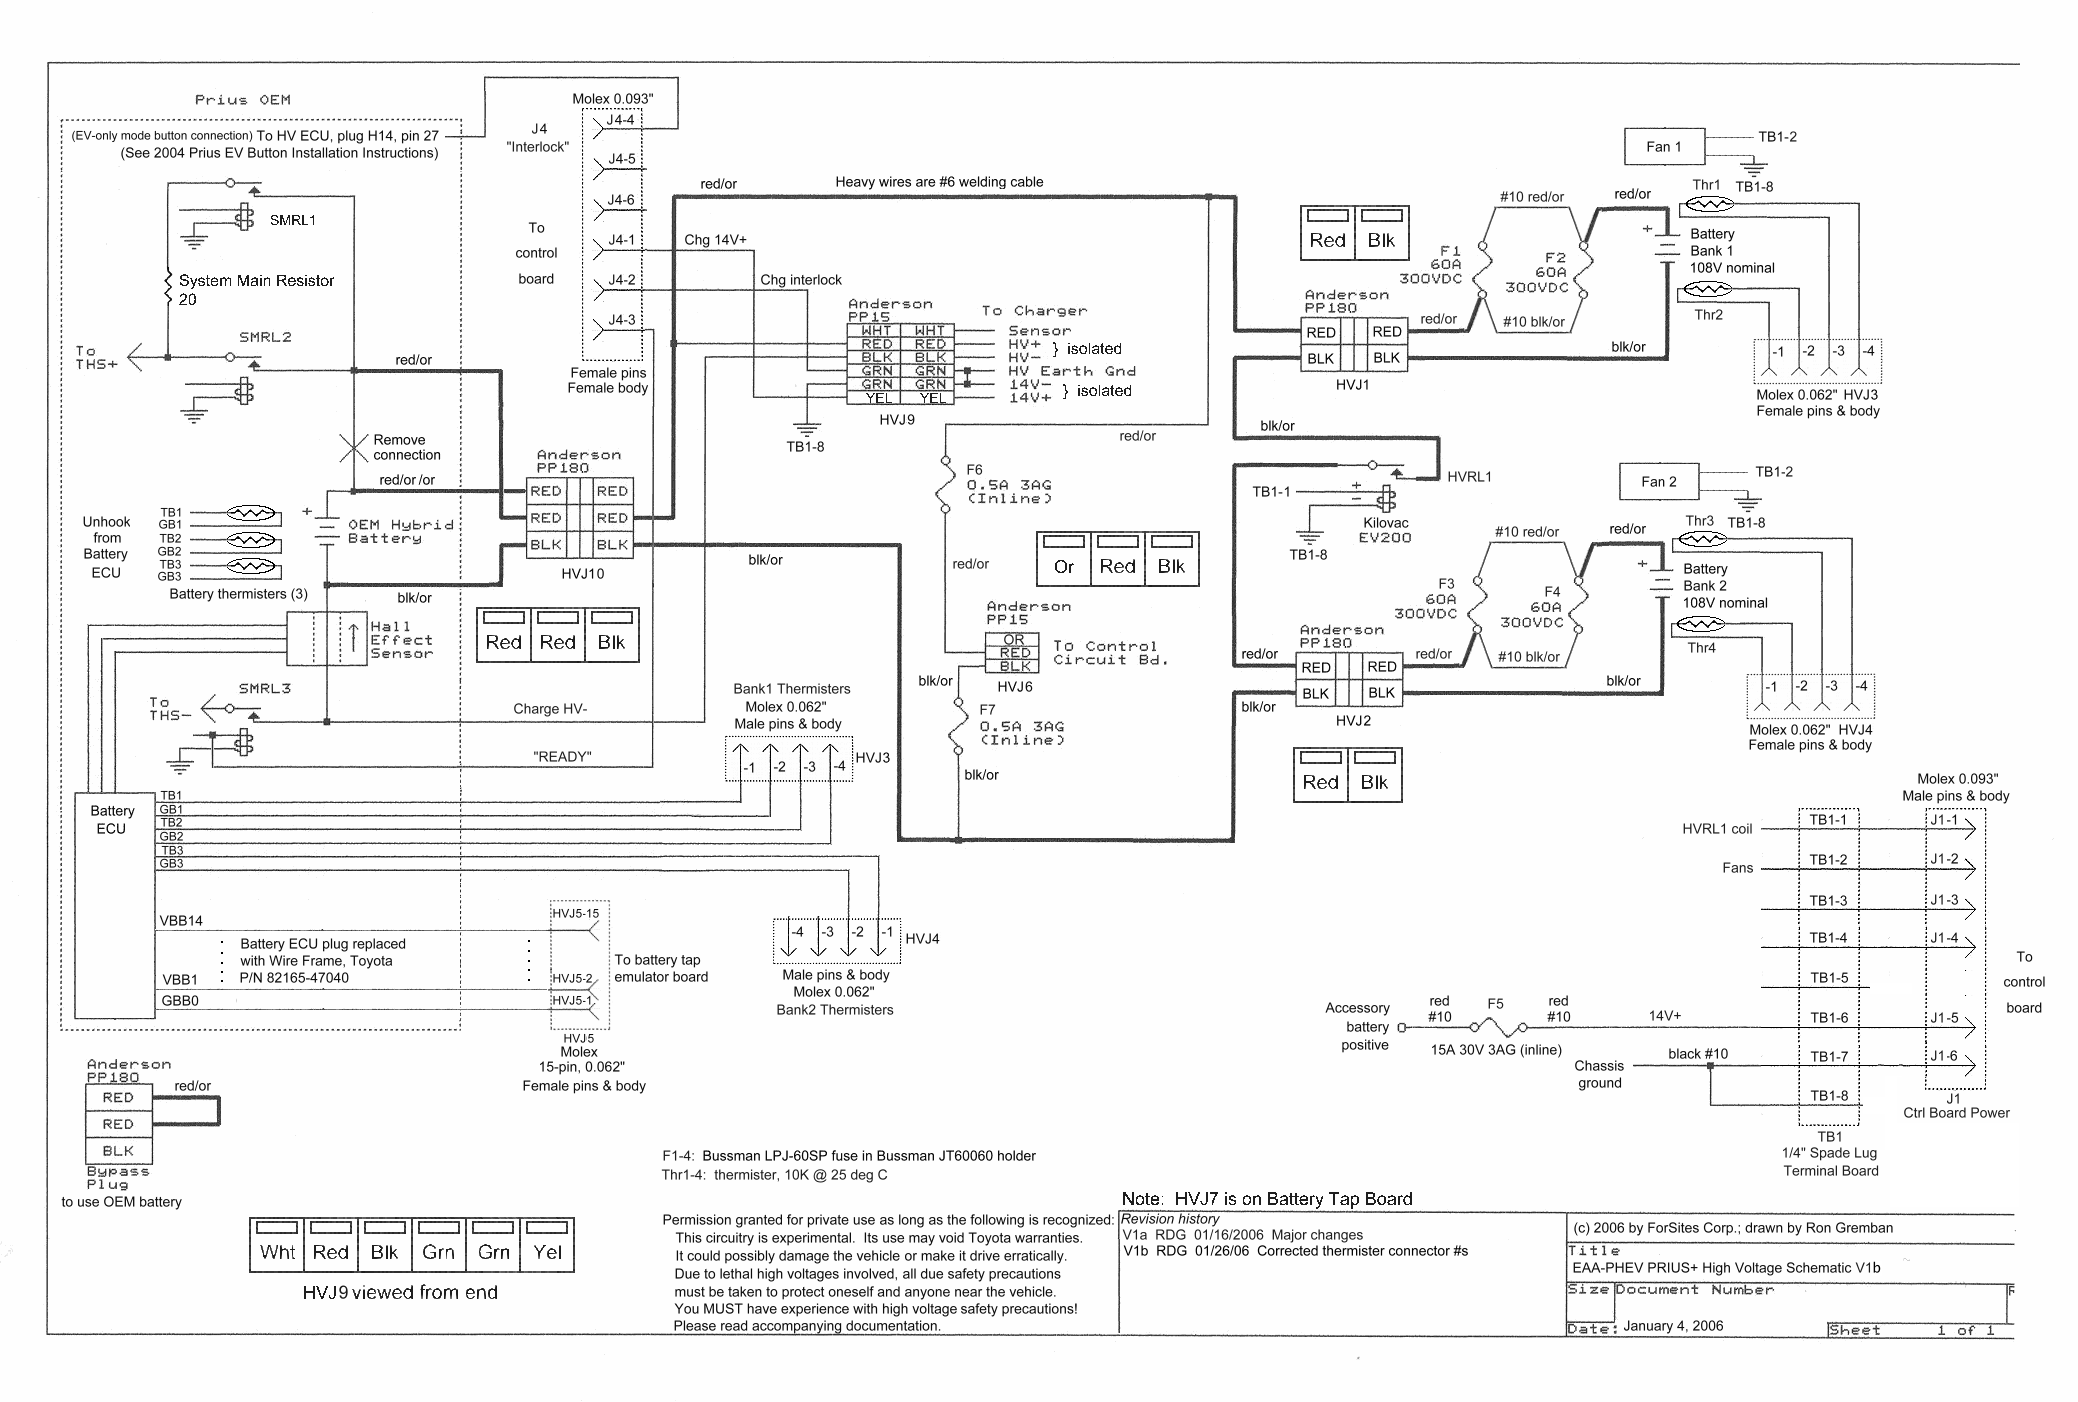
 Version 1. ( source )
 Originally hand drawn by Ron Gremban, then converted to CAD and PDF by Nick Viera. (maillist yahoo source)
 See also: HV System Layout and Wiring Diagram of CalCars' 1st PRIUS+.
Originally hand drawn by Ron Gremban, then converted to CAD and PDF by Nick Viera.
The diagrams below are outdated and useful only for reference.
Although wiring details have changed, these CalCars diagrams should give an idea of a way to lay out the battery box.
This is the second version by Ron Gremban.
Originally hand drawn by Ron Gremban, then converted to CAD and PDF by Nick Viera.