|
General Disclaimer: (HV) (DC) injury or death hazard, use at your own risk, may void warranty. |
Uploads by Cewert
Jump to navigation
Jump to search
This special page shows all uploaded files.
| Date | Name | Thumbnail | Size | Description | Versions |
|---|---|---|---|---|---|
| 00:12, 27 April 2007 | Low voltage wiring inside OEM Battery.jpg (file) |  |
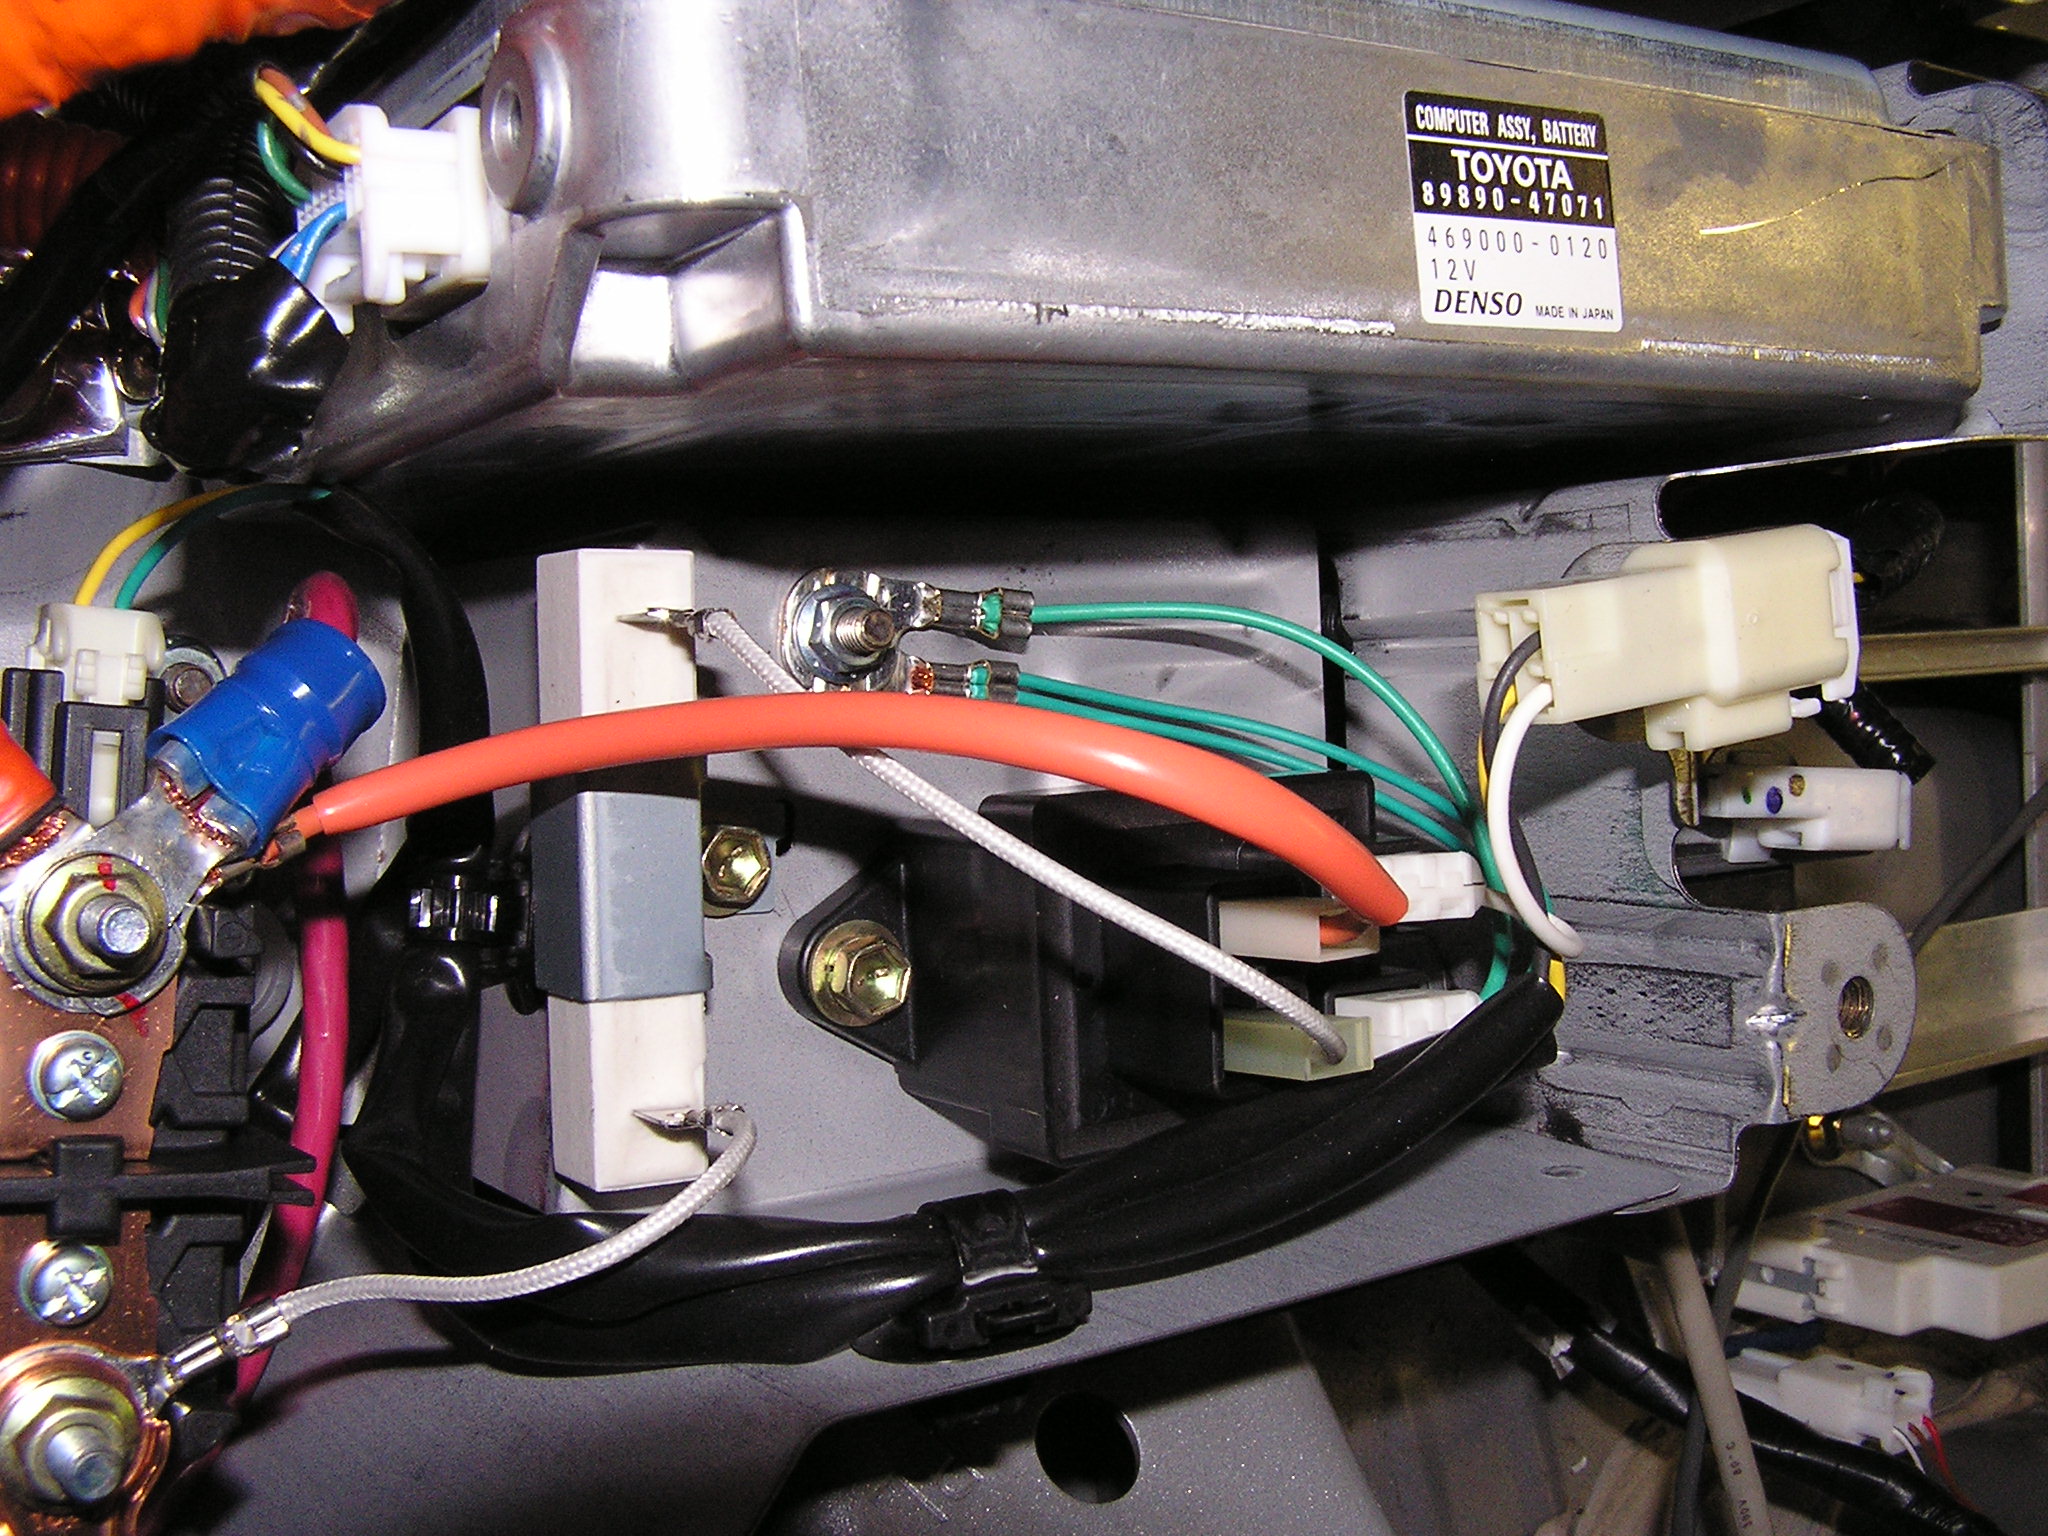
675 KB | Unmodified low voltage wiring inside OEM battery. Shows green wires from contactors going to chassis ground. | 1 |
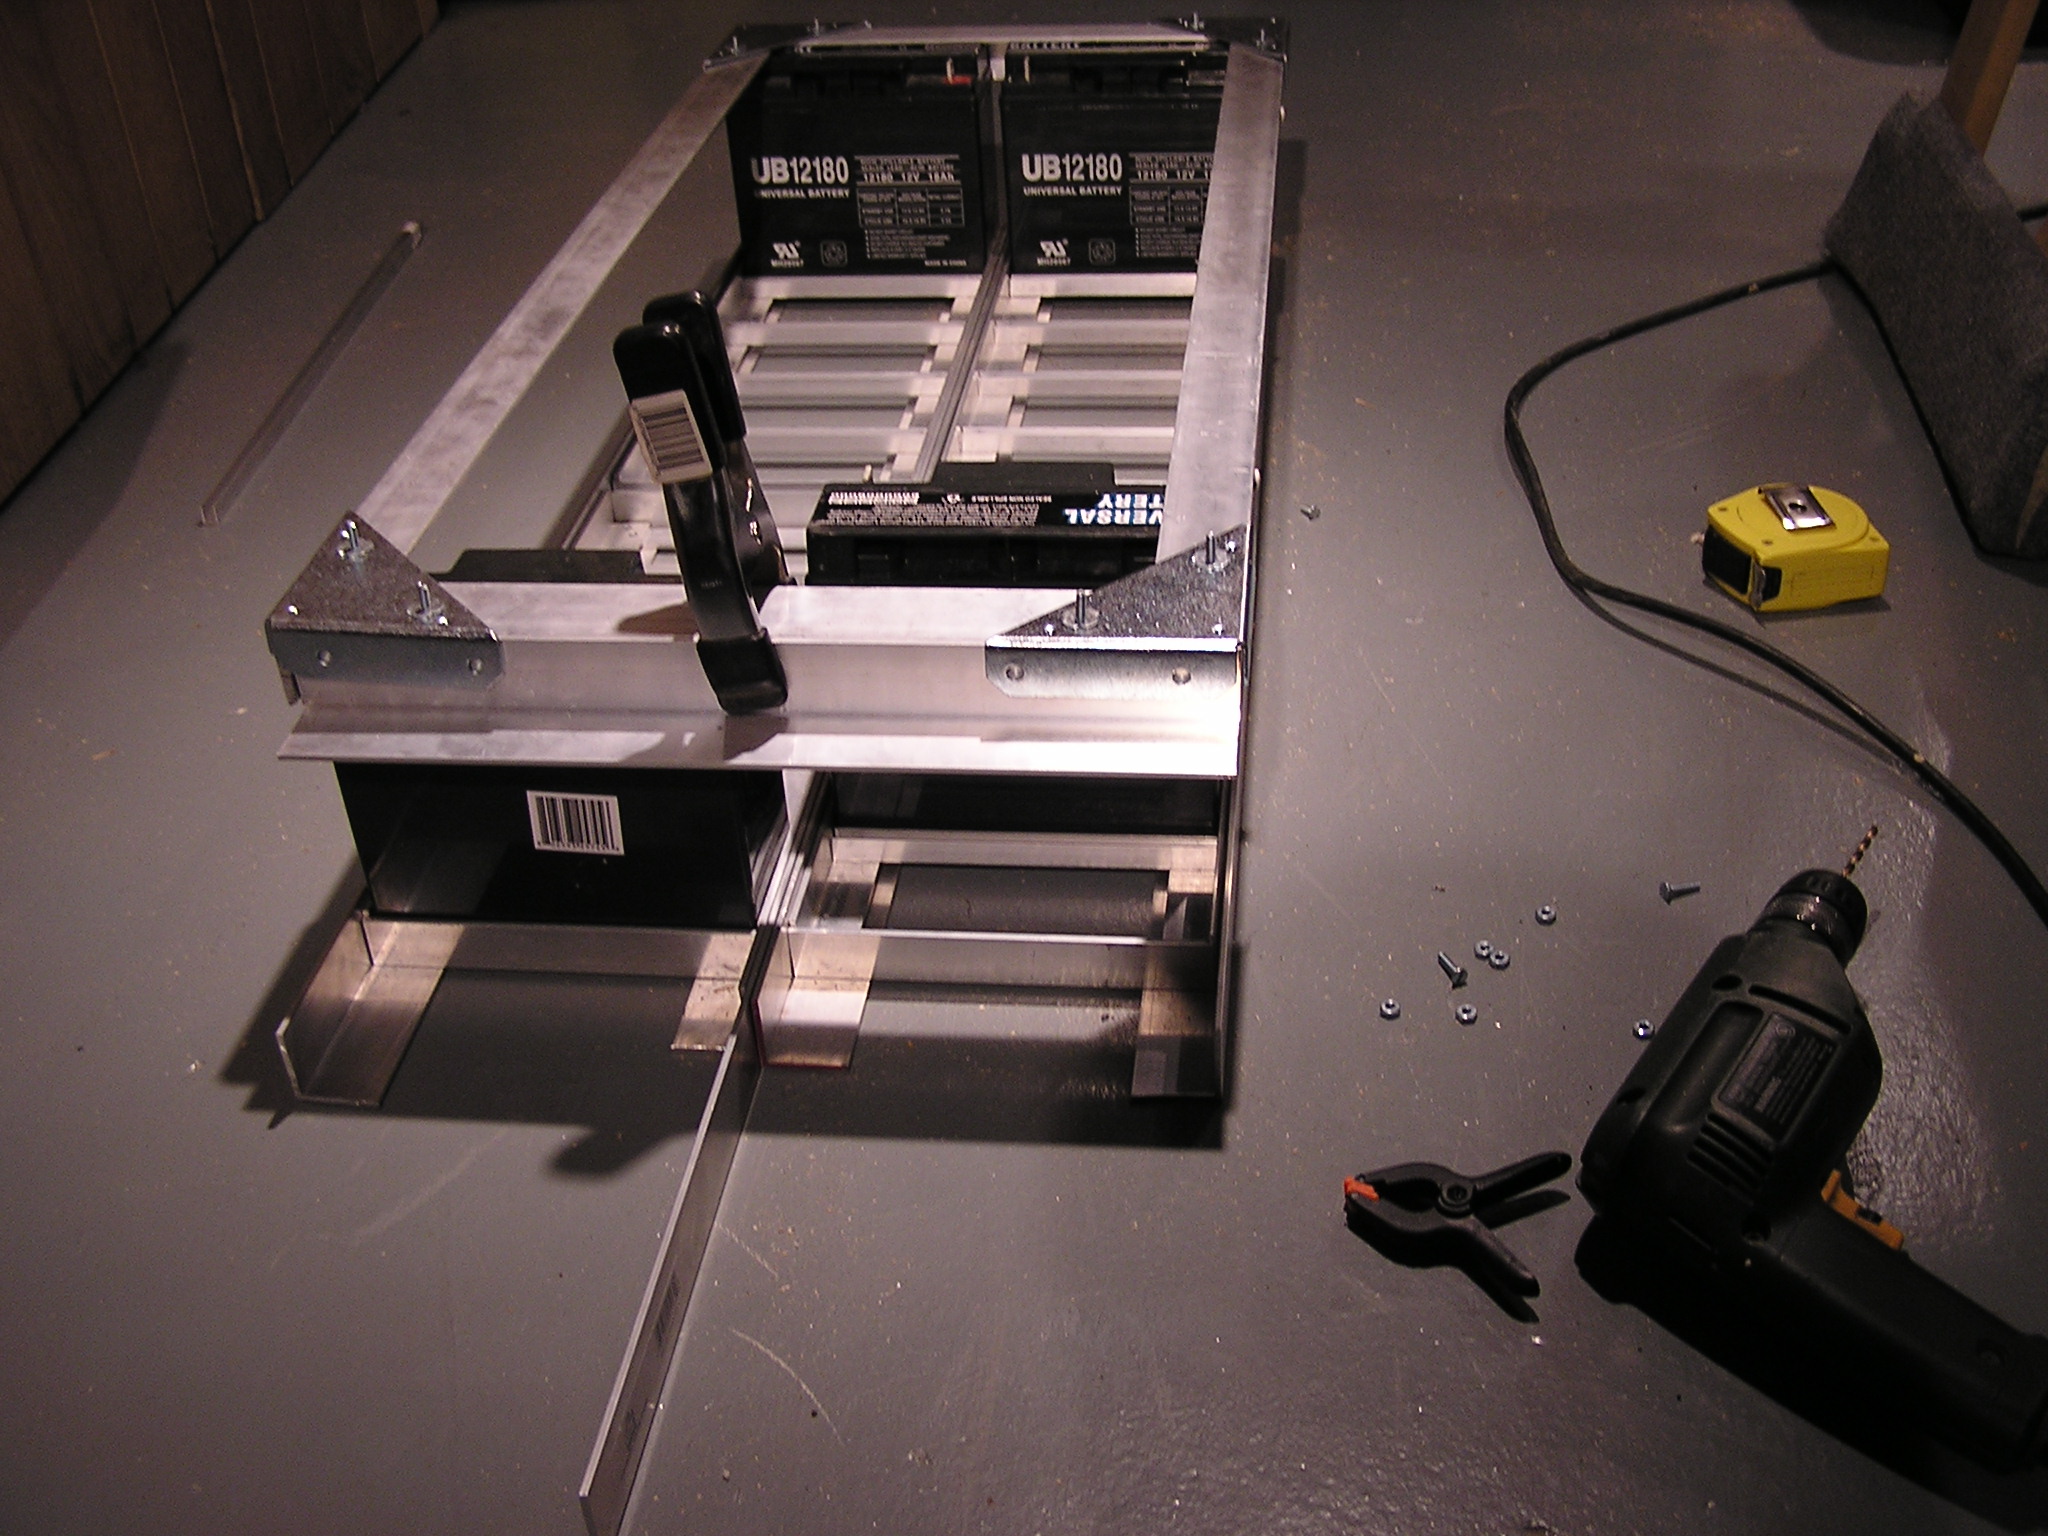
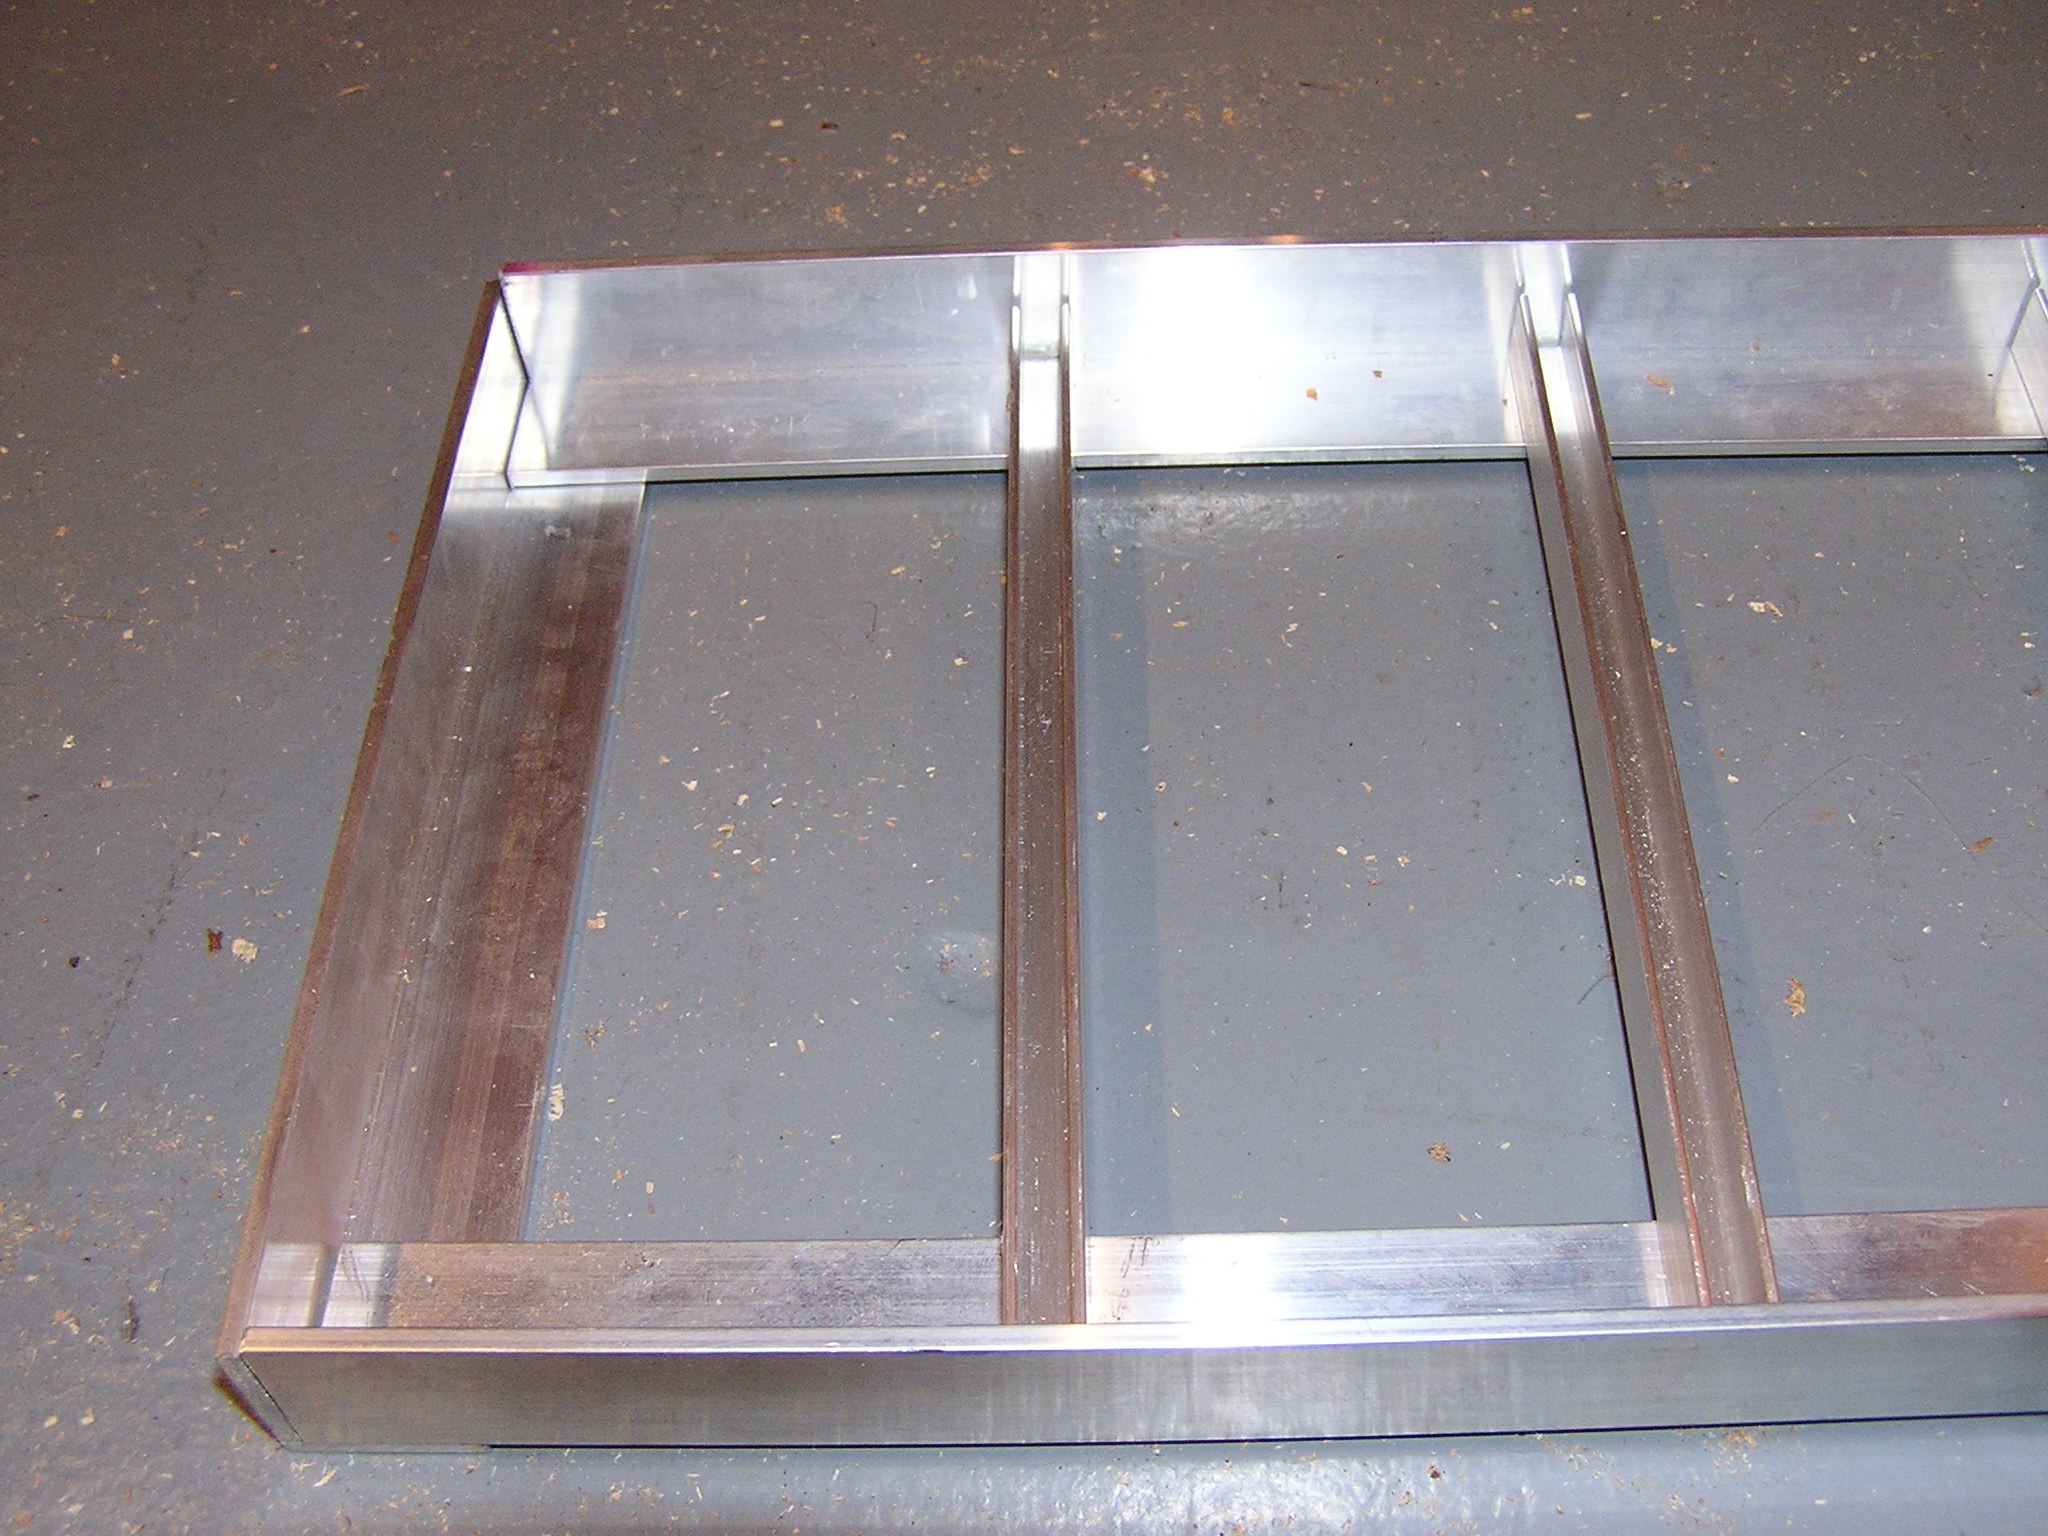
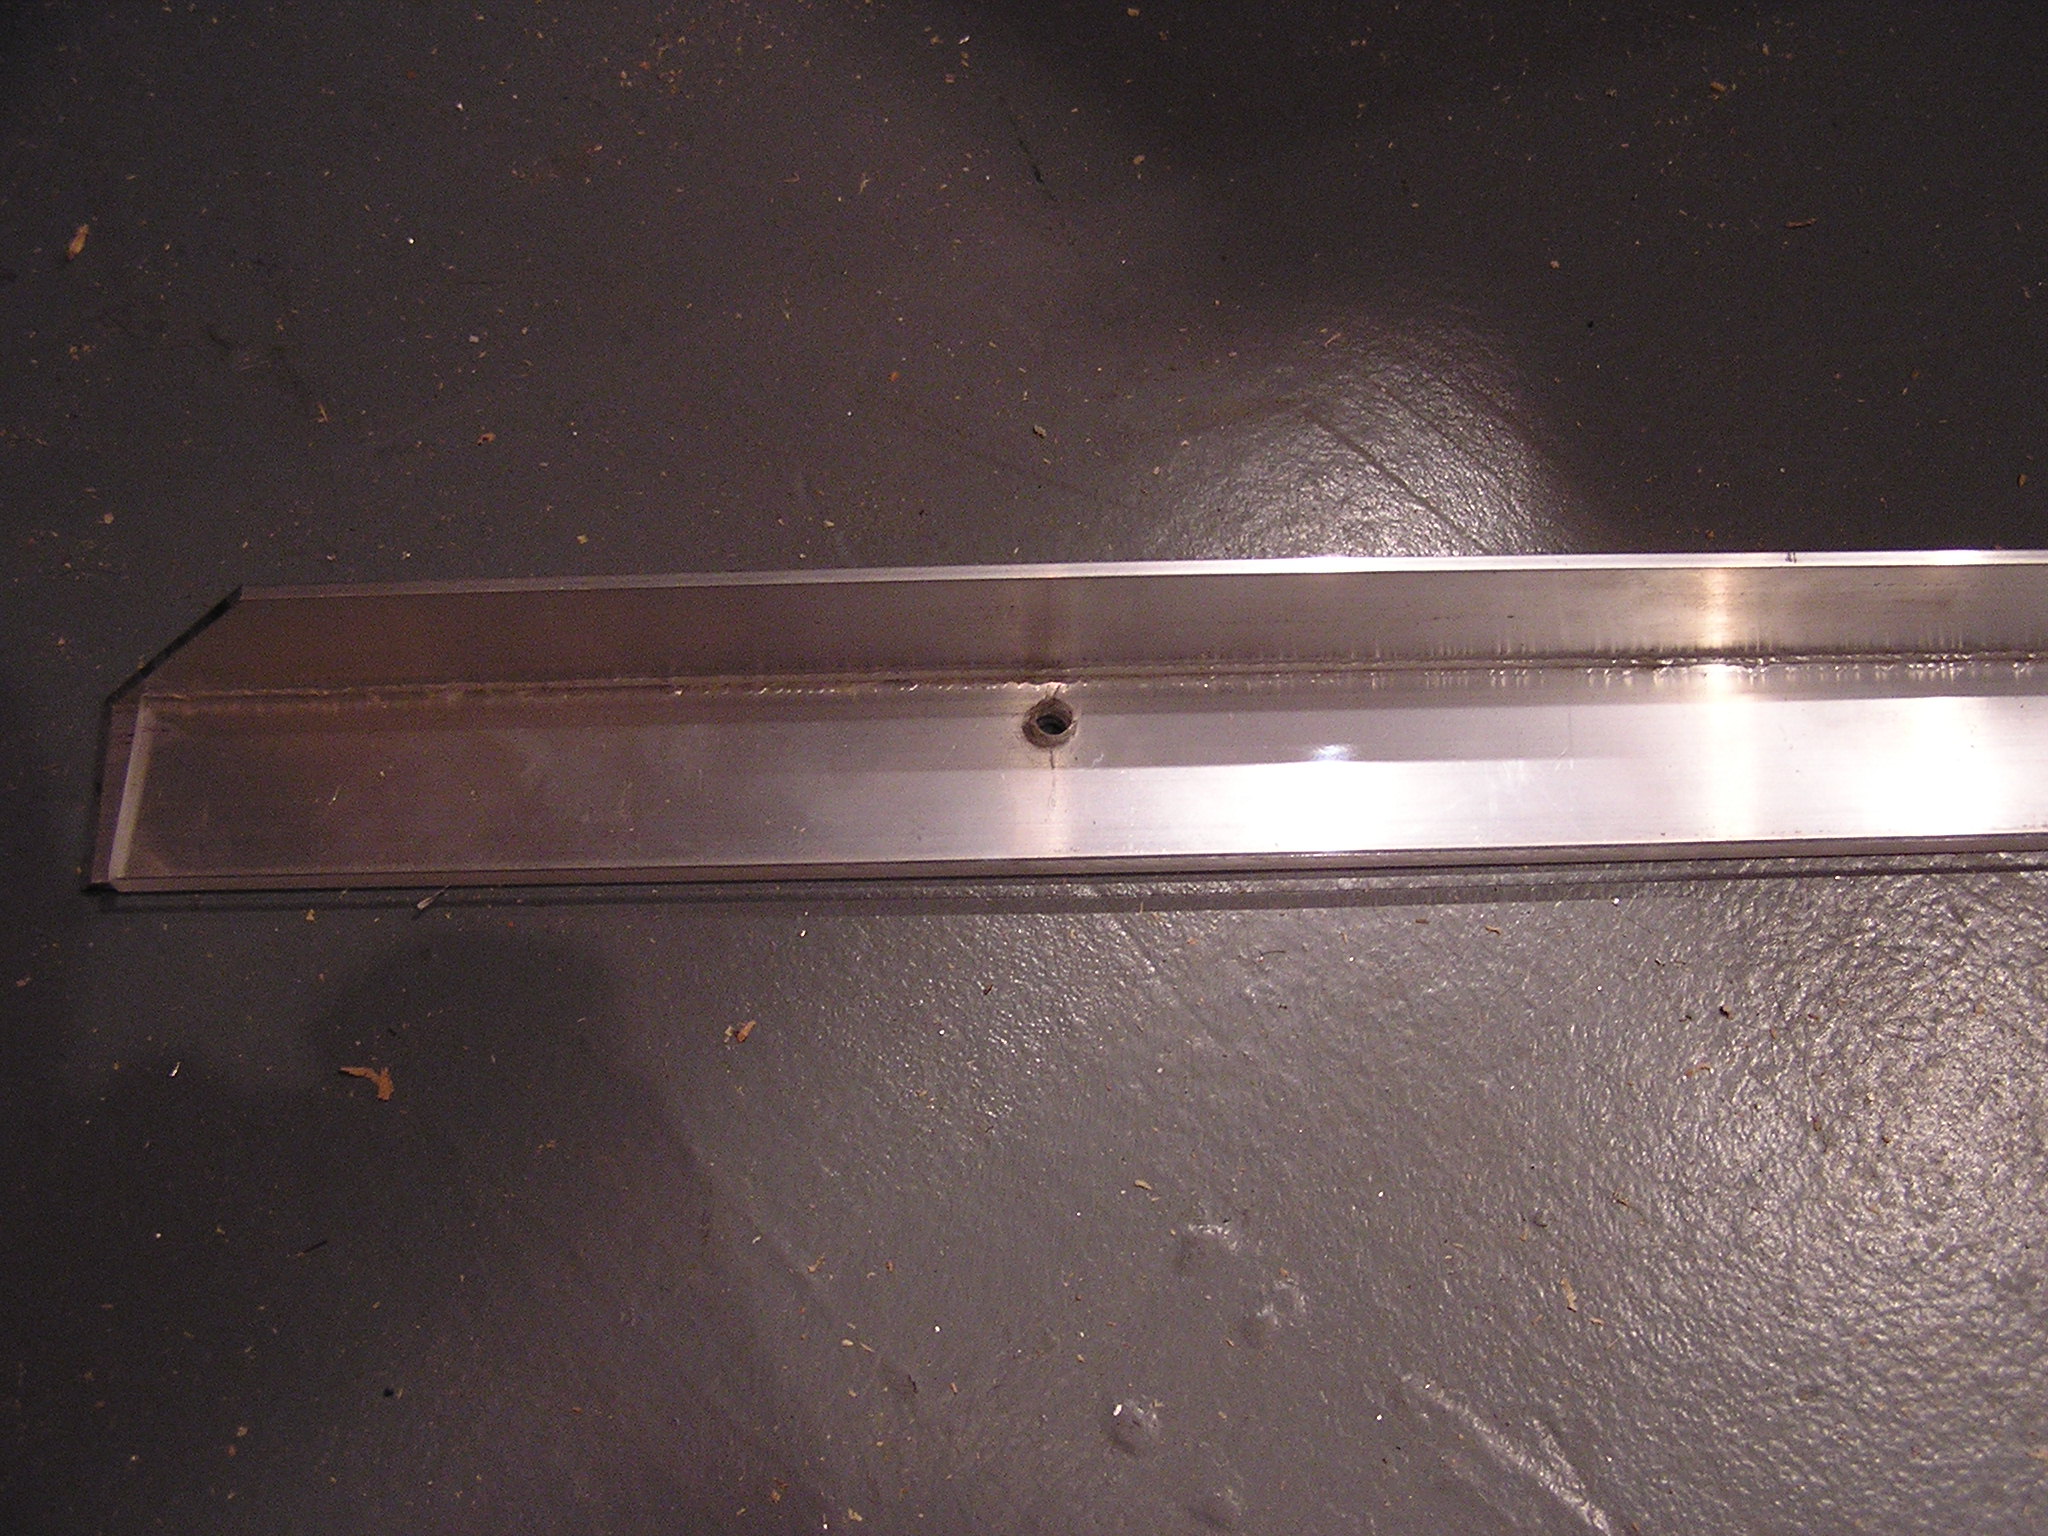
| 23:00, 17 December 2006 | Batt Box with Bolt Down Angle.JPG (file) |  |
676 KB | Shows the aluminum angle iron that sicks out of each side to bolt the battery box top down to the car. Waiting to drill holes until it is actually mounted. | 2 |
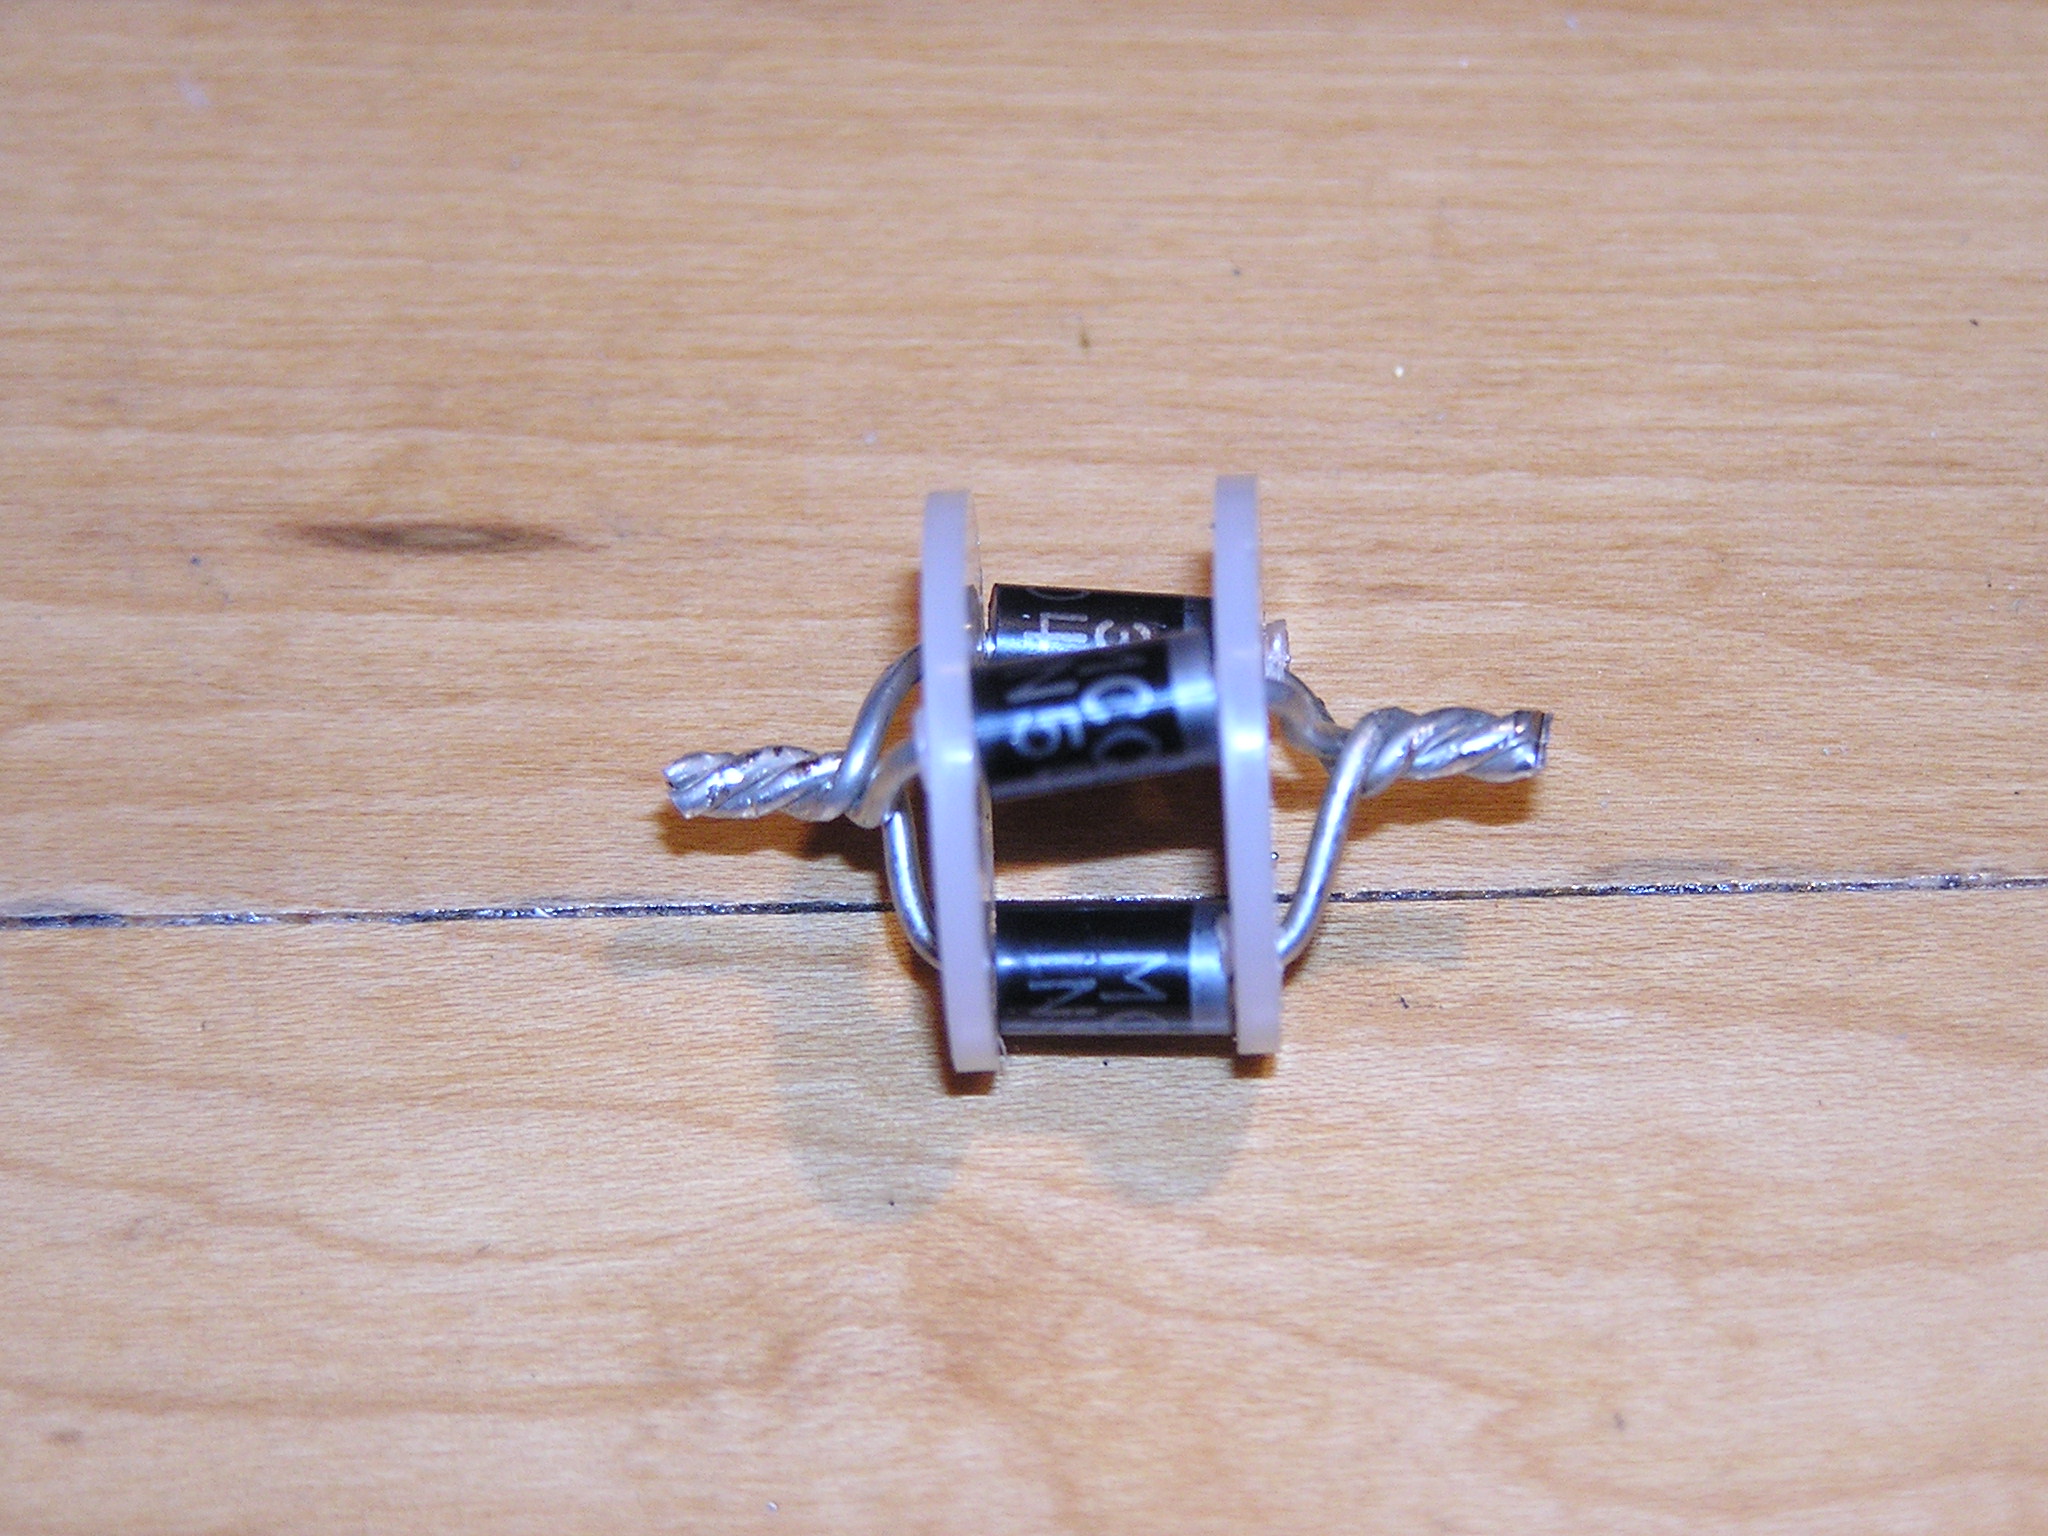
| 01:35, 25 May 2007 | OEM Battery Fan Modification - Diode Mounting 2.jpg (file) |  |
677 KB | A ladder approach to mounting the diodes for the OEM battery fan override modification. | 1 |
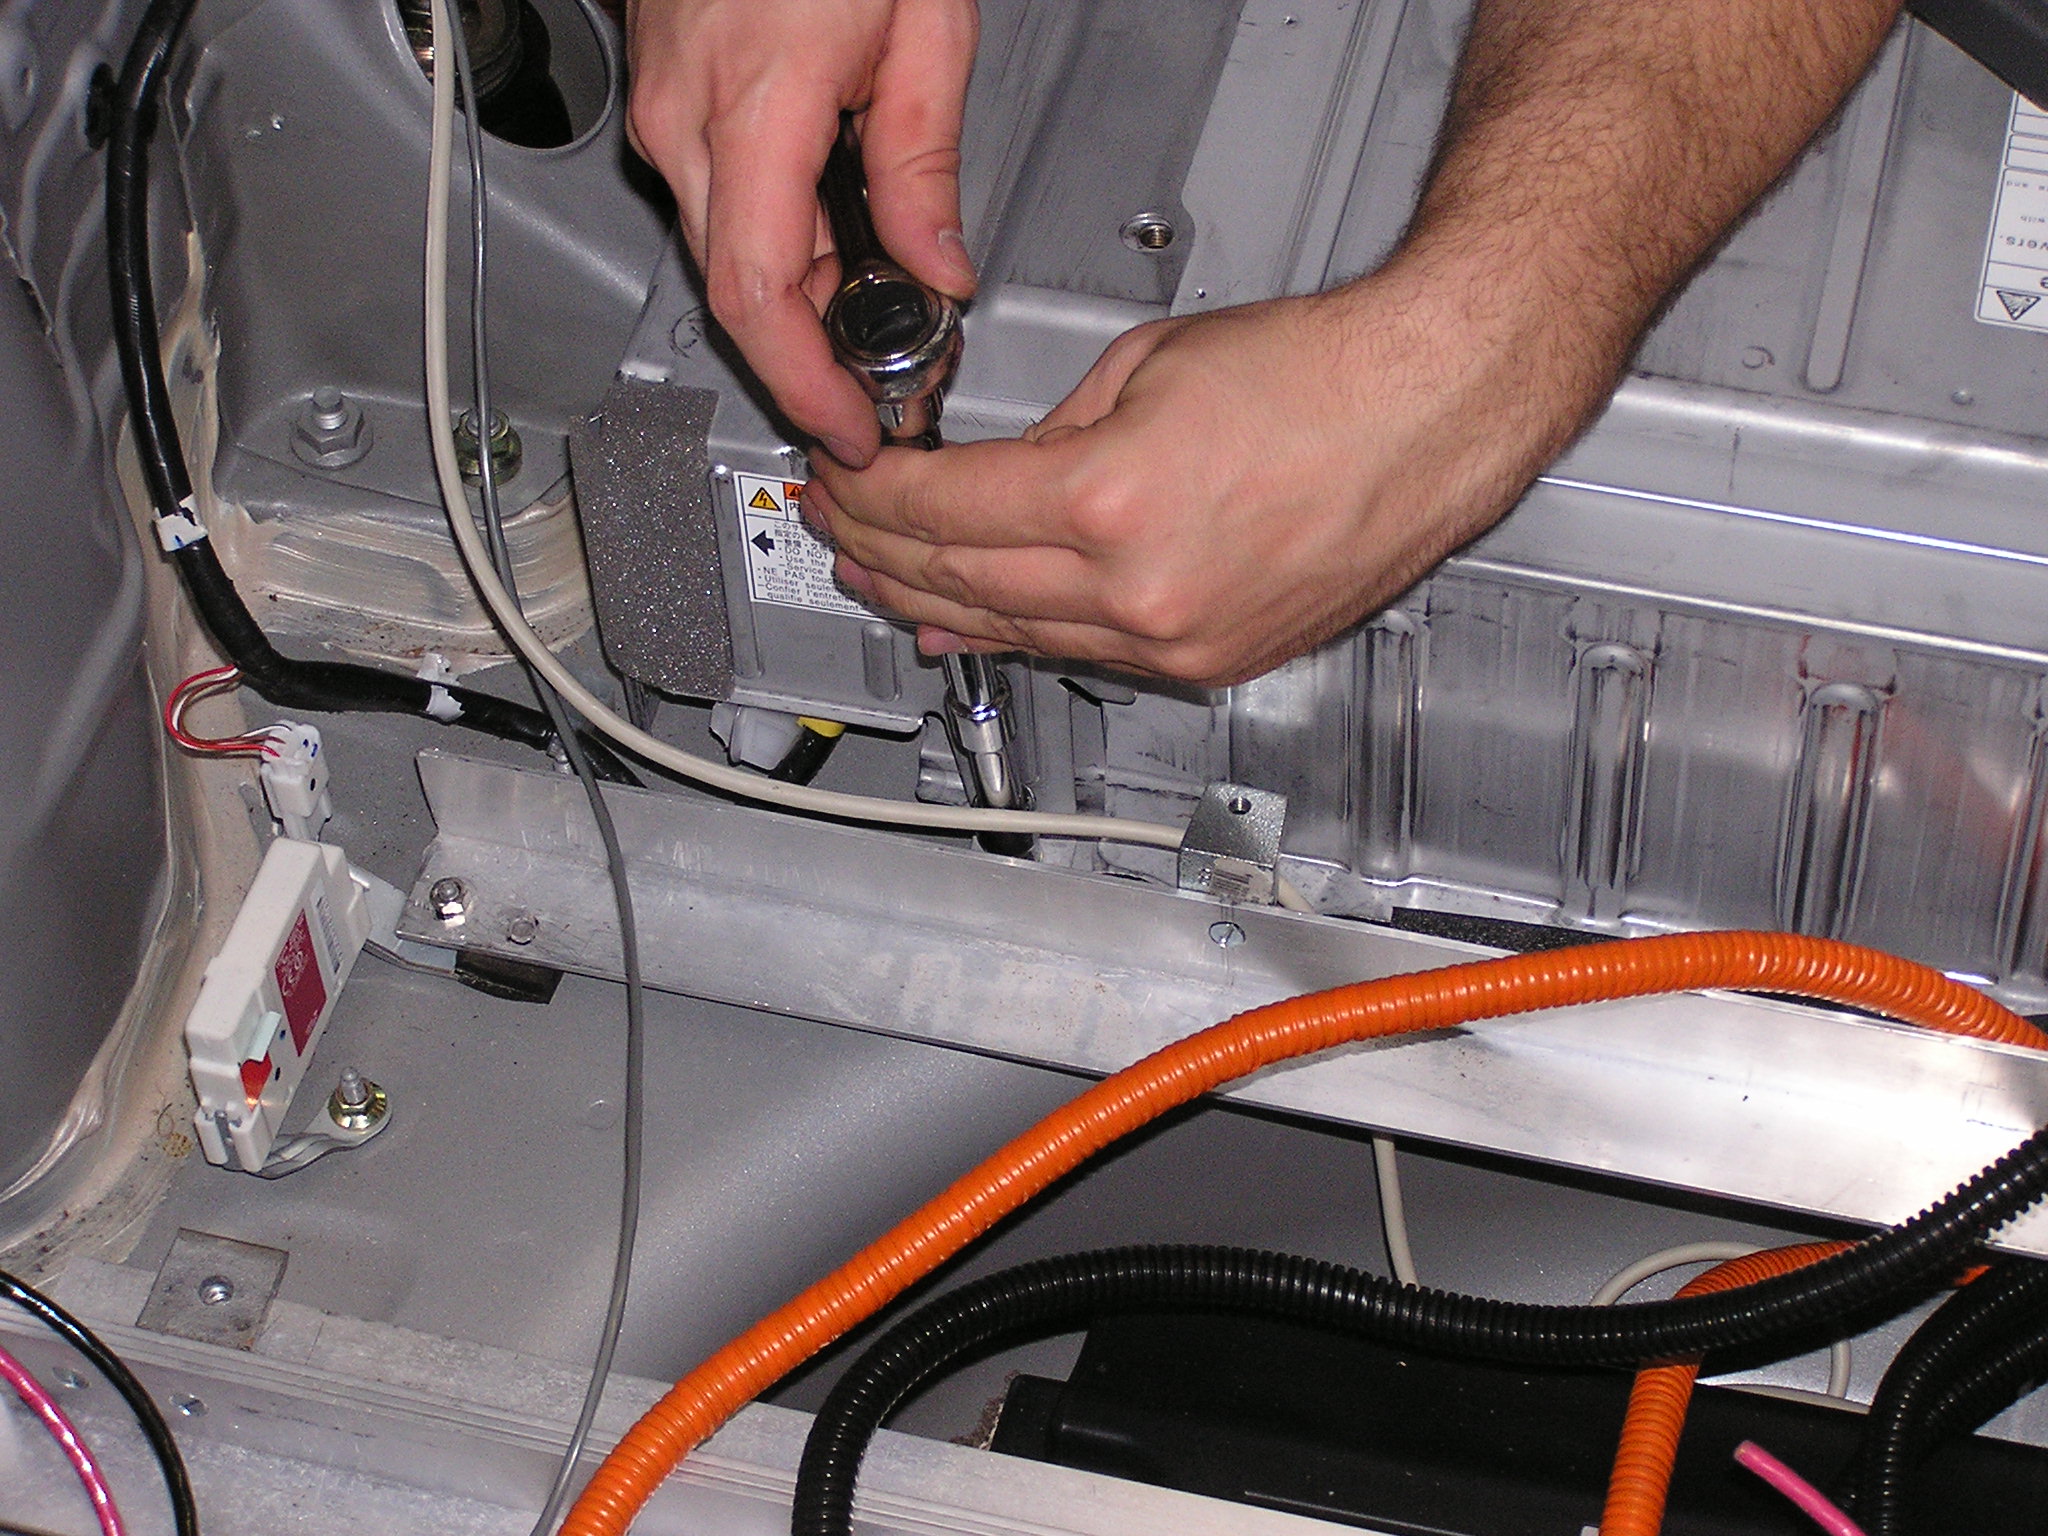
| 00:10, 27 April 2007 | Inside OEM battery after tie in.jpg (file) |  |
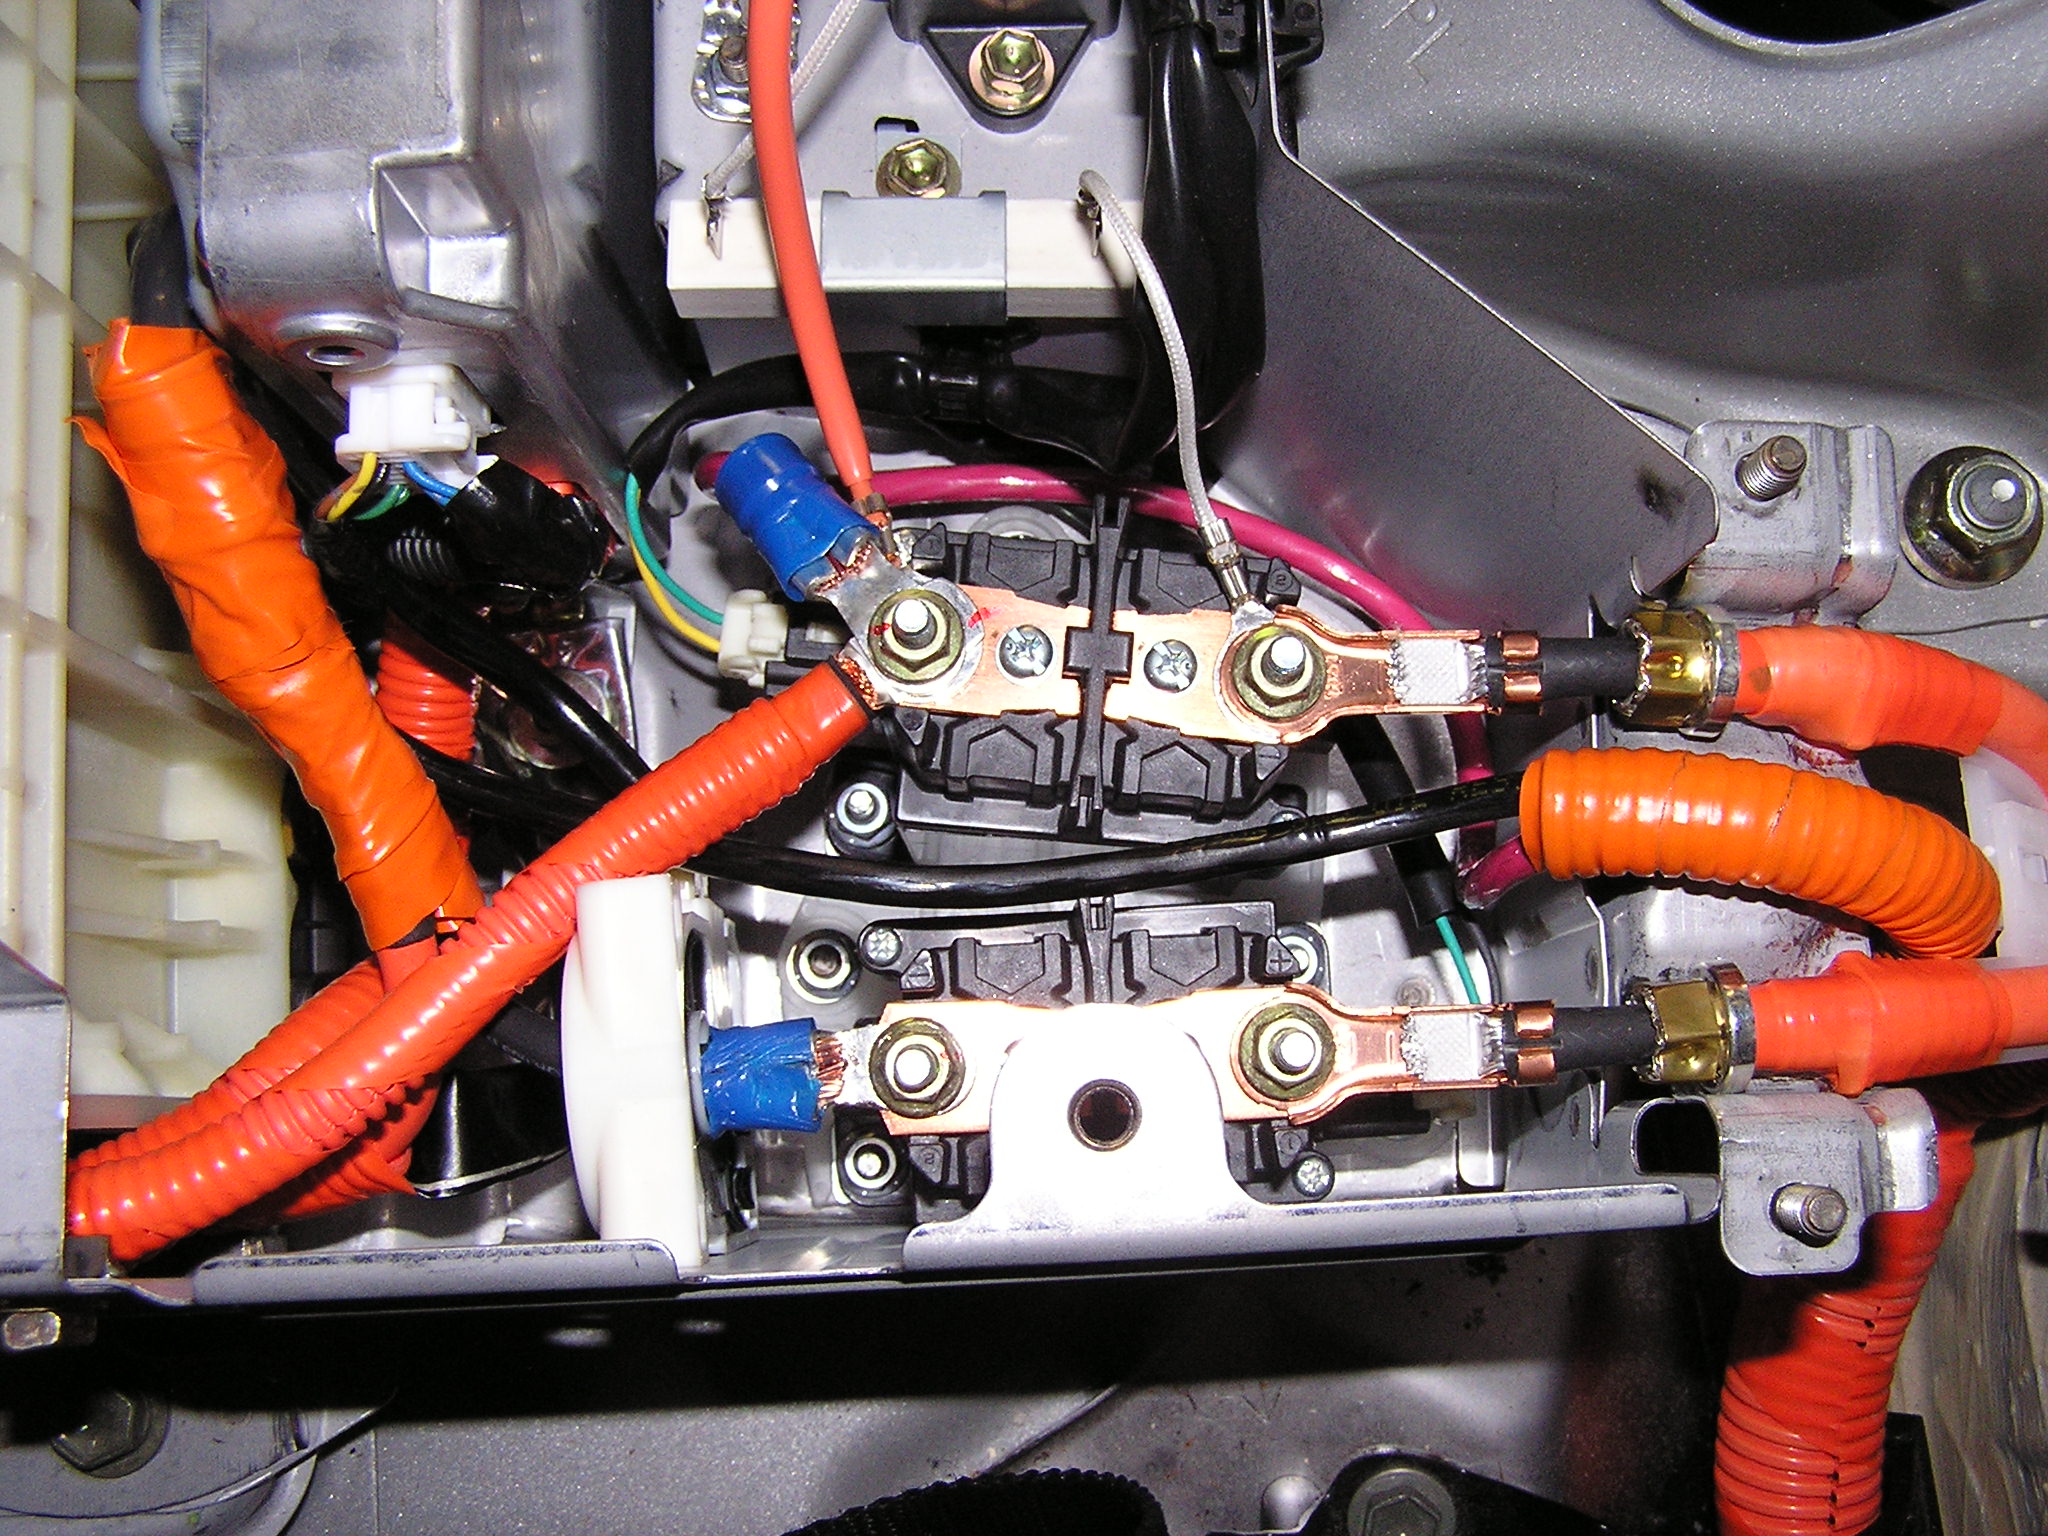
678 KB | Inside the OEM battery after the HV tie in is completed. | 1 |
| 15:23, 21 March 2007 | Electronics Box Partial 1.jpg (file) |  |
679 KB | Mostly completed electronics box without top. This is for the alt. mounting method. | 1 |
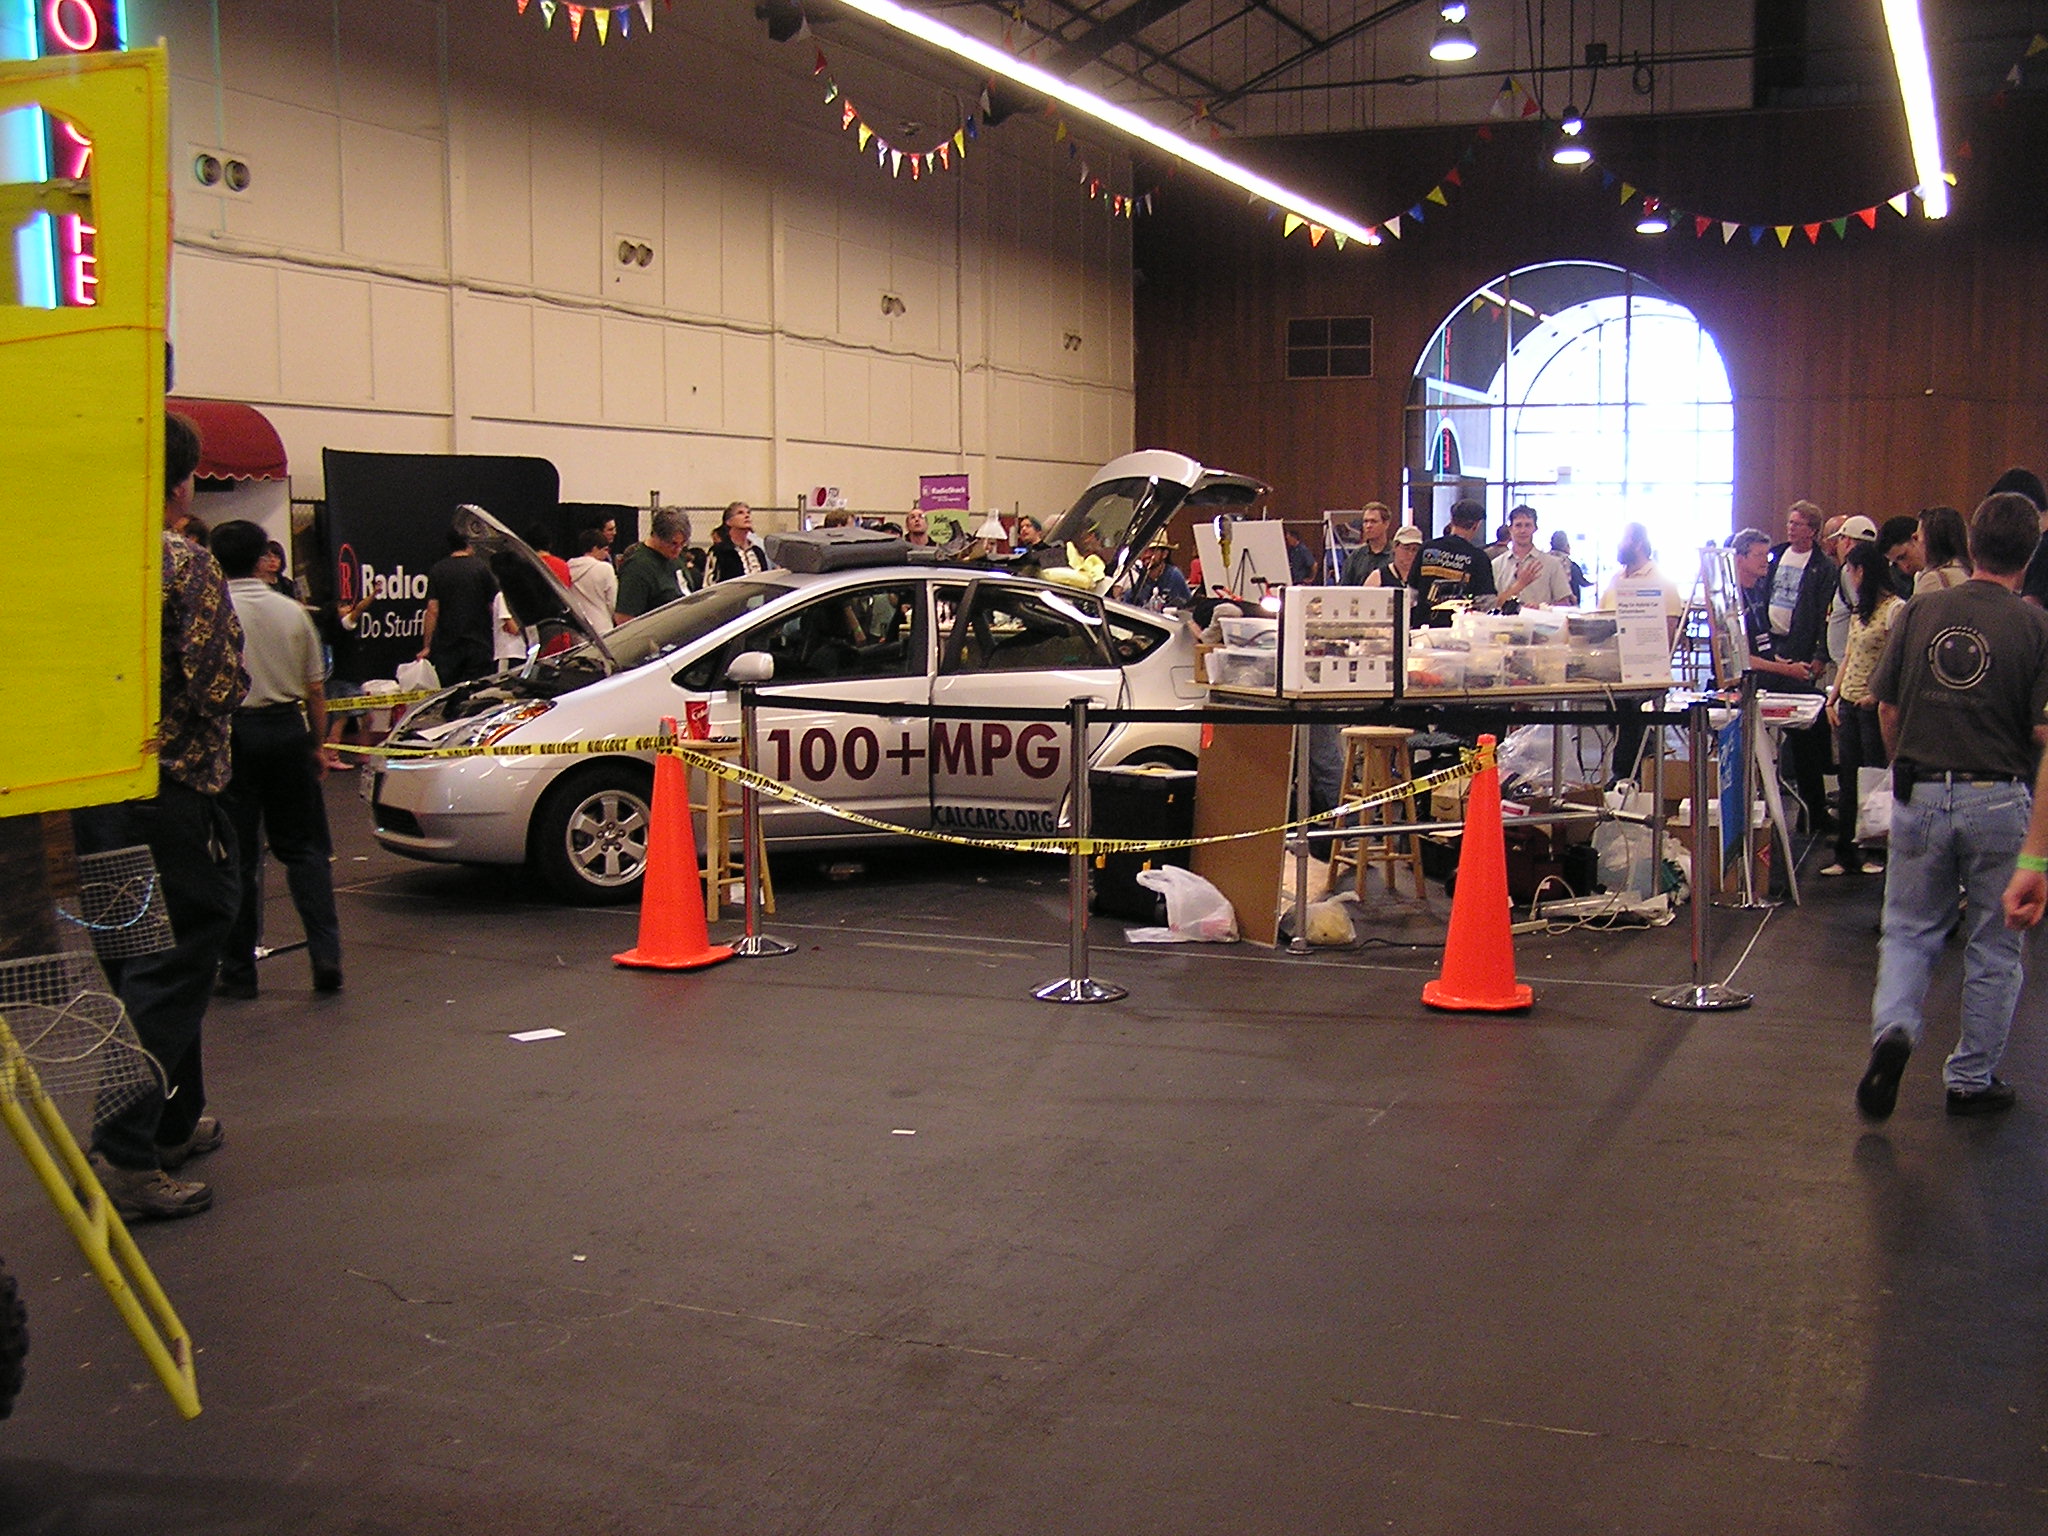
| 16:33, 22 May 2007 | Maker Faire 2007 4.jpg (file) |  |
680 KB | From the 2007 Maker Faire | 1 |
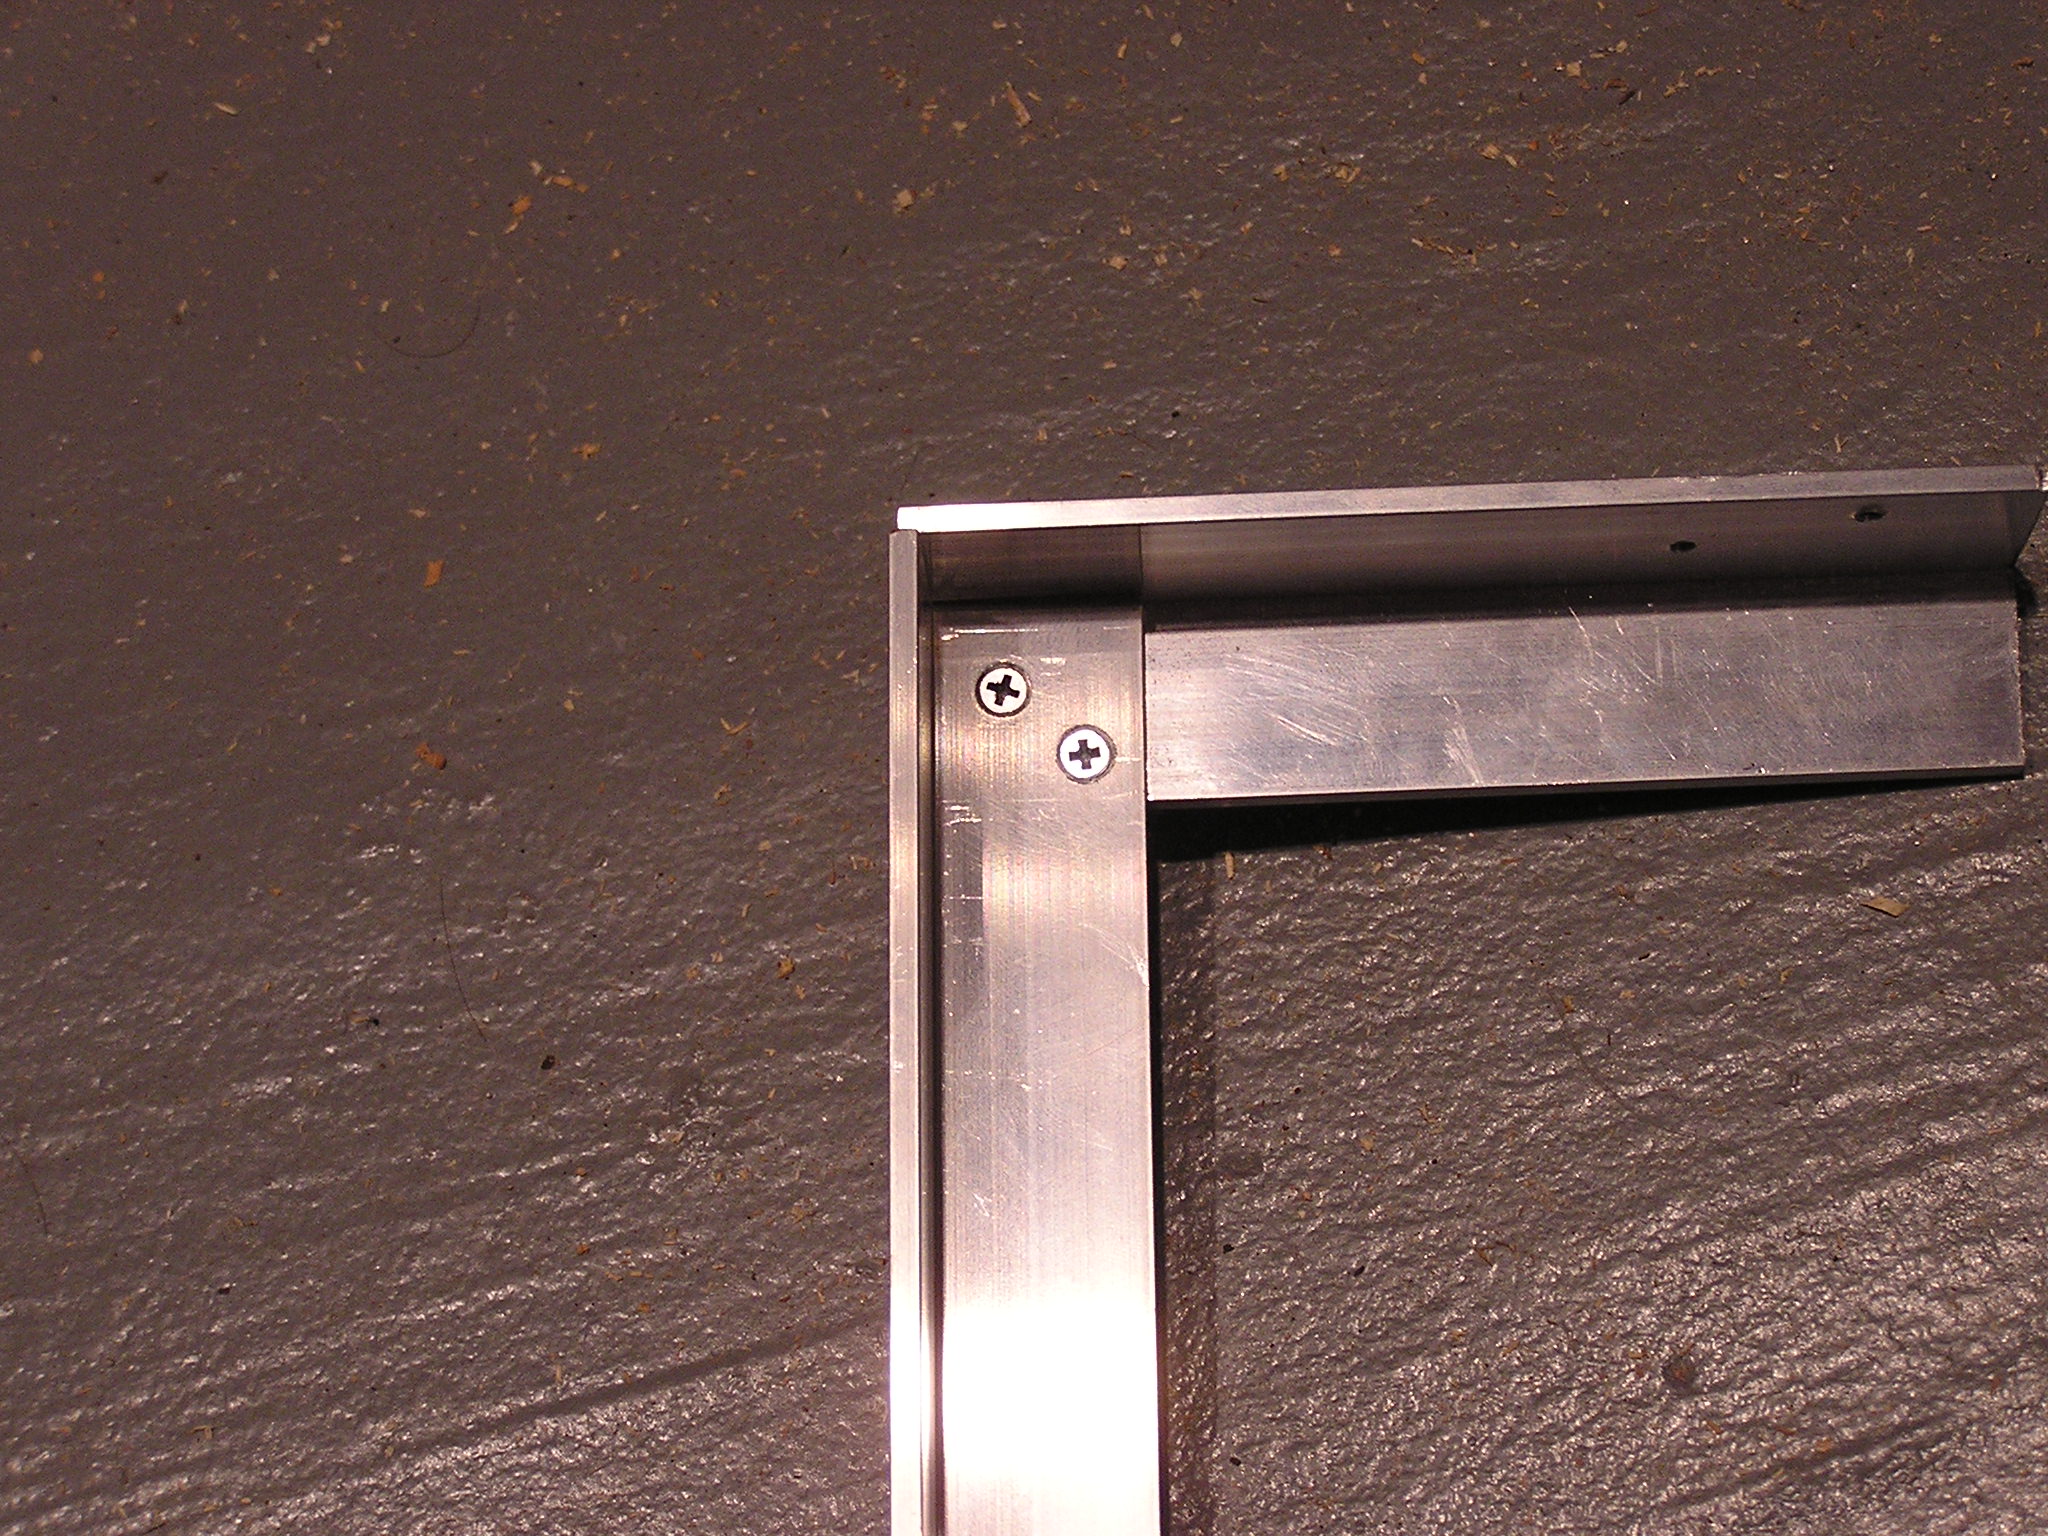
| 22:57, 17 December 2006 | Finished Corner.JPG (file) |  |
685 KB | Finished corner with ground of screws. I'm pretty sure this isn't done the official CalCars method. | 1 |
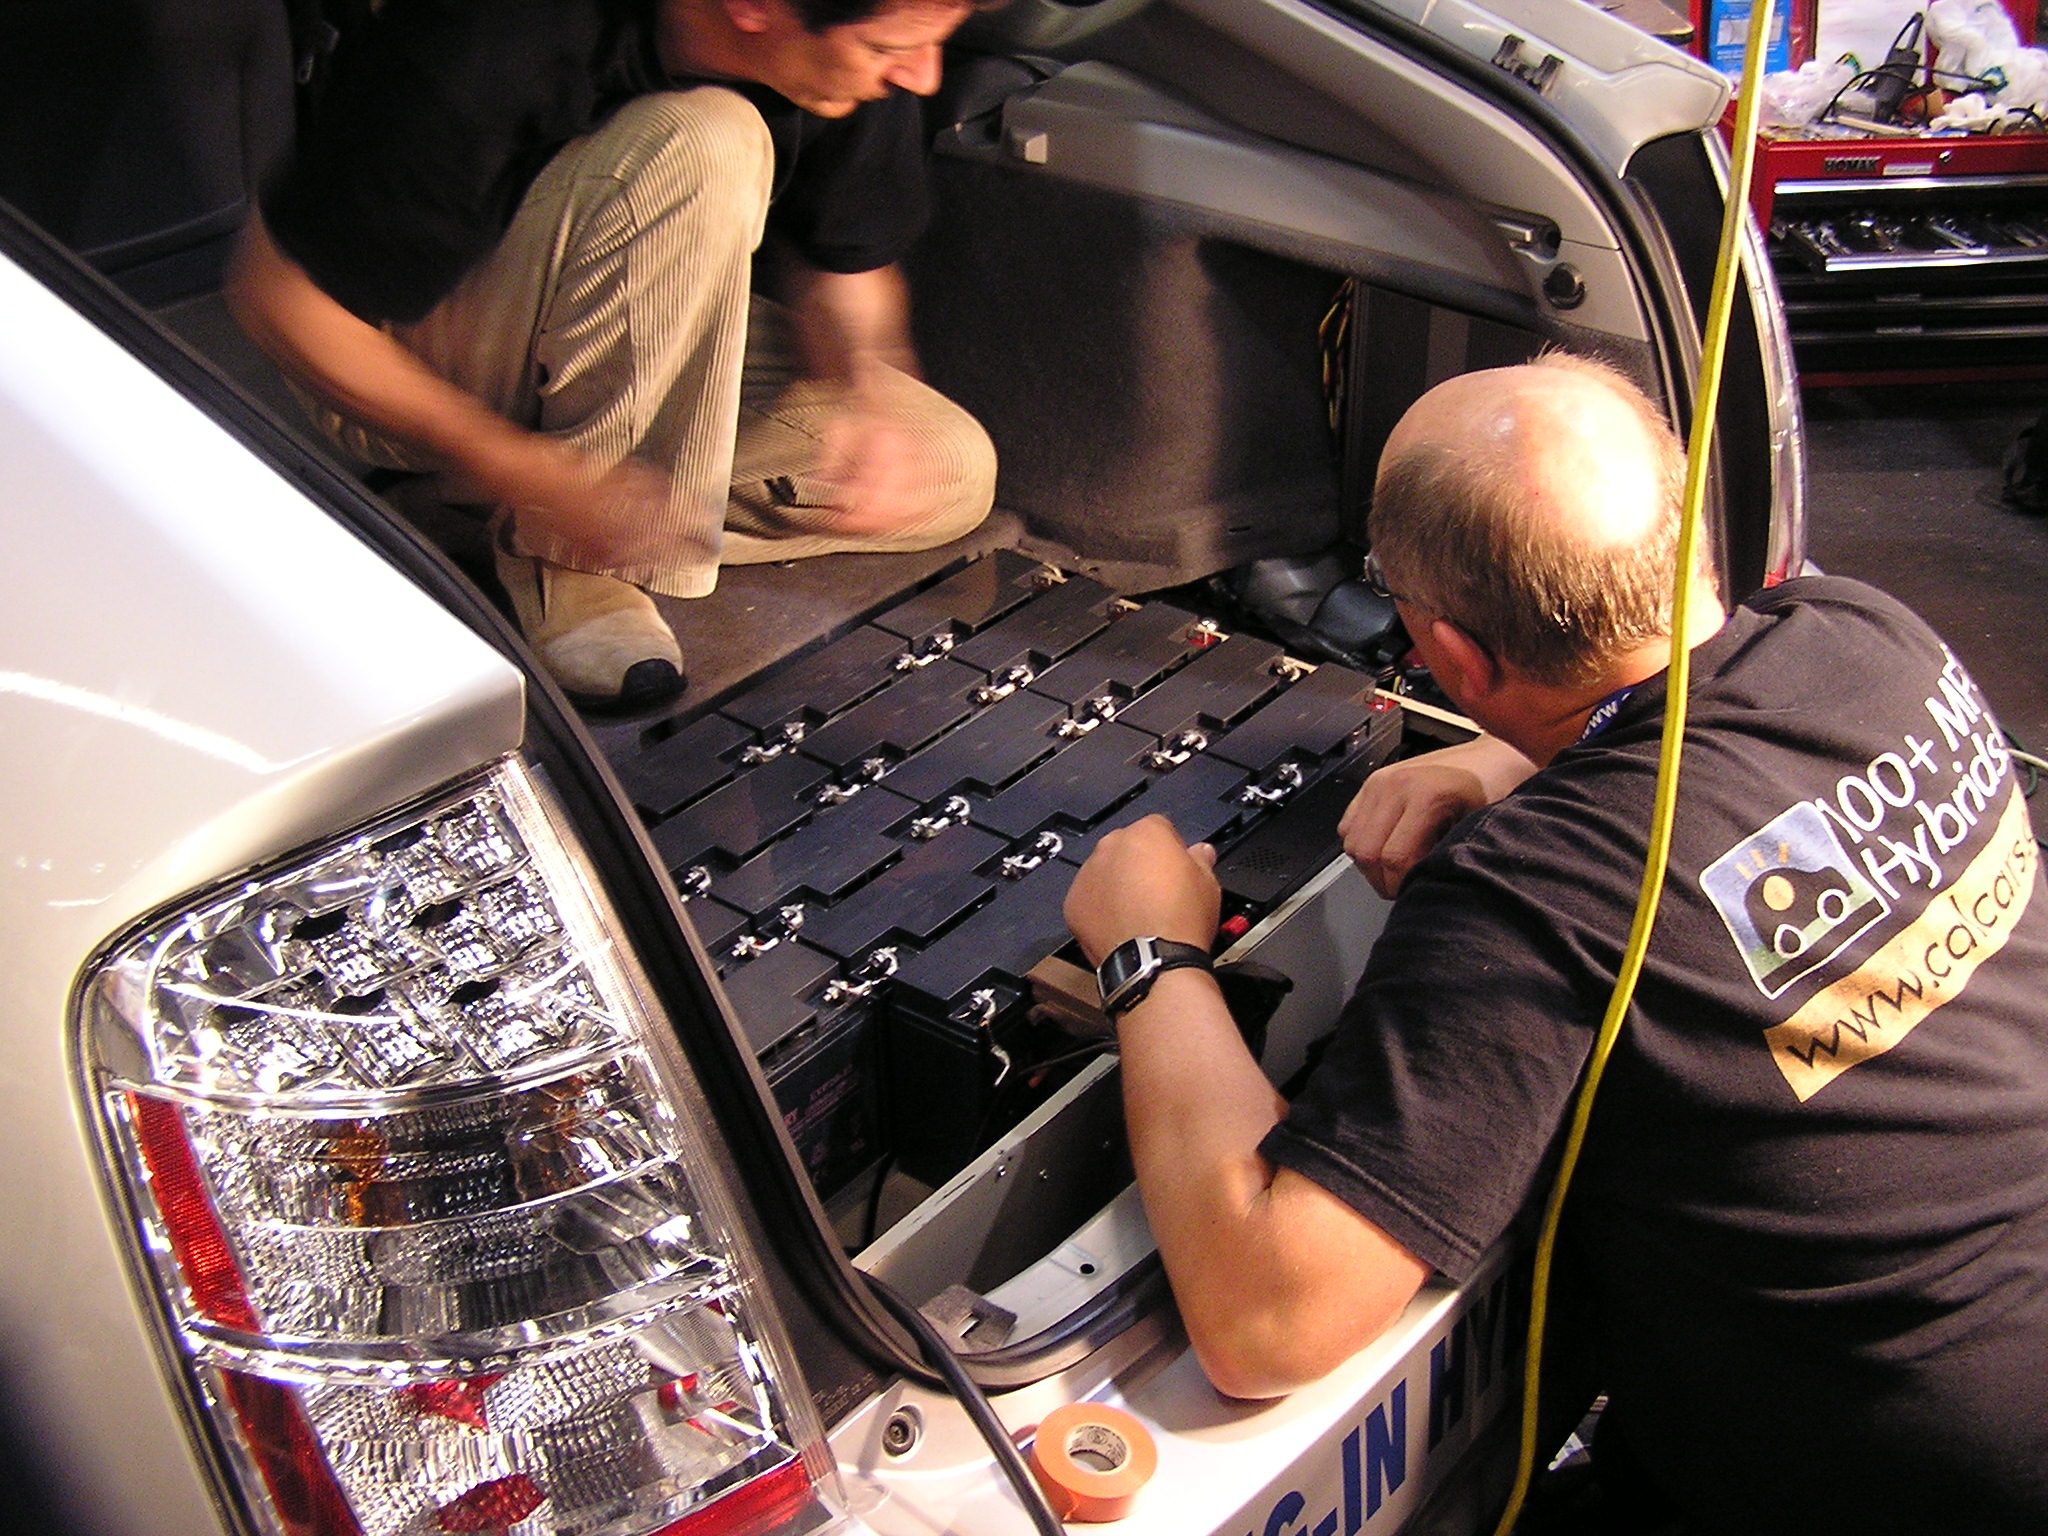
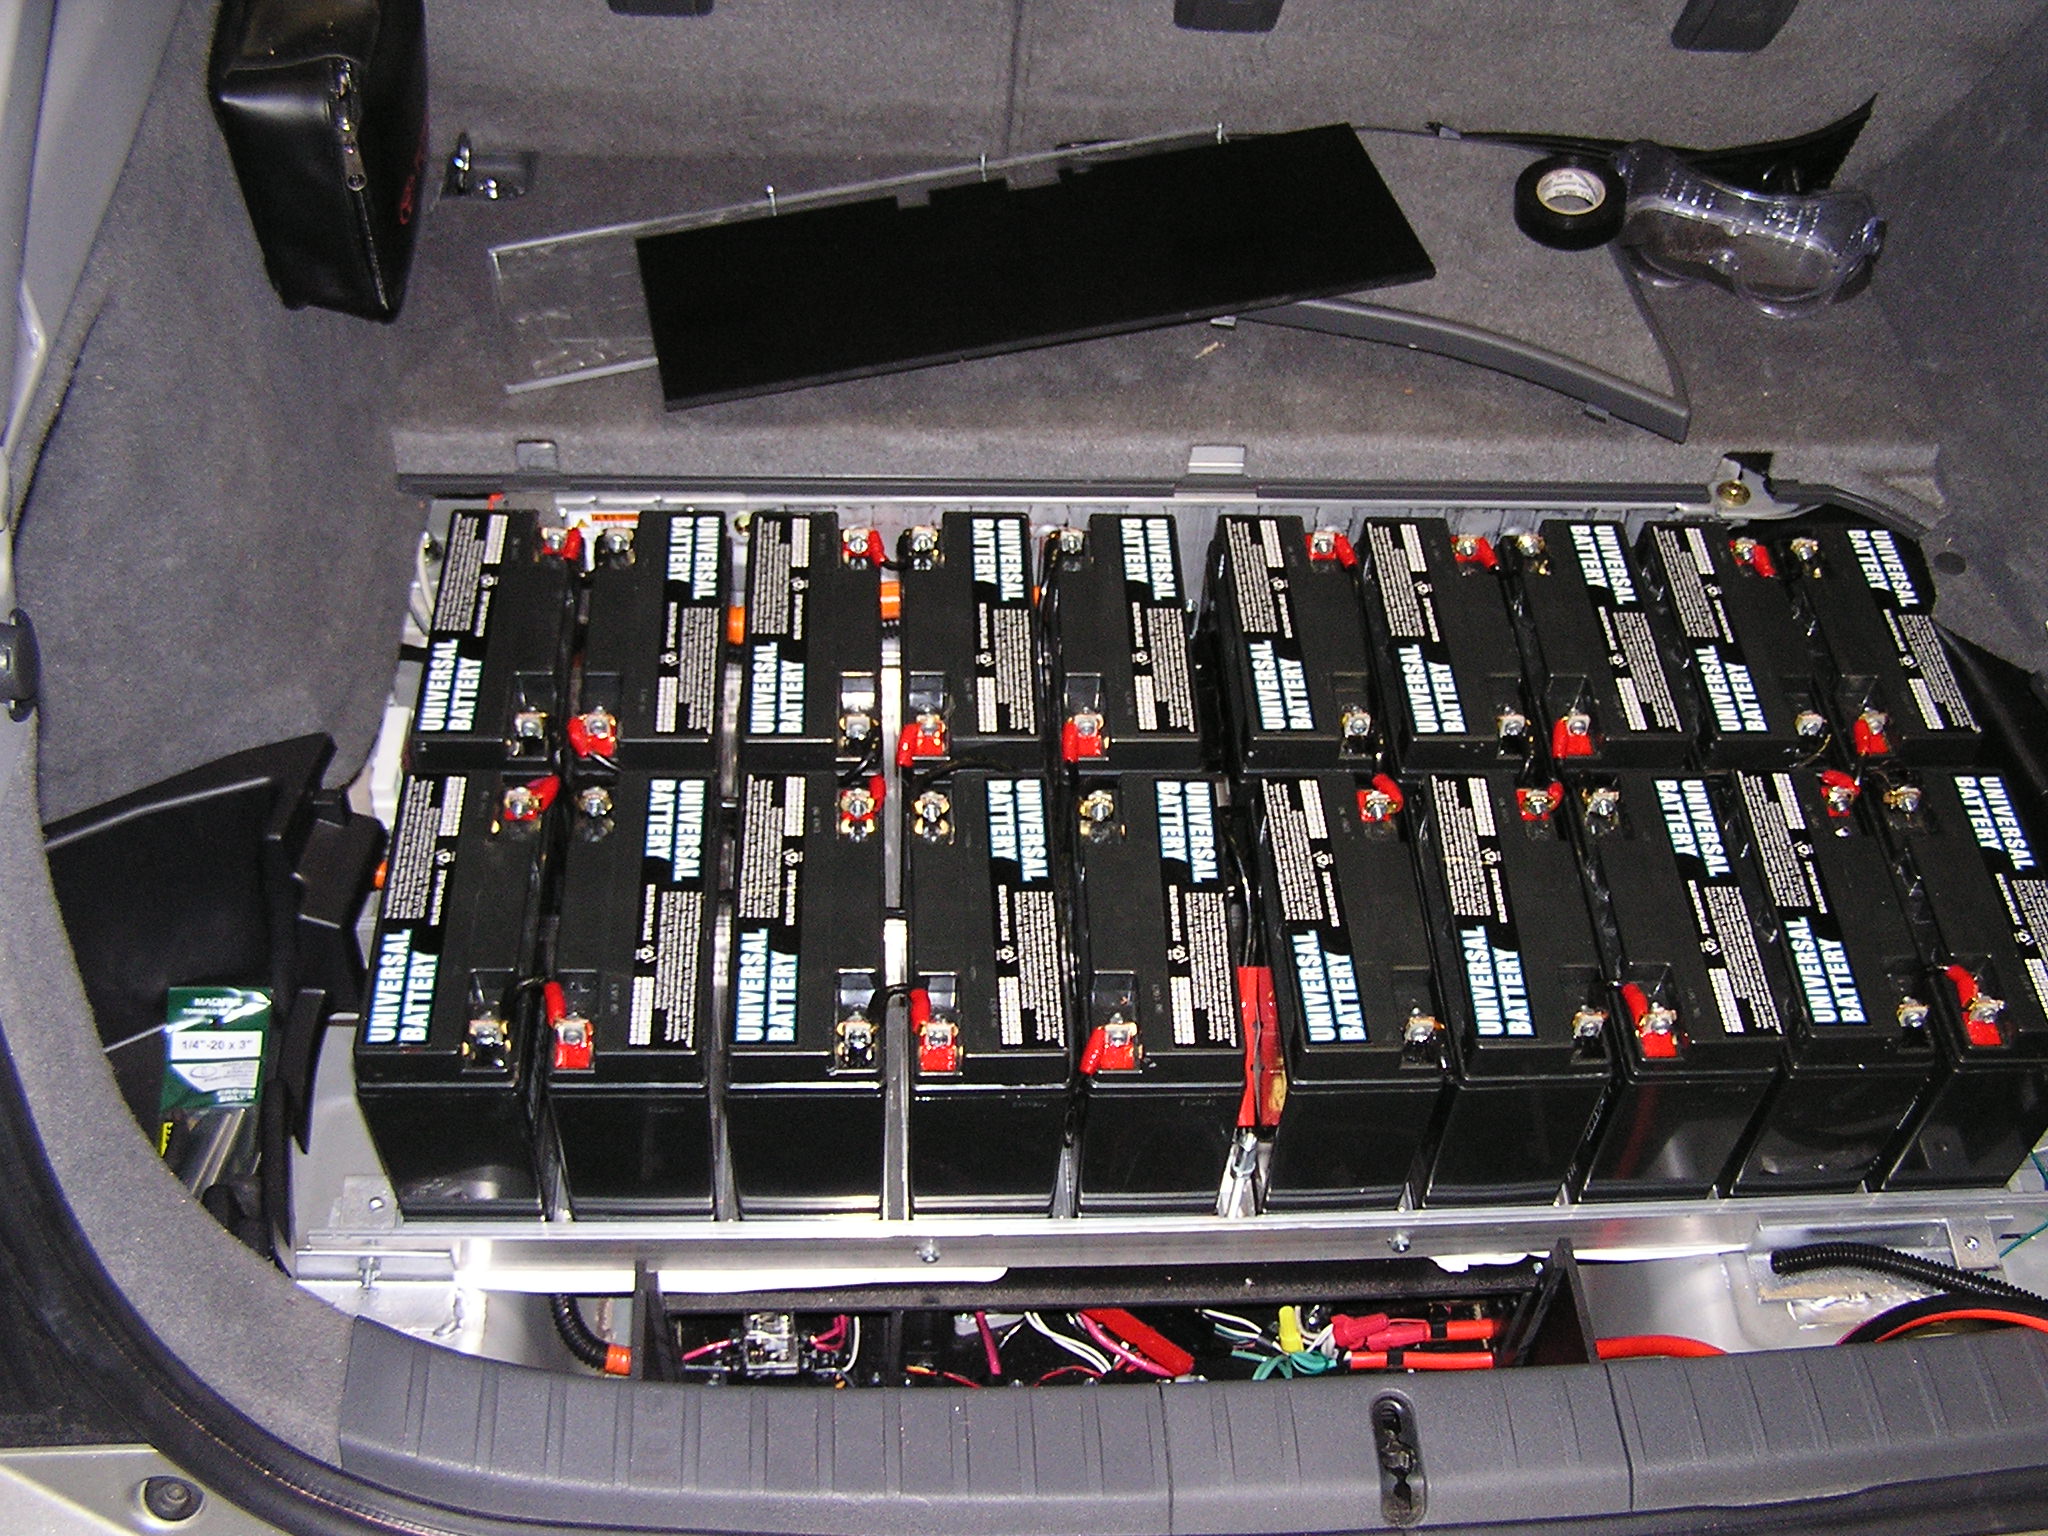
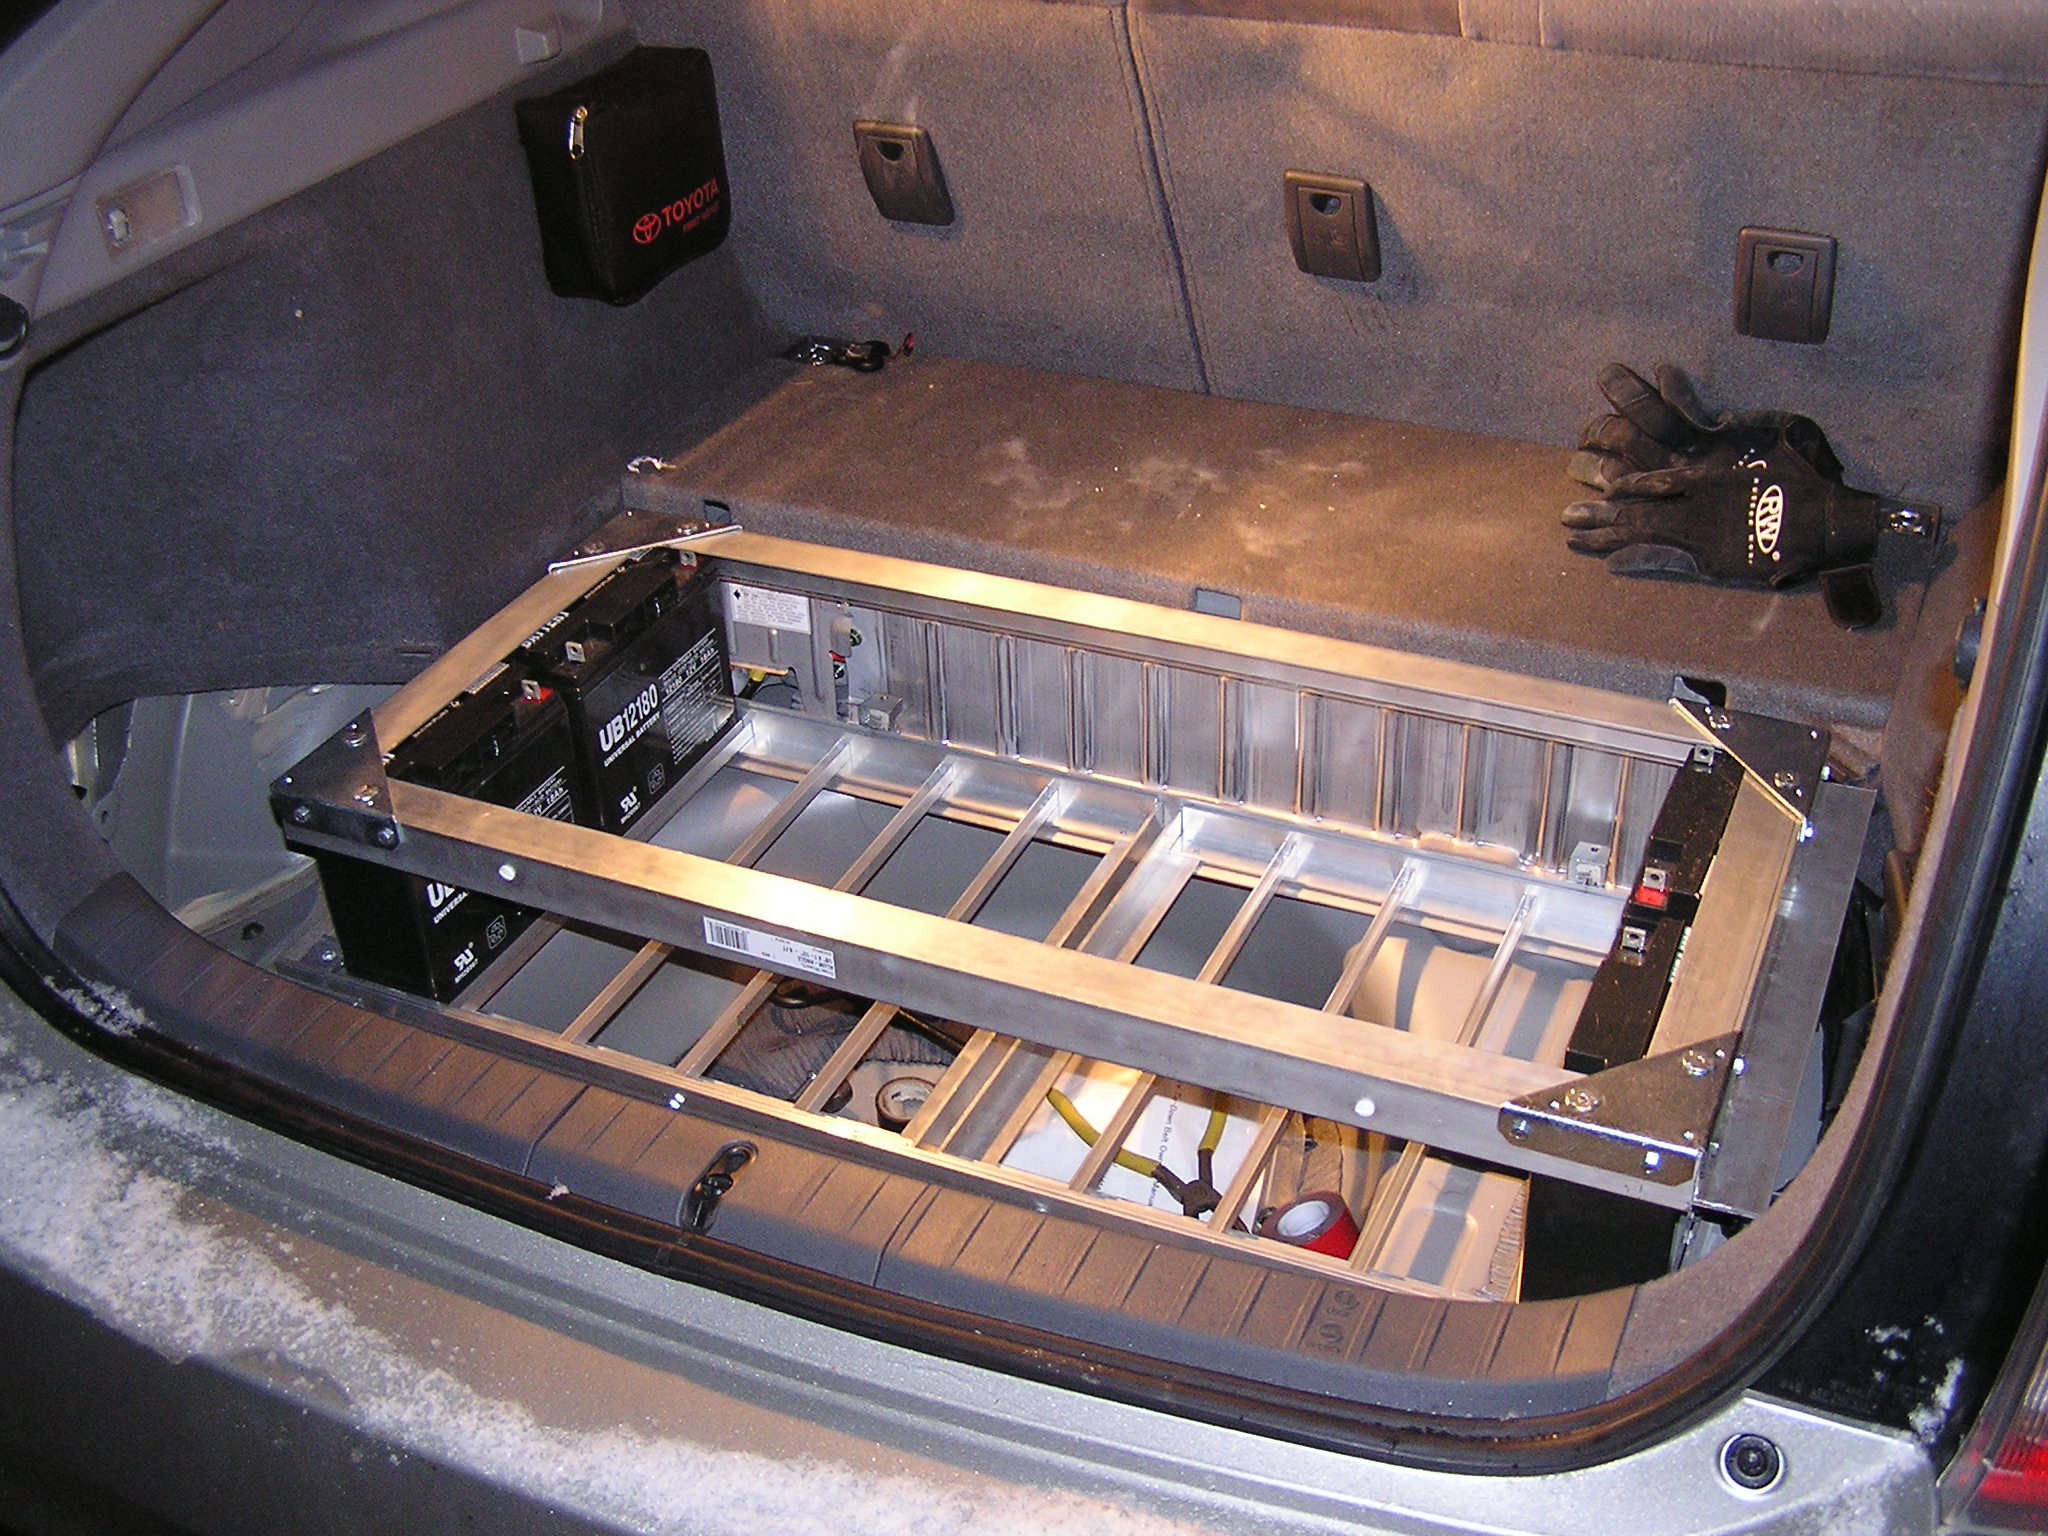
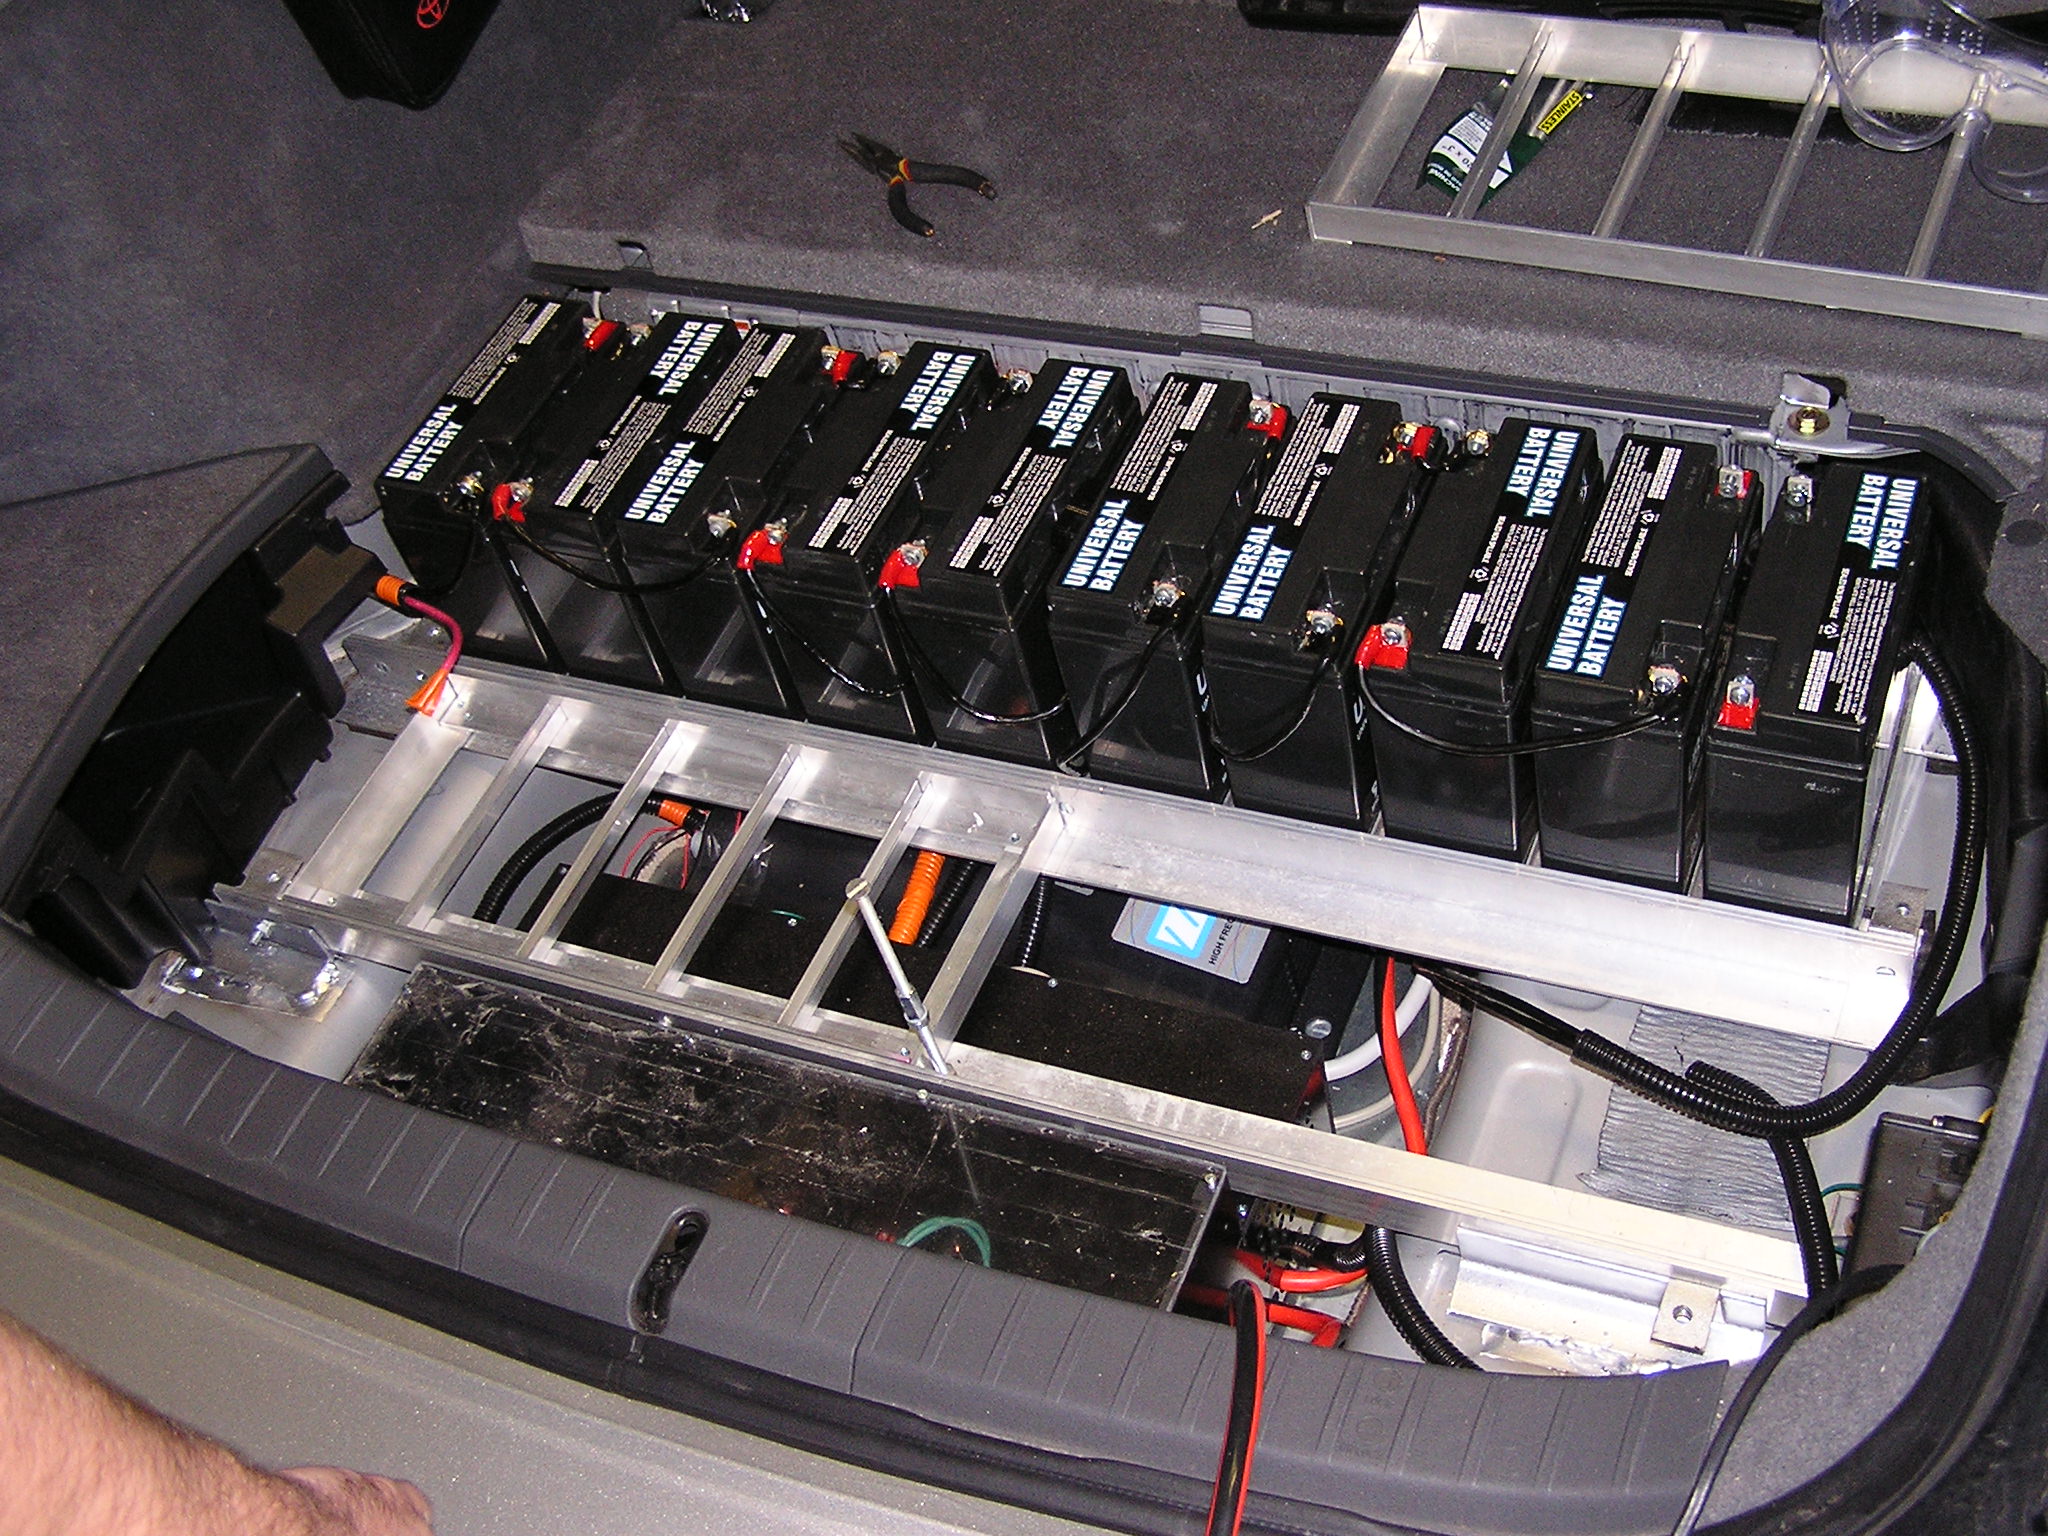
| 23:46, 26 April 2007 | Batteries being installed 2.jpg (file) |  |
688 KB | Batteries being installed on Chris Ewert's conversion - alt. mounting method. | 1 |
| 00:09, 27 April 2007 | Inside OEM battery from back of car.jpg (file) |  |
689 KB | The inside of the OEM battery from the rear of the car (unmodified.) | 1 |
| 01:33, 25 May 2007 | OEM Battery Fan Modification - Diode Mounting 1.jpg (file) |  |
689 KB | One way to mount the diodes for the OEM battery fan override modification | 1 |
| 00:07, 27 April 2007 | Opening OEM battery.jpg (file) |  |
692 KB | Opening up the OEM battery (make sure to disconnect service plug FIRST!) | 1 |
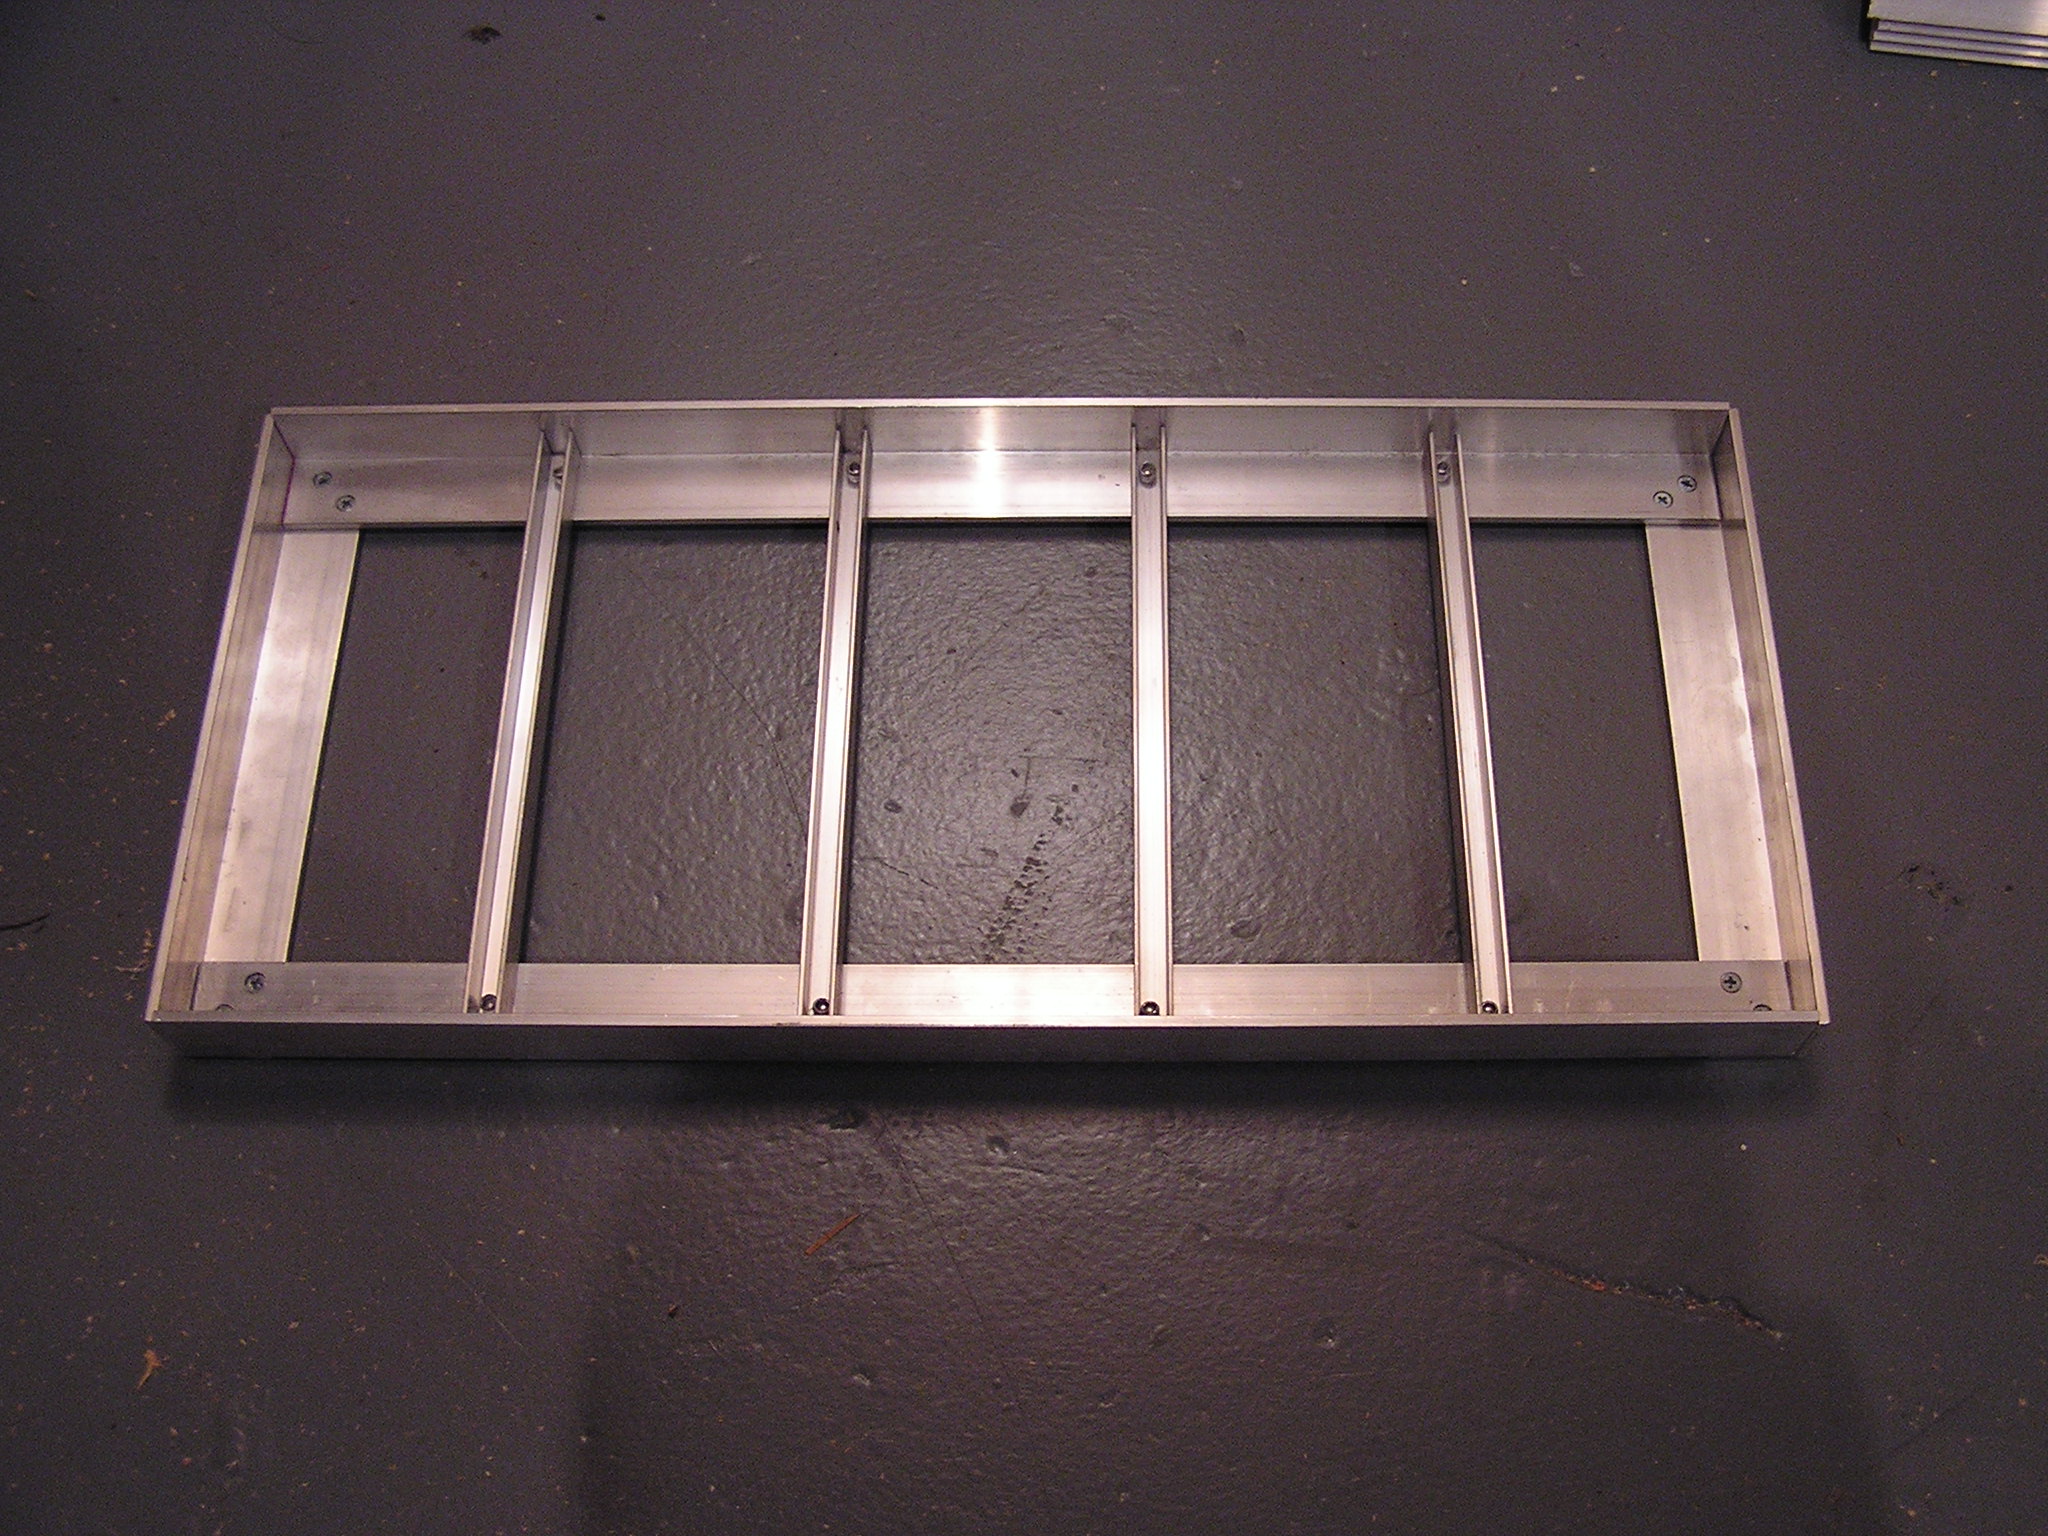
| 04:56, 15 December 2006 | Tray Set Together Close Up.JPG (file) |  |
693 KB | 1 | |
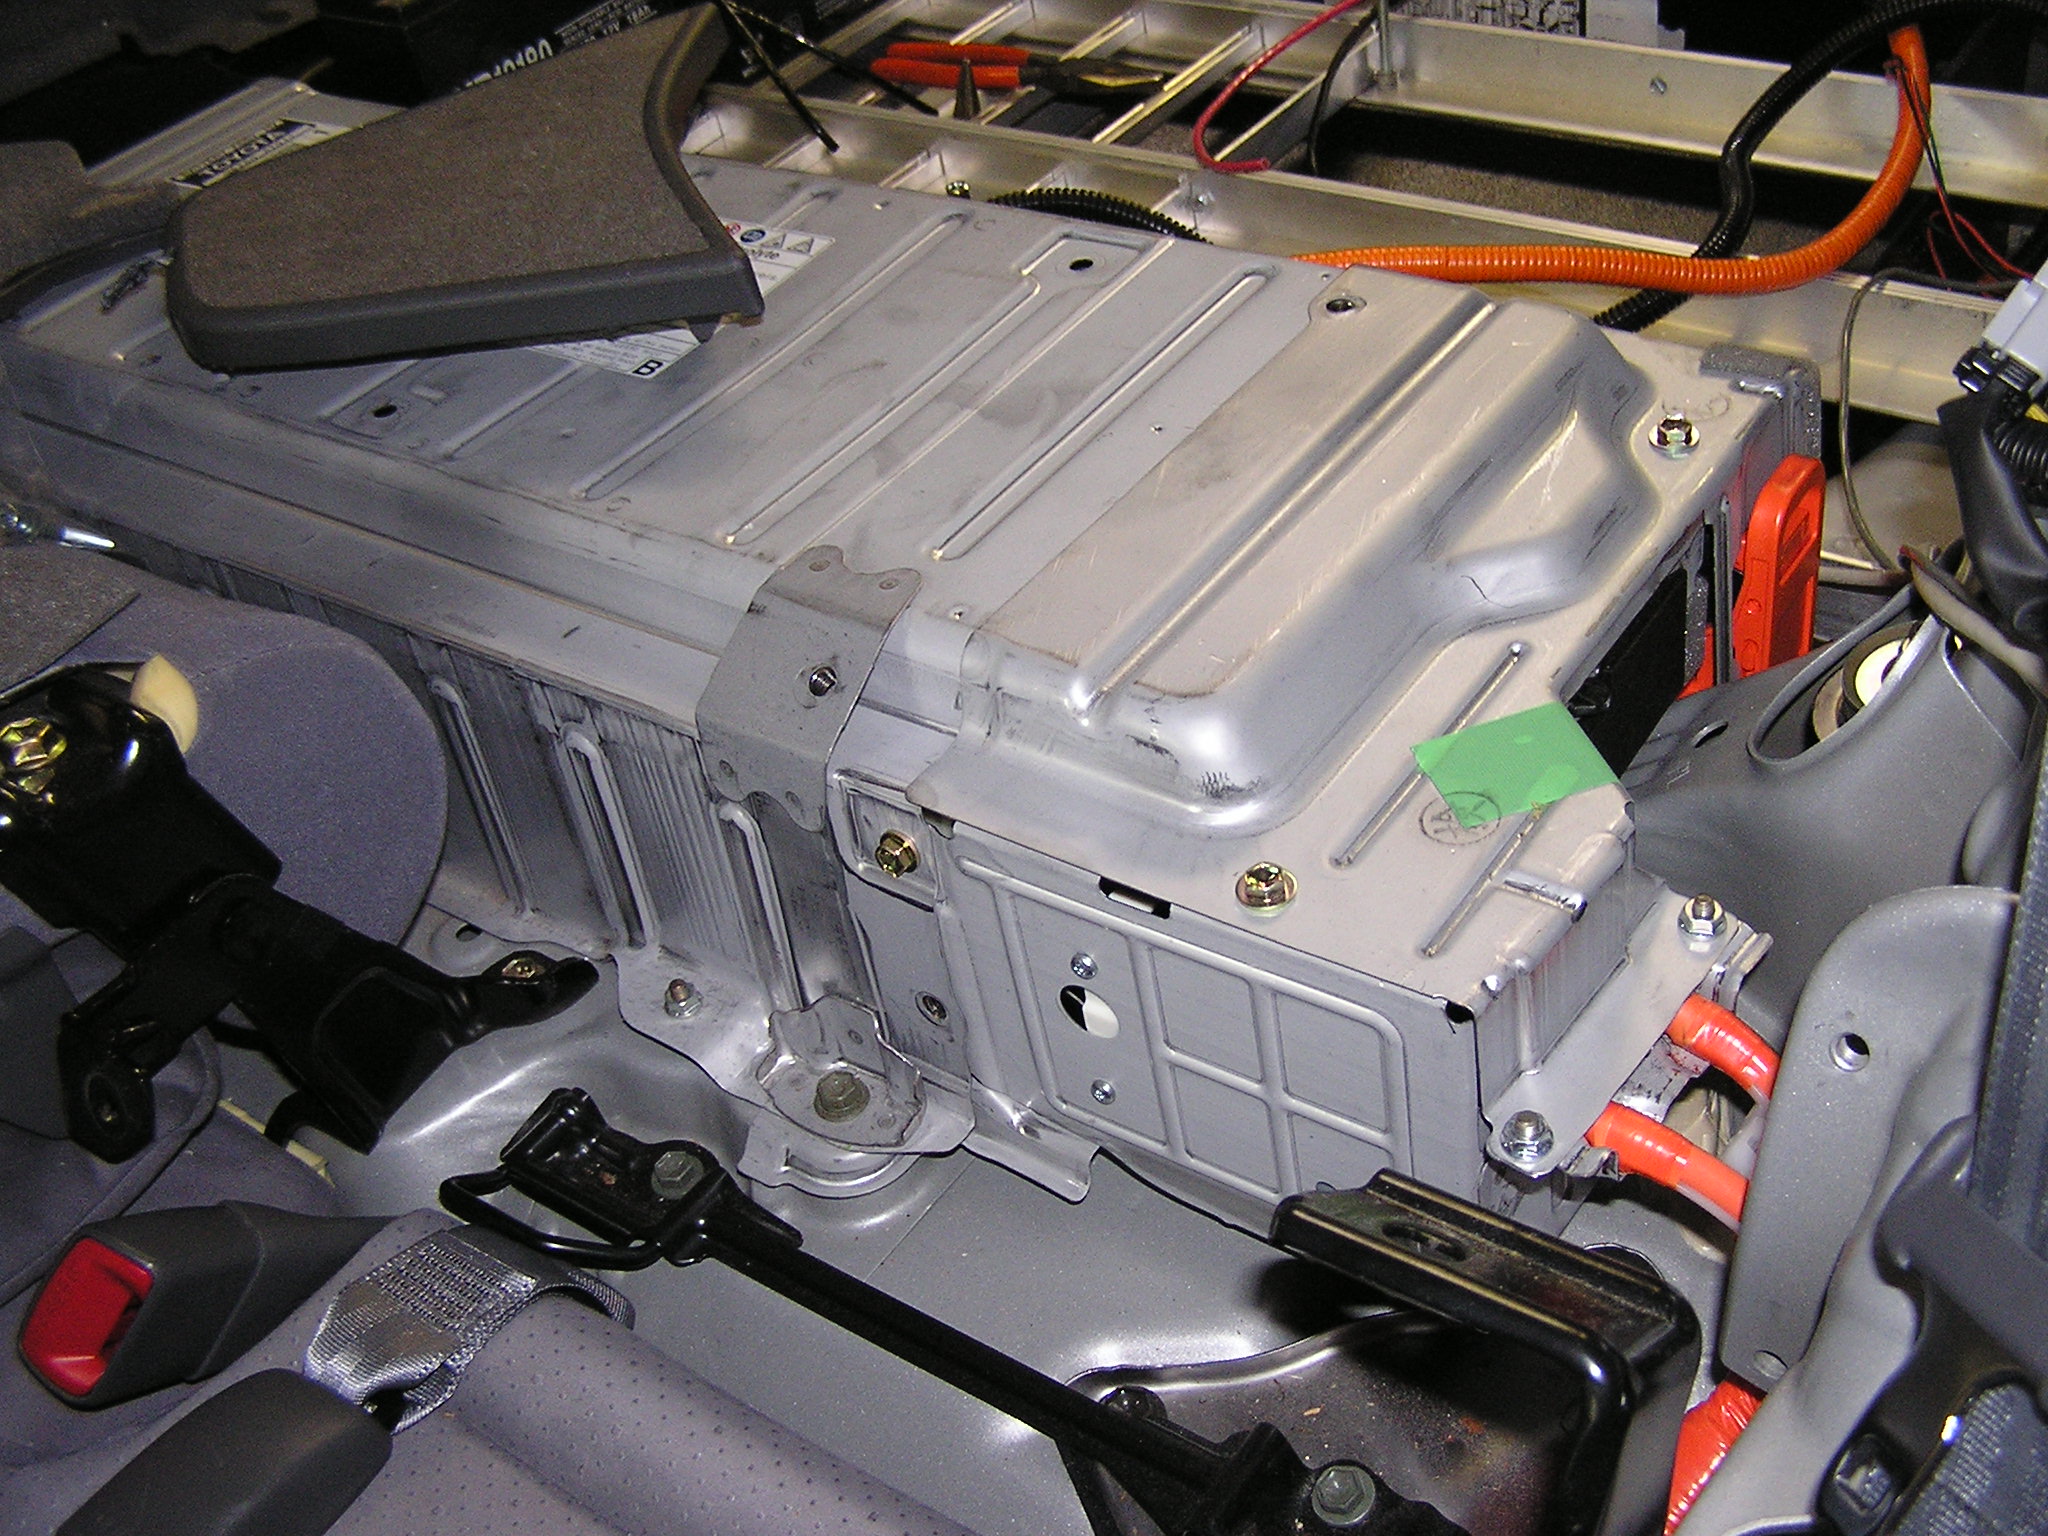
| 00:04, 27 April 2007 | OEM battery exposed.jpg (file) |  |
693 KB | The OEM battery, almost ready to be unscrewed (service plug must be disconnected first.) | 1 |
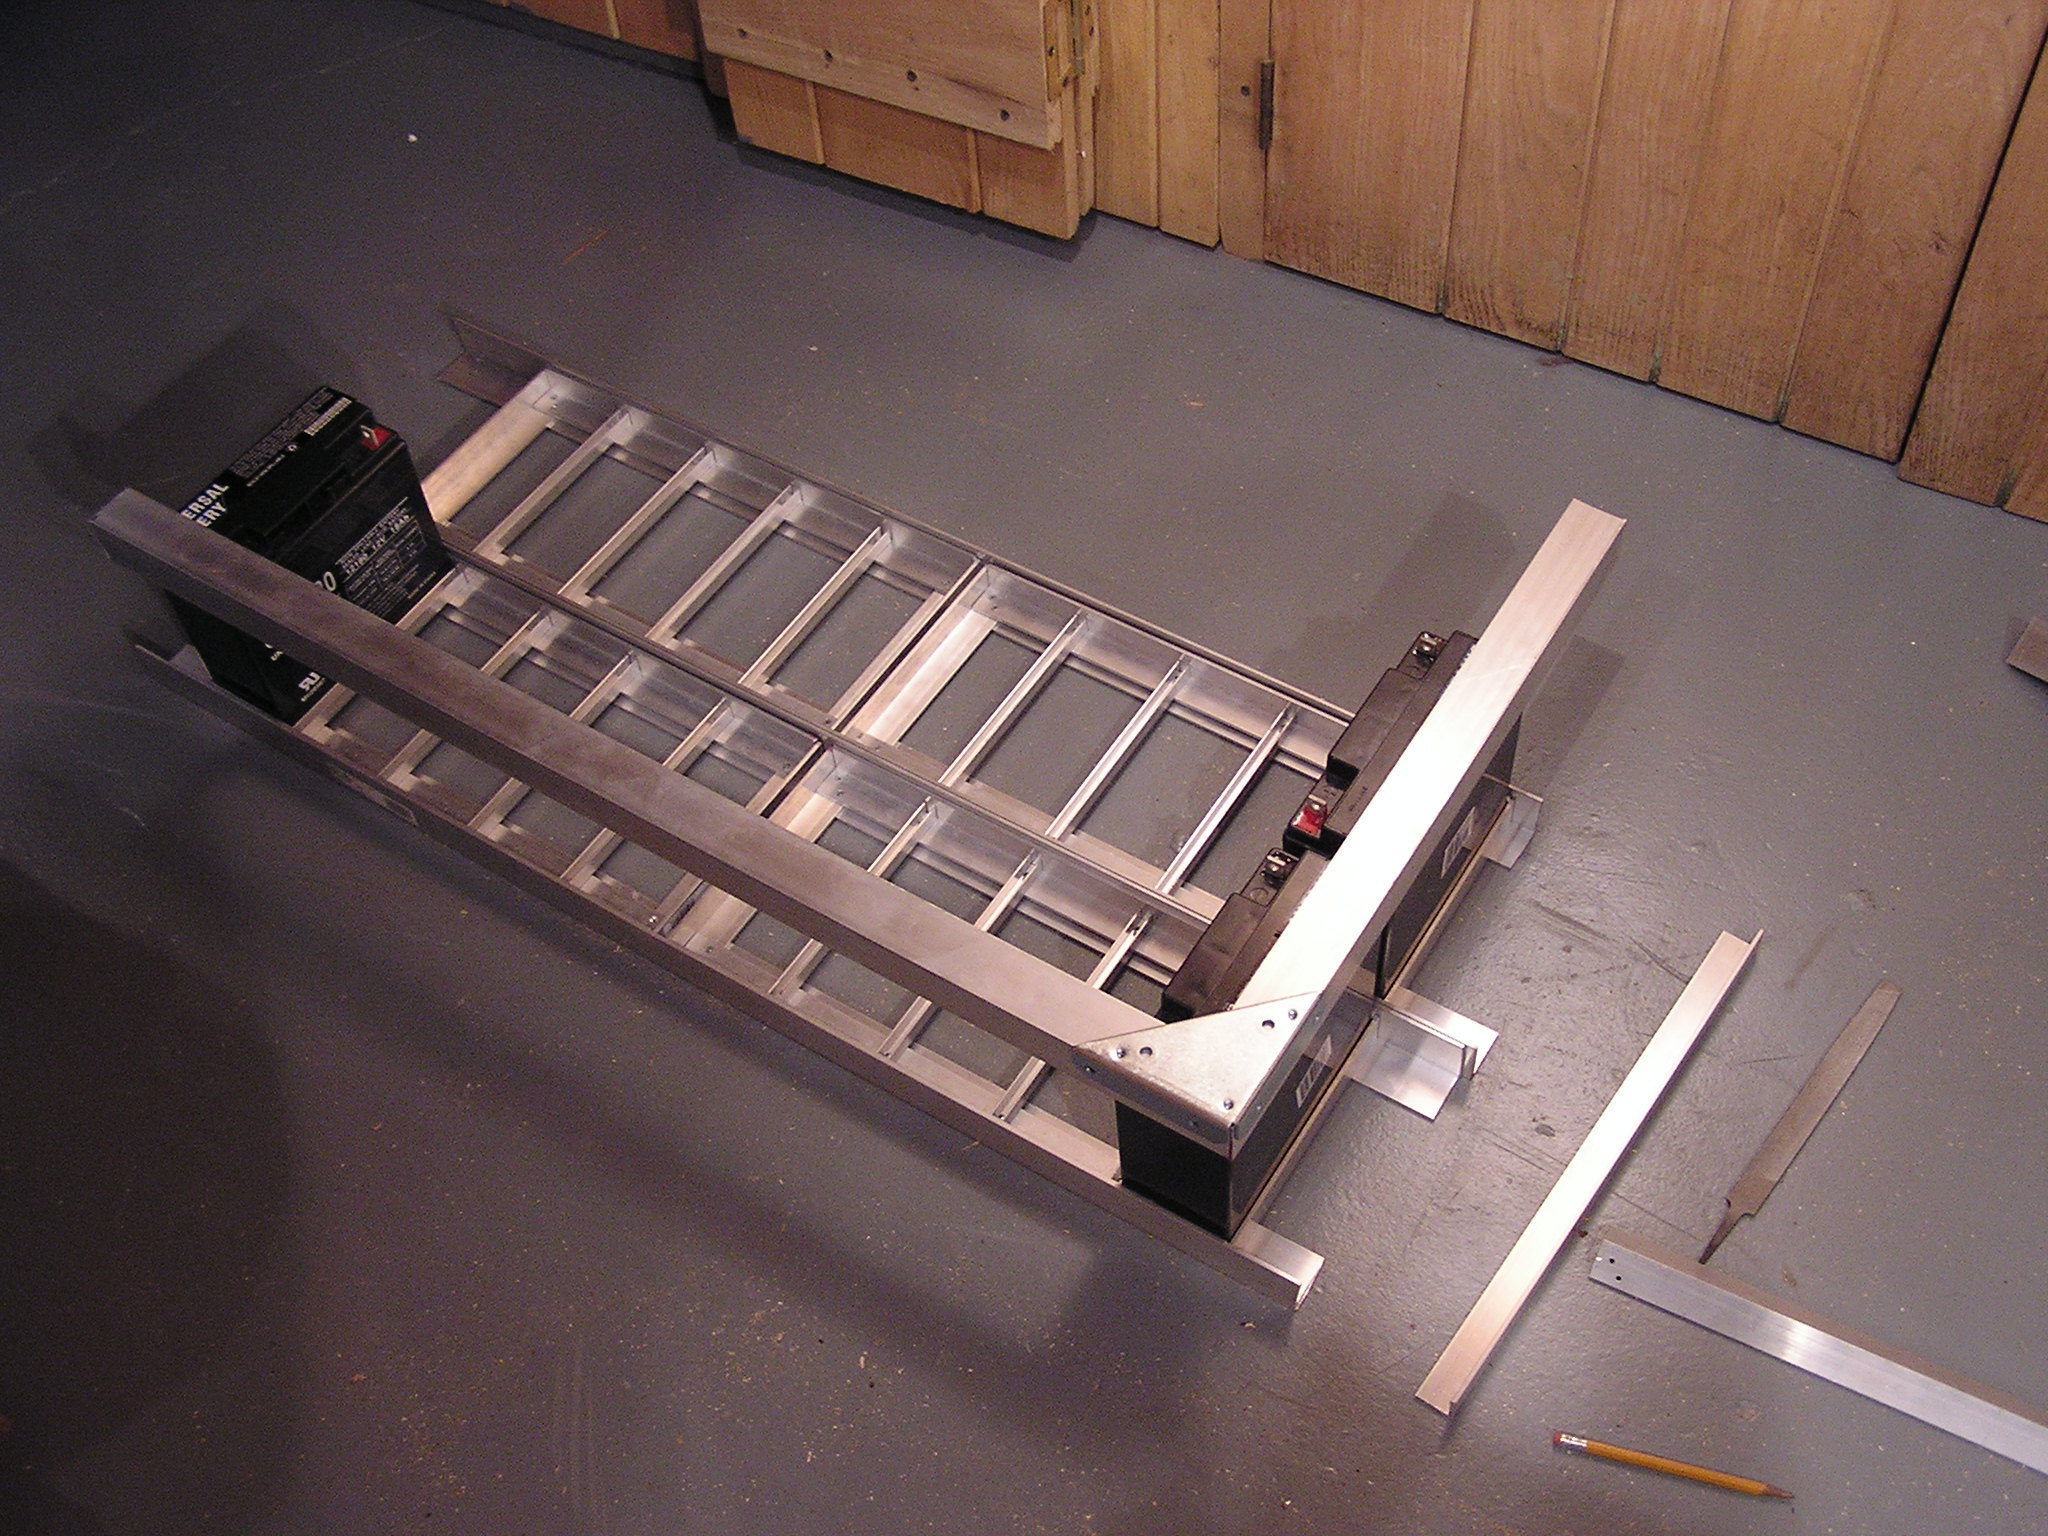
| 04:07, 13 February 2007 | P1240040.JPG (file) |  |
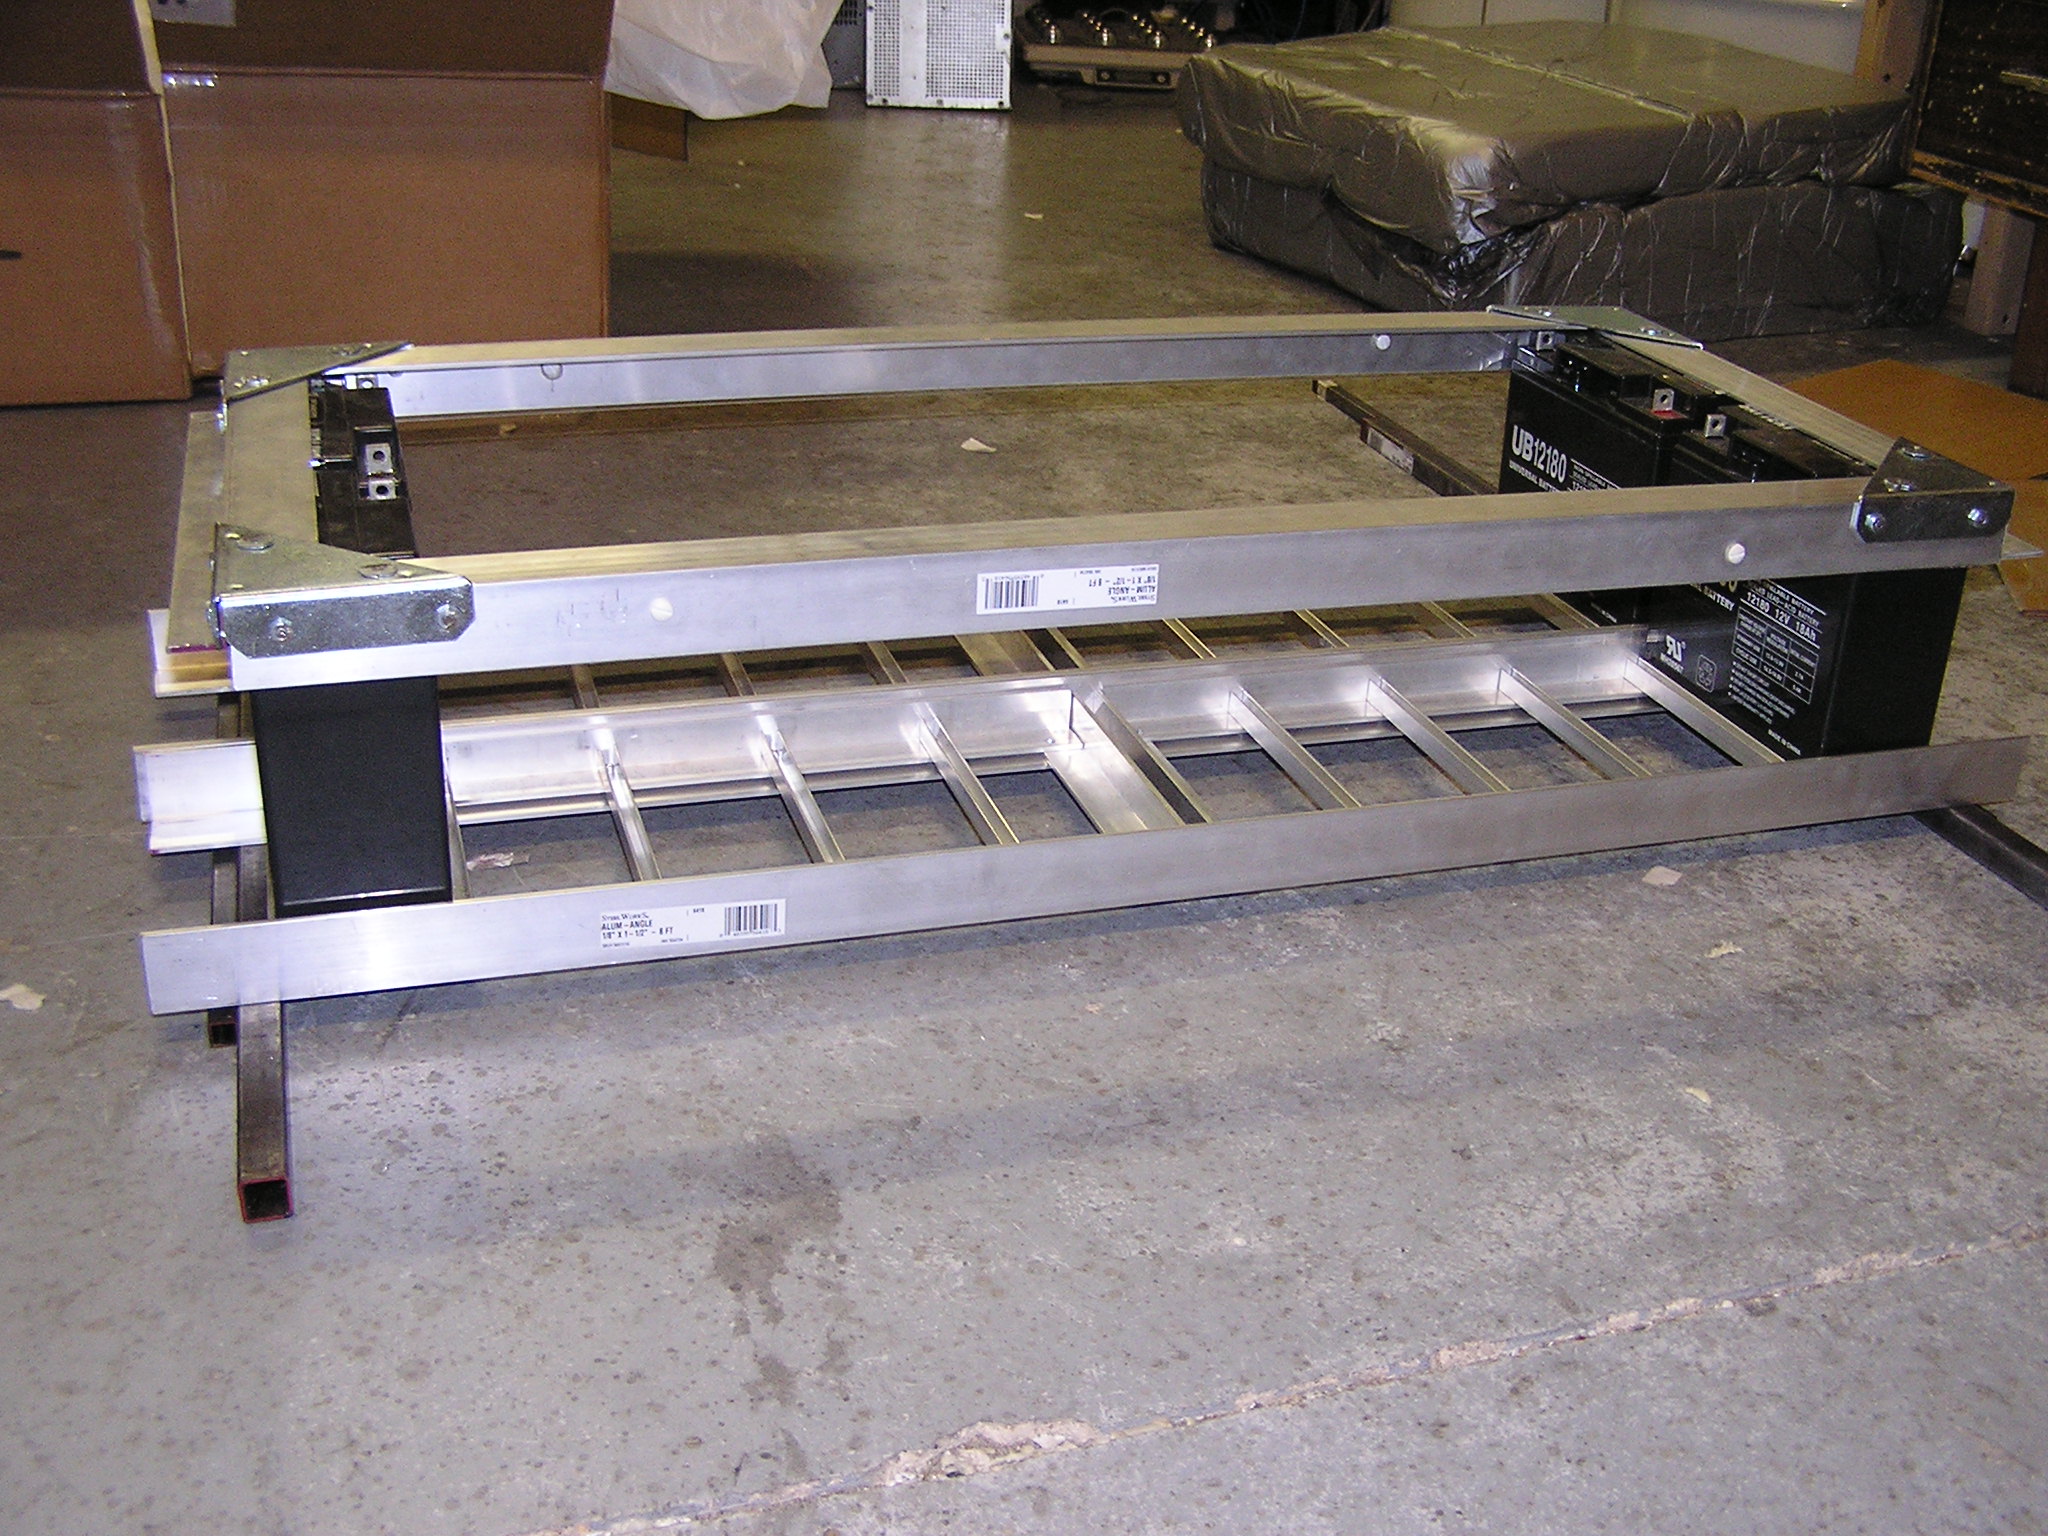
693 KB | Battery box from side set together | 1 |
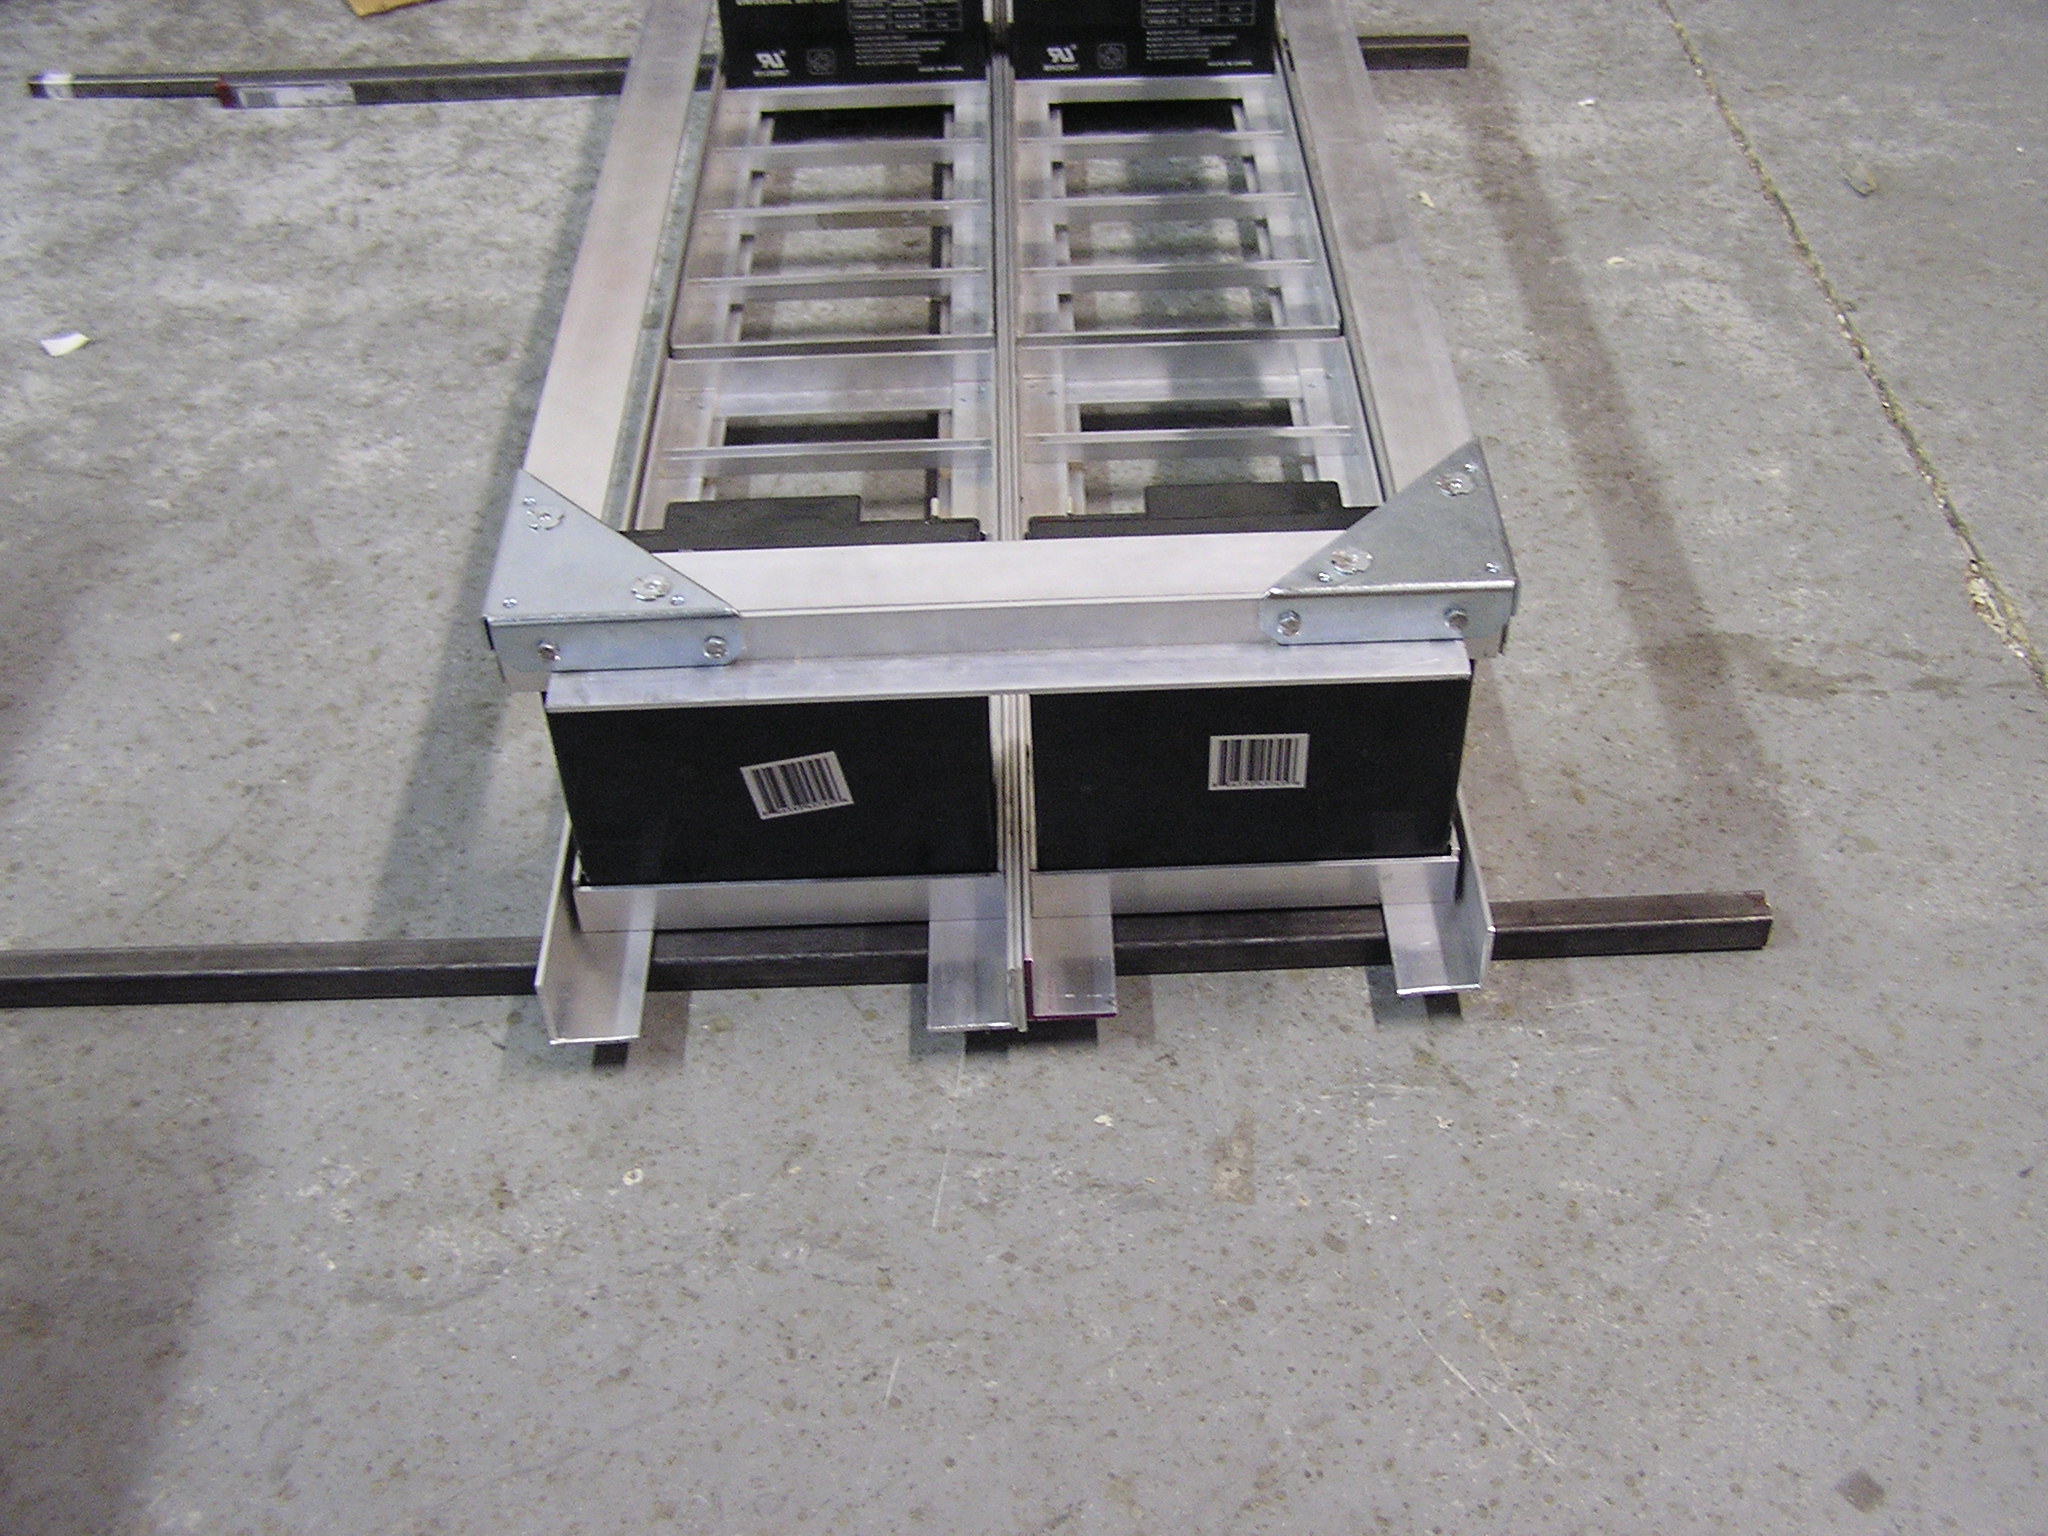
| 22:43, 17 December 2006 | Batt Box Top 3 Angles.JPG (file) |  |
696 KB | Aluminum angle irons cut with 45 degree angles and laid on top of the battery box | 1 |
| 04:15, 13 February 2007 | Batt box test fit forward design.JPG (file) |  |
696 KB | Test fitting (and partially mounted) battery box. The battery box is moved as forward as possible. | 1 |
| 23:48, 26 April 2007 | Batt box top modified for alt mounting method.jpg (file) |  |
700 KB | The battery box top after it was modified for use with the alturnative mouting method. | 1 |
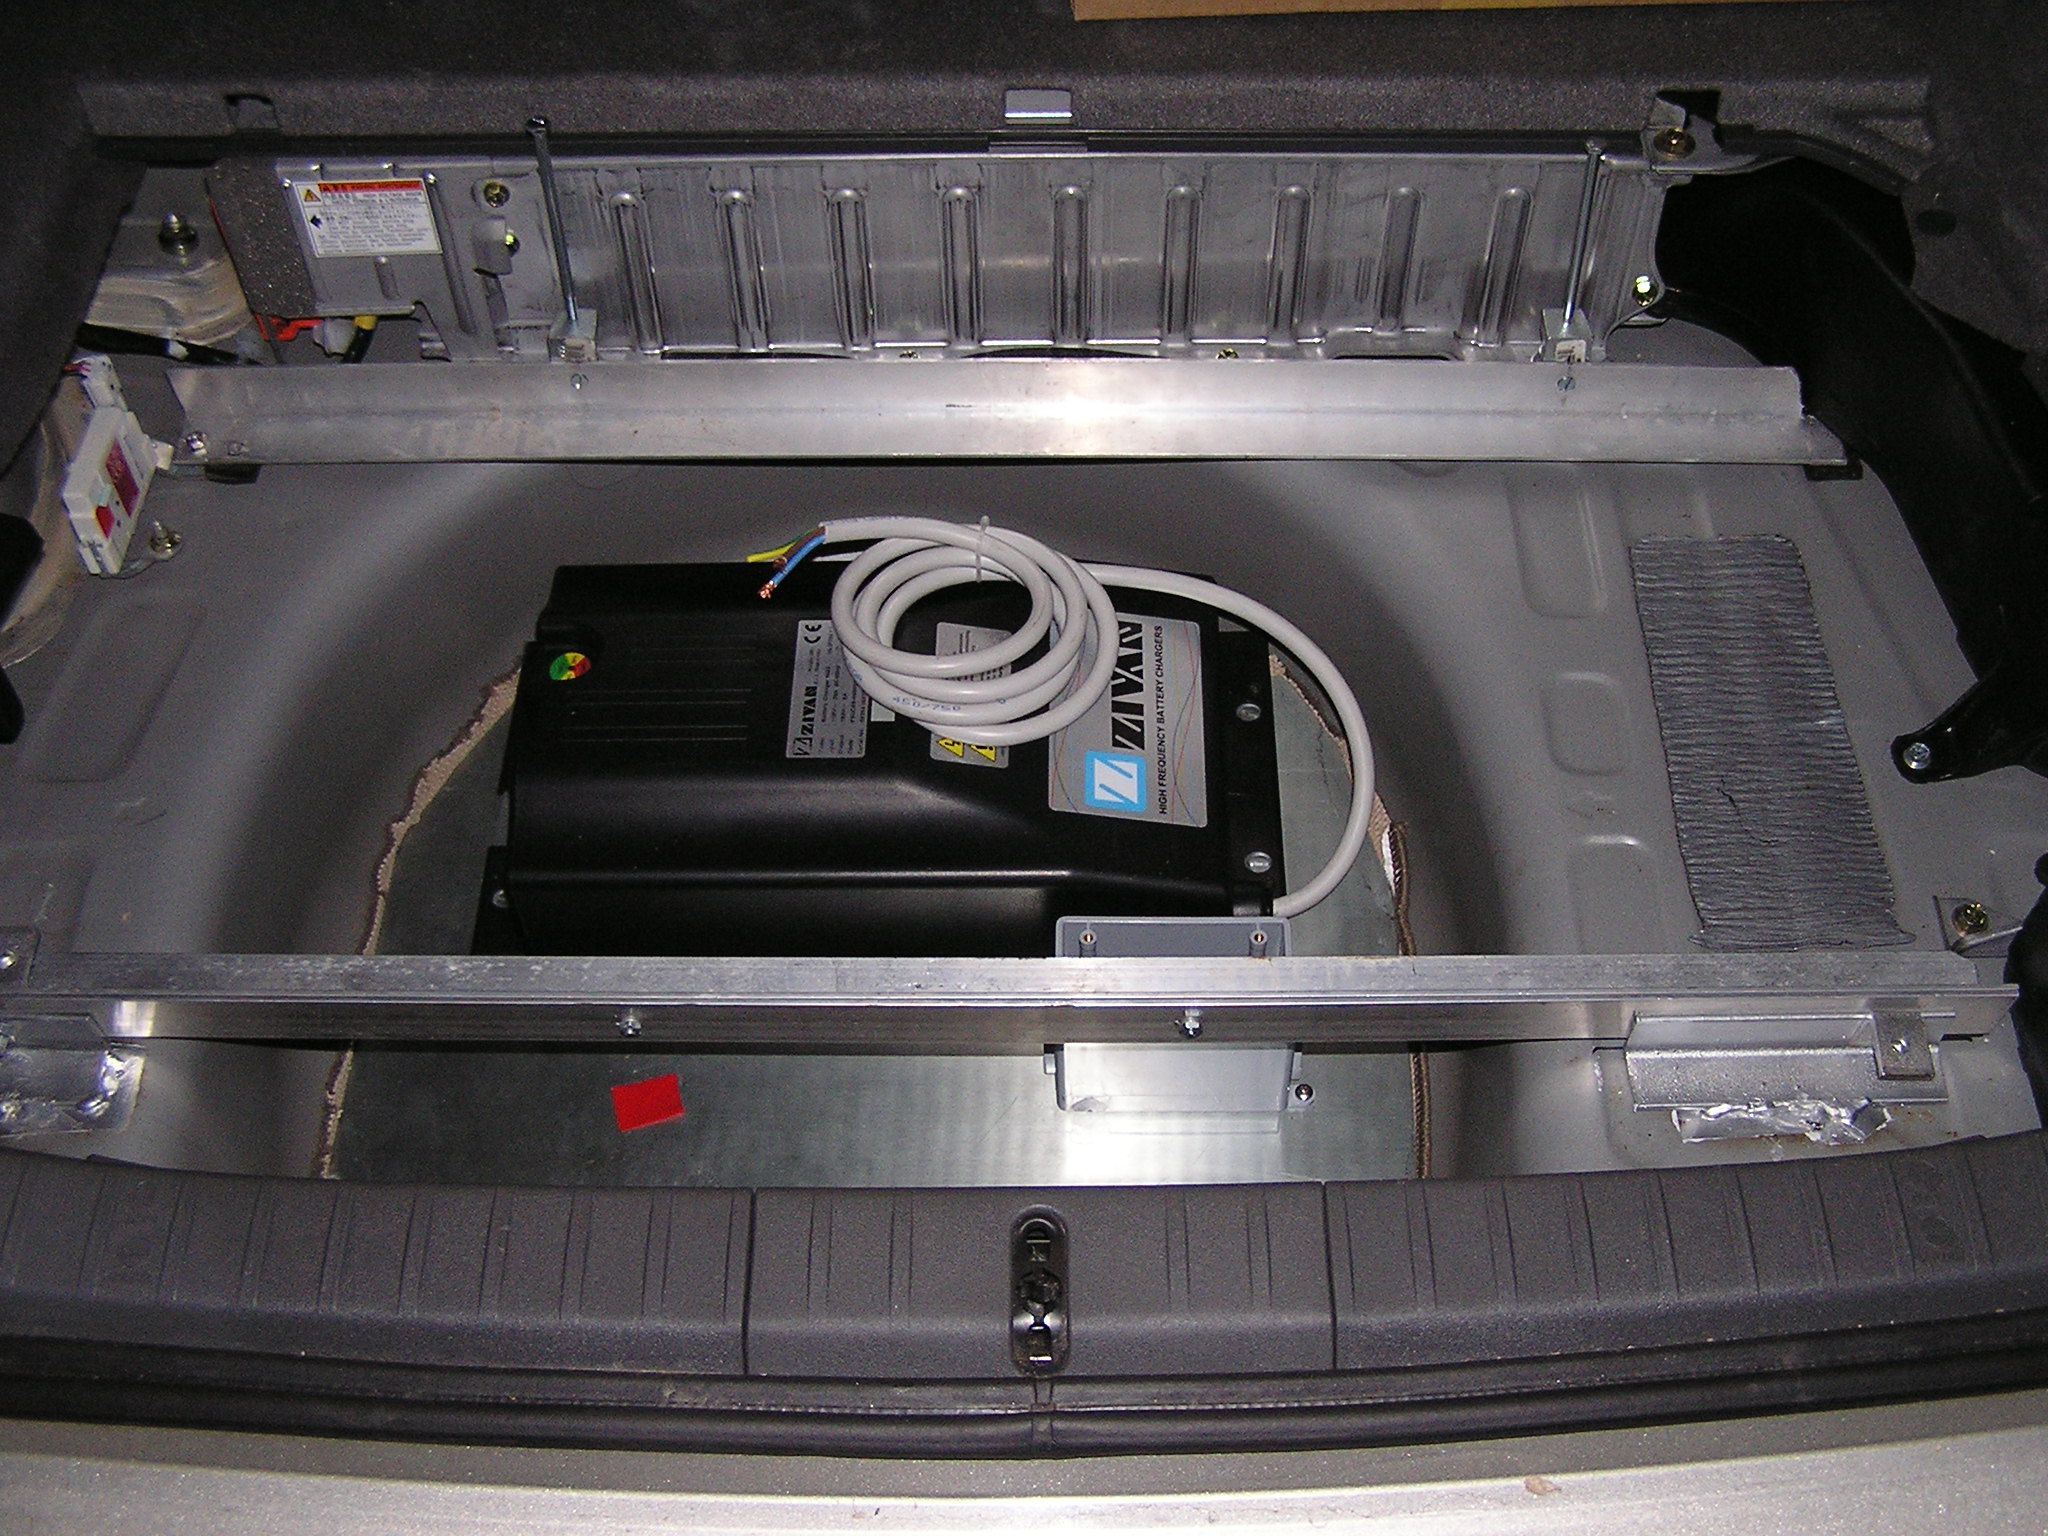
| 19:49, 20 March 2007 | Charger in tirewell.JPG (file) |  |
703 KB | Alt. mounting method. Charger is in tire well on steel sheet. Also shows outter batt box supports | 1 |
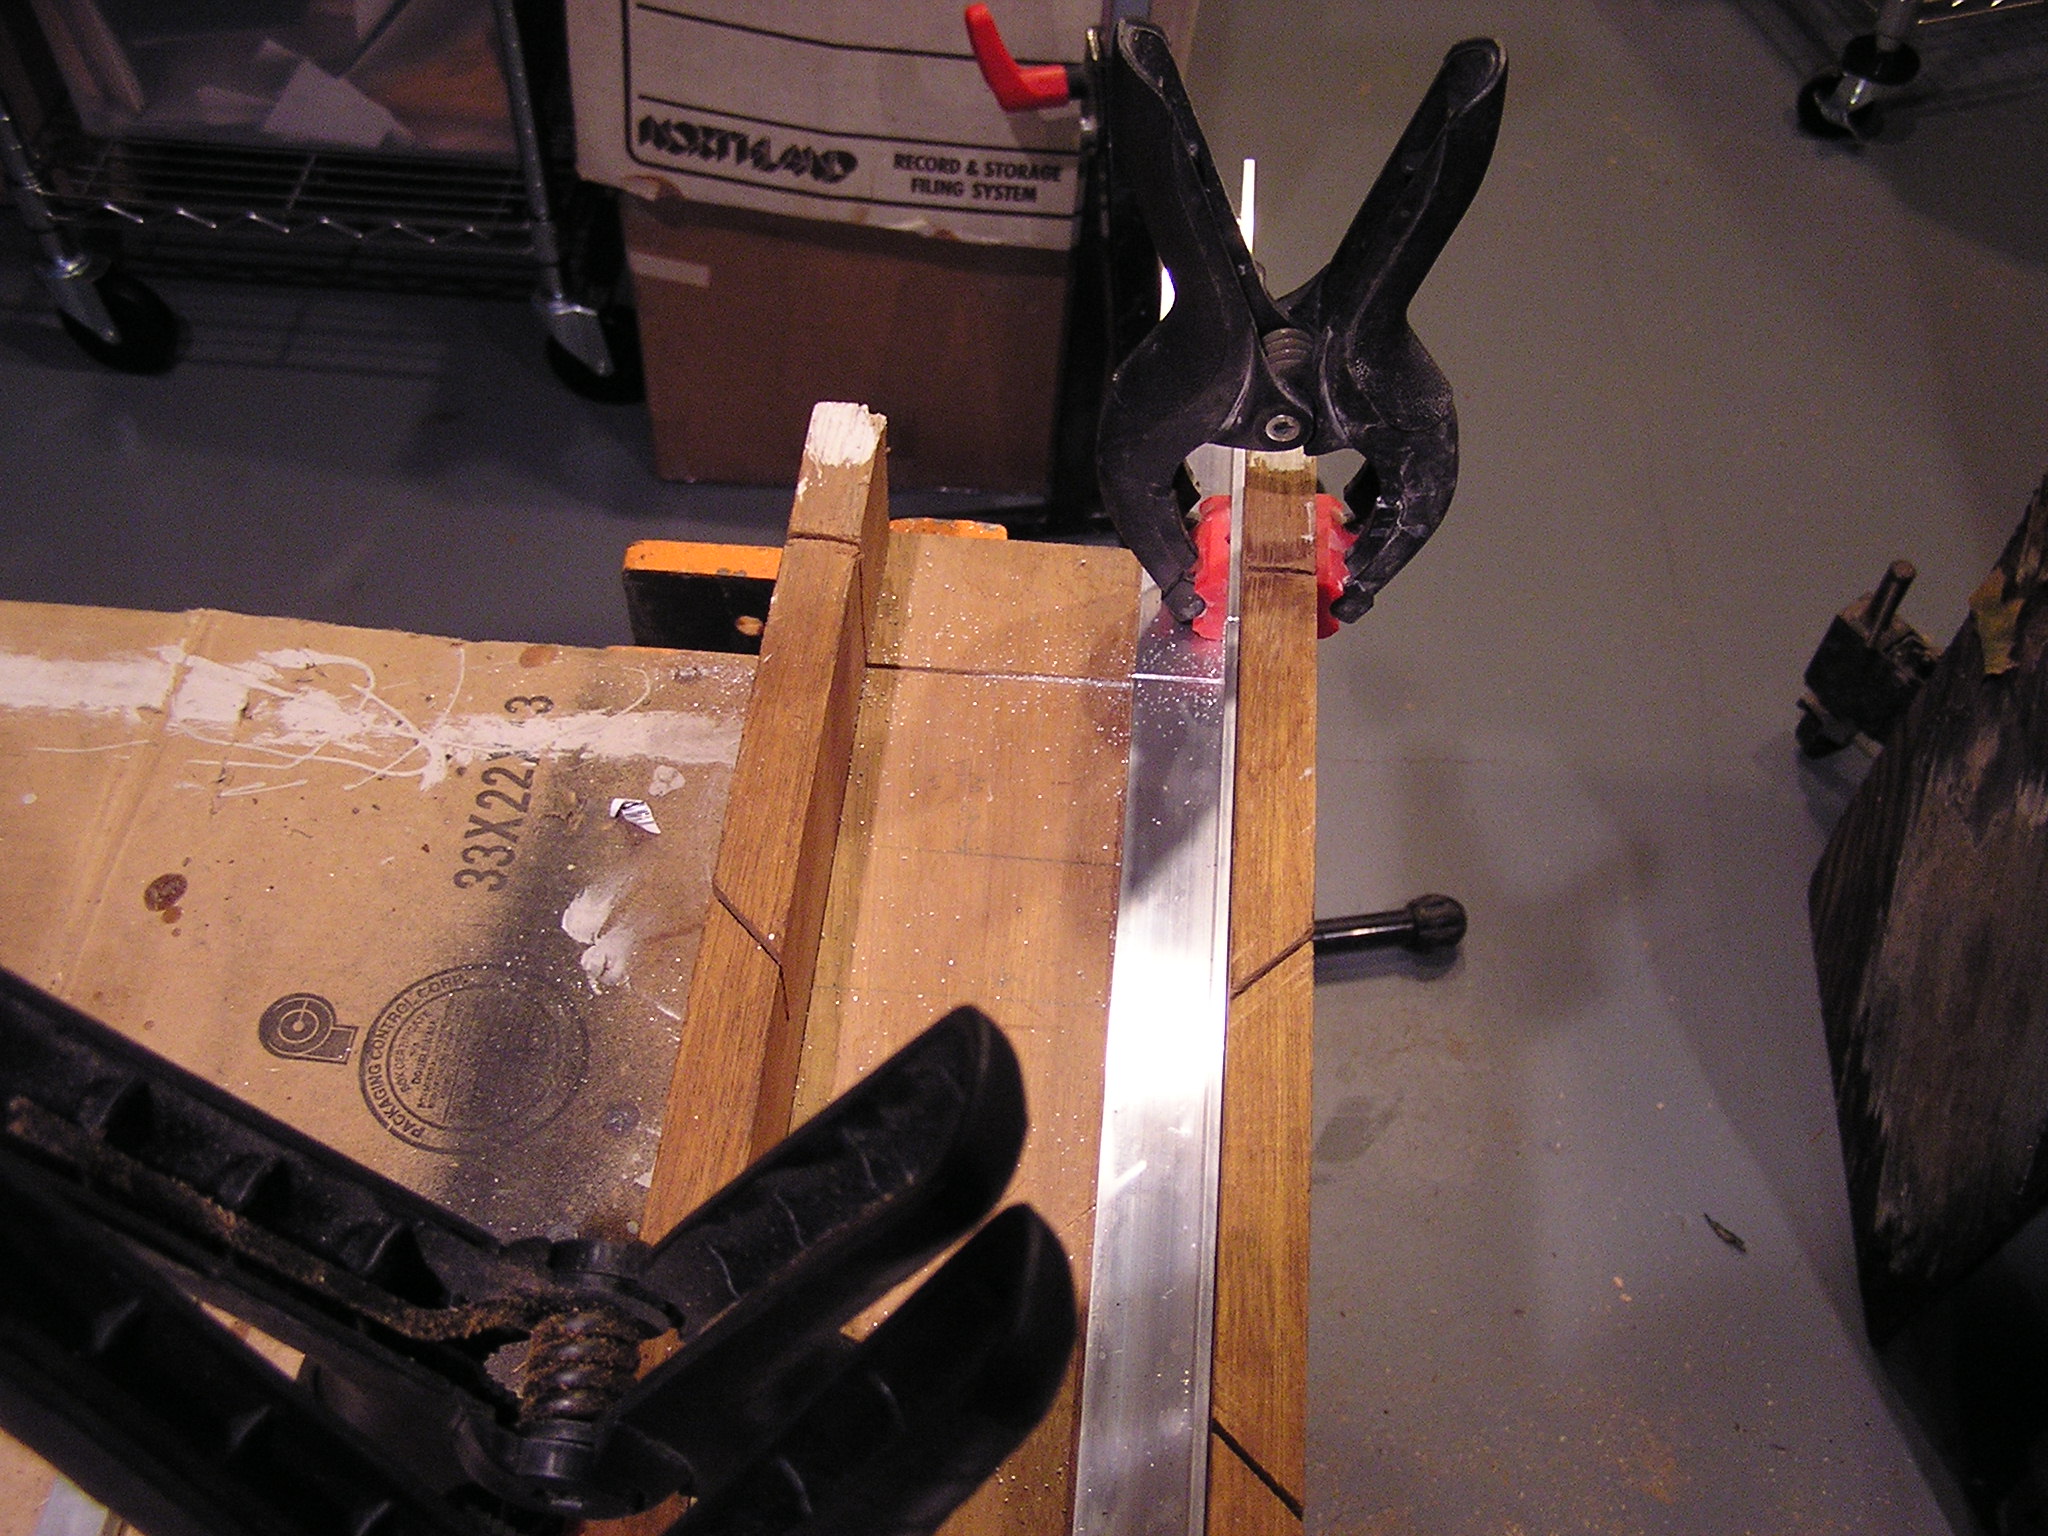
| 04:51, 15 December 2006 | Cutting Aluminum.JPG (file) |  |
704 KB | 1 | |
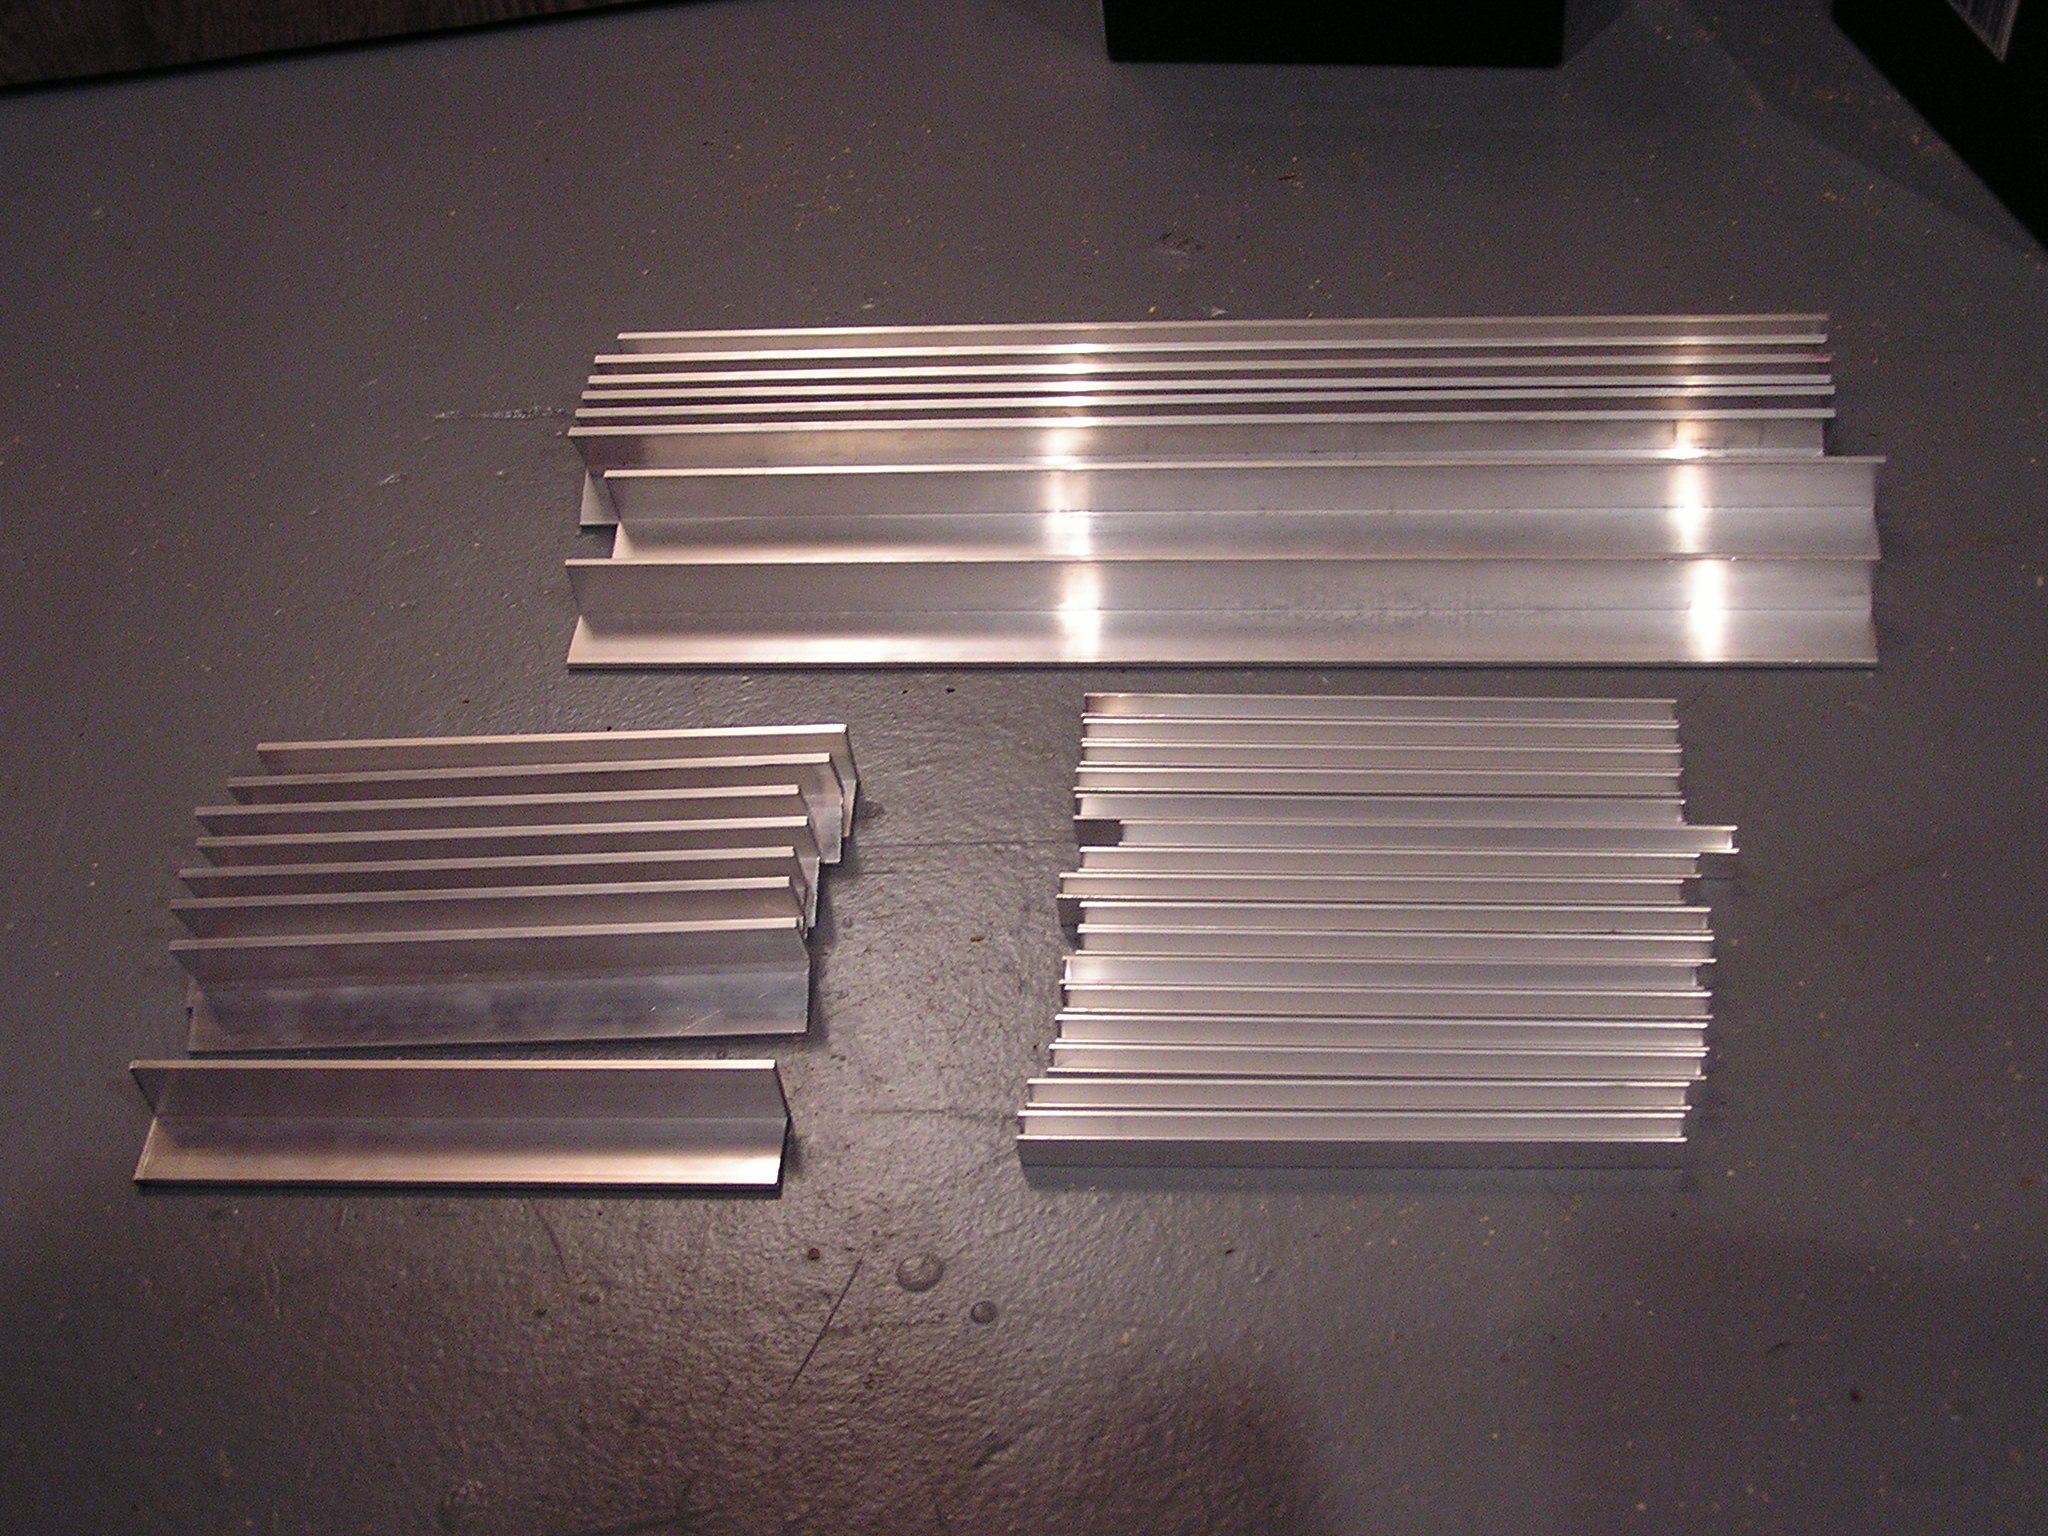
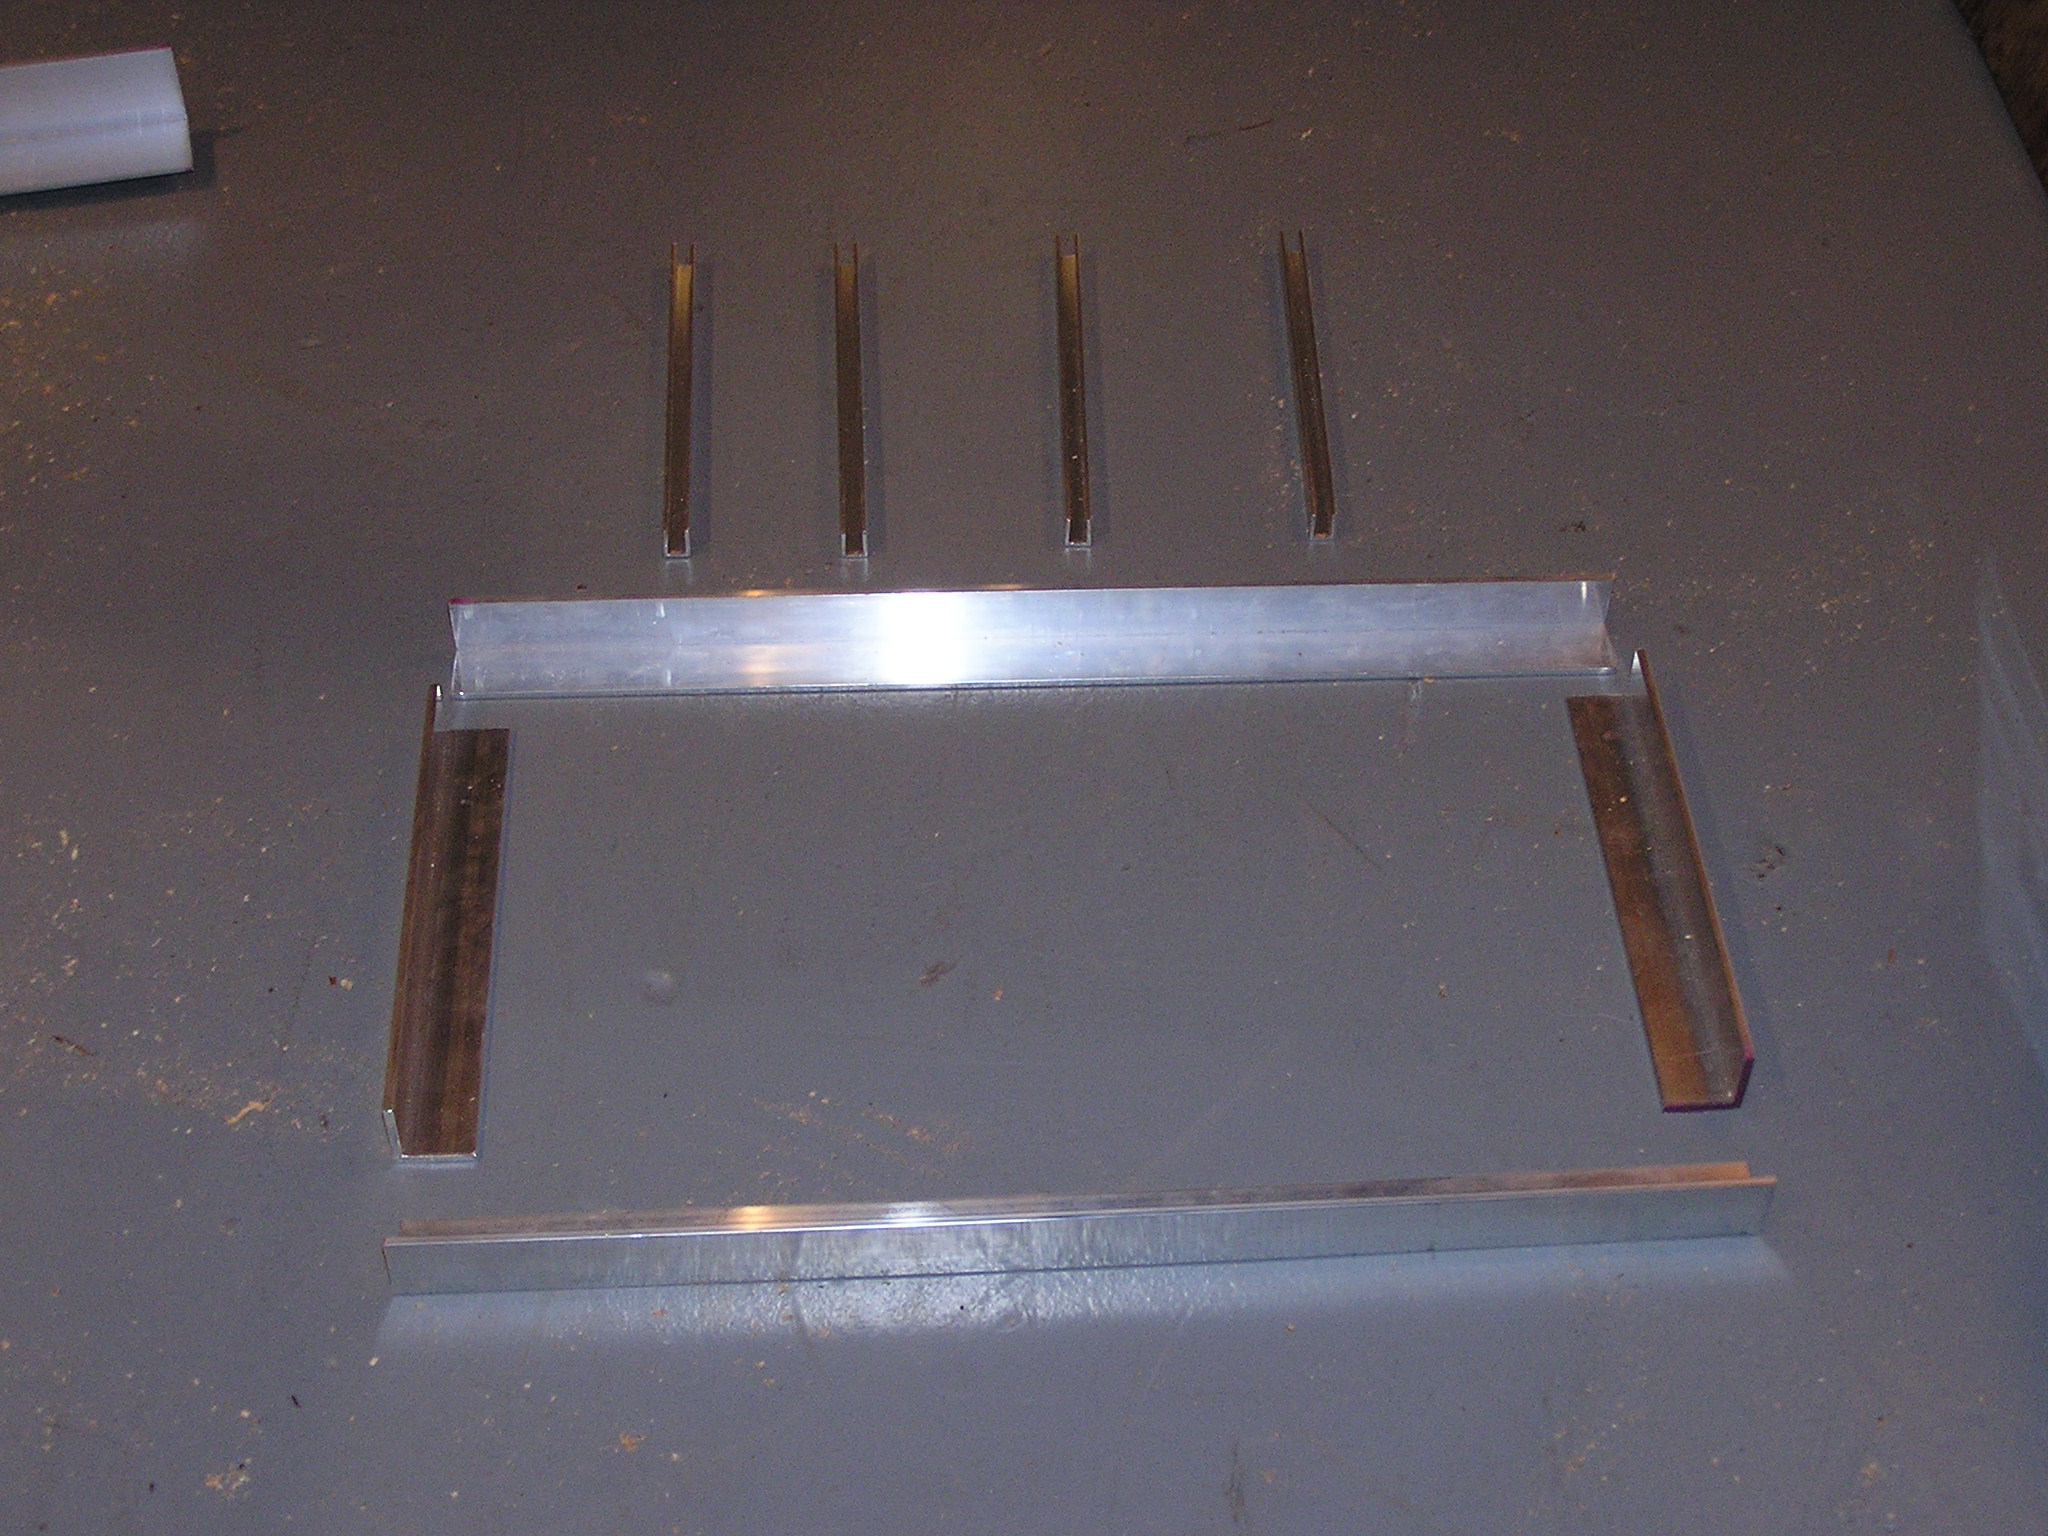
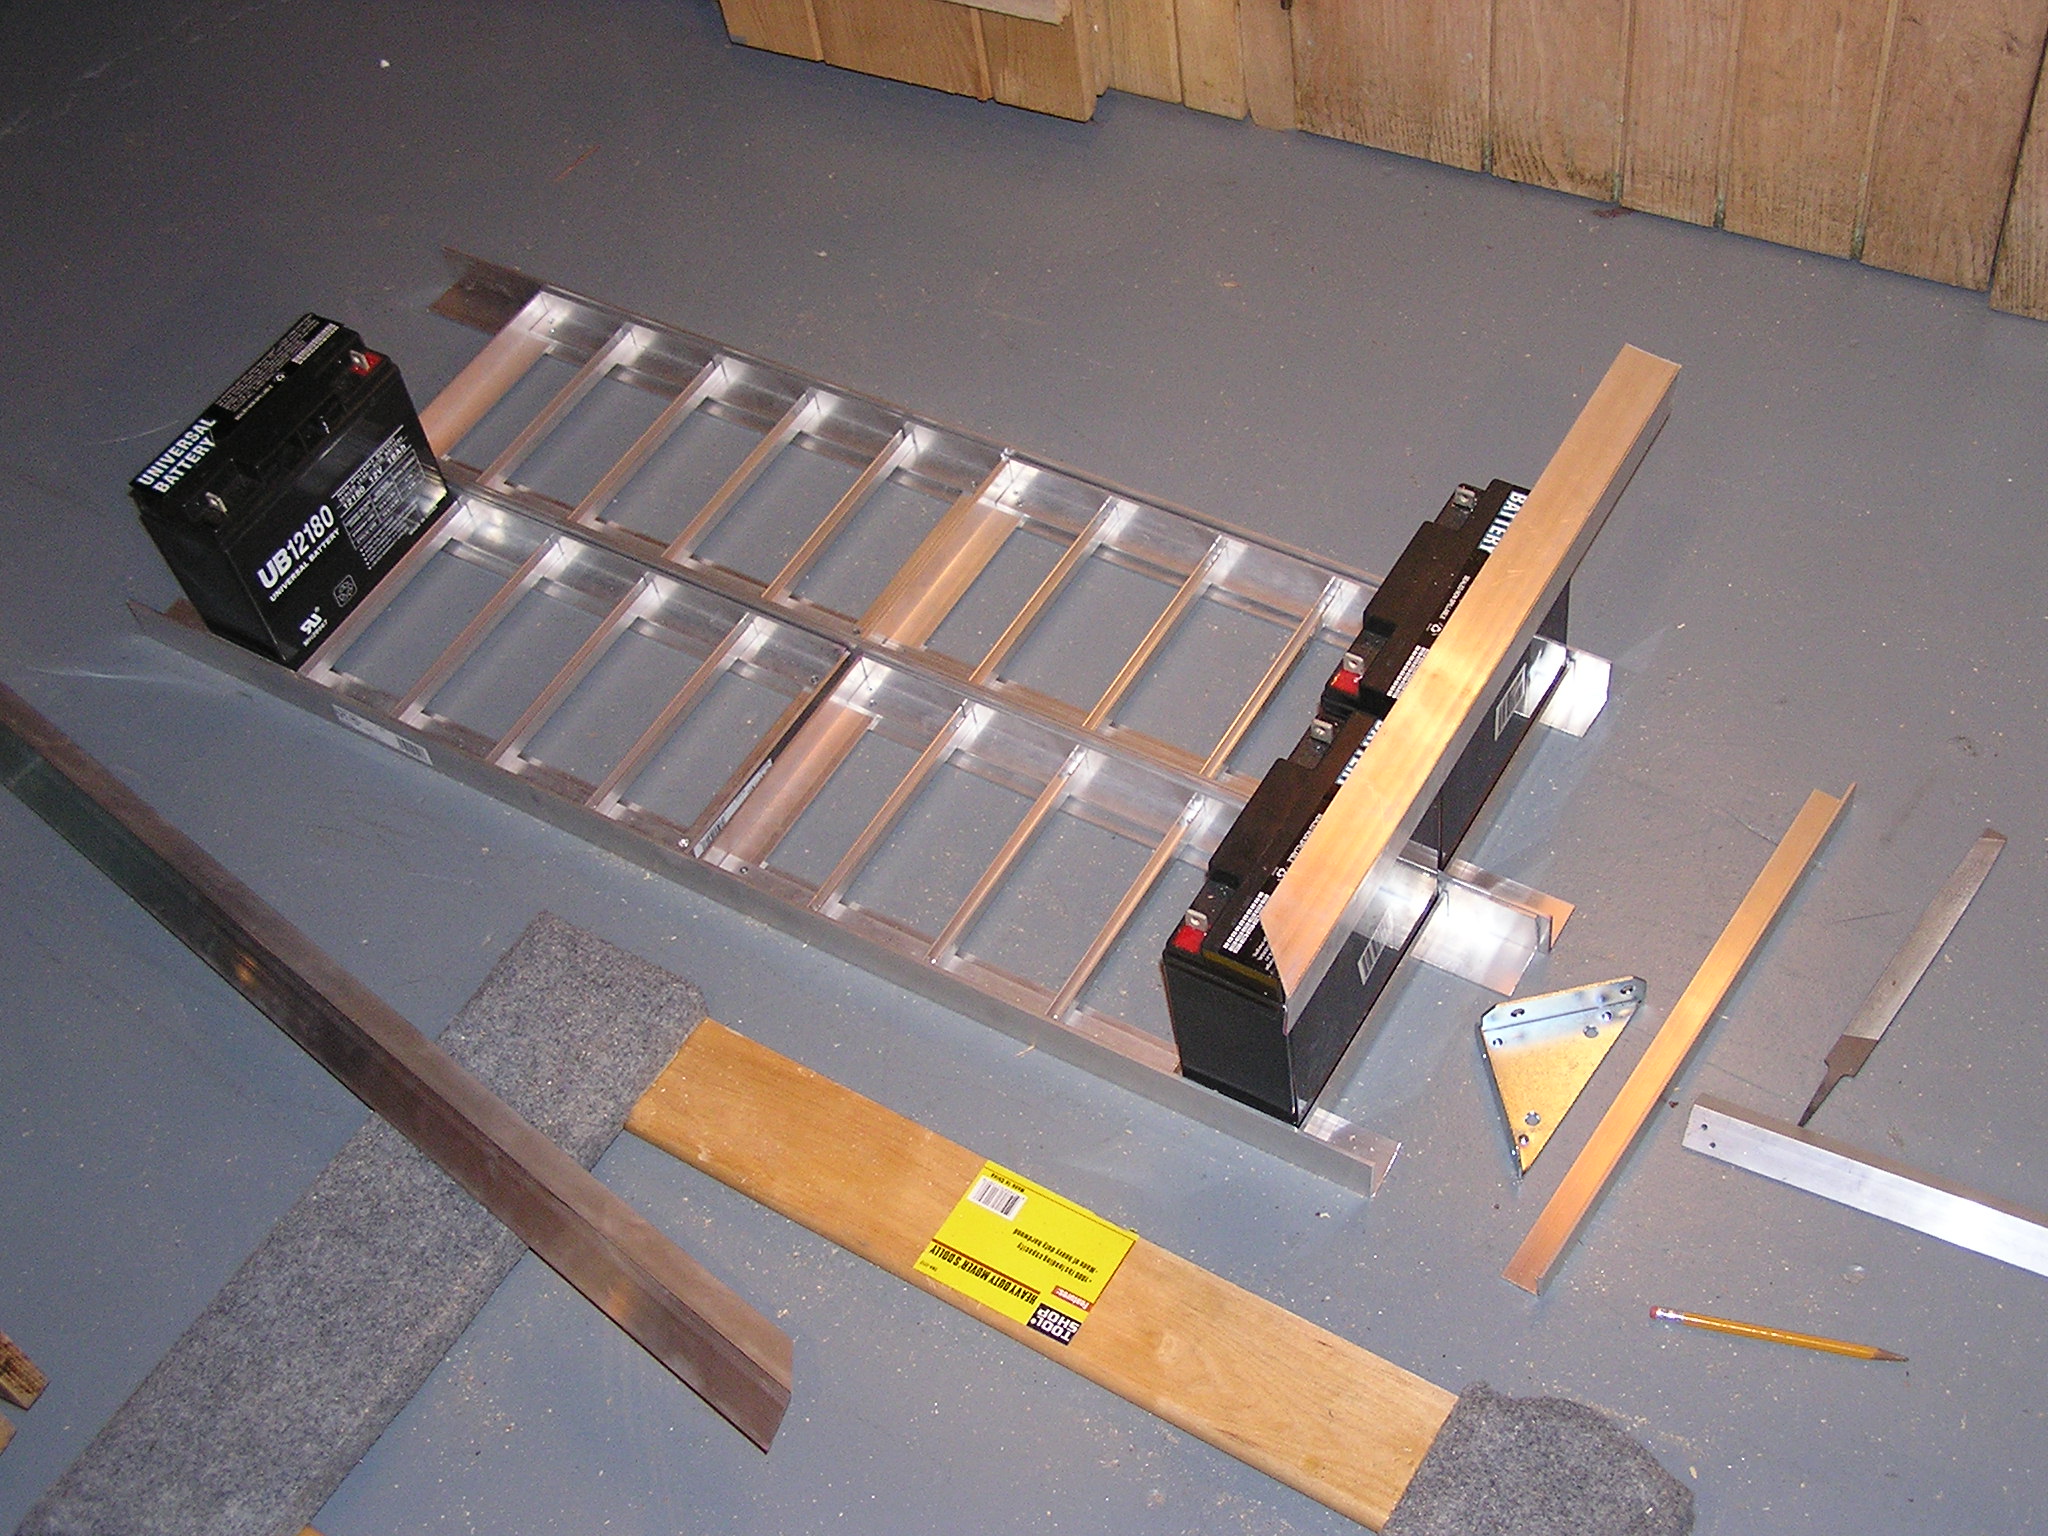
| 04:54, 15 December 2006 | Tray Pieces.JPG (file) |  |
704 KB | These are all the aluminum pieces needed to build the 4 battery trays. | 1 |
| 16:29, 22 May 2007 | Maker Faire 2007 1.jpg (file) |  |
704 KB | From the 2007 Maker Faire | 1 |
| 04:09, 13 February 2007 | Batt Box with screw lift supports.JPG (file) |  |
705 KB | Battery box set together with supports for screw lift idea | 1 |
| 23:43, 26 April 2007 | PriusPlus control board unstuffed back.jpg (file) |  |
705 KB | Back of PriusPlus control board - unstuffed | 1 |
| 05:14, 15 December 2006 | Closeup of Sample Finished Corner.JPG (file) |  |
705 KB | This is just a sample I tried on a scrap pieces before doing the real thing. | 1 |
| 23:45, 26 April 2007 | Batteries being installed 1.jpg (file) |  |
707 KB | Batteries being installed (alt. mounting method in Chris Ewert's car.) | 1 |
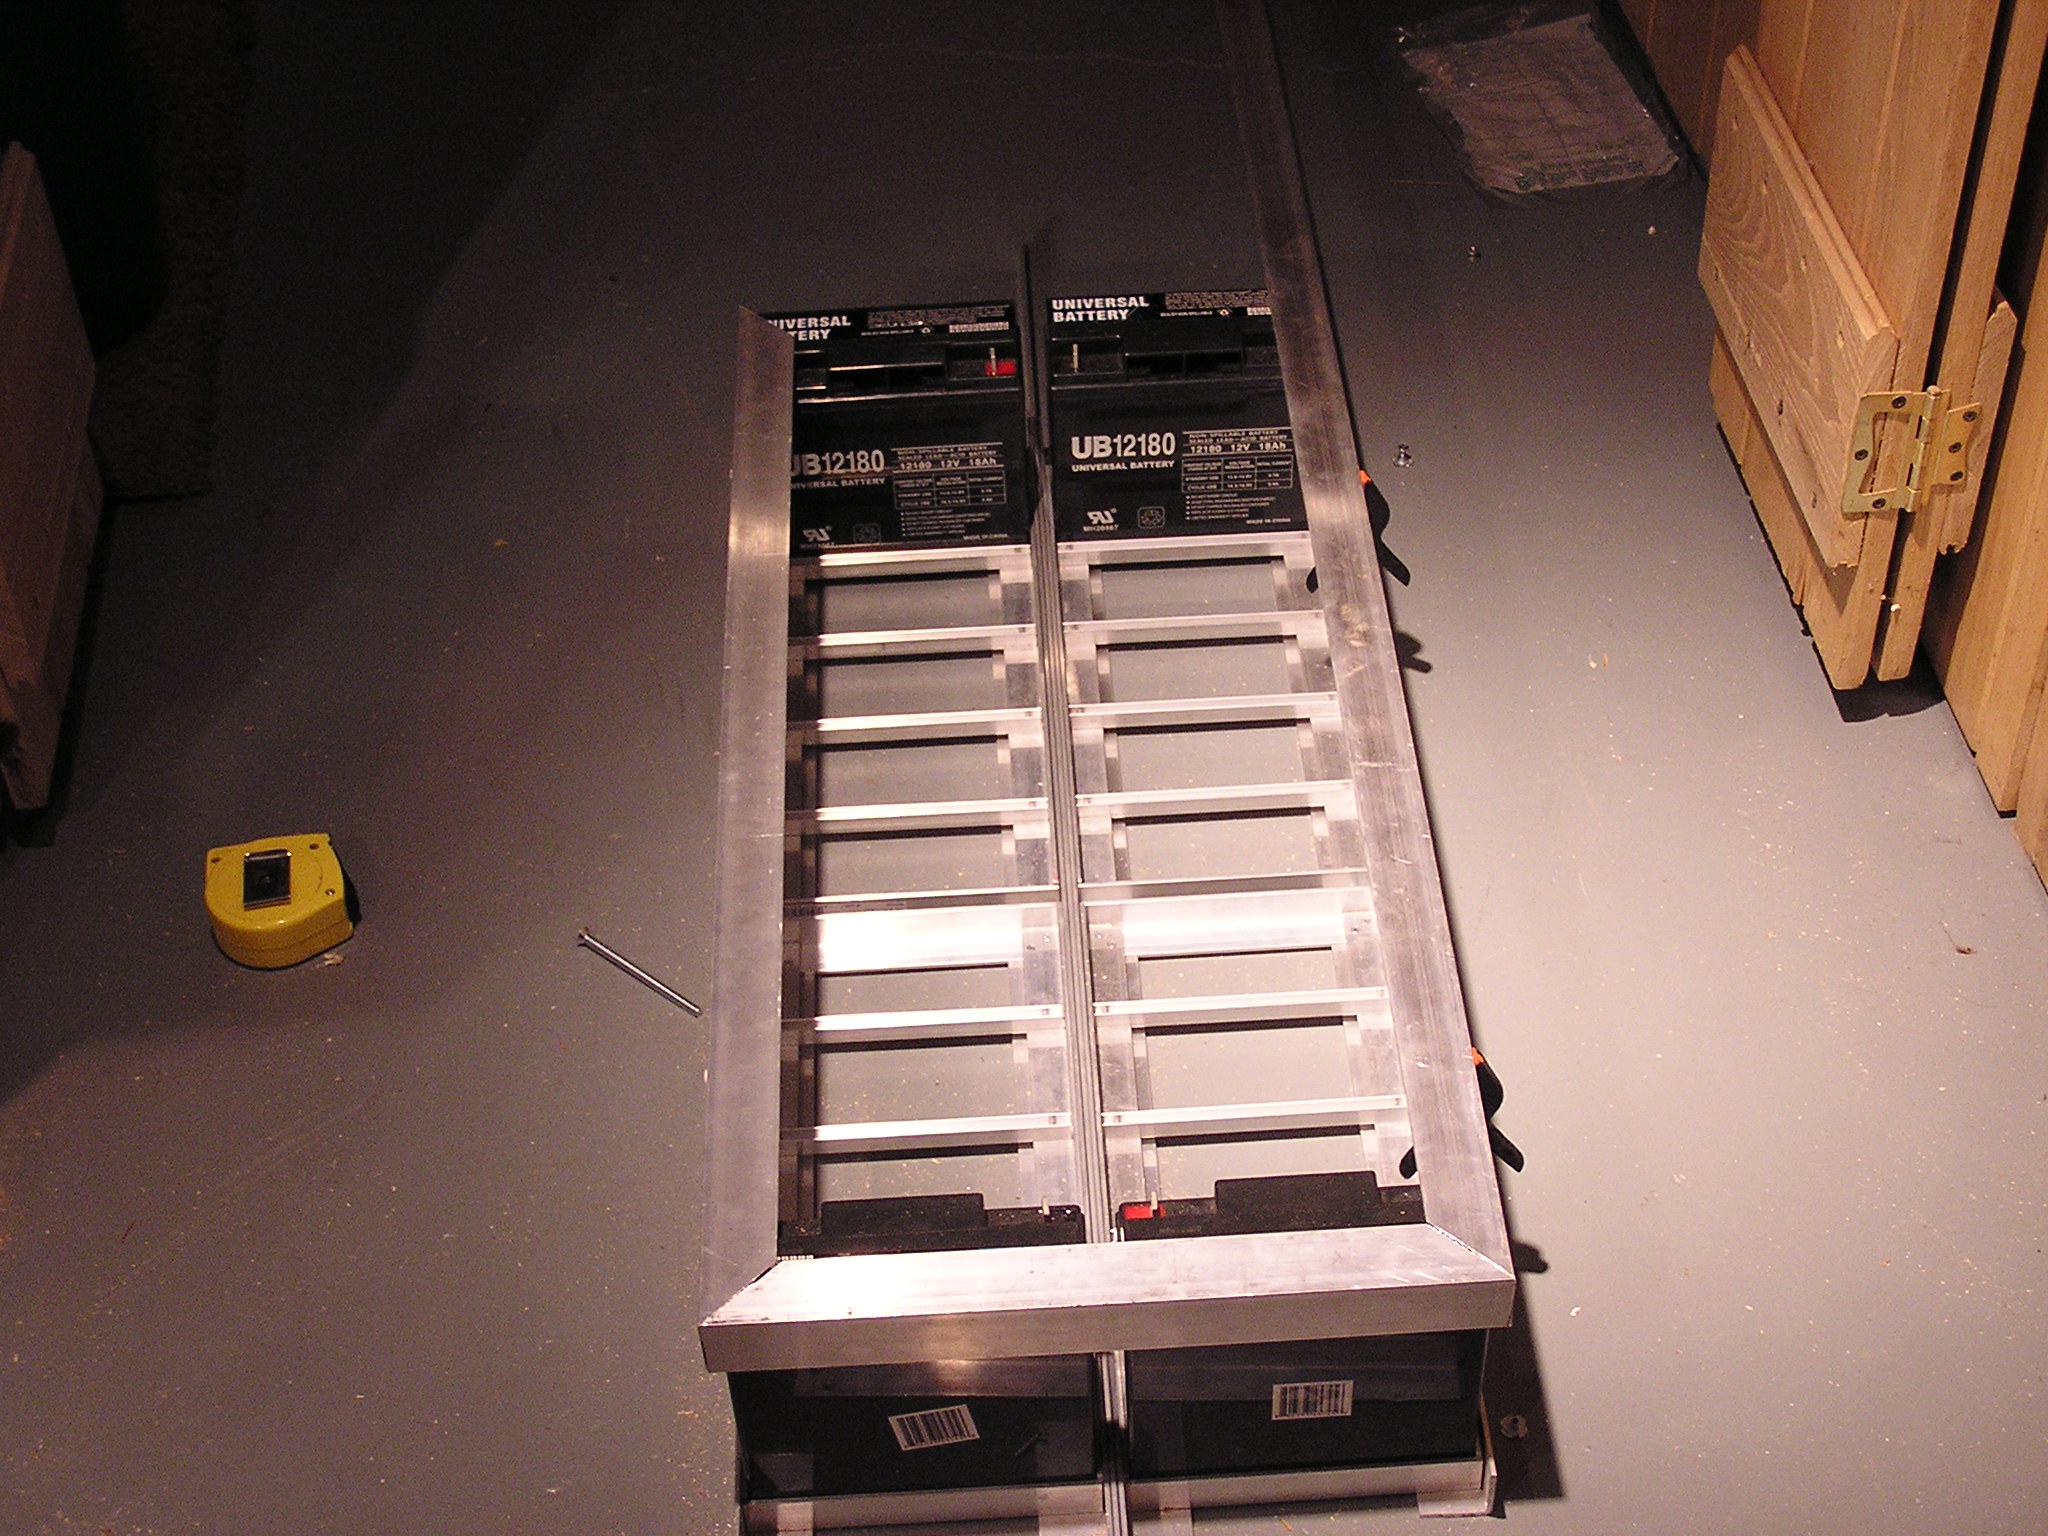
| 05:18, 15 December 2006 | Finished Tray.JPG (file) |  |
712 KB | 1 | |
| 00:01, 27 April 2007 | Removing rear drivers side seat top.jpg (file) |  |
713 KB | Removing the rear drivers side seat to access the OEM battery | 1 |
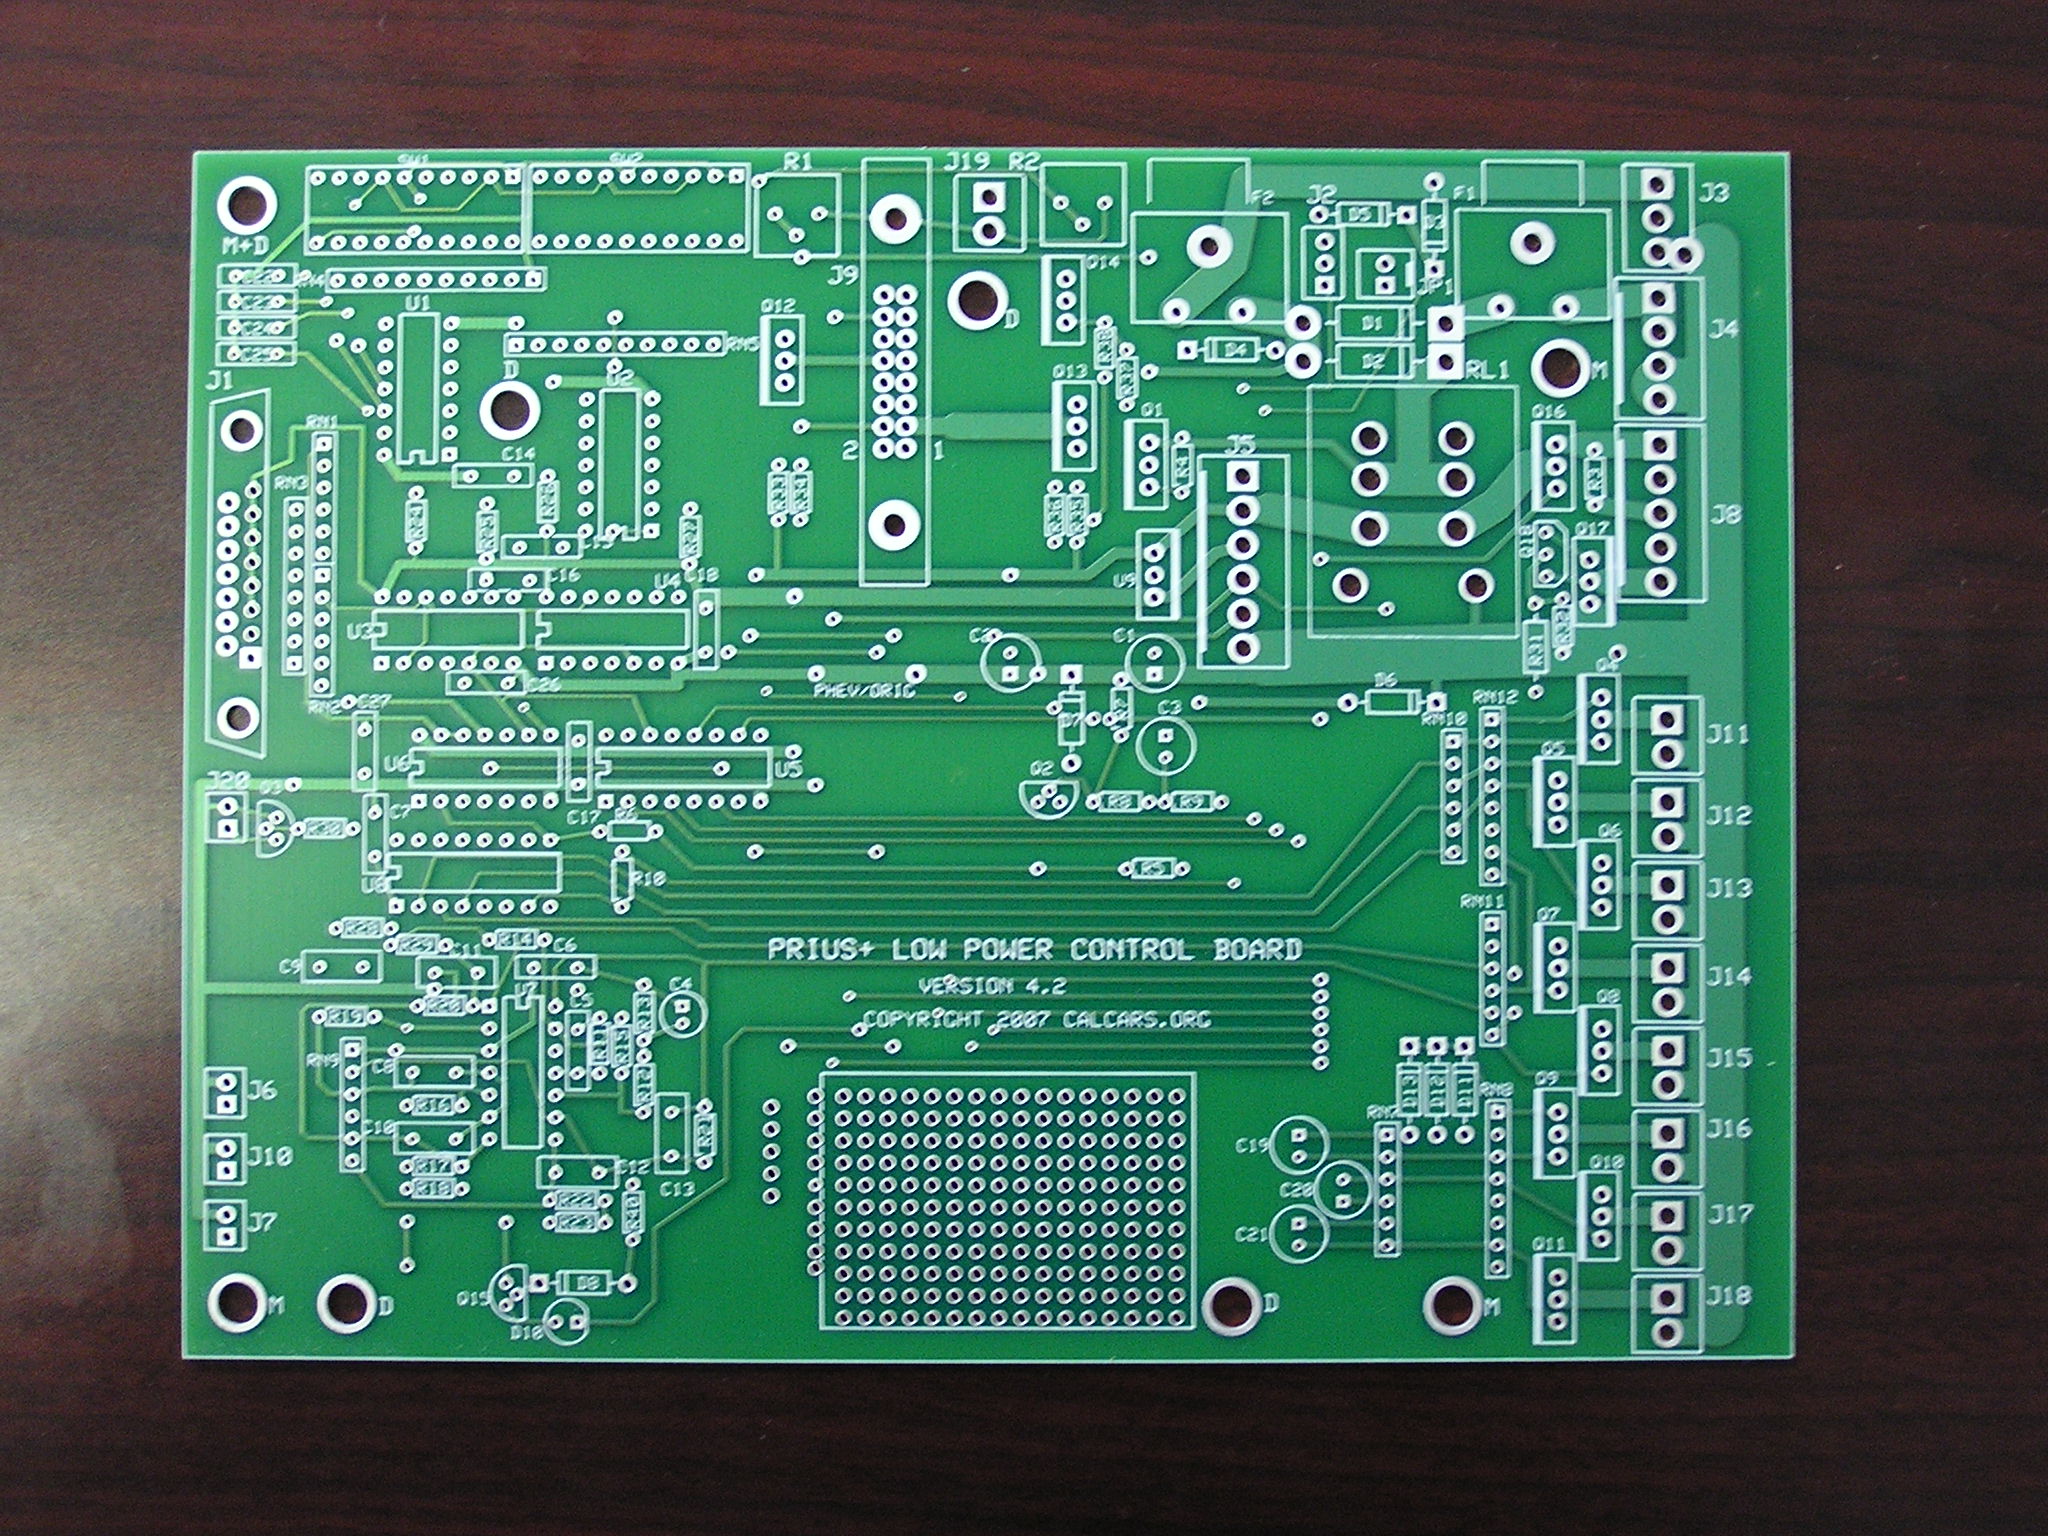
| 23:42, 26 April 2007 | PriusPlus control board unstuffed front.jpg (file) |  |
714 KB | Front of PriusPlus control board - unstuffed | 1 |
| 22:56, 17 December 2006 | Binding Posts Ground Down.JPG (file) |  |
716 KB | These are the binding posts I choose to use. The one on the left is ground down to fit and the burs are also ground off. I'm sure there is a better way to do this, but it worked. | 1 |
| 15:25, 21 March 2007 | Electronics Box Partial 2.jpg (file) |  |
717 KB | Partially completed electronics box for alt. mounting method. | 1 |
| 22:51, 17 December 2006 | Plexiglass Shield.JPG (file) |  |
717 KB | I choose to install a plexiglass 'shield' on the side of the aluminum angle iron to reduce the risk of a wire / terminal hitting the aluminum and arcing. I am not sure if that is in the official CalCars plans or not. It is held in by non-conductive nylo | 1 |
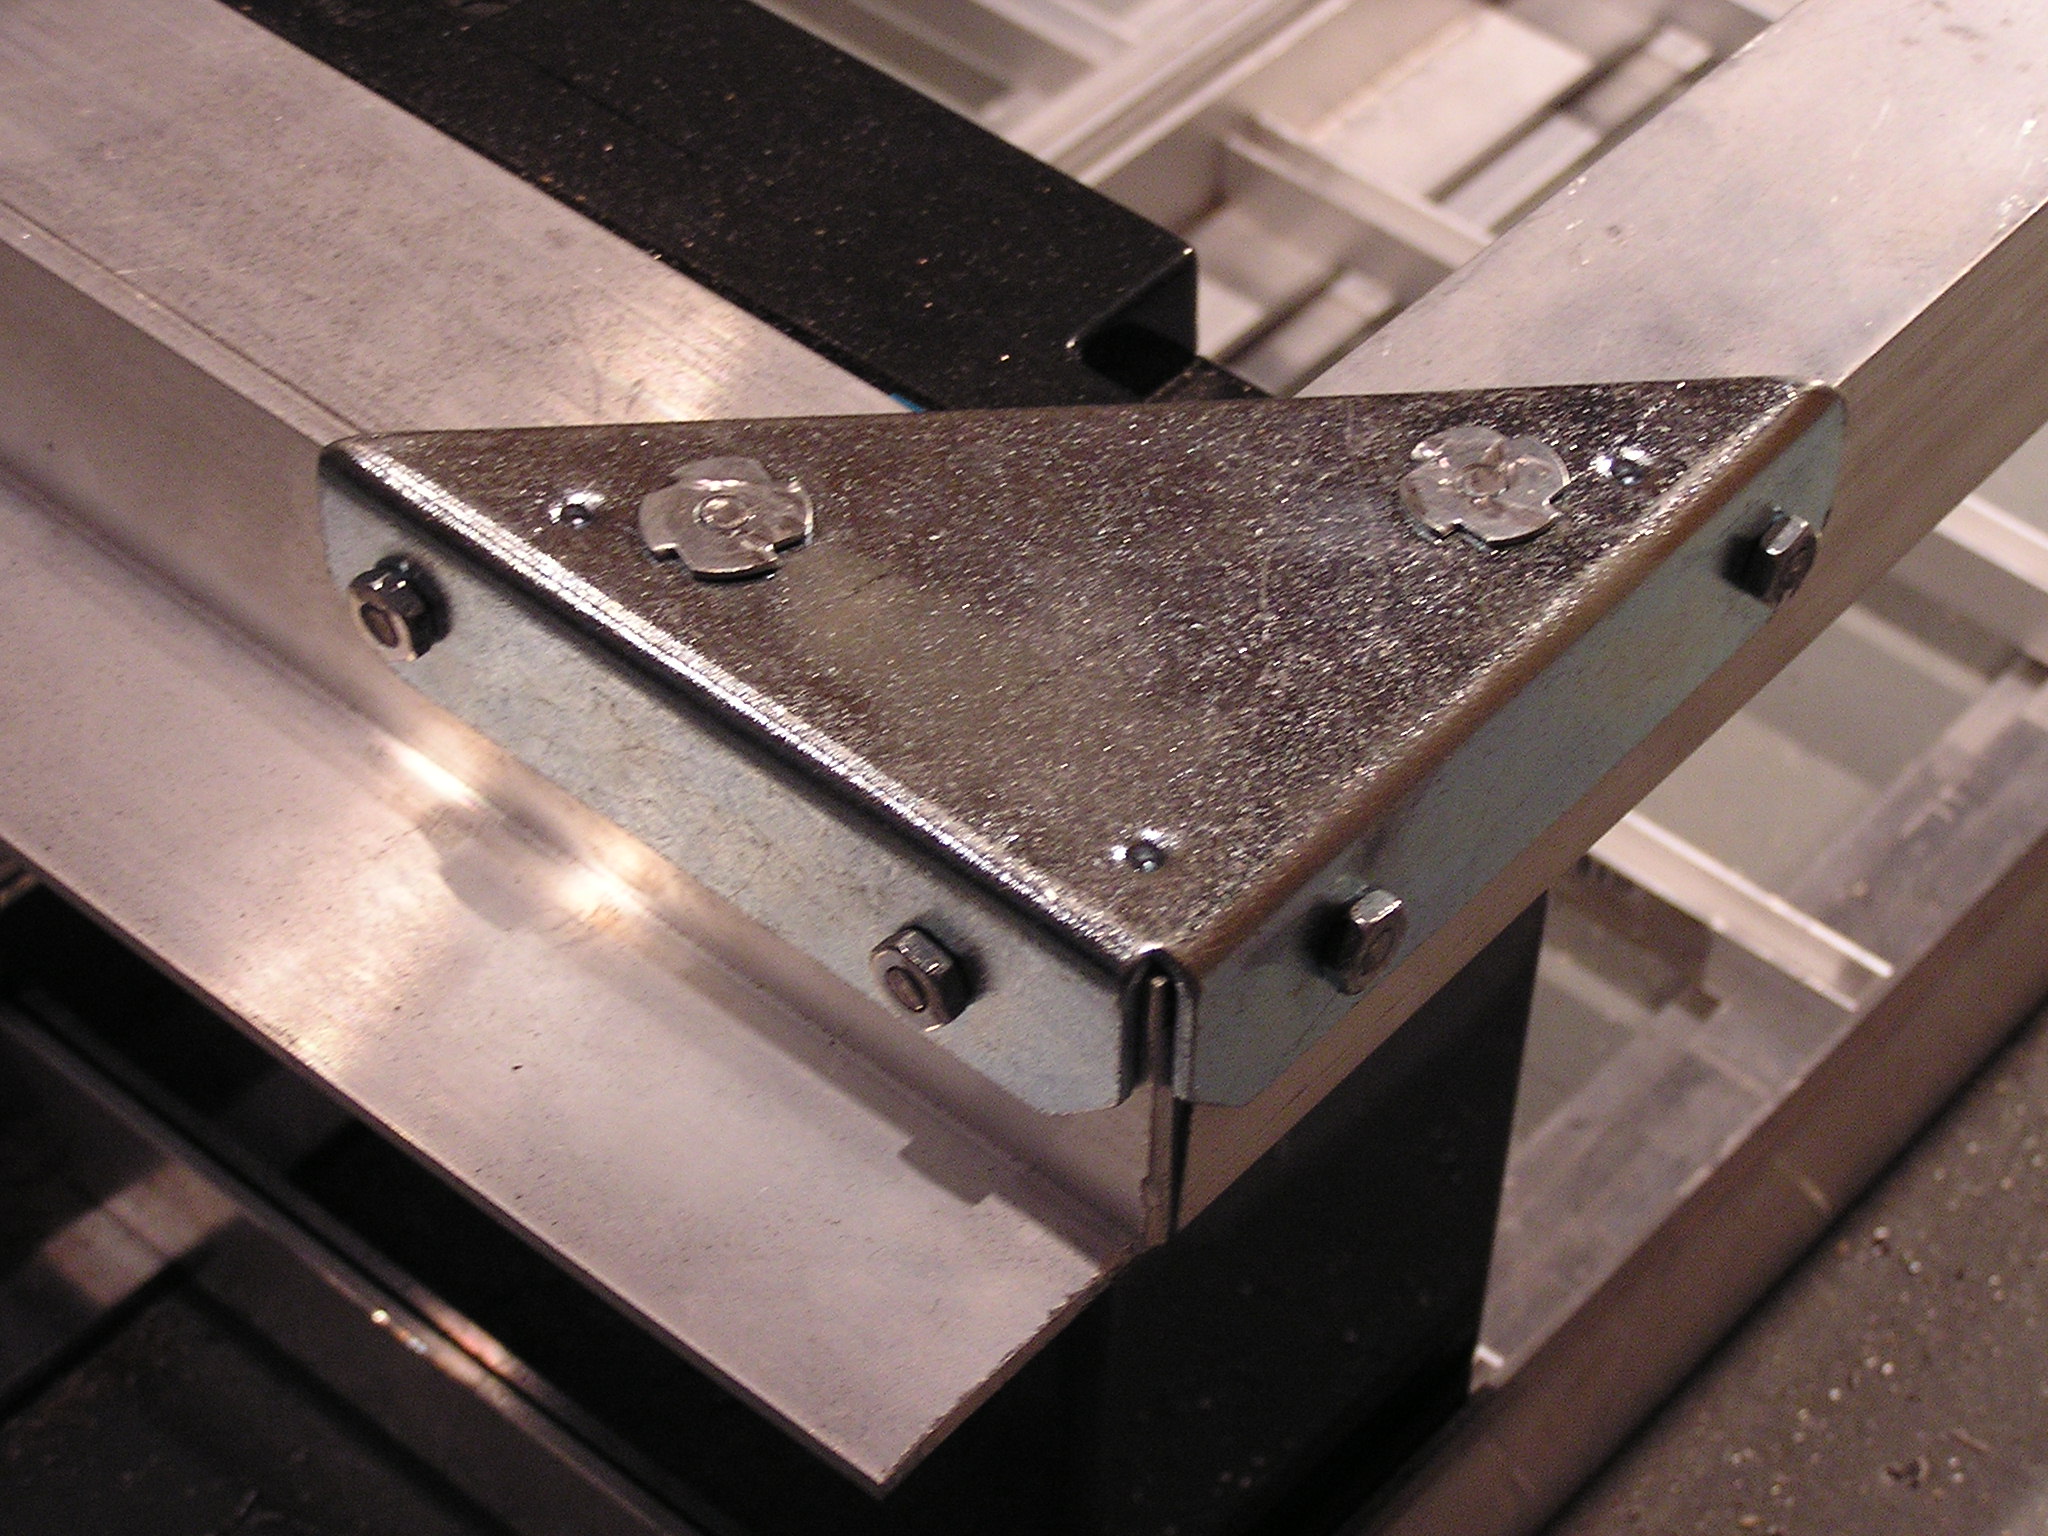
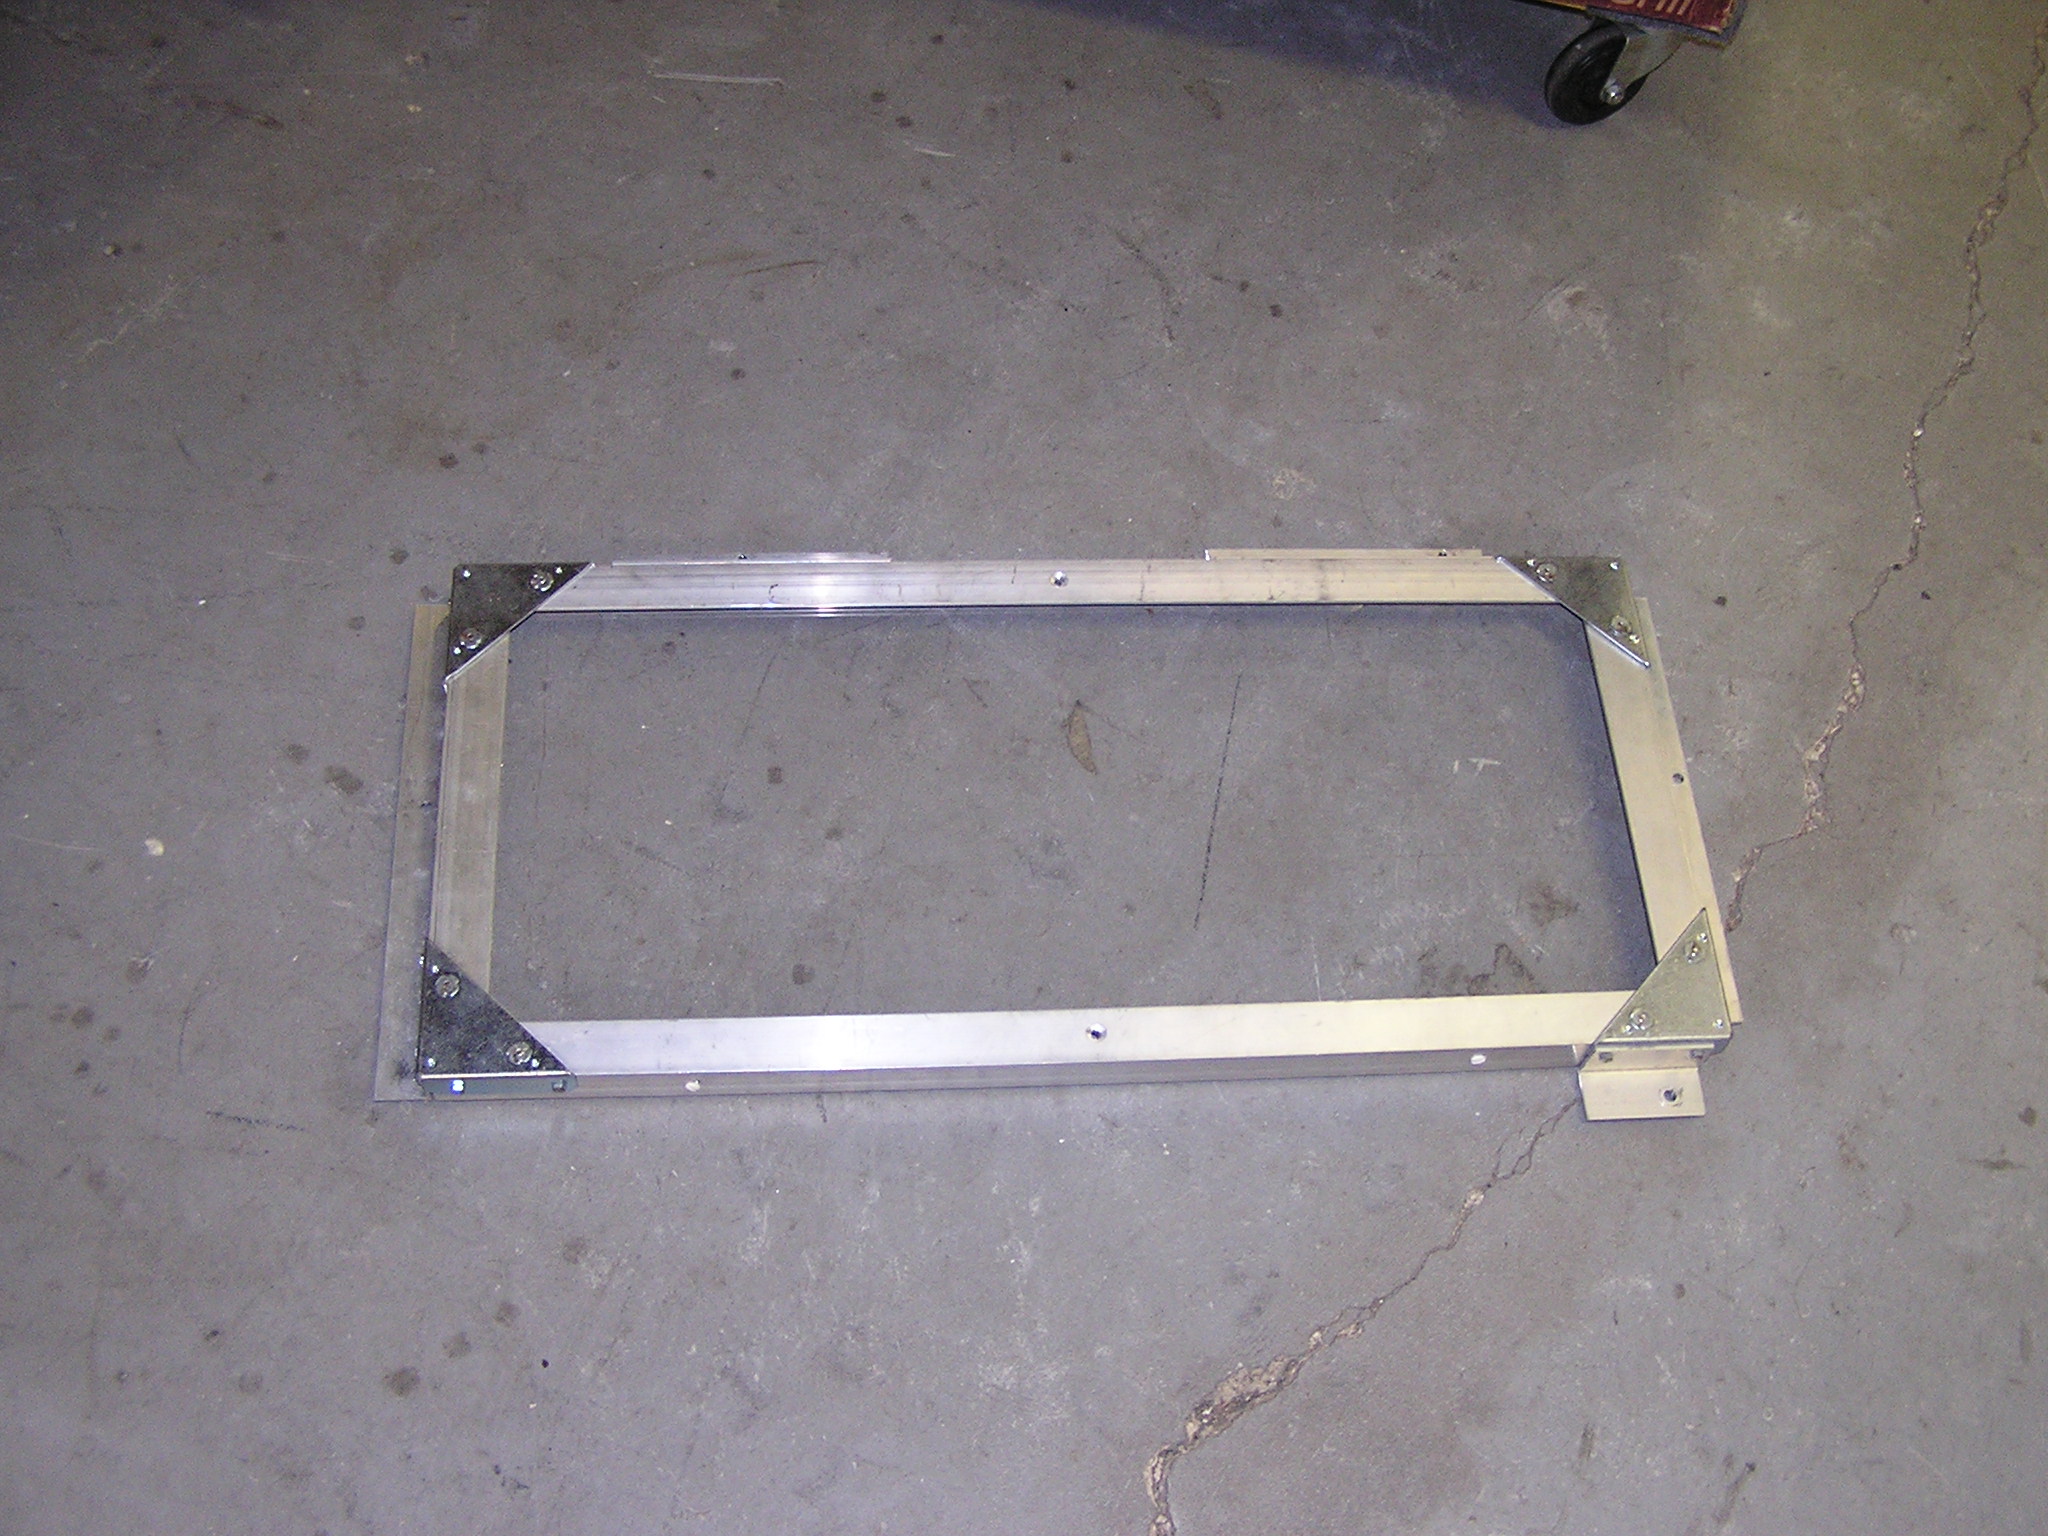
| 05:34, 15 December 2006 | Top Battery Box With Corner Bracket.JPG (file) |  |
718 KB | Corner bracket is just sitting on the top of the battery box waiting to be screwed down. | 1 |
| 05:10, 15 December 2006 | Tray Parts Laid Out.JPG (file) |  |
721 KB | All the parts of one tray laid out | 1 |
| 05:31, 15 December 2006 | Starting on the Top of Battery Box.JPG (file) |  |
723 KB | Bottom is mostly assembled, now starting on cutting the angle irons for the top. | 1 |
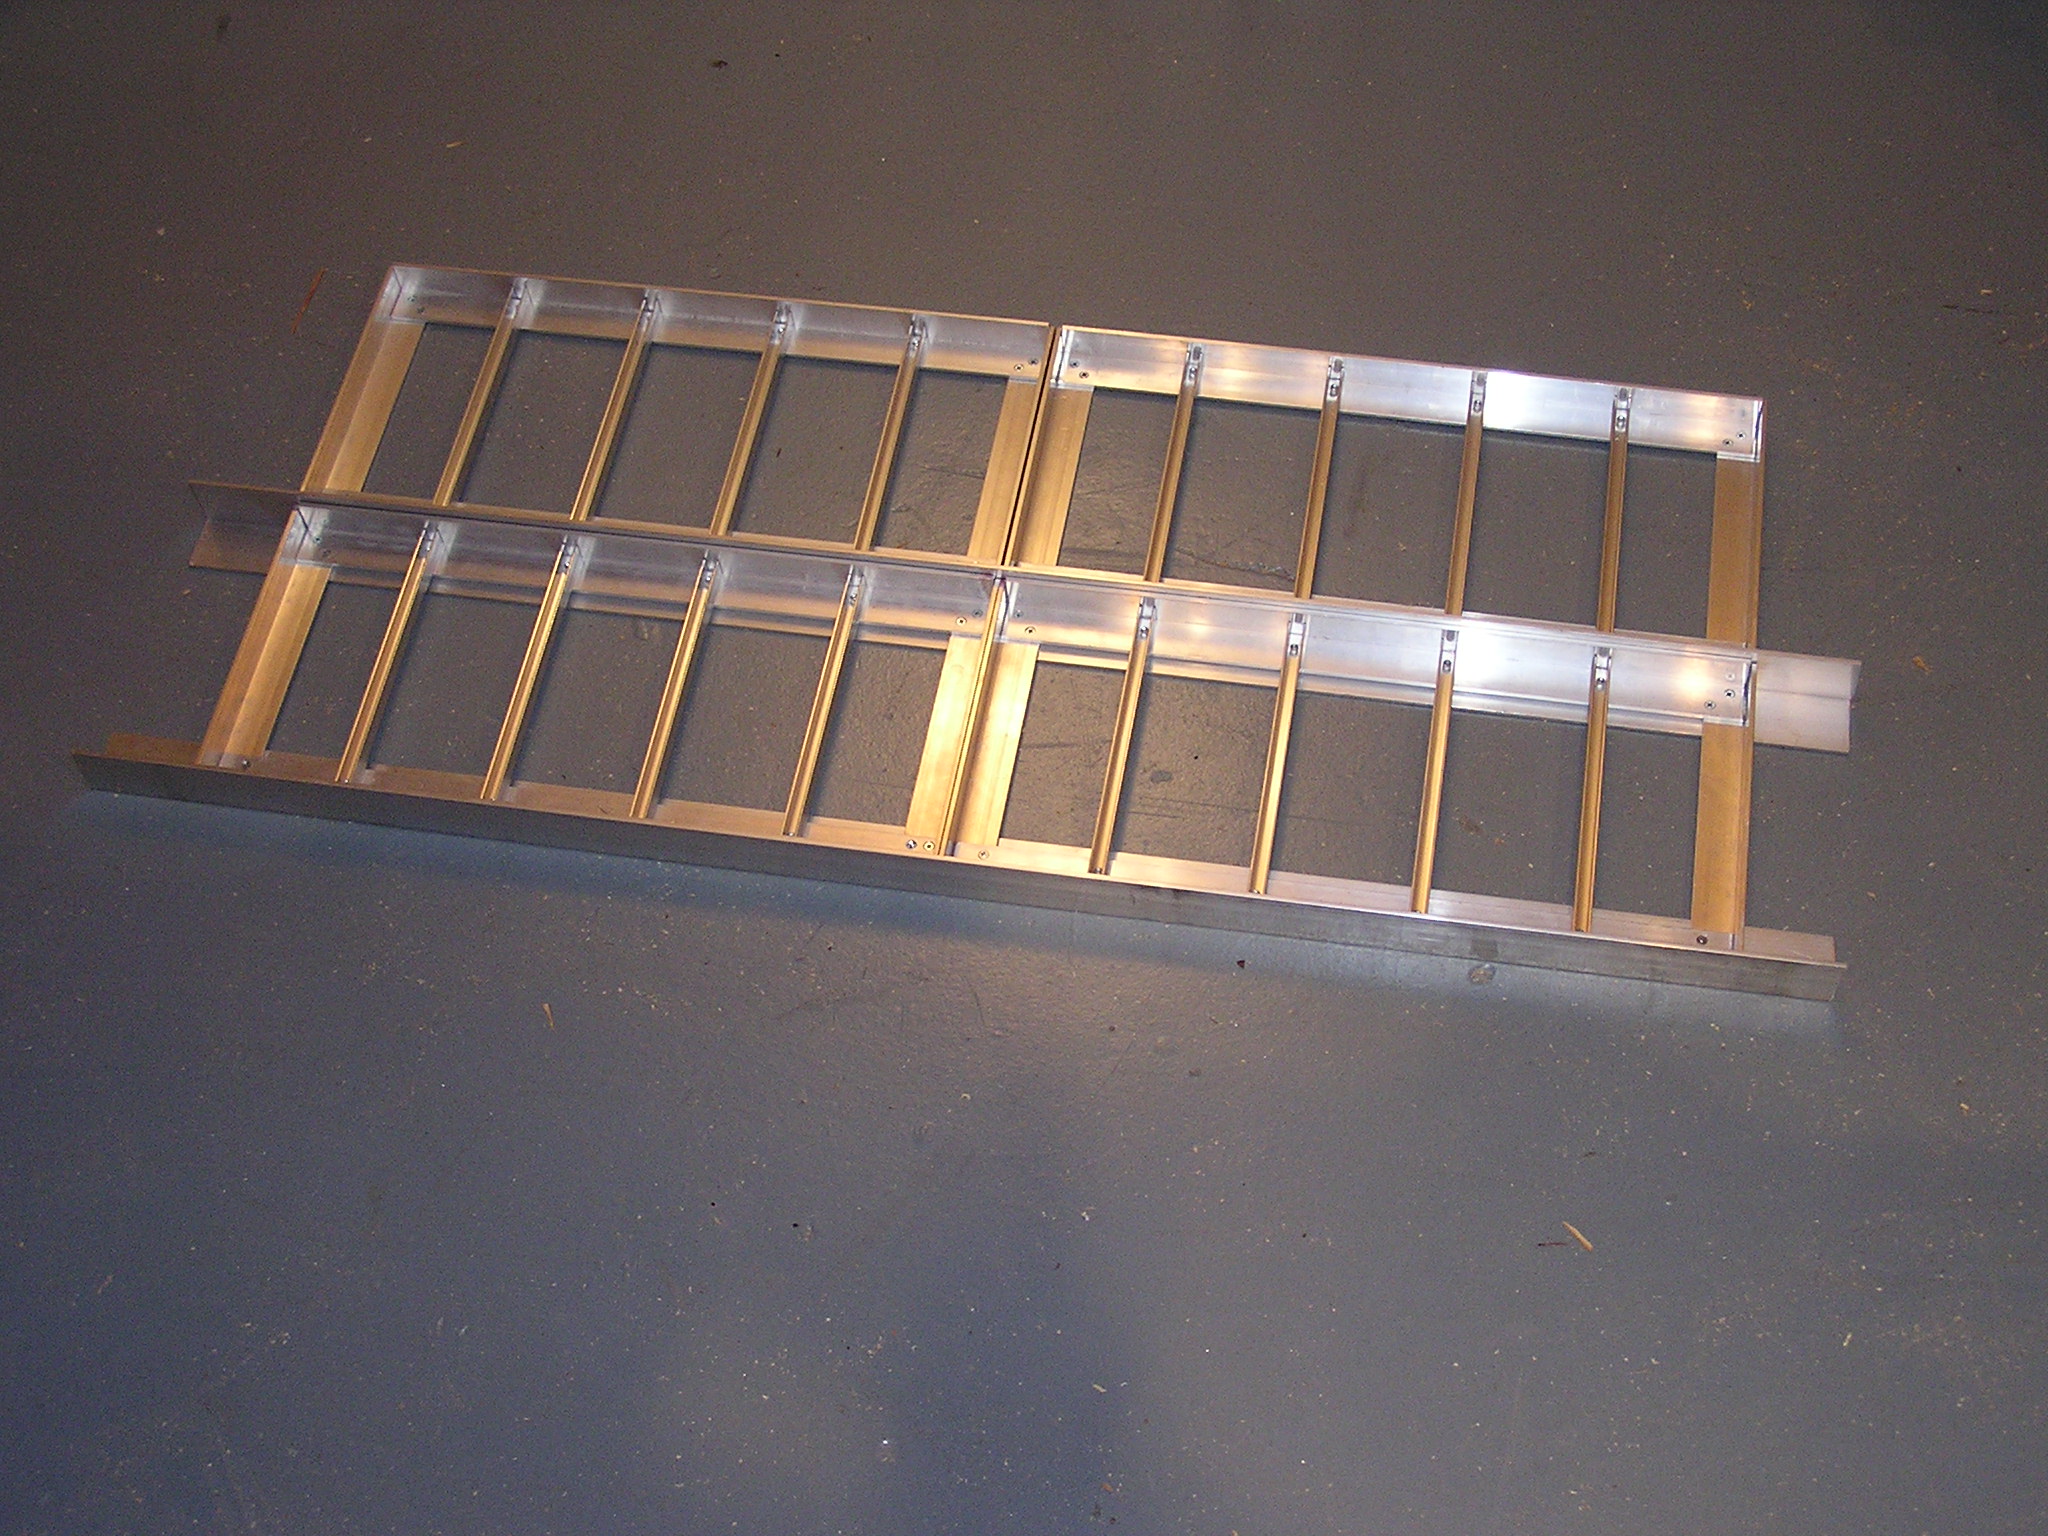
| 04:55, 15 December 2006 | Tray Set Together With Battery.JPG (file) |  |
725 KB | 1 | |
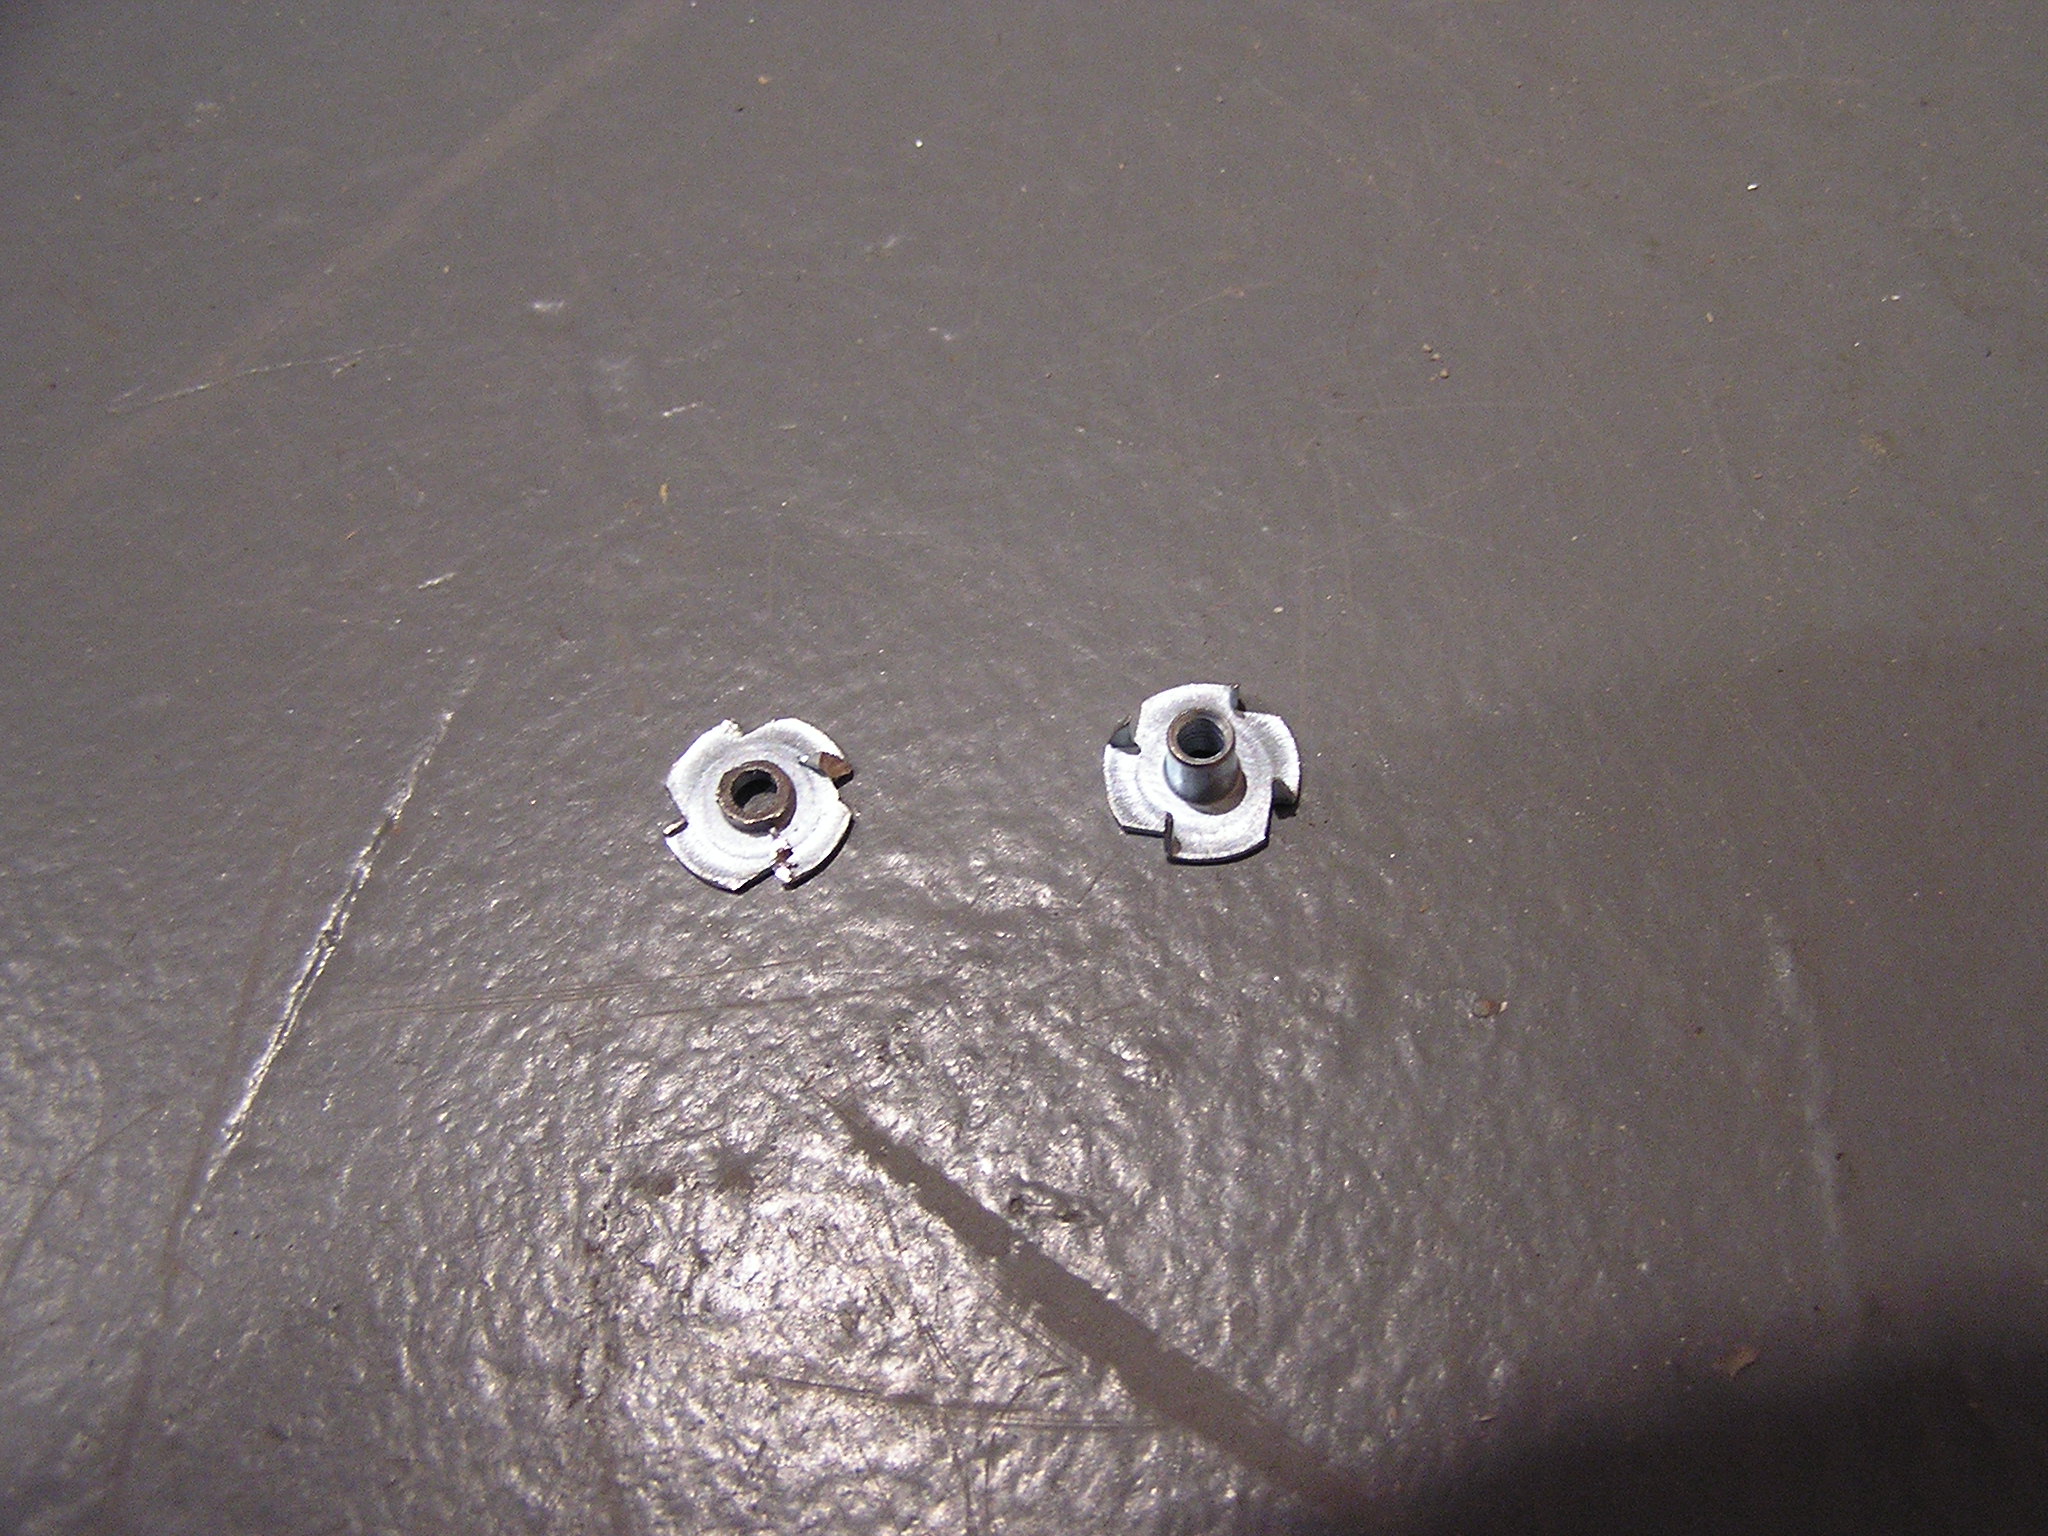
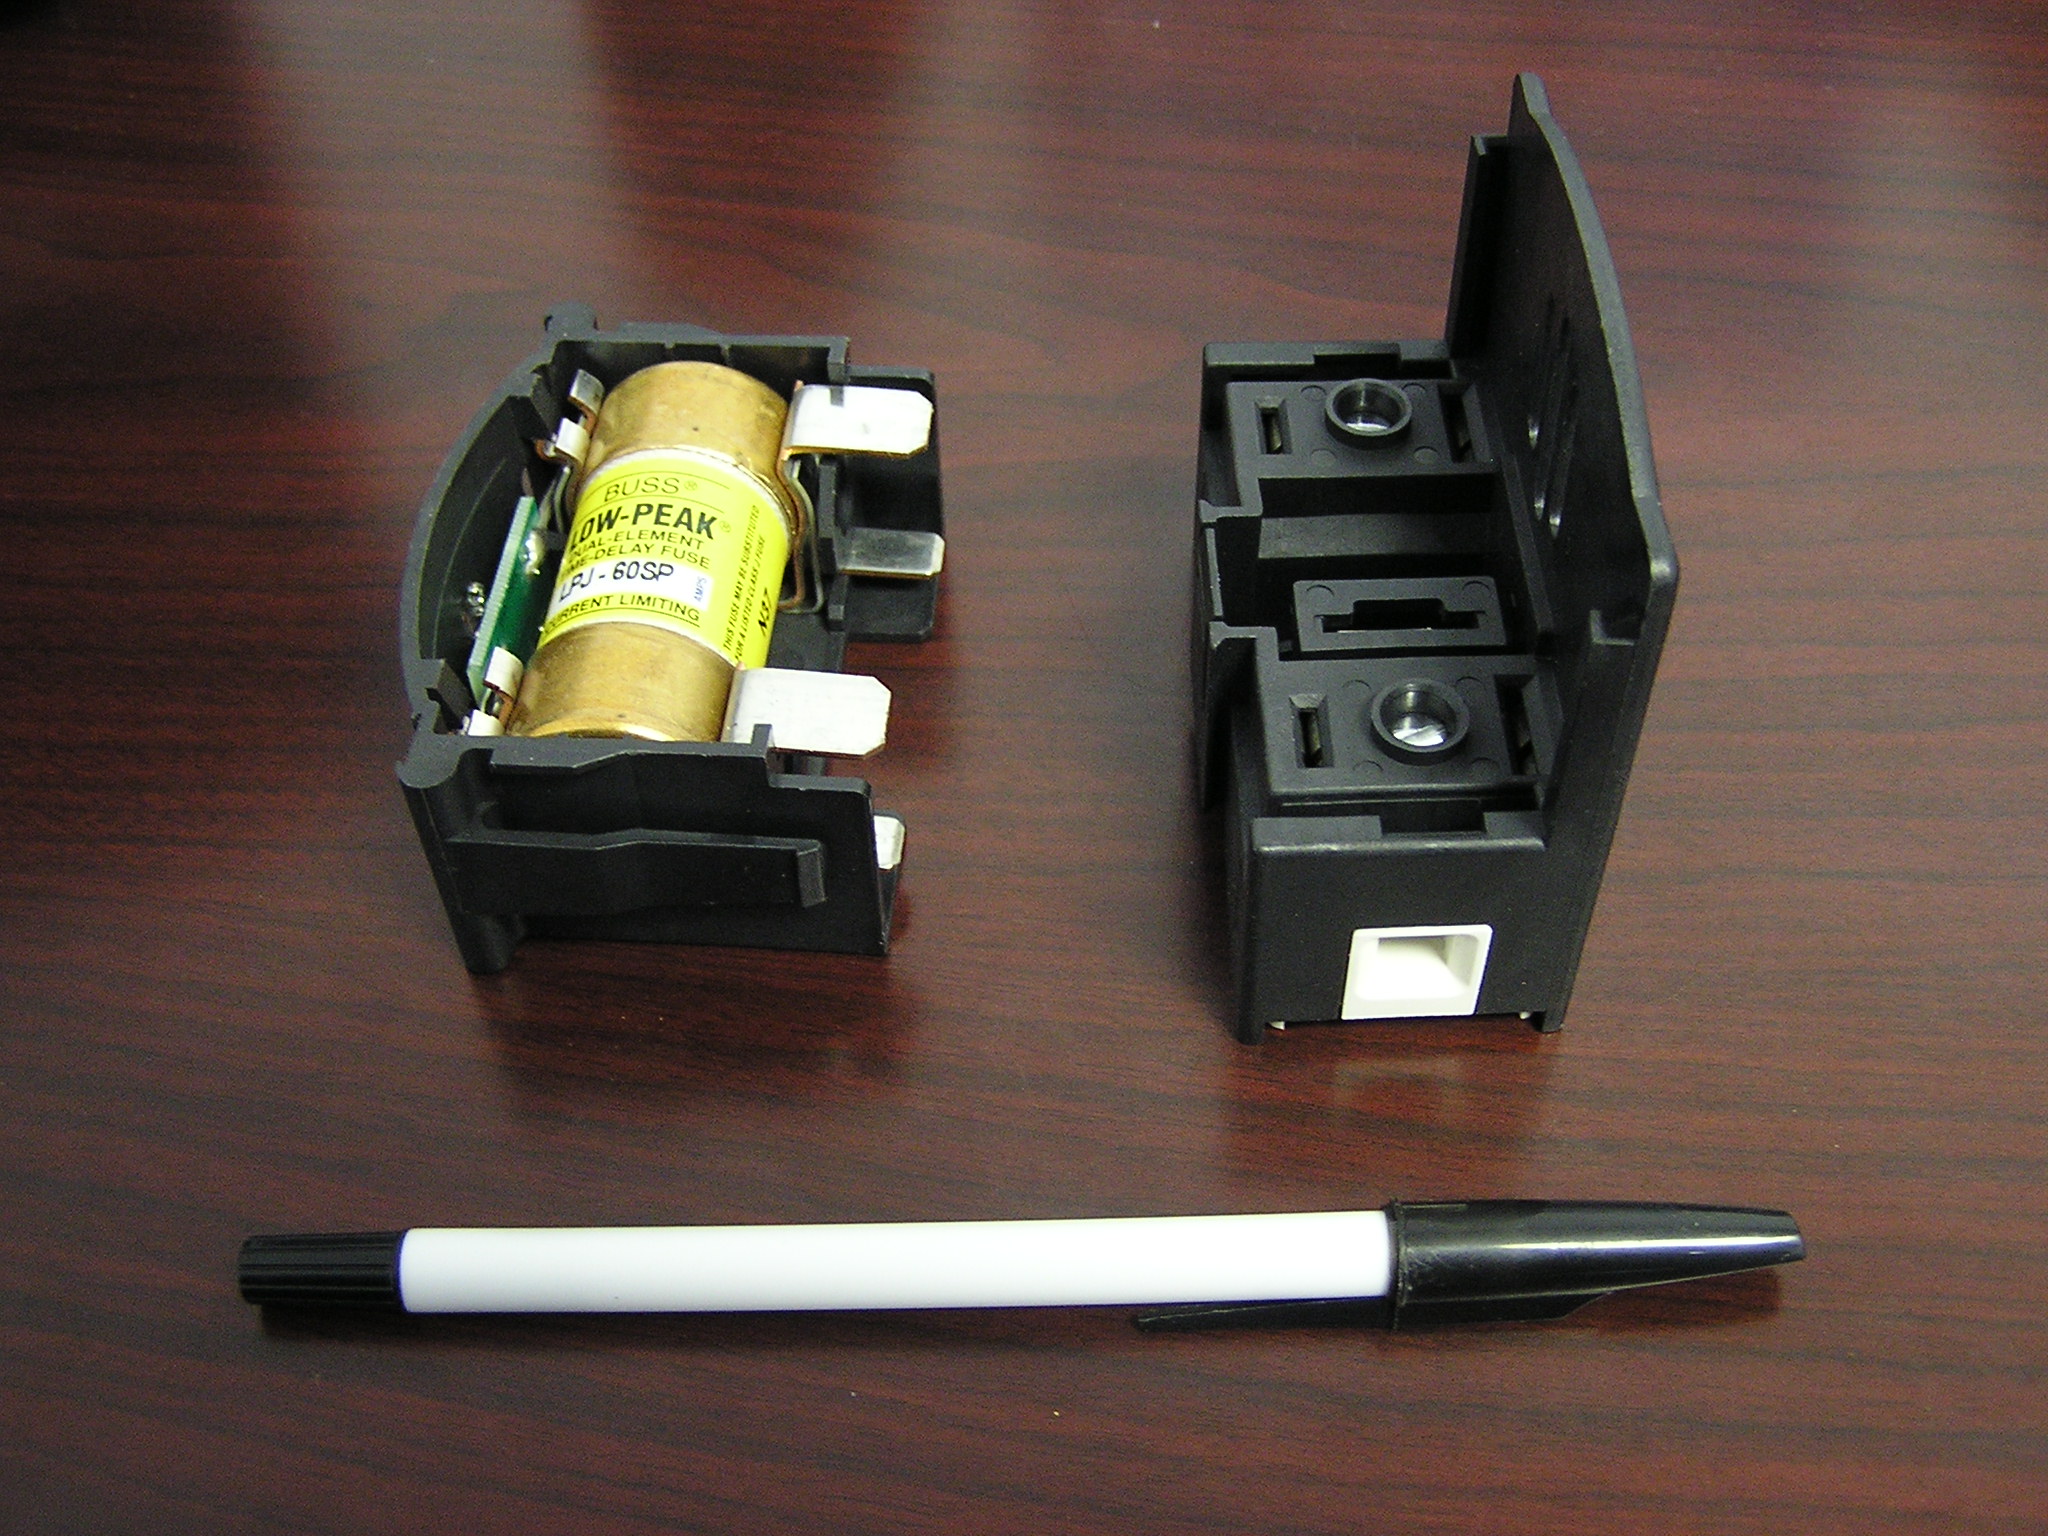
| 19:03, 12 January 2007 | Fuse in holder.JPG (file) |  |
727 KB | Installing the fuse into the holder | 1 |
| 05:33, 15 December 2006 | Top Battery Box 45 Degree Cuts.JPG (file) |  |
728 KB | The aluminum angle irons are cut with 45 degree angles so they fit snugly | 1 |
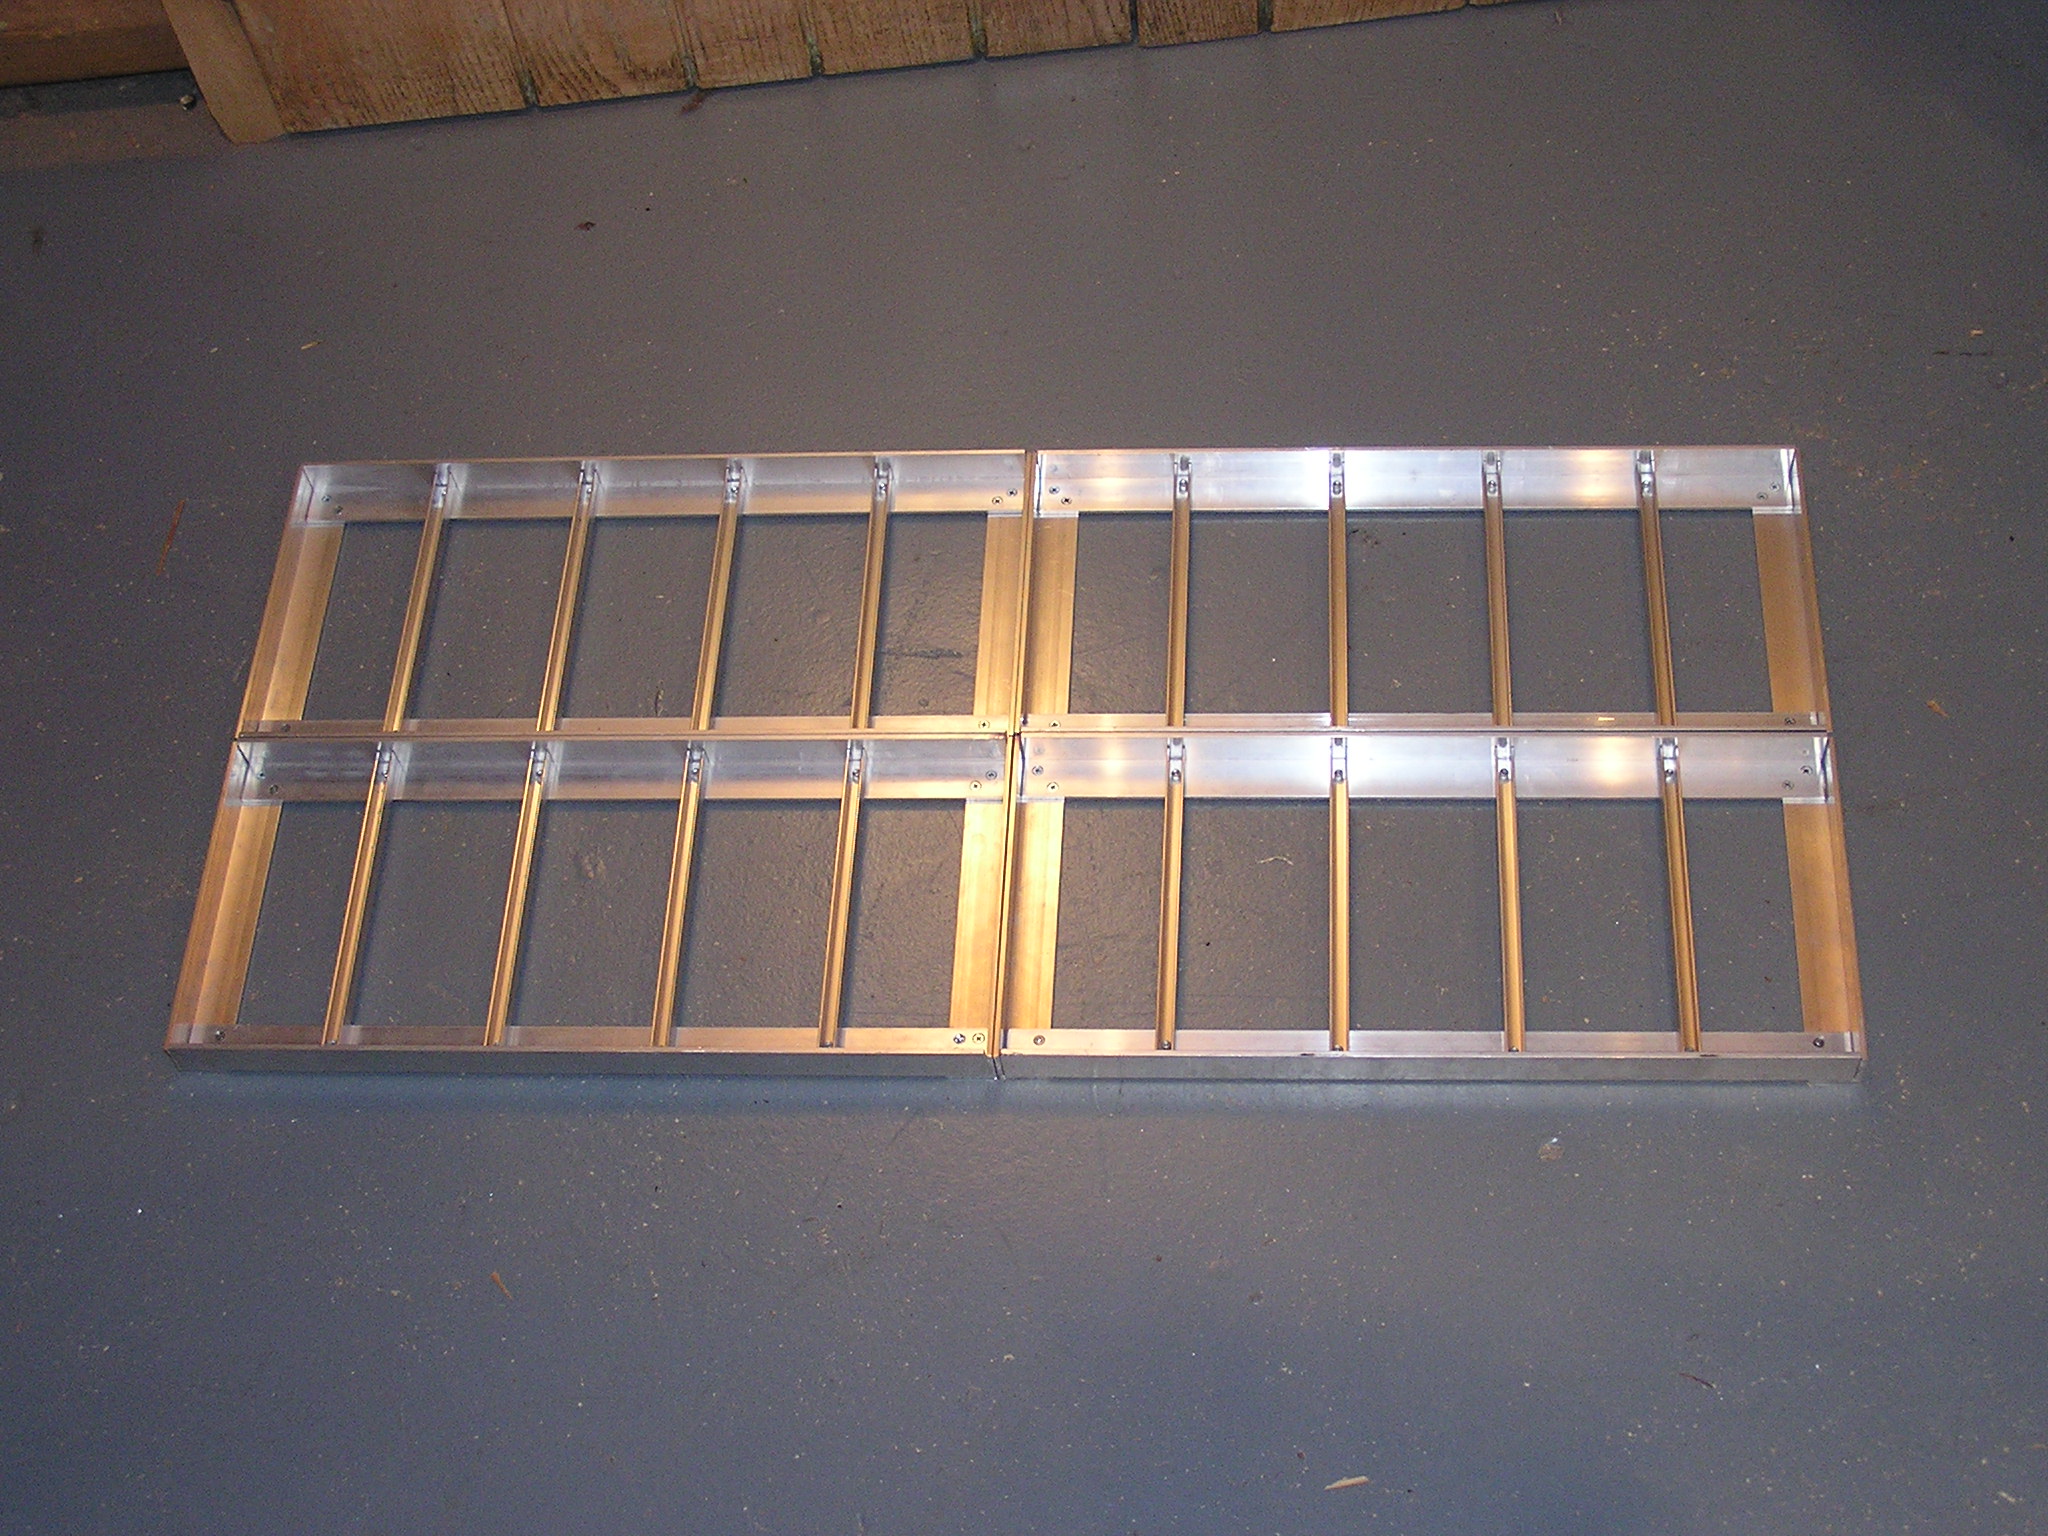
| 05:19, 15 December 2006 | 4 Finished Trays.JPG (file) |  |
746 KB | 1 | |
| 05:29, 15 December 2006 | 2 Trays with Some Supports.JPG (file) |  |
752 KB | 2 of the trays sitting on 2 1-1/2 angle irons (others just sitting there) | 1 |
| 23:21, 26 April 2007 | Left side of electronics box.jpg (file) |  |
1.18 MB | Shows the left outside of the electronics box | 1 |
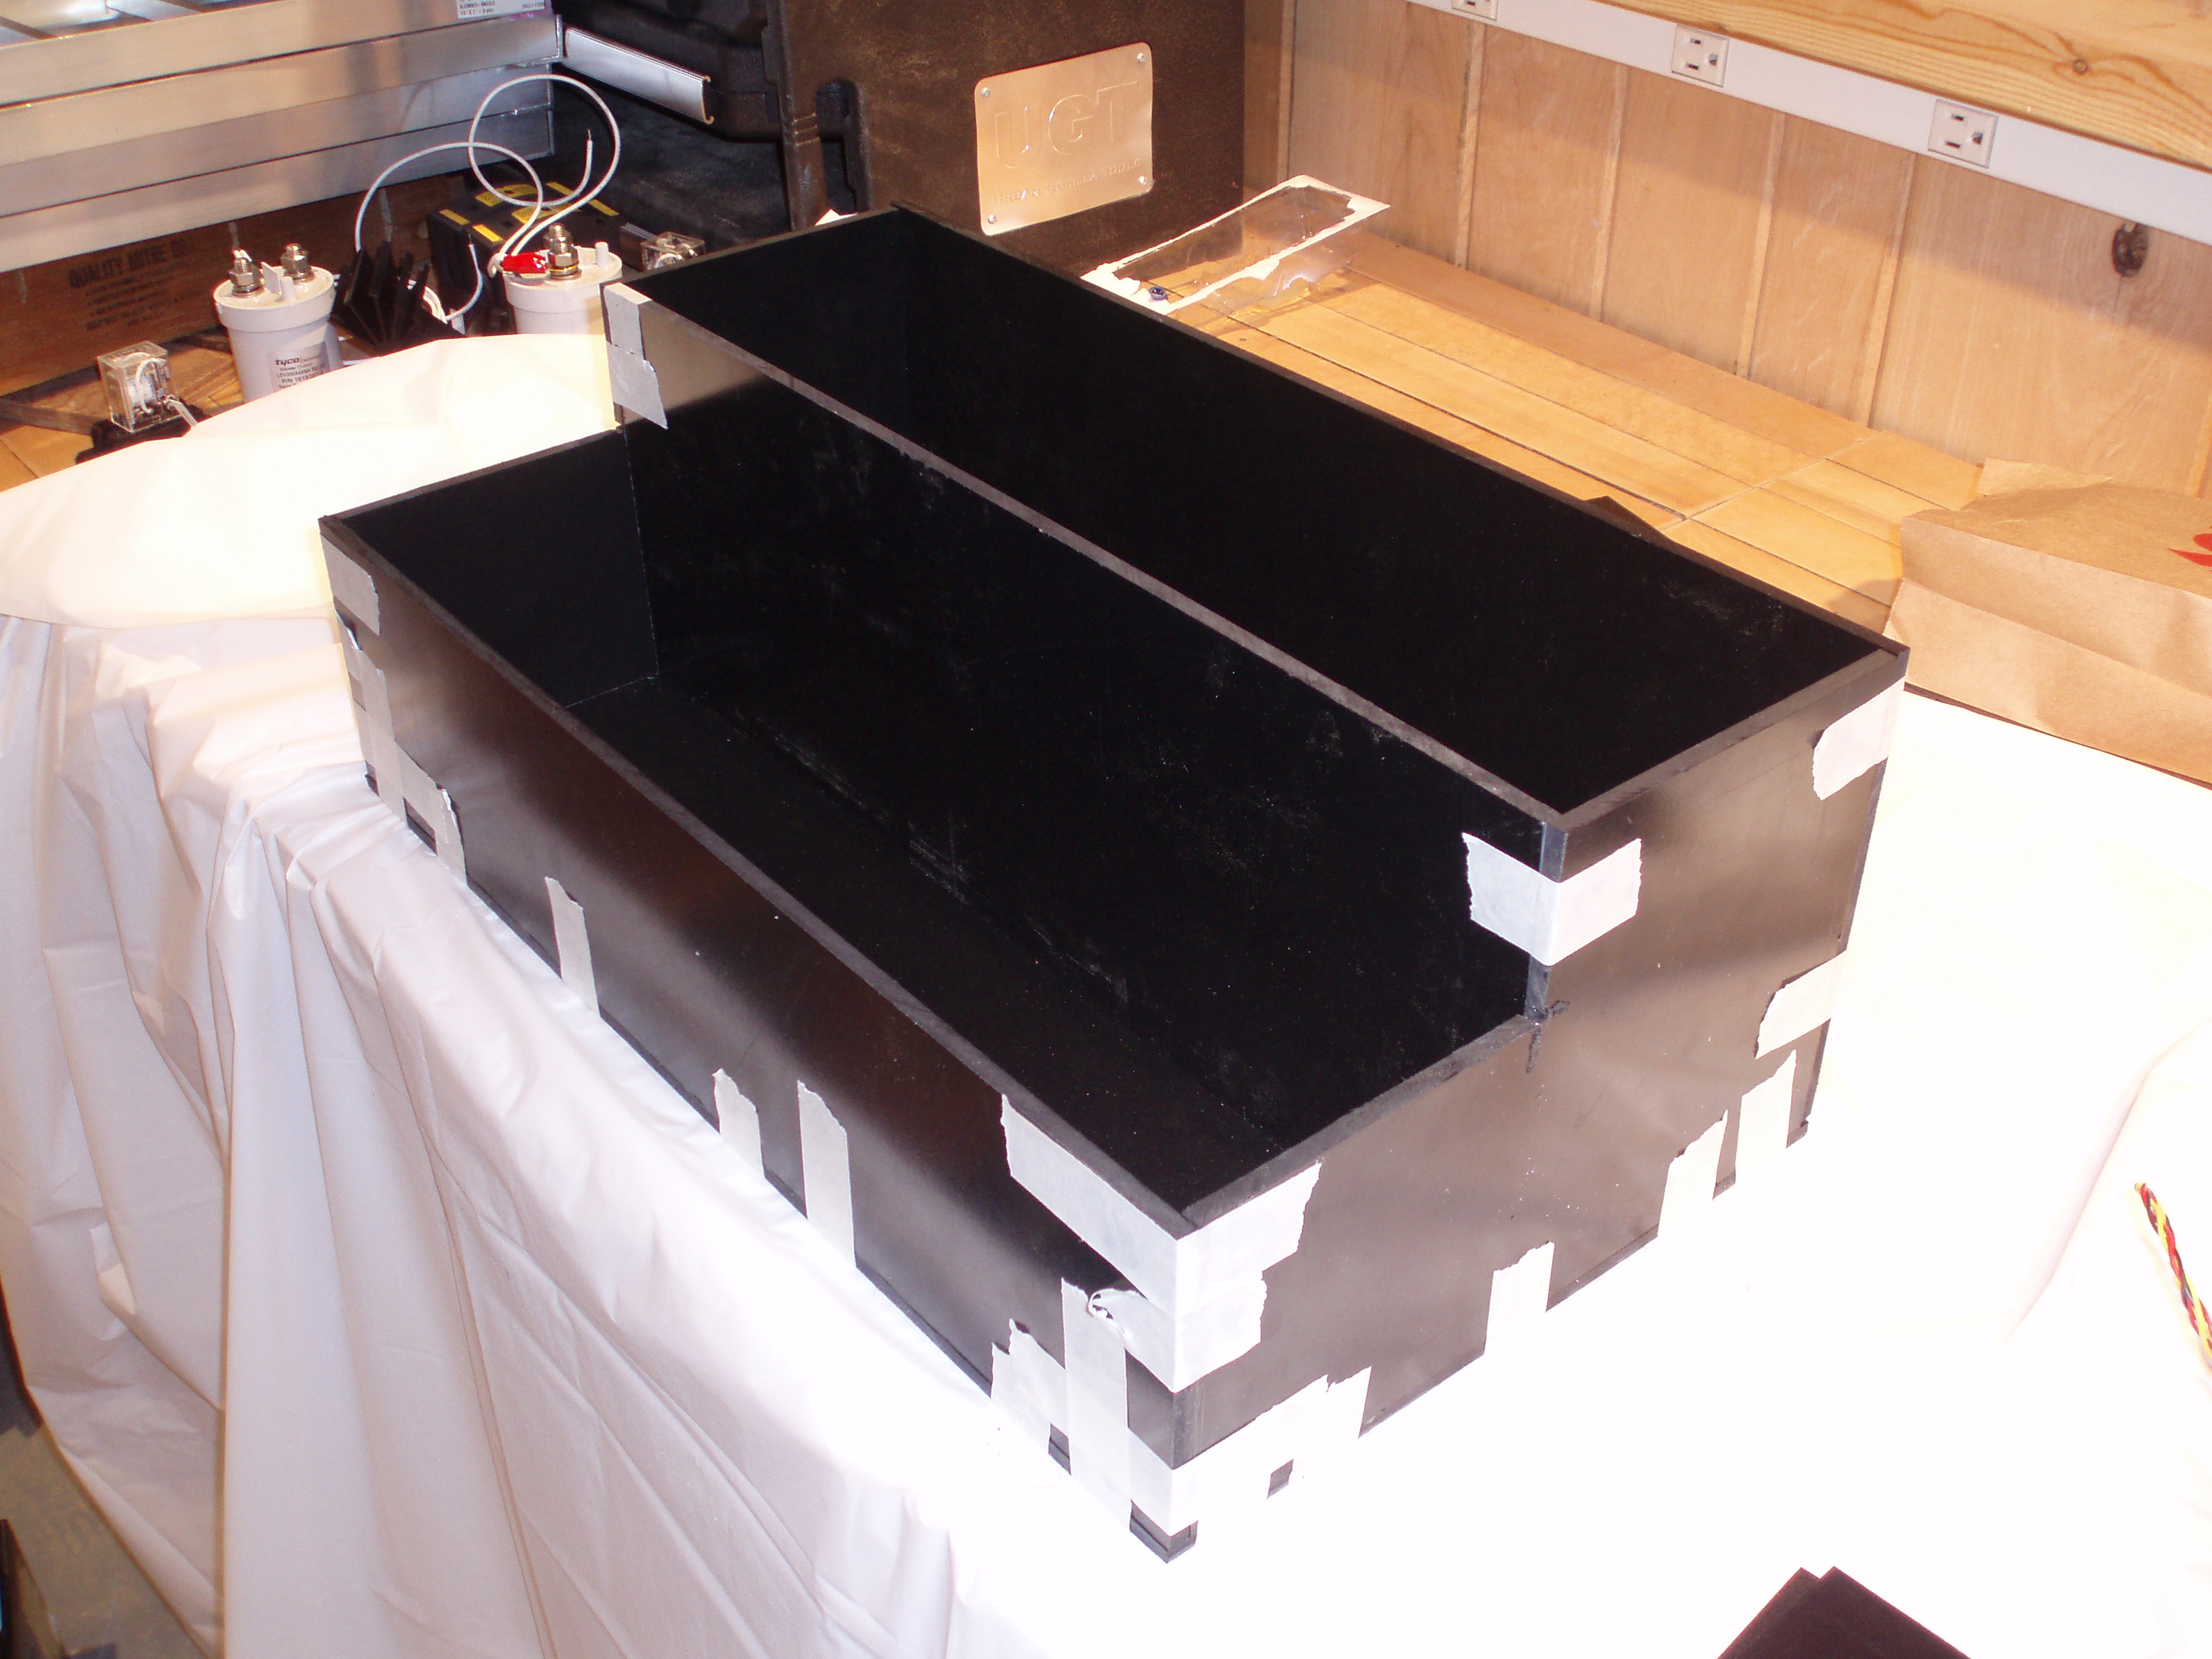
| 23:29, 26 April 2007 | Electronics box being assembled.jpg (file) |  |
1.2 MB | Assembling the electronics box: its taped together awaiting epoxy glue | 1 |
| 23:51, 26 April 2007 | Right side of electronics box.jpg (file) |  |
1.26 MB | 1 | |
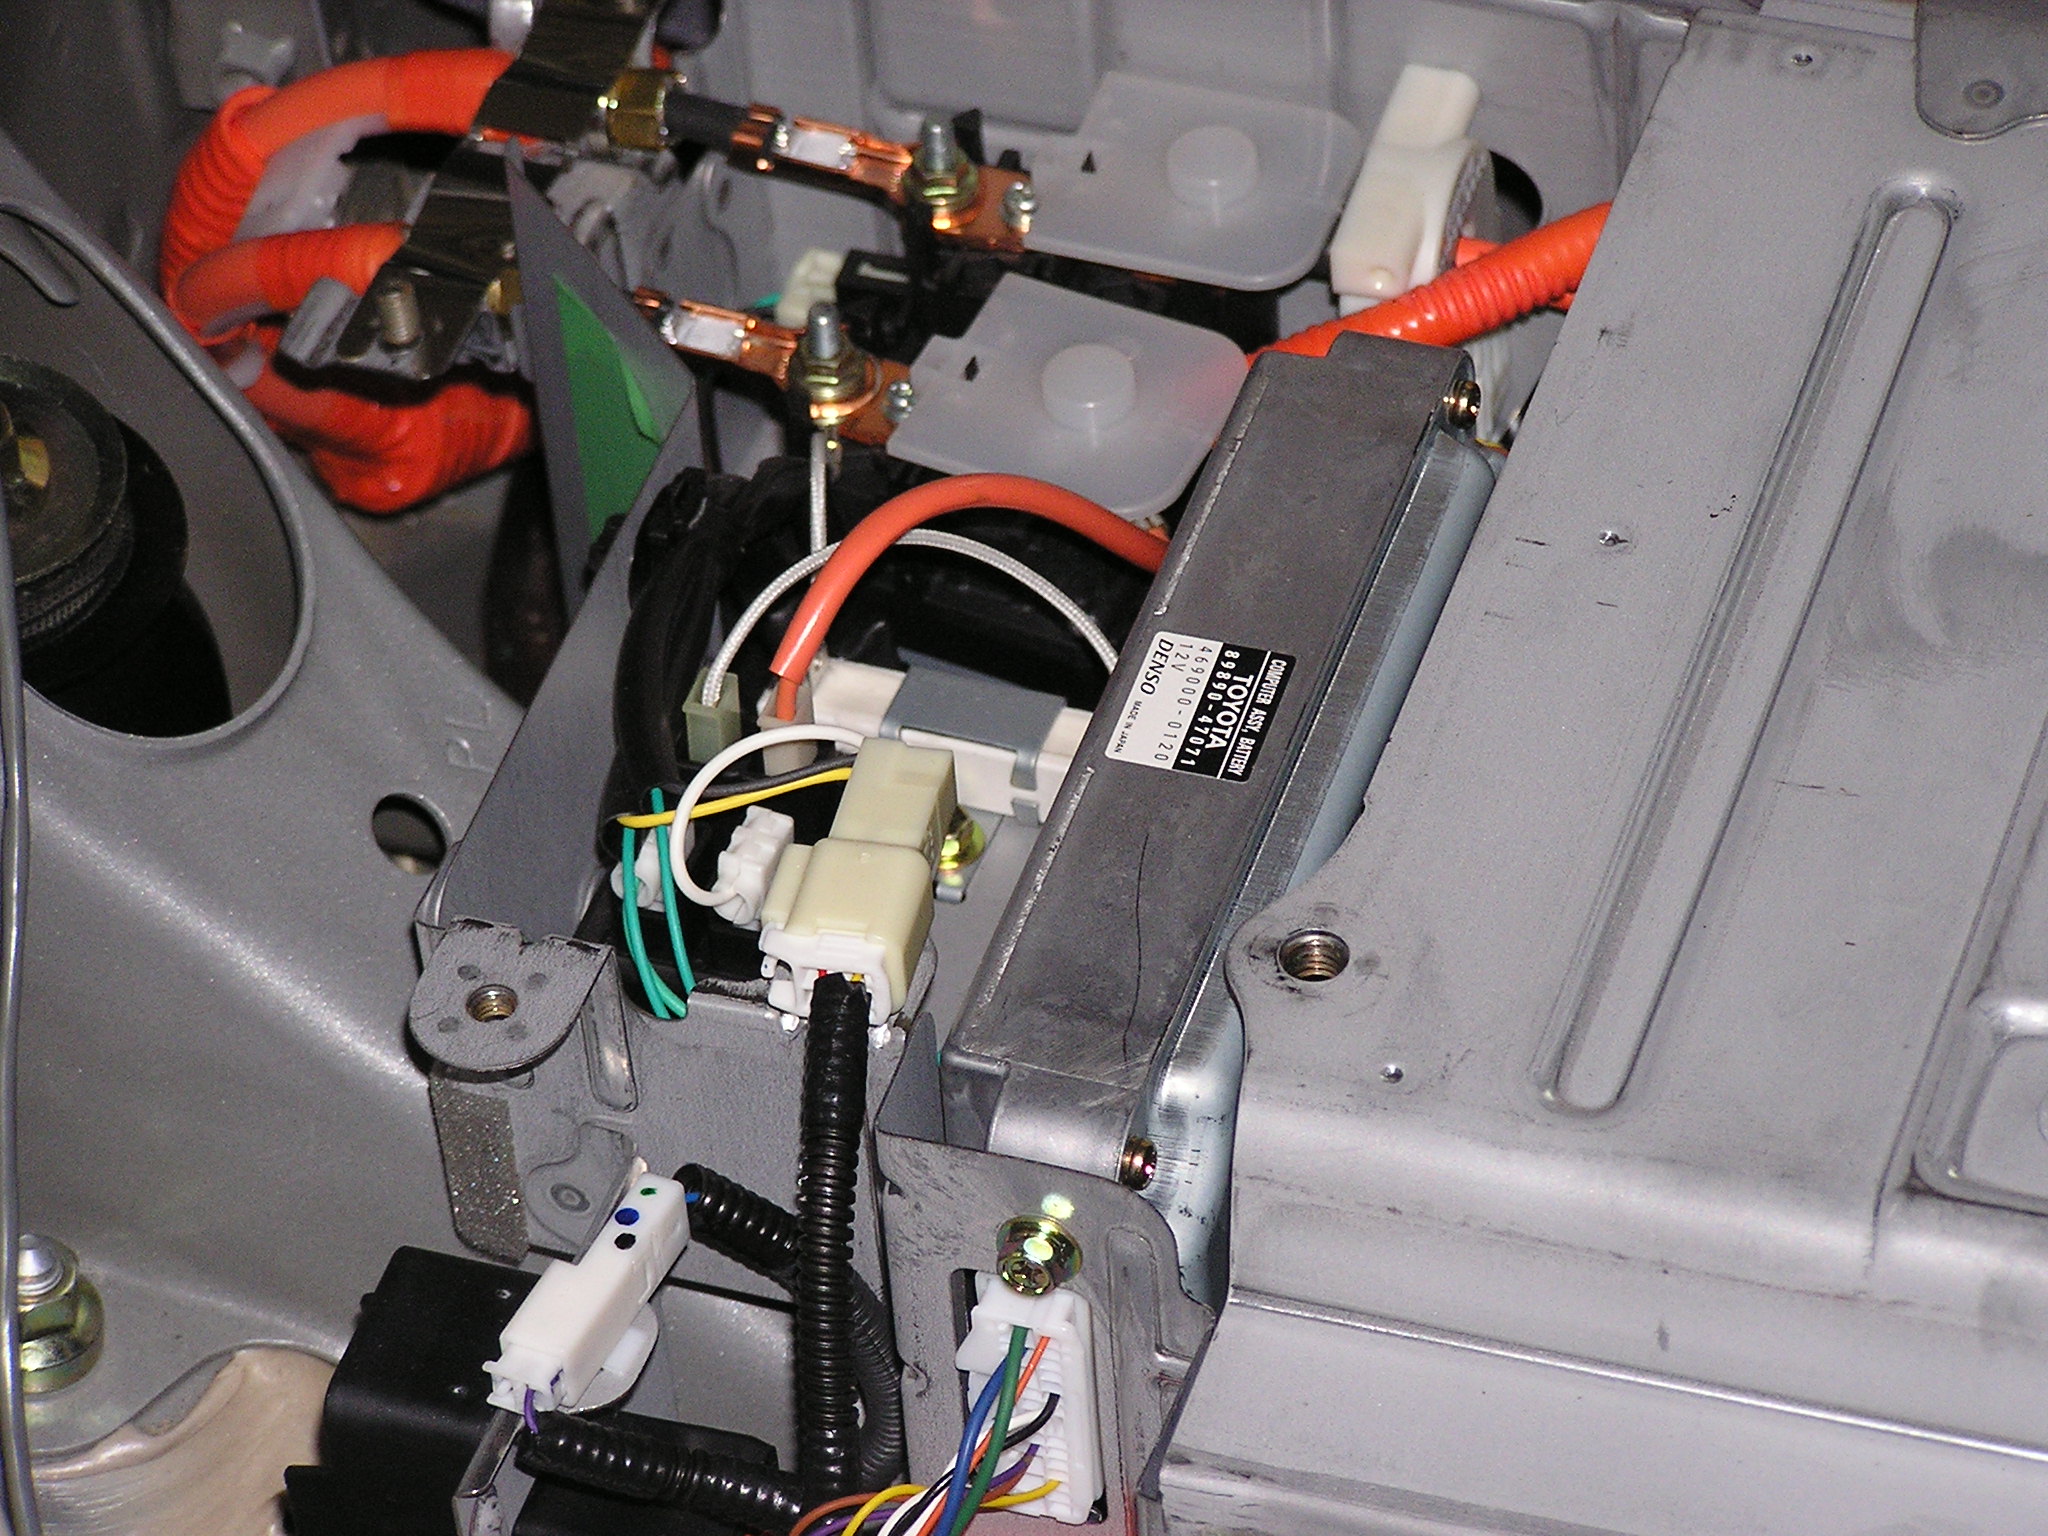
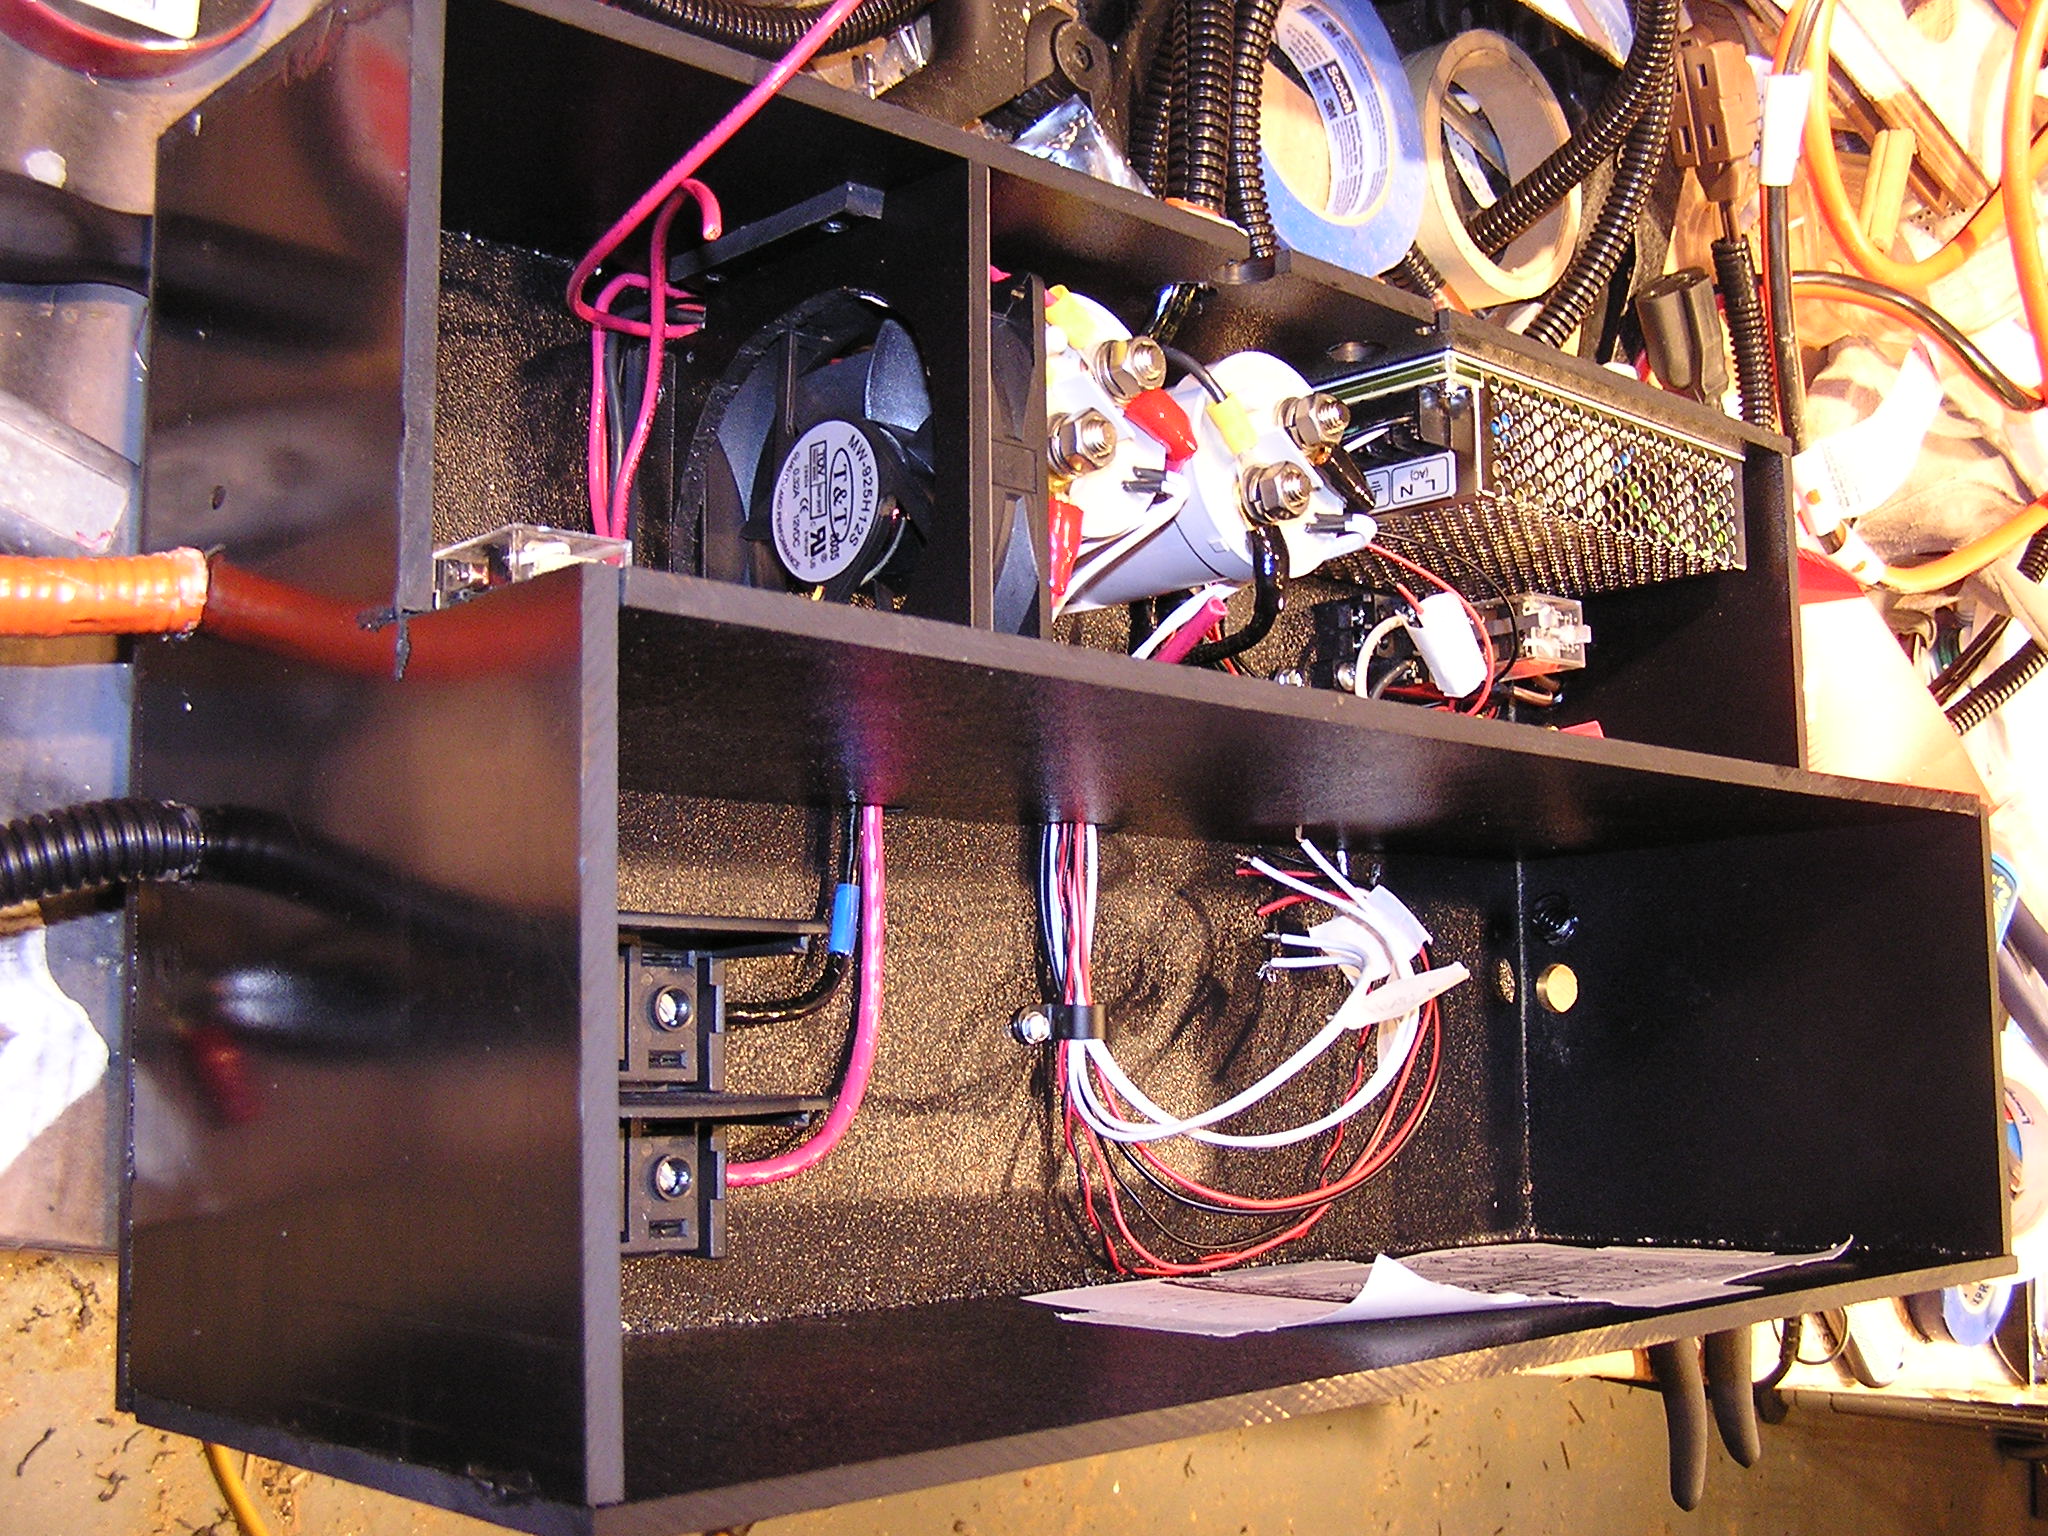
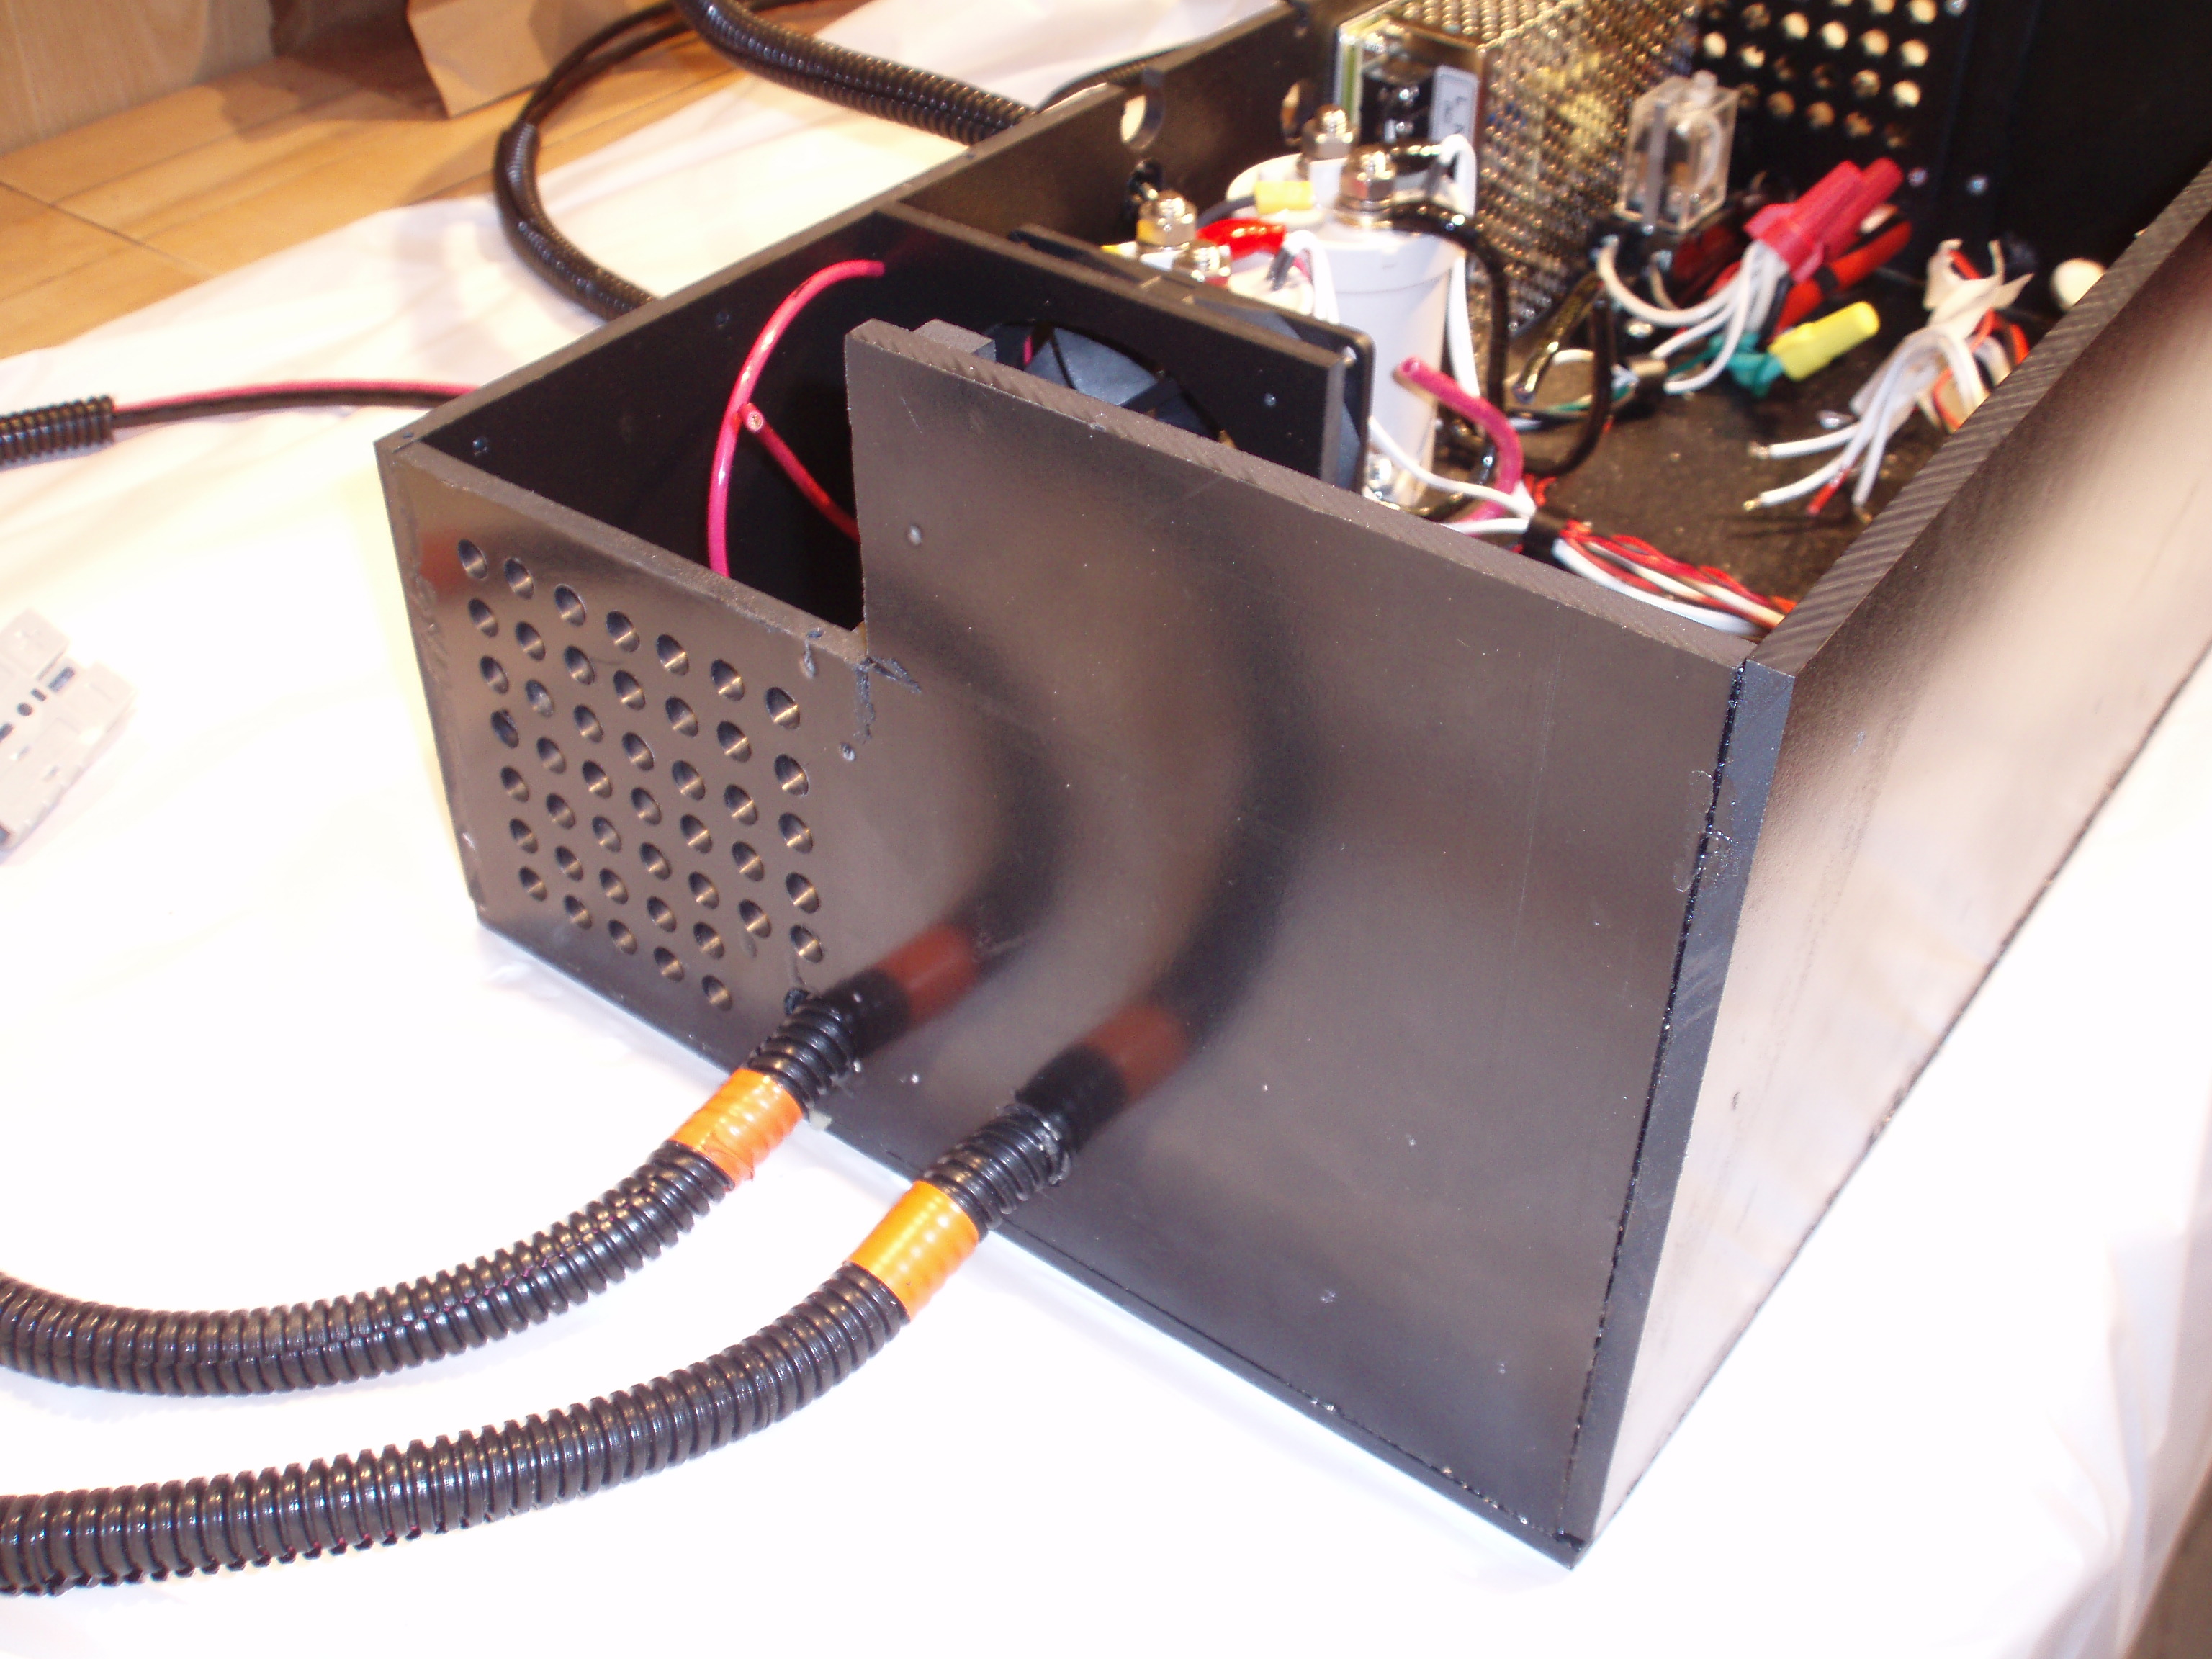
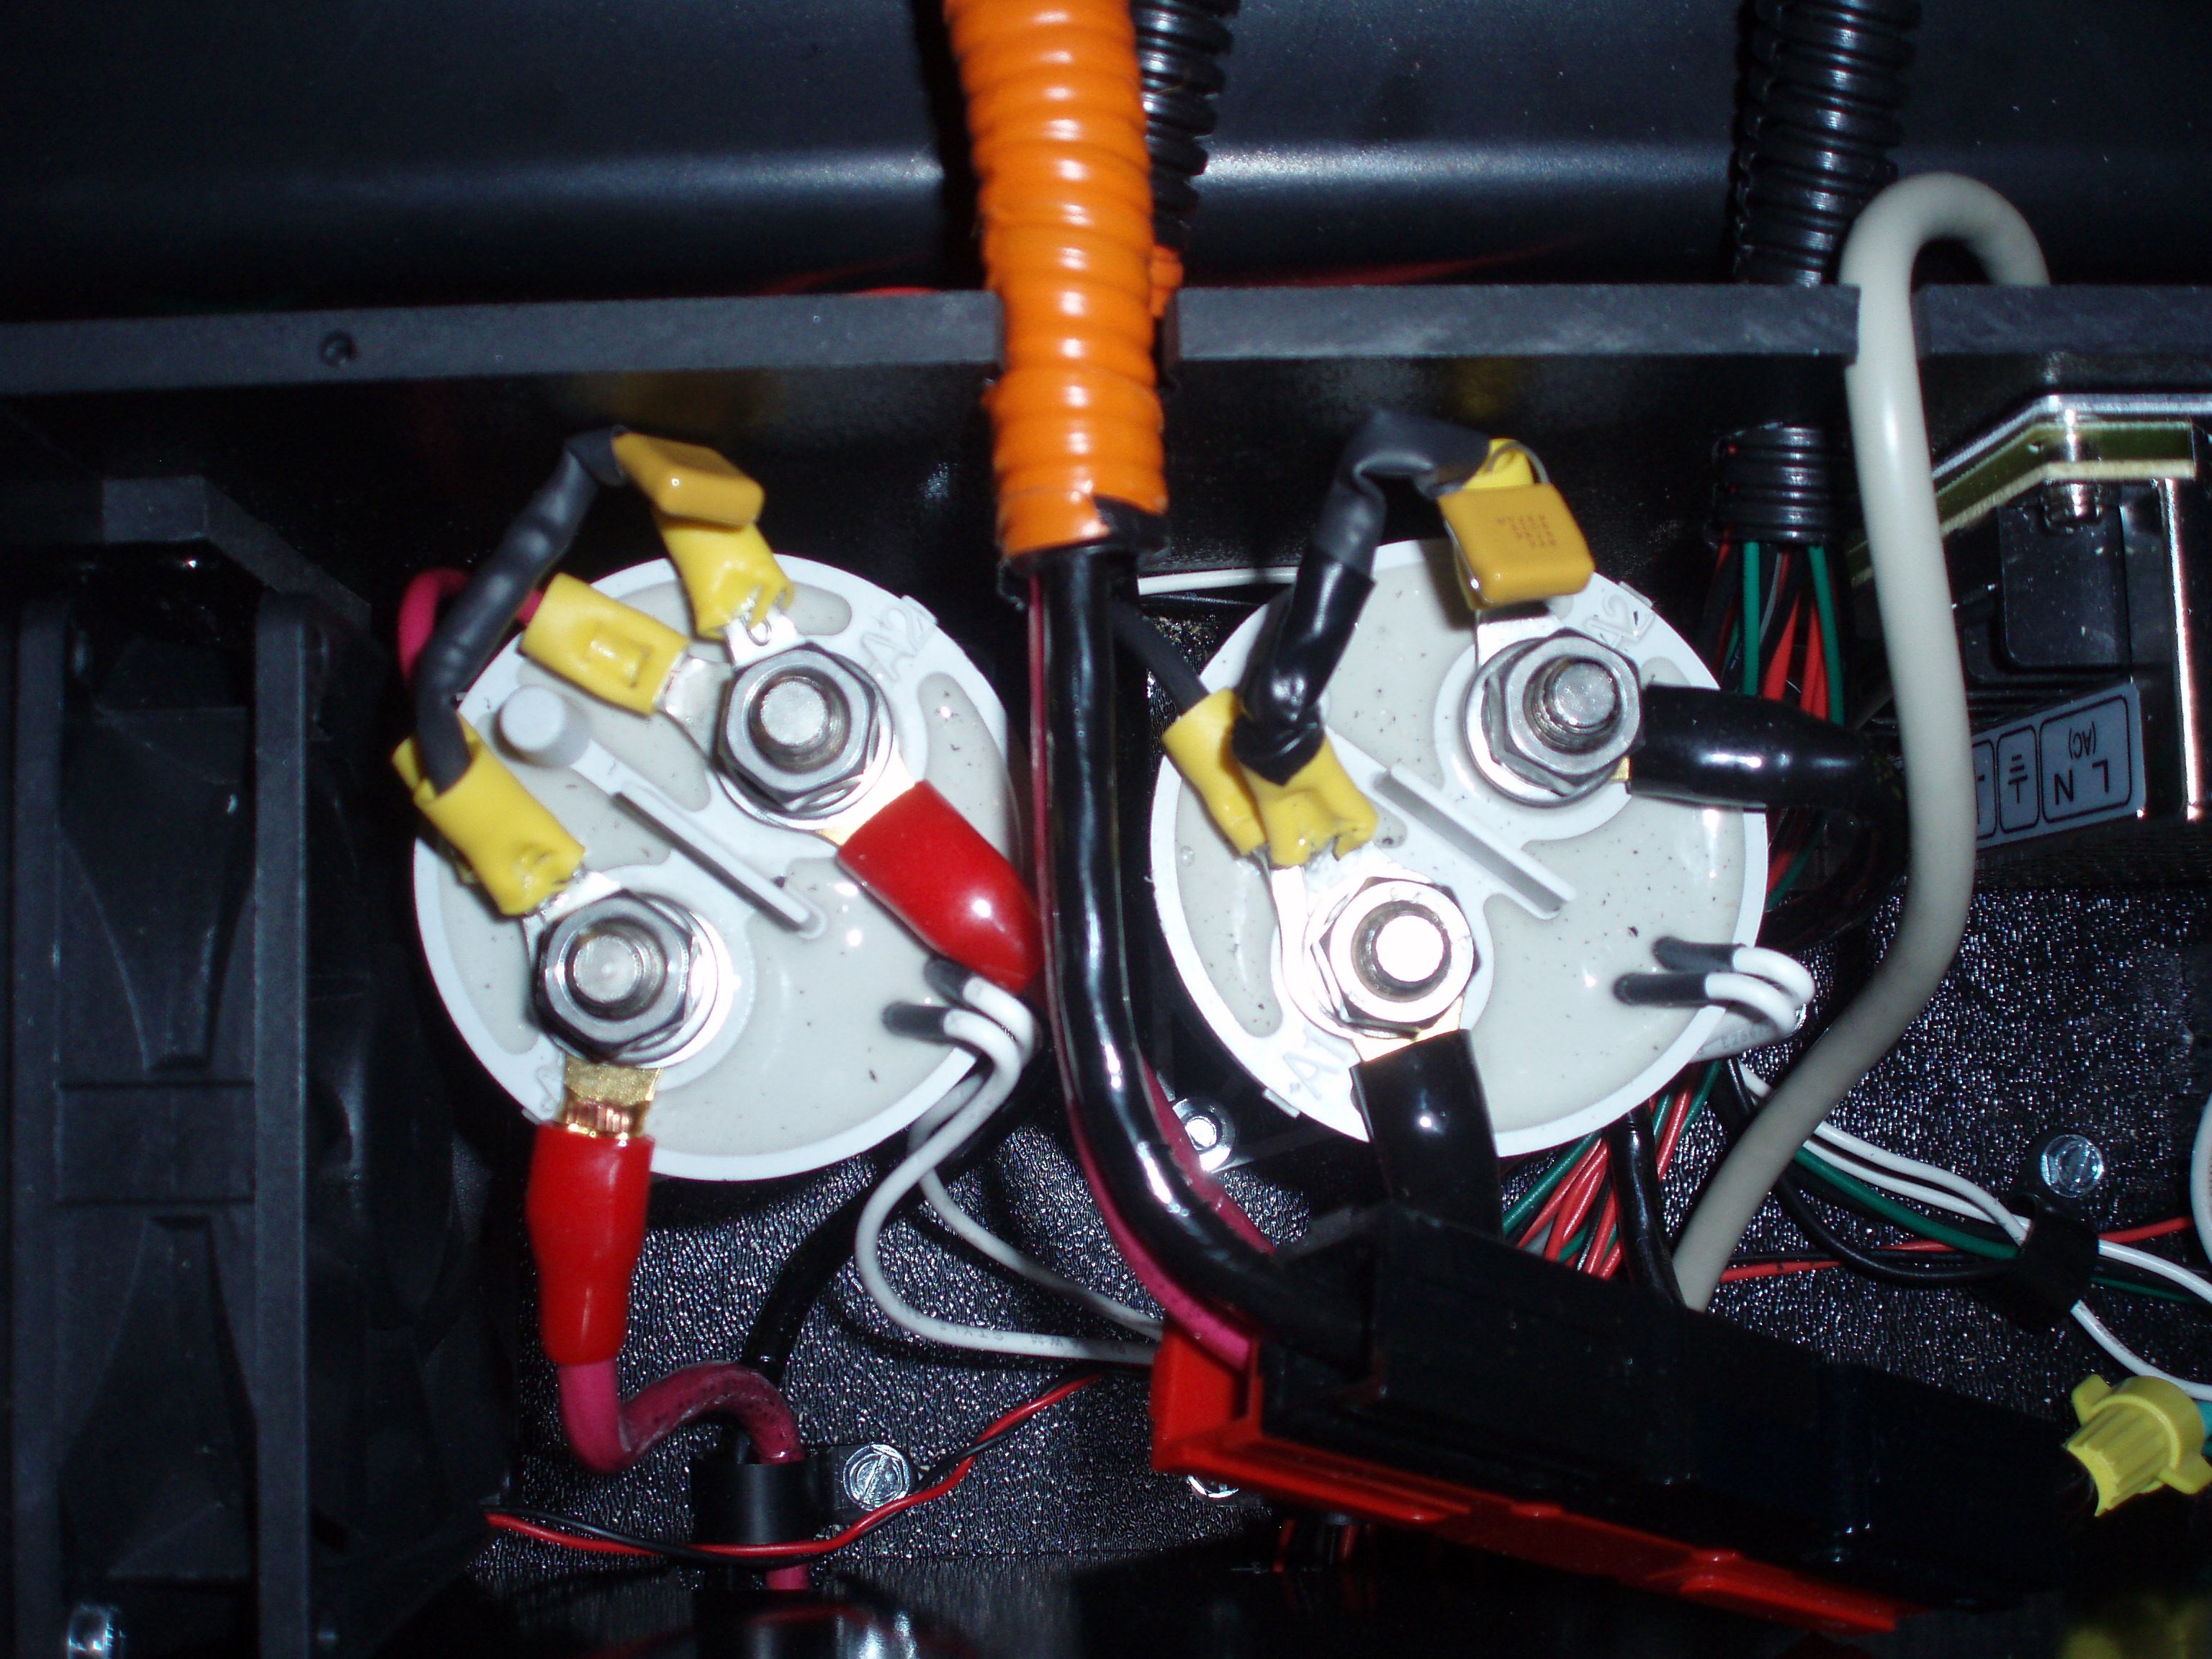
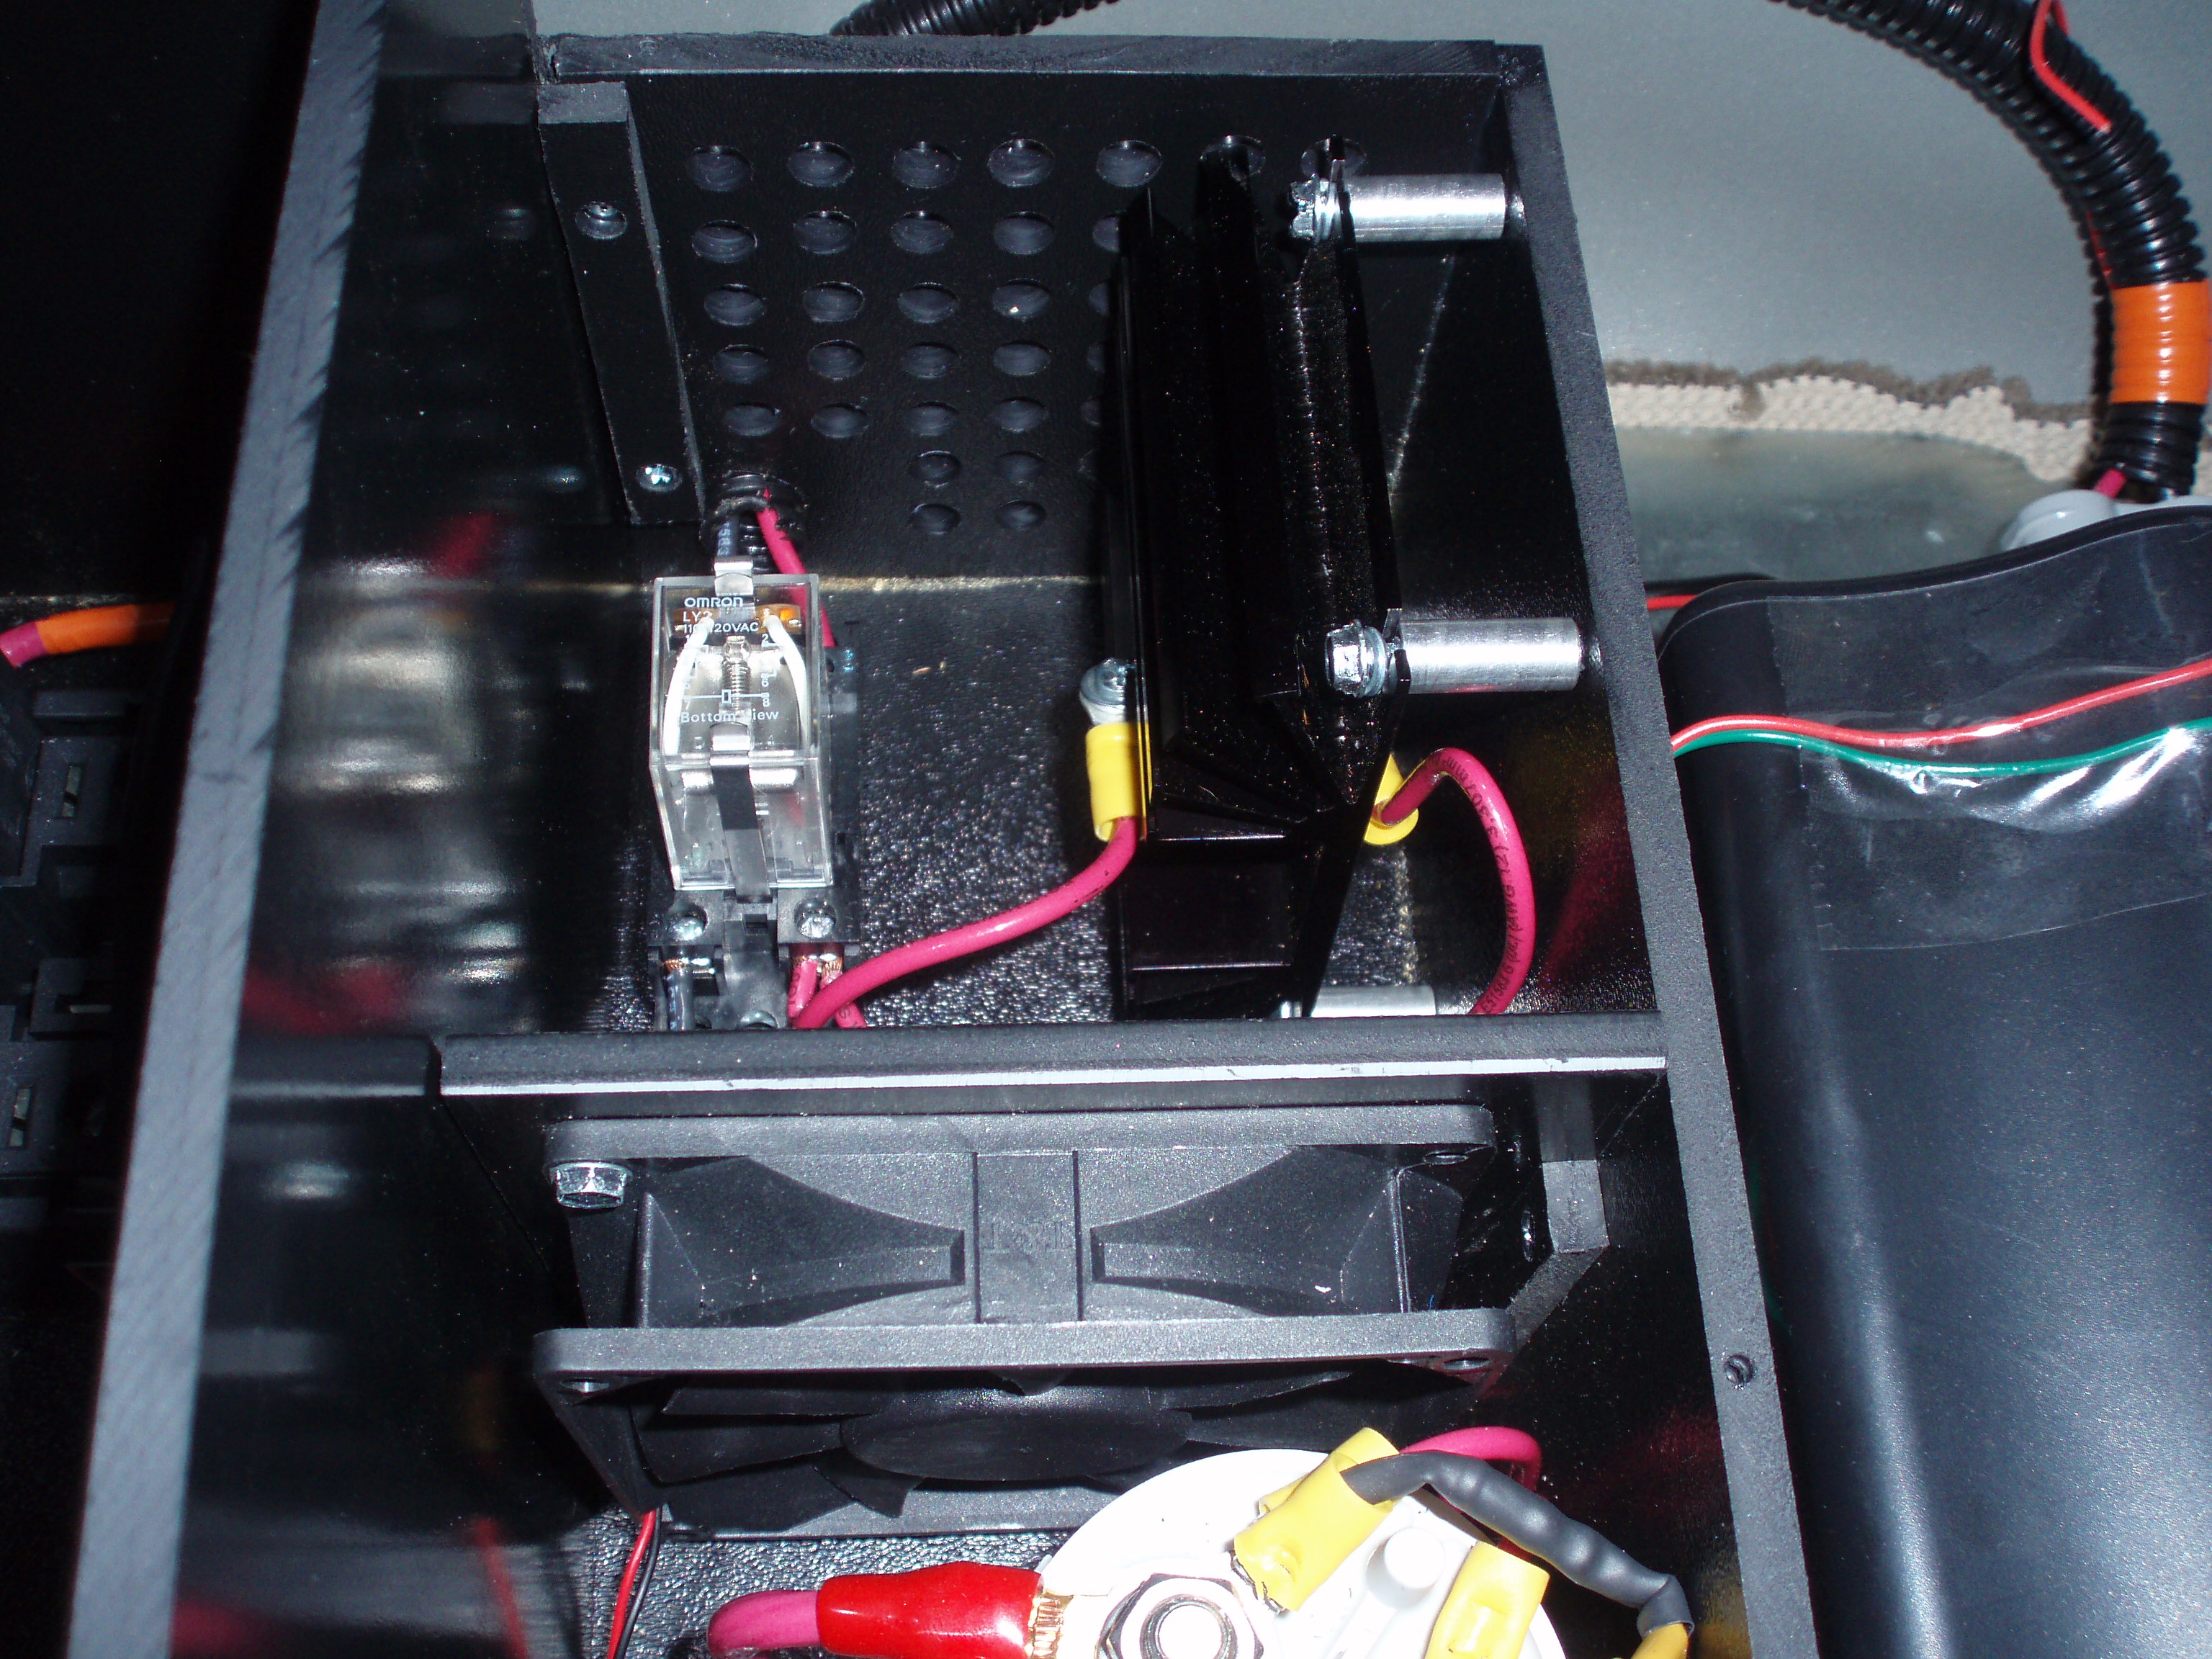
| 23:19, 26 April 2007 | Contactors in electronics box.jpg (file) |  |
1.37 MB | Shows the contactors, snubbers and disconnect for OEM battery tie-in. | 1 |
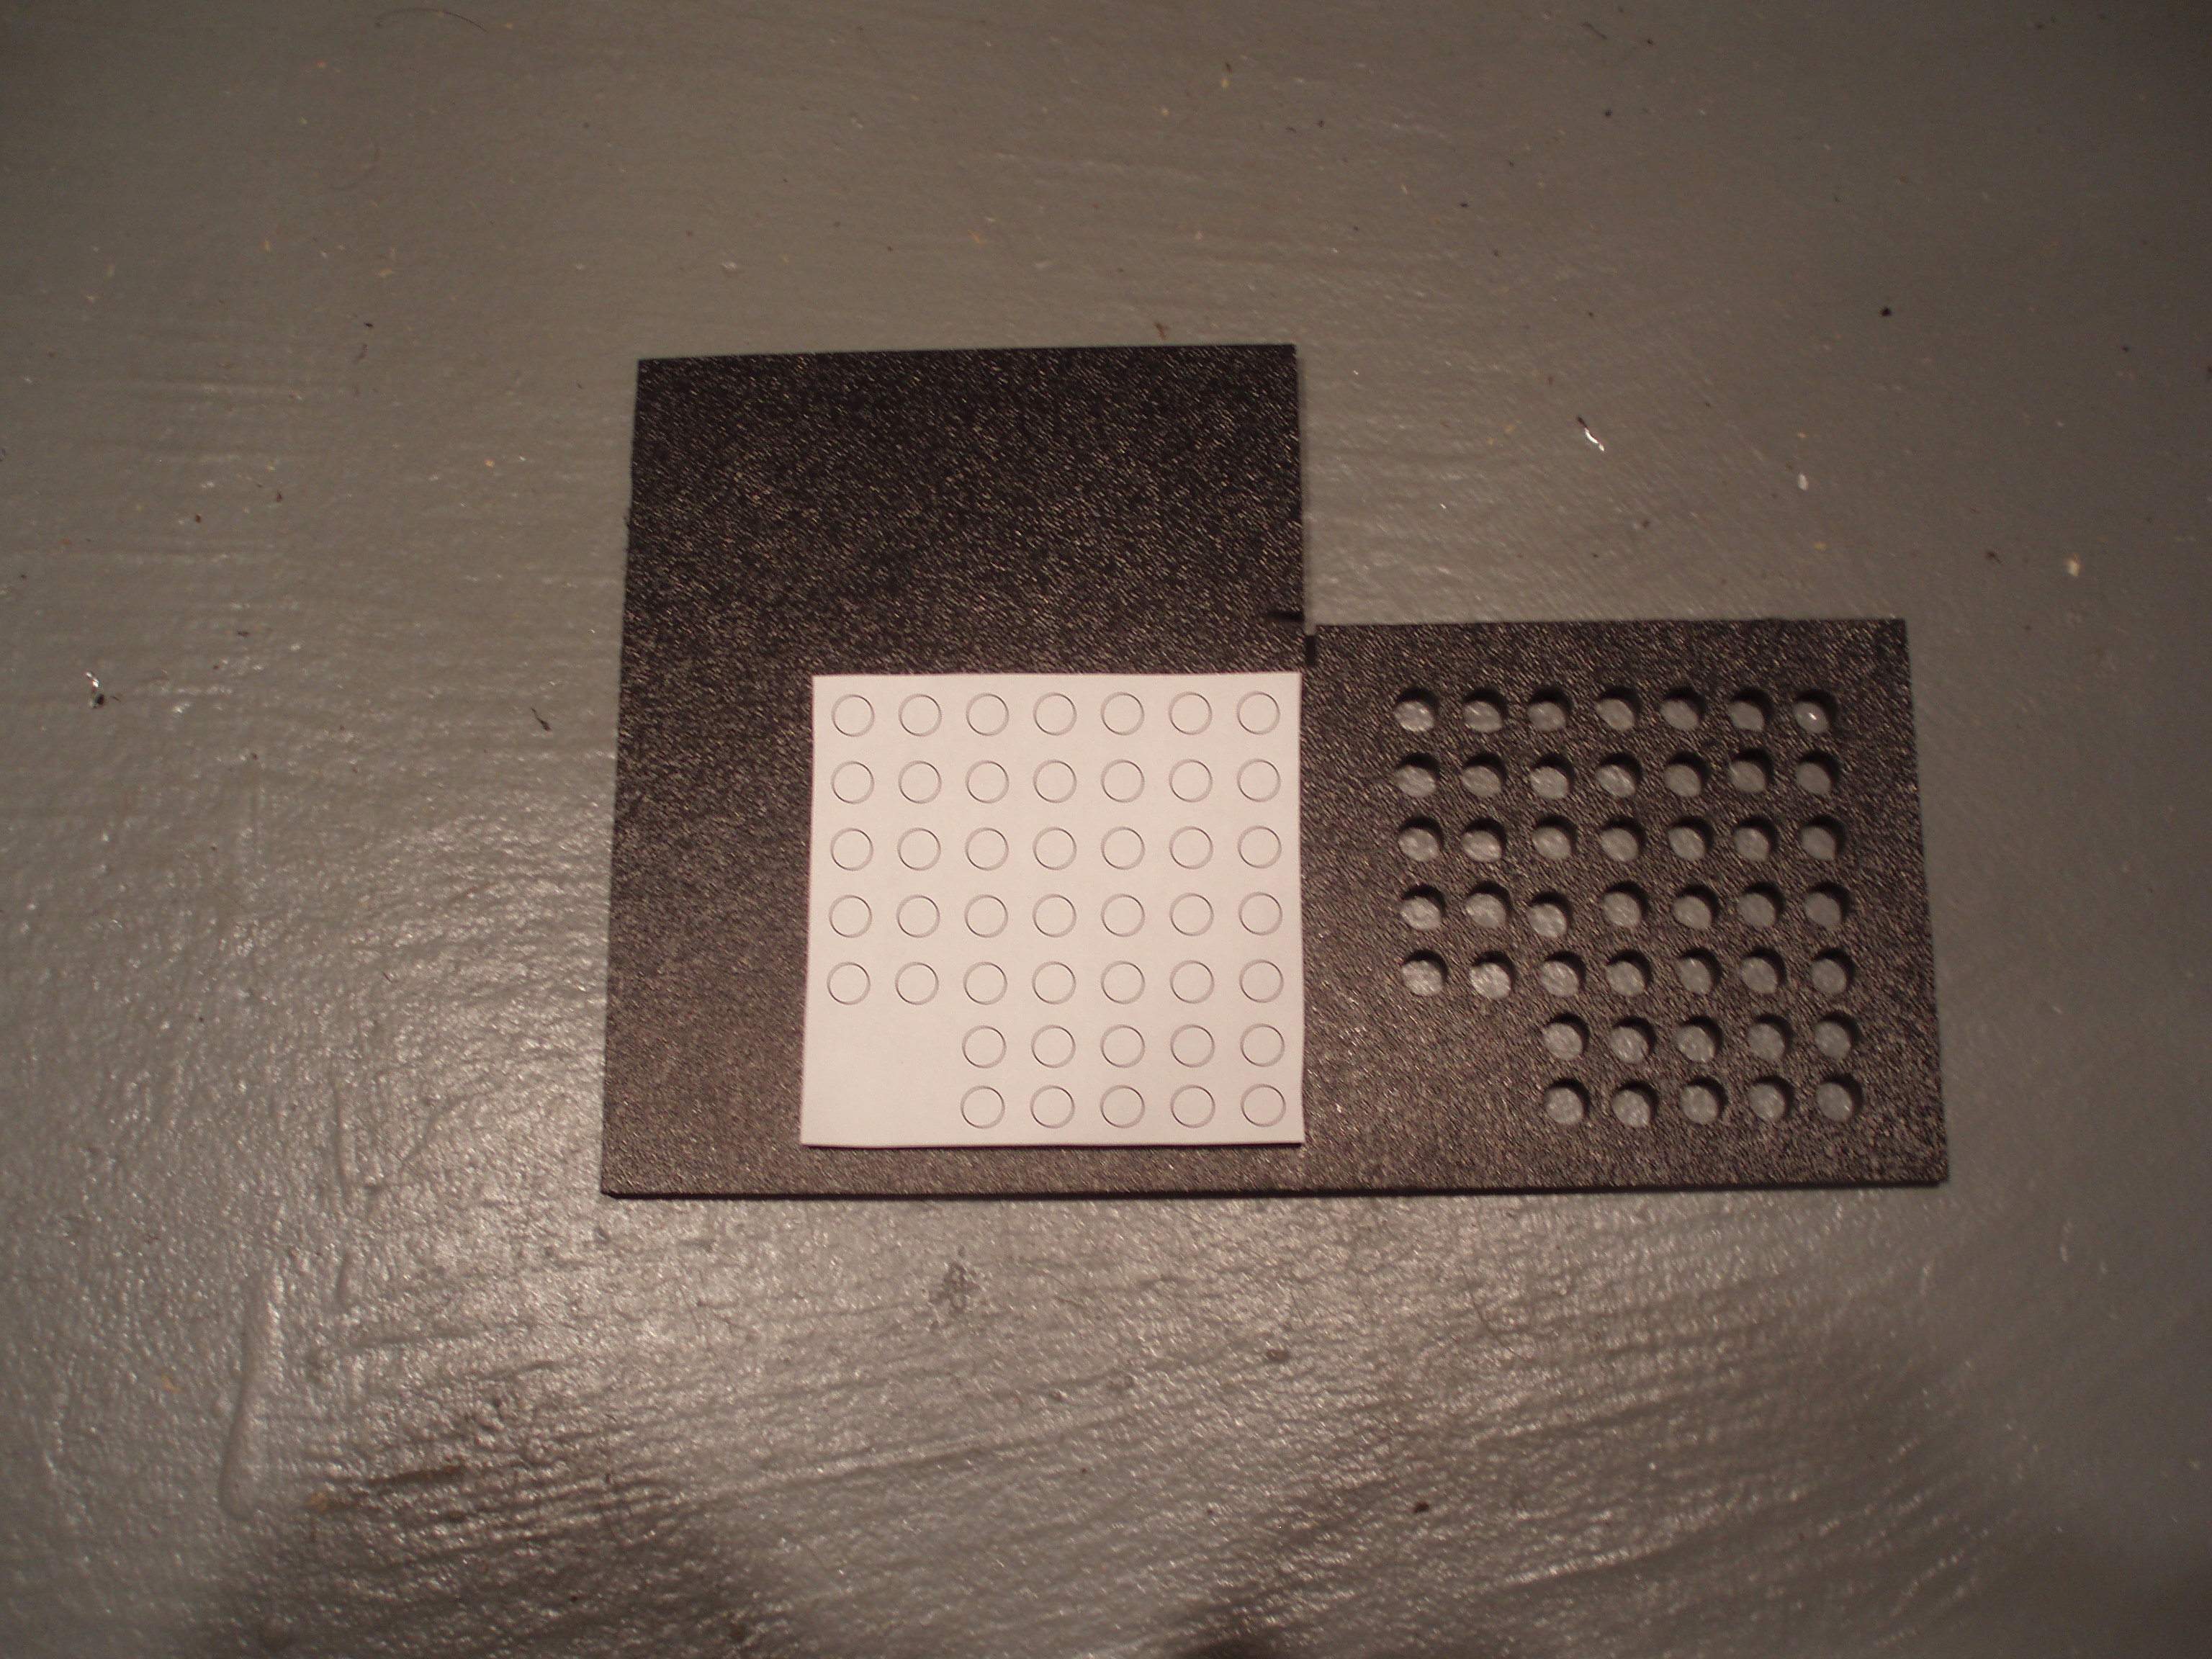
| 01:23, 23 June 2007 | Electronics Box Assembly - Side Vents.jpg (file) |  |
1.41 MB | Shows the assembly of the electronics box | 1 |
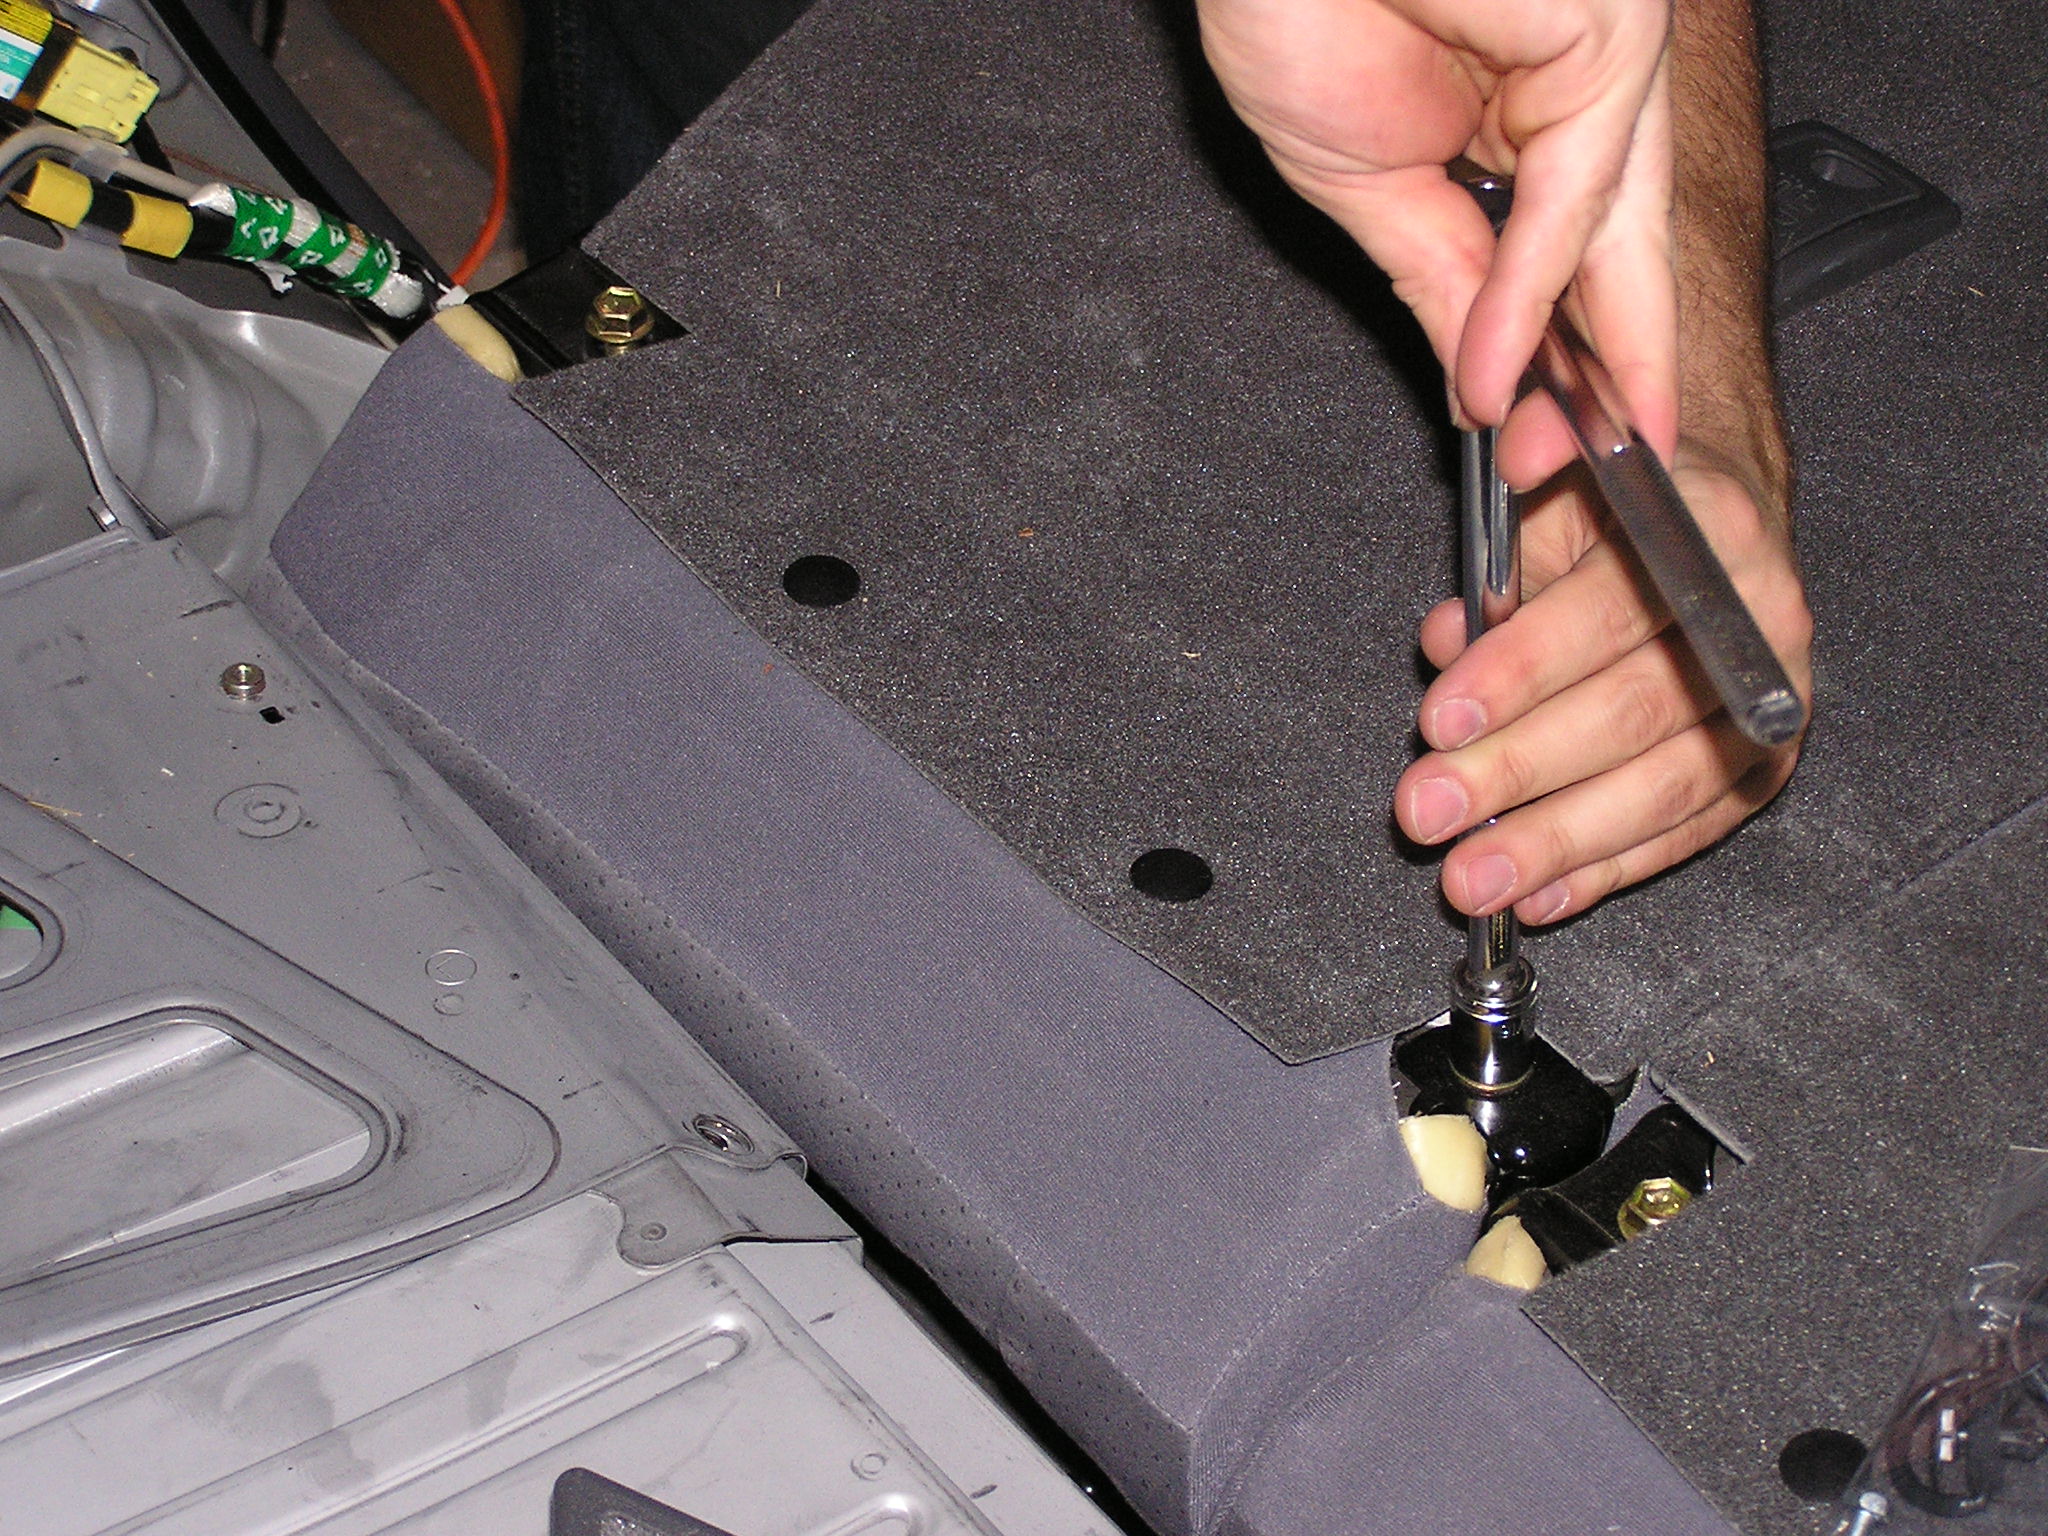
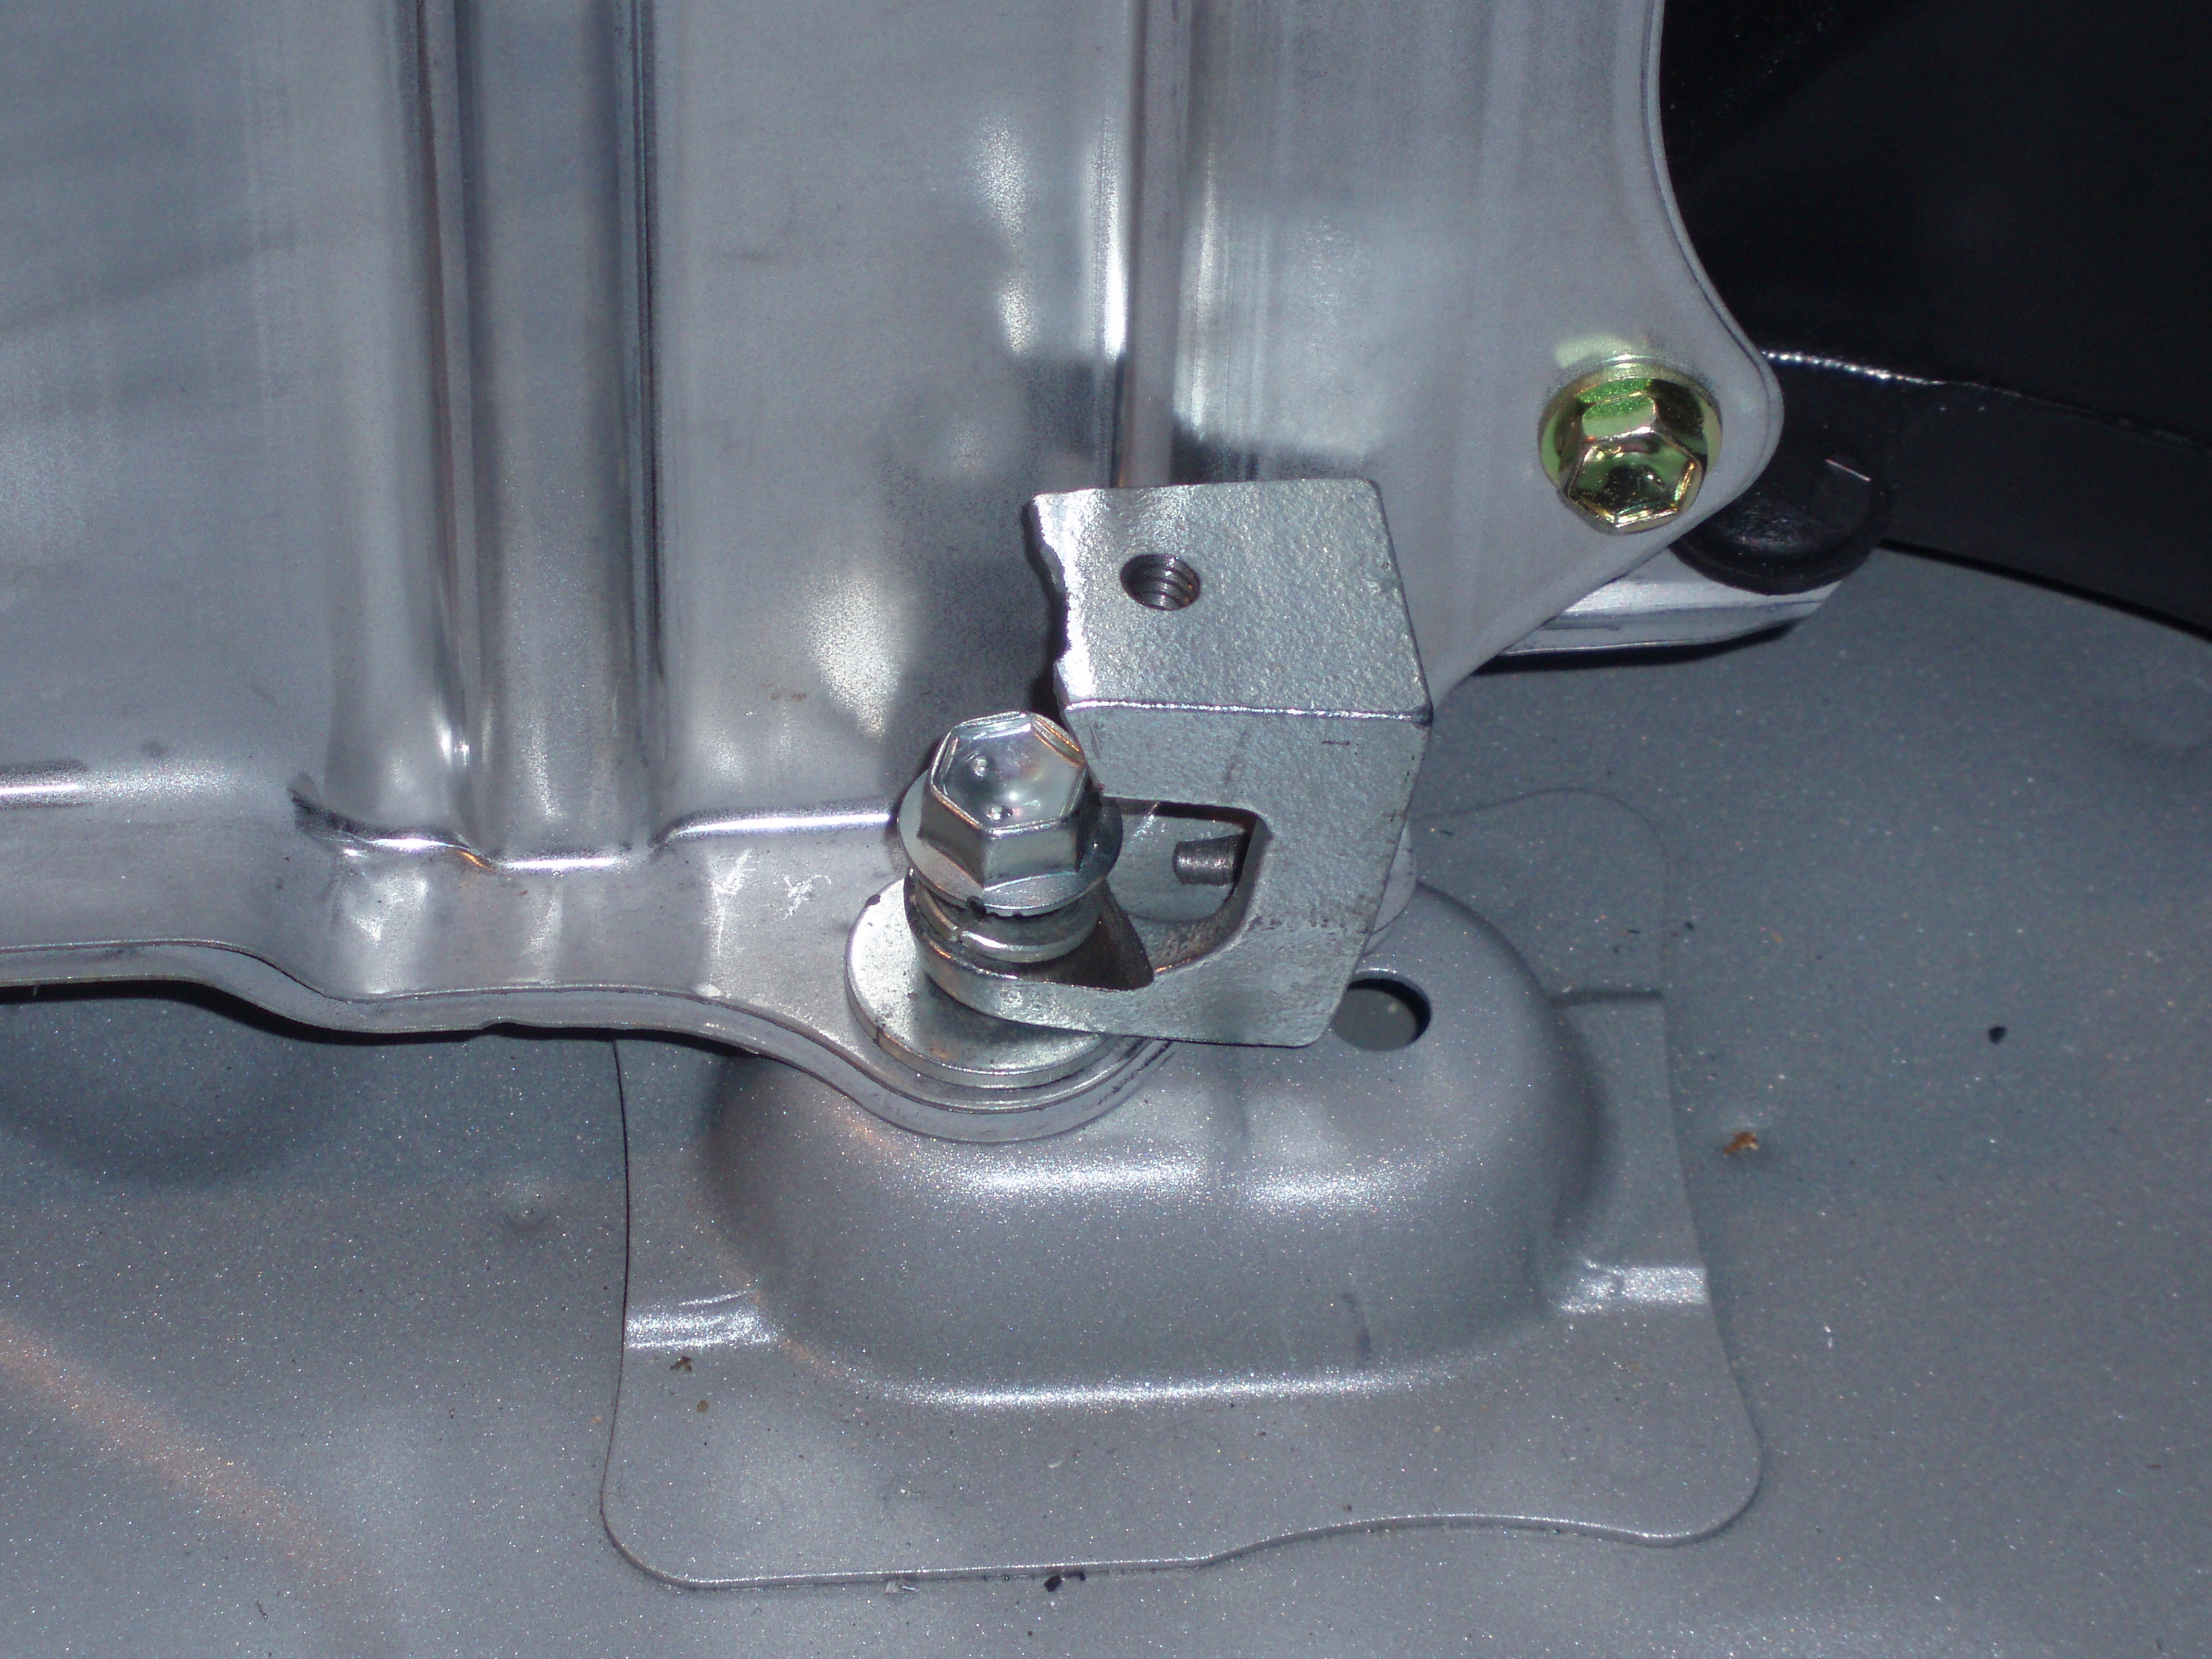
| 04:13, 13 February 2007 | Bracket on OEM Batt screw.JPG (file) |  |
1.42 MB | Bracket on OEM battery mounts I used to hold down new battery box | 1 |
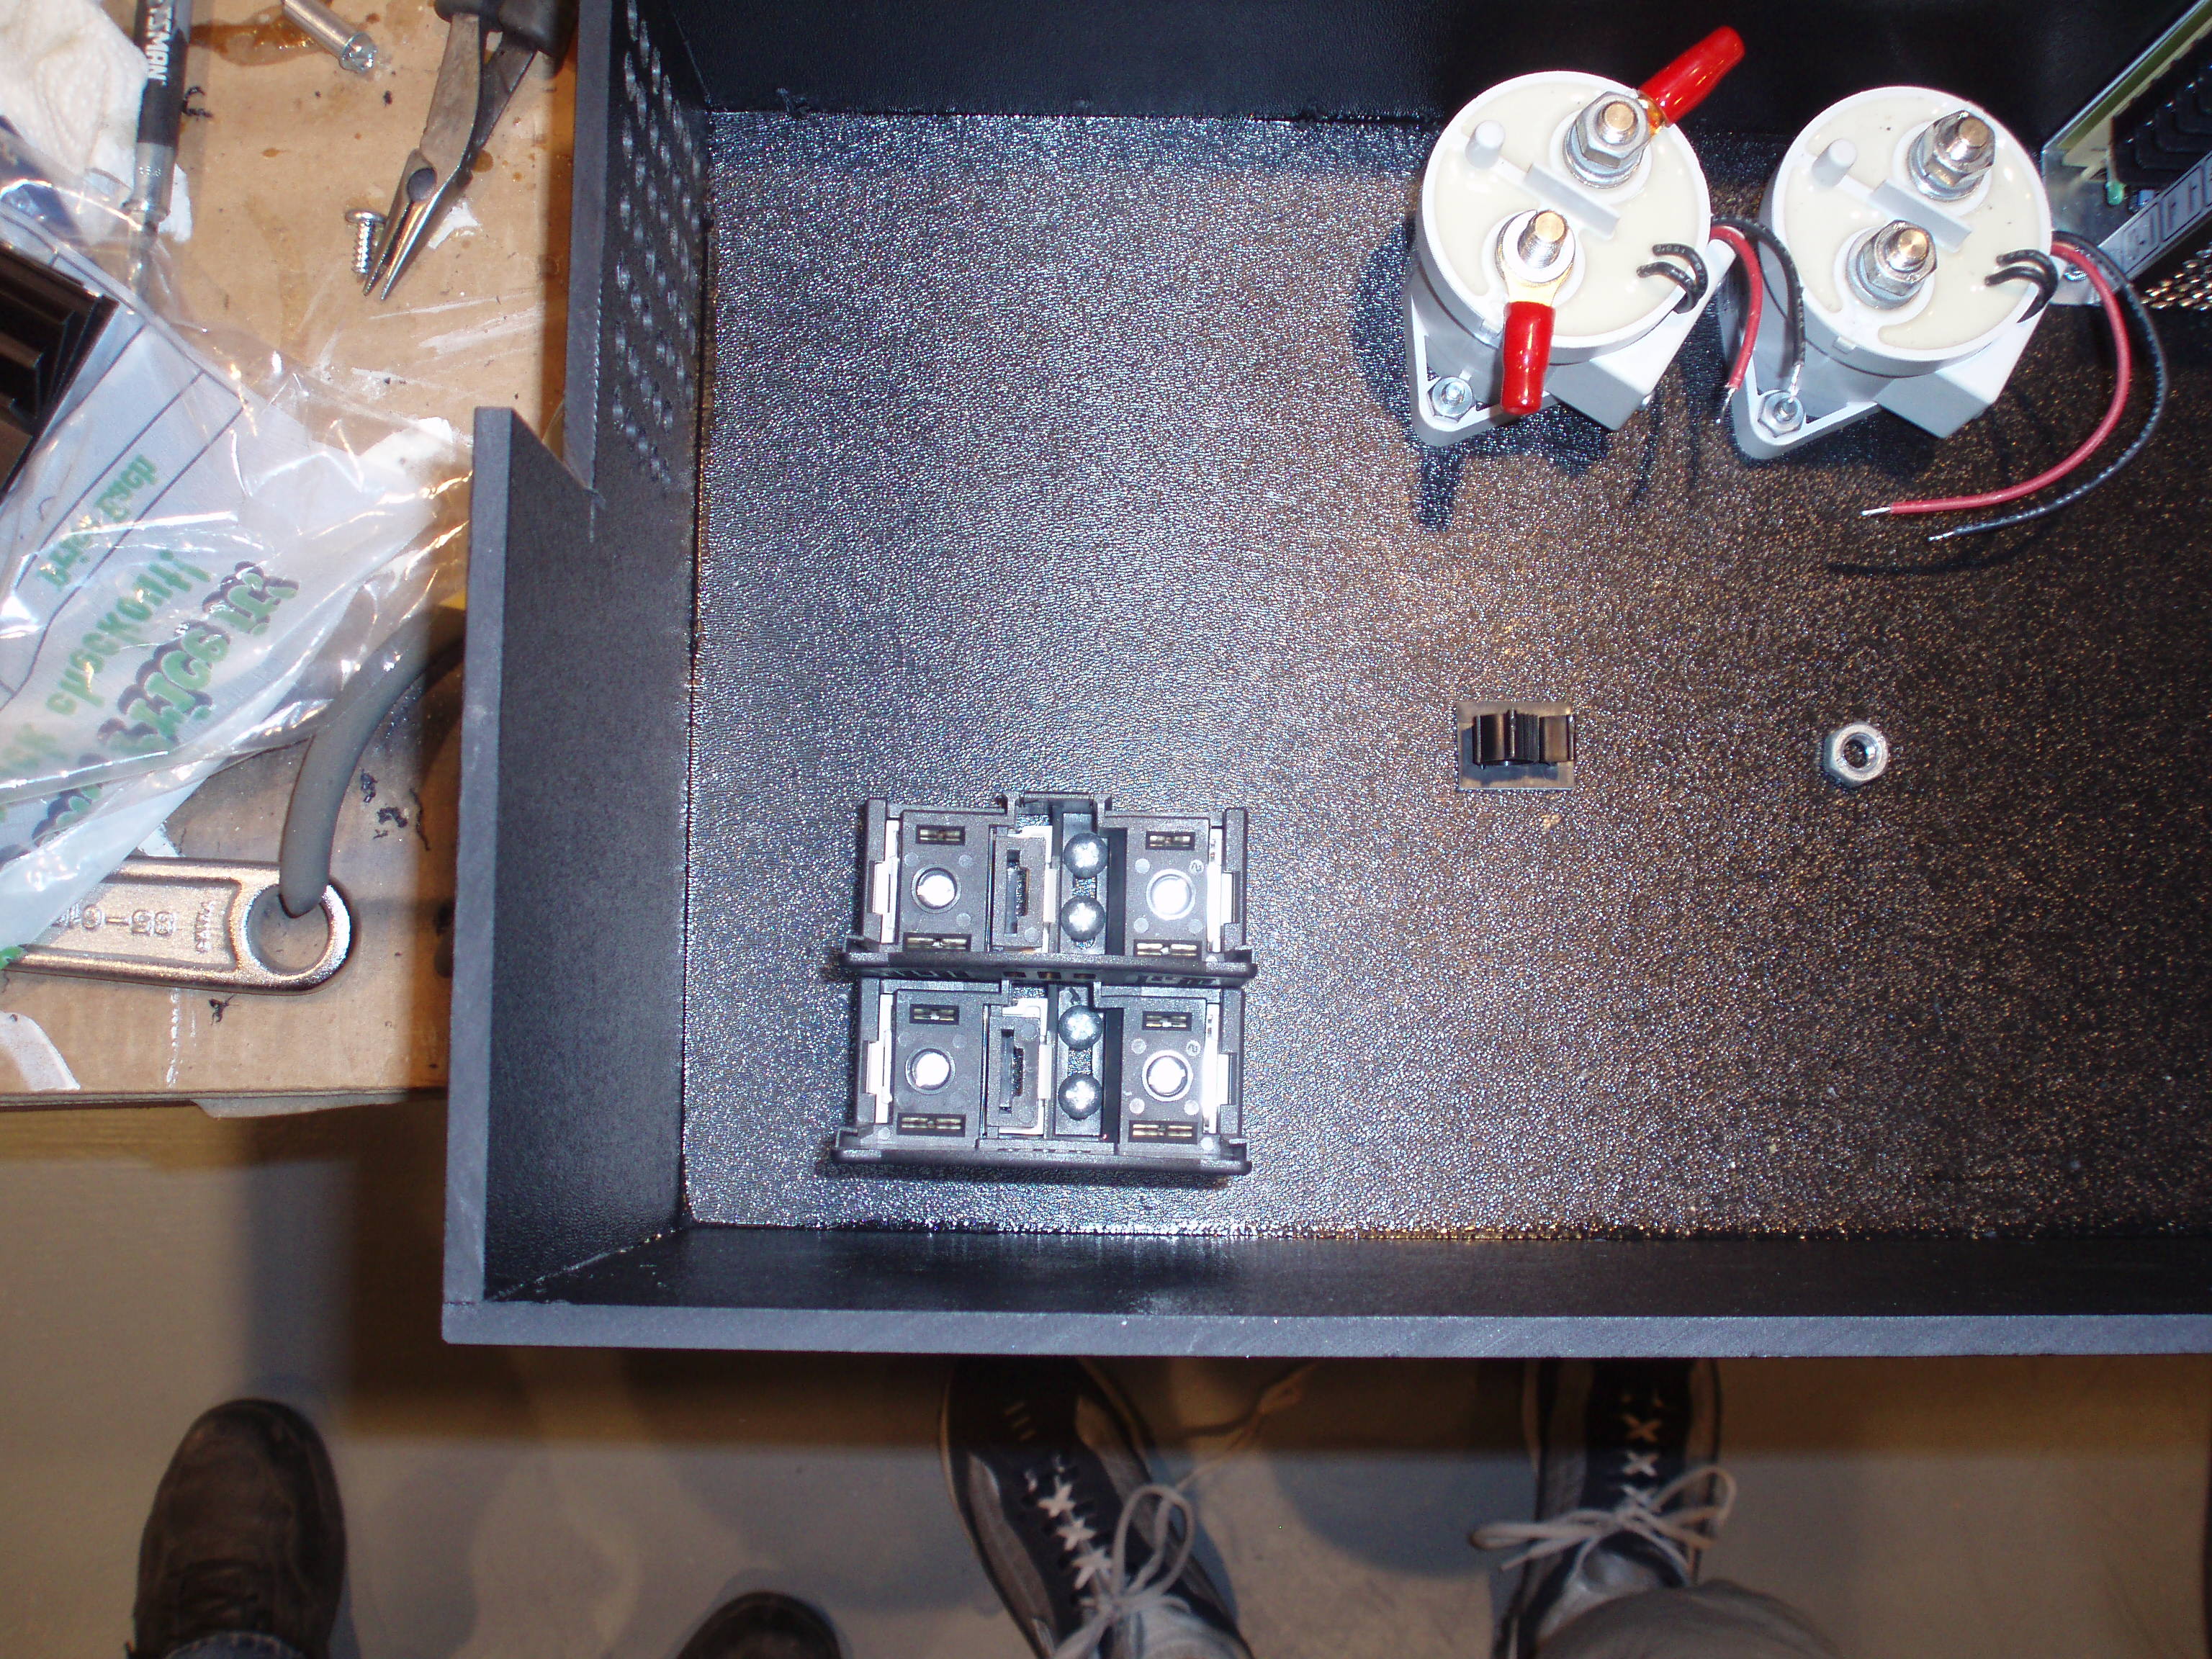
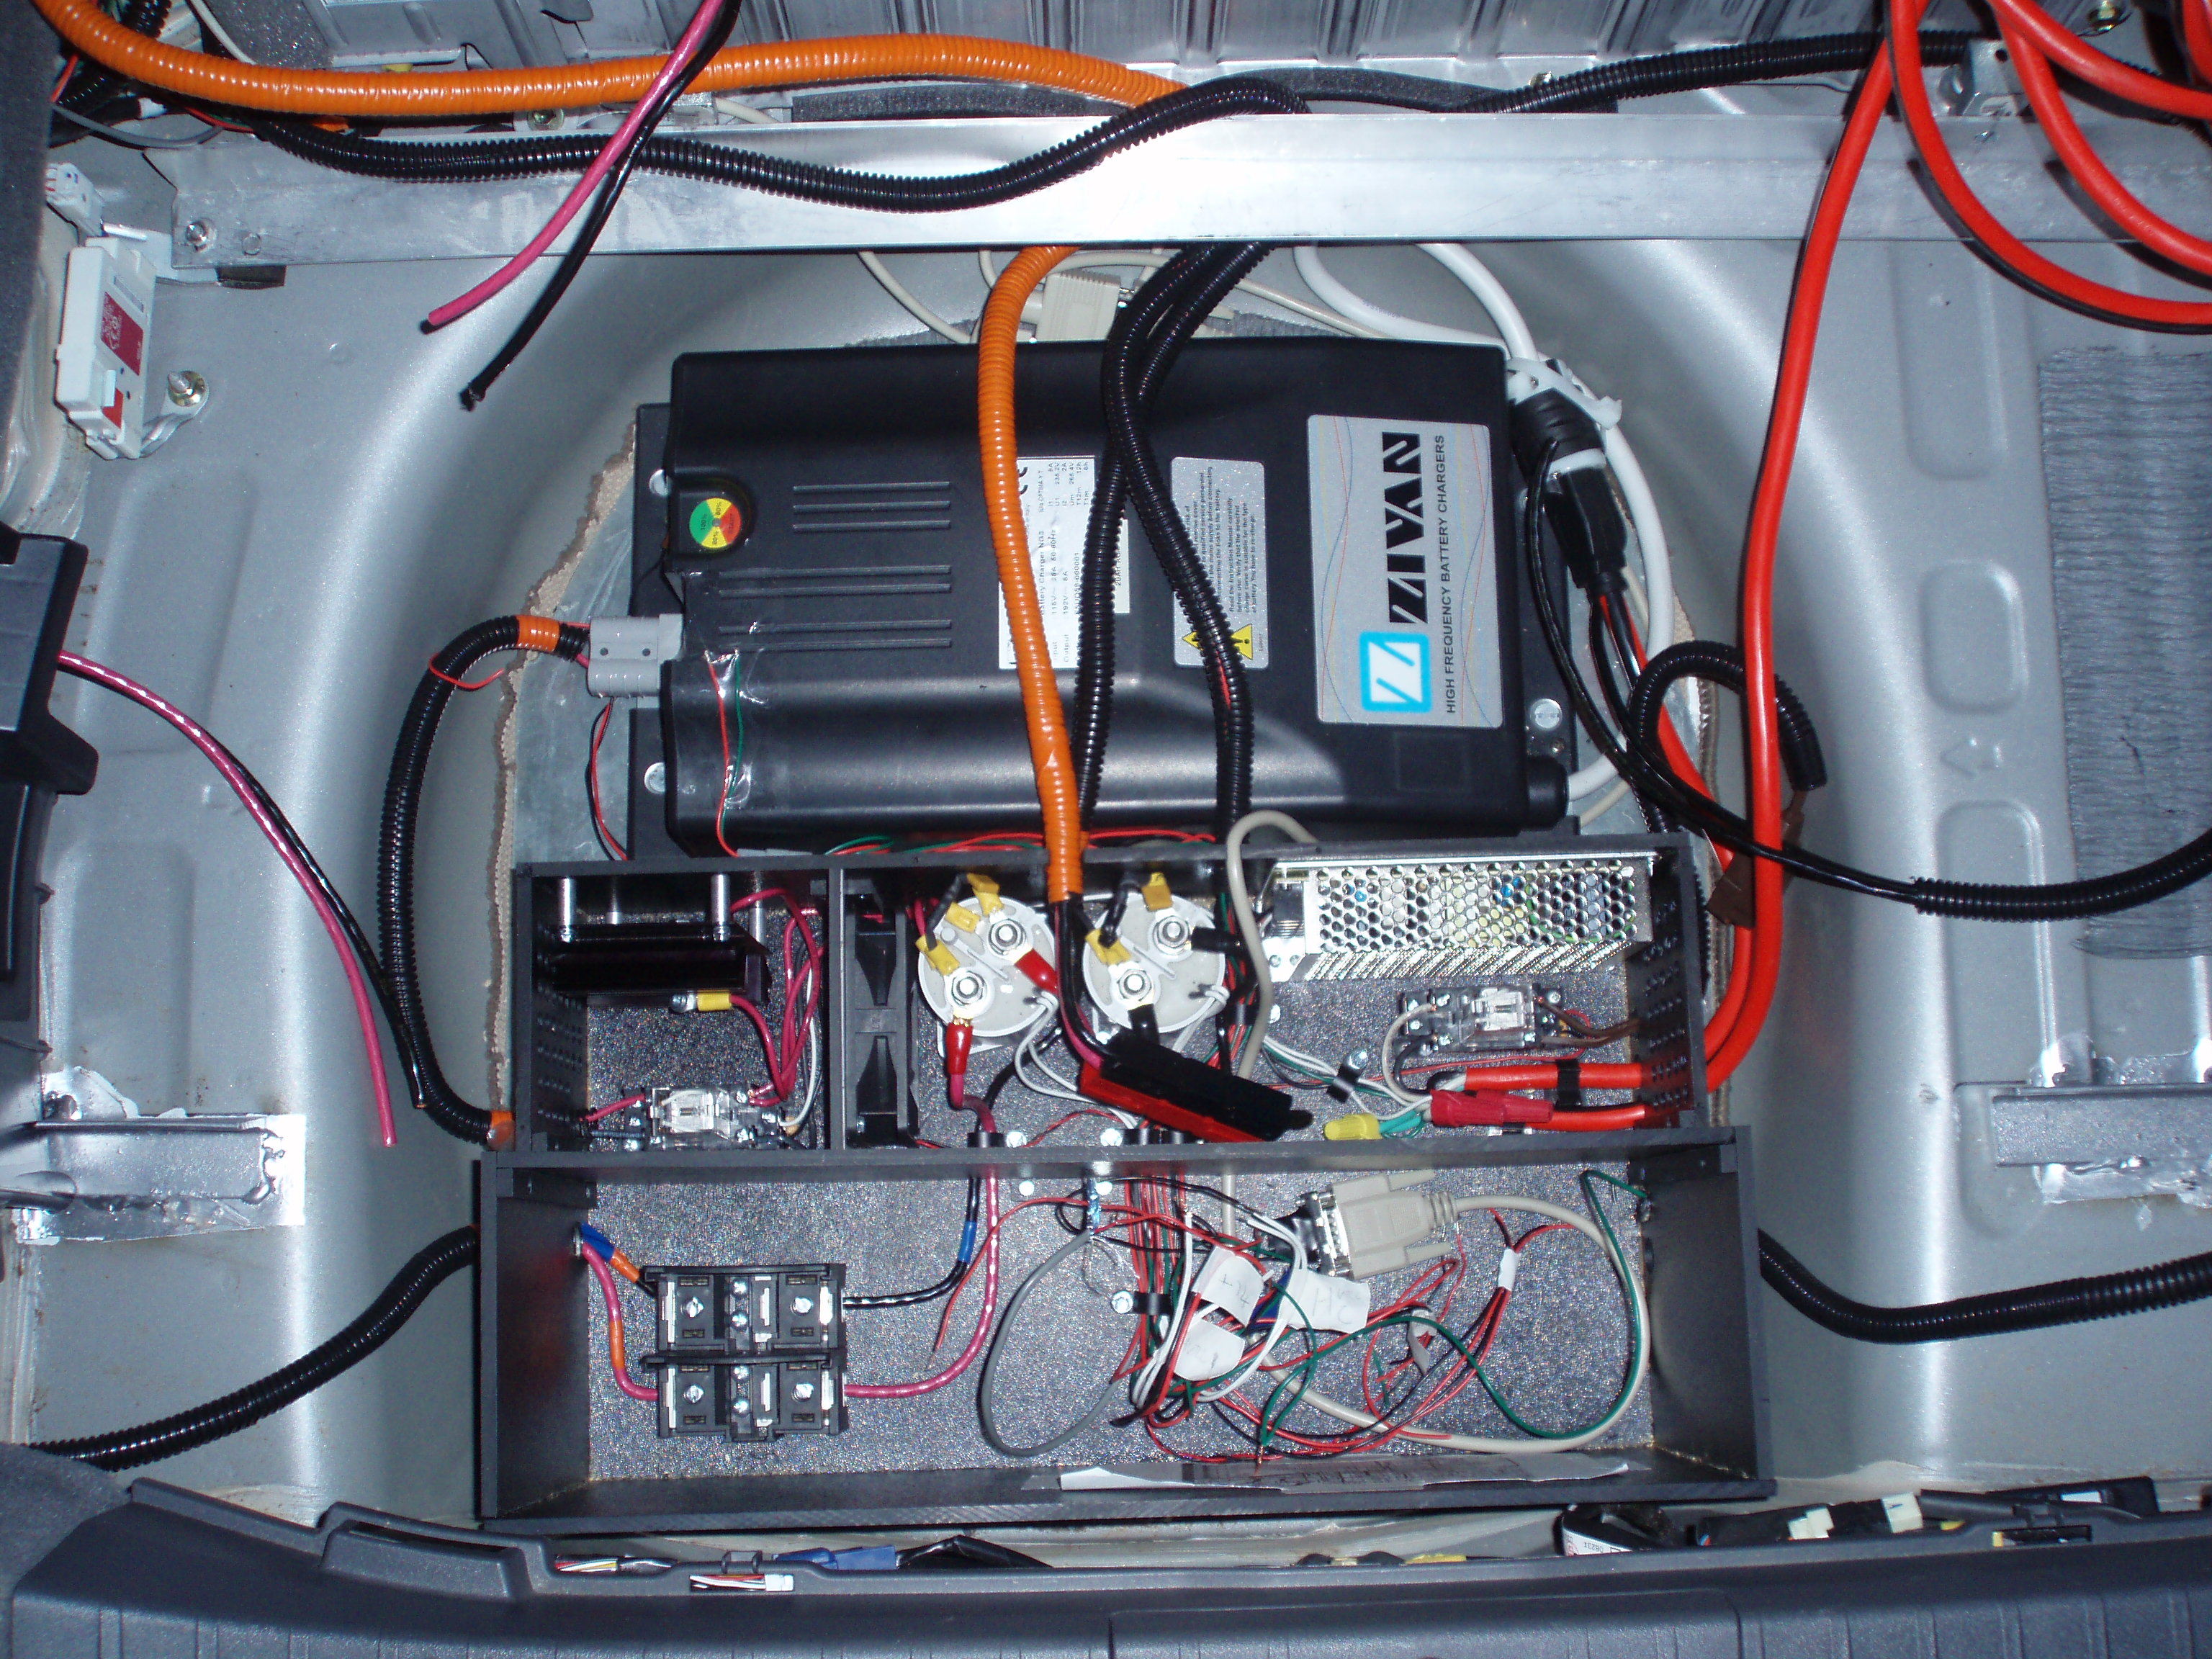
| 01:20, 23 June 2007 | Electronics Box Assembly Mounting Components.jpg (file) |  |
1.42 MB | The electronics box being constructed | 1 |
| 23:17, 26 April 2007 | HVD1 in electronics box.jpg (file) |  |
1.49 MB | Alt. mounting method, shows HVD1 wired up in the electronics box | 1 |
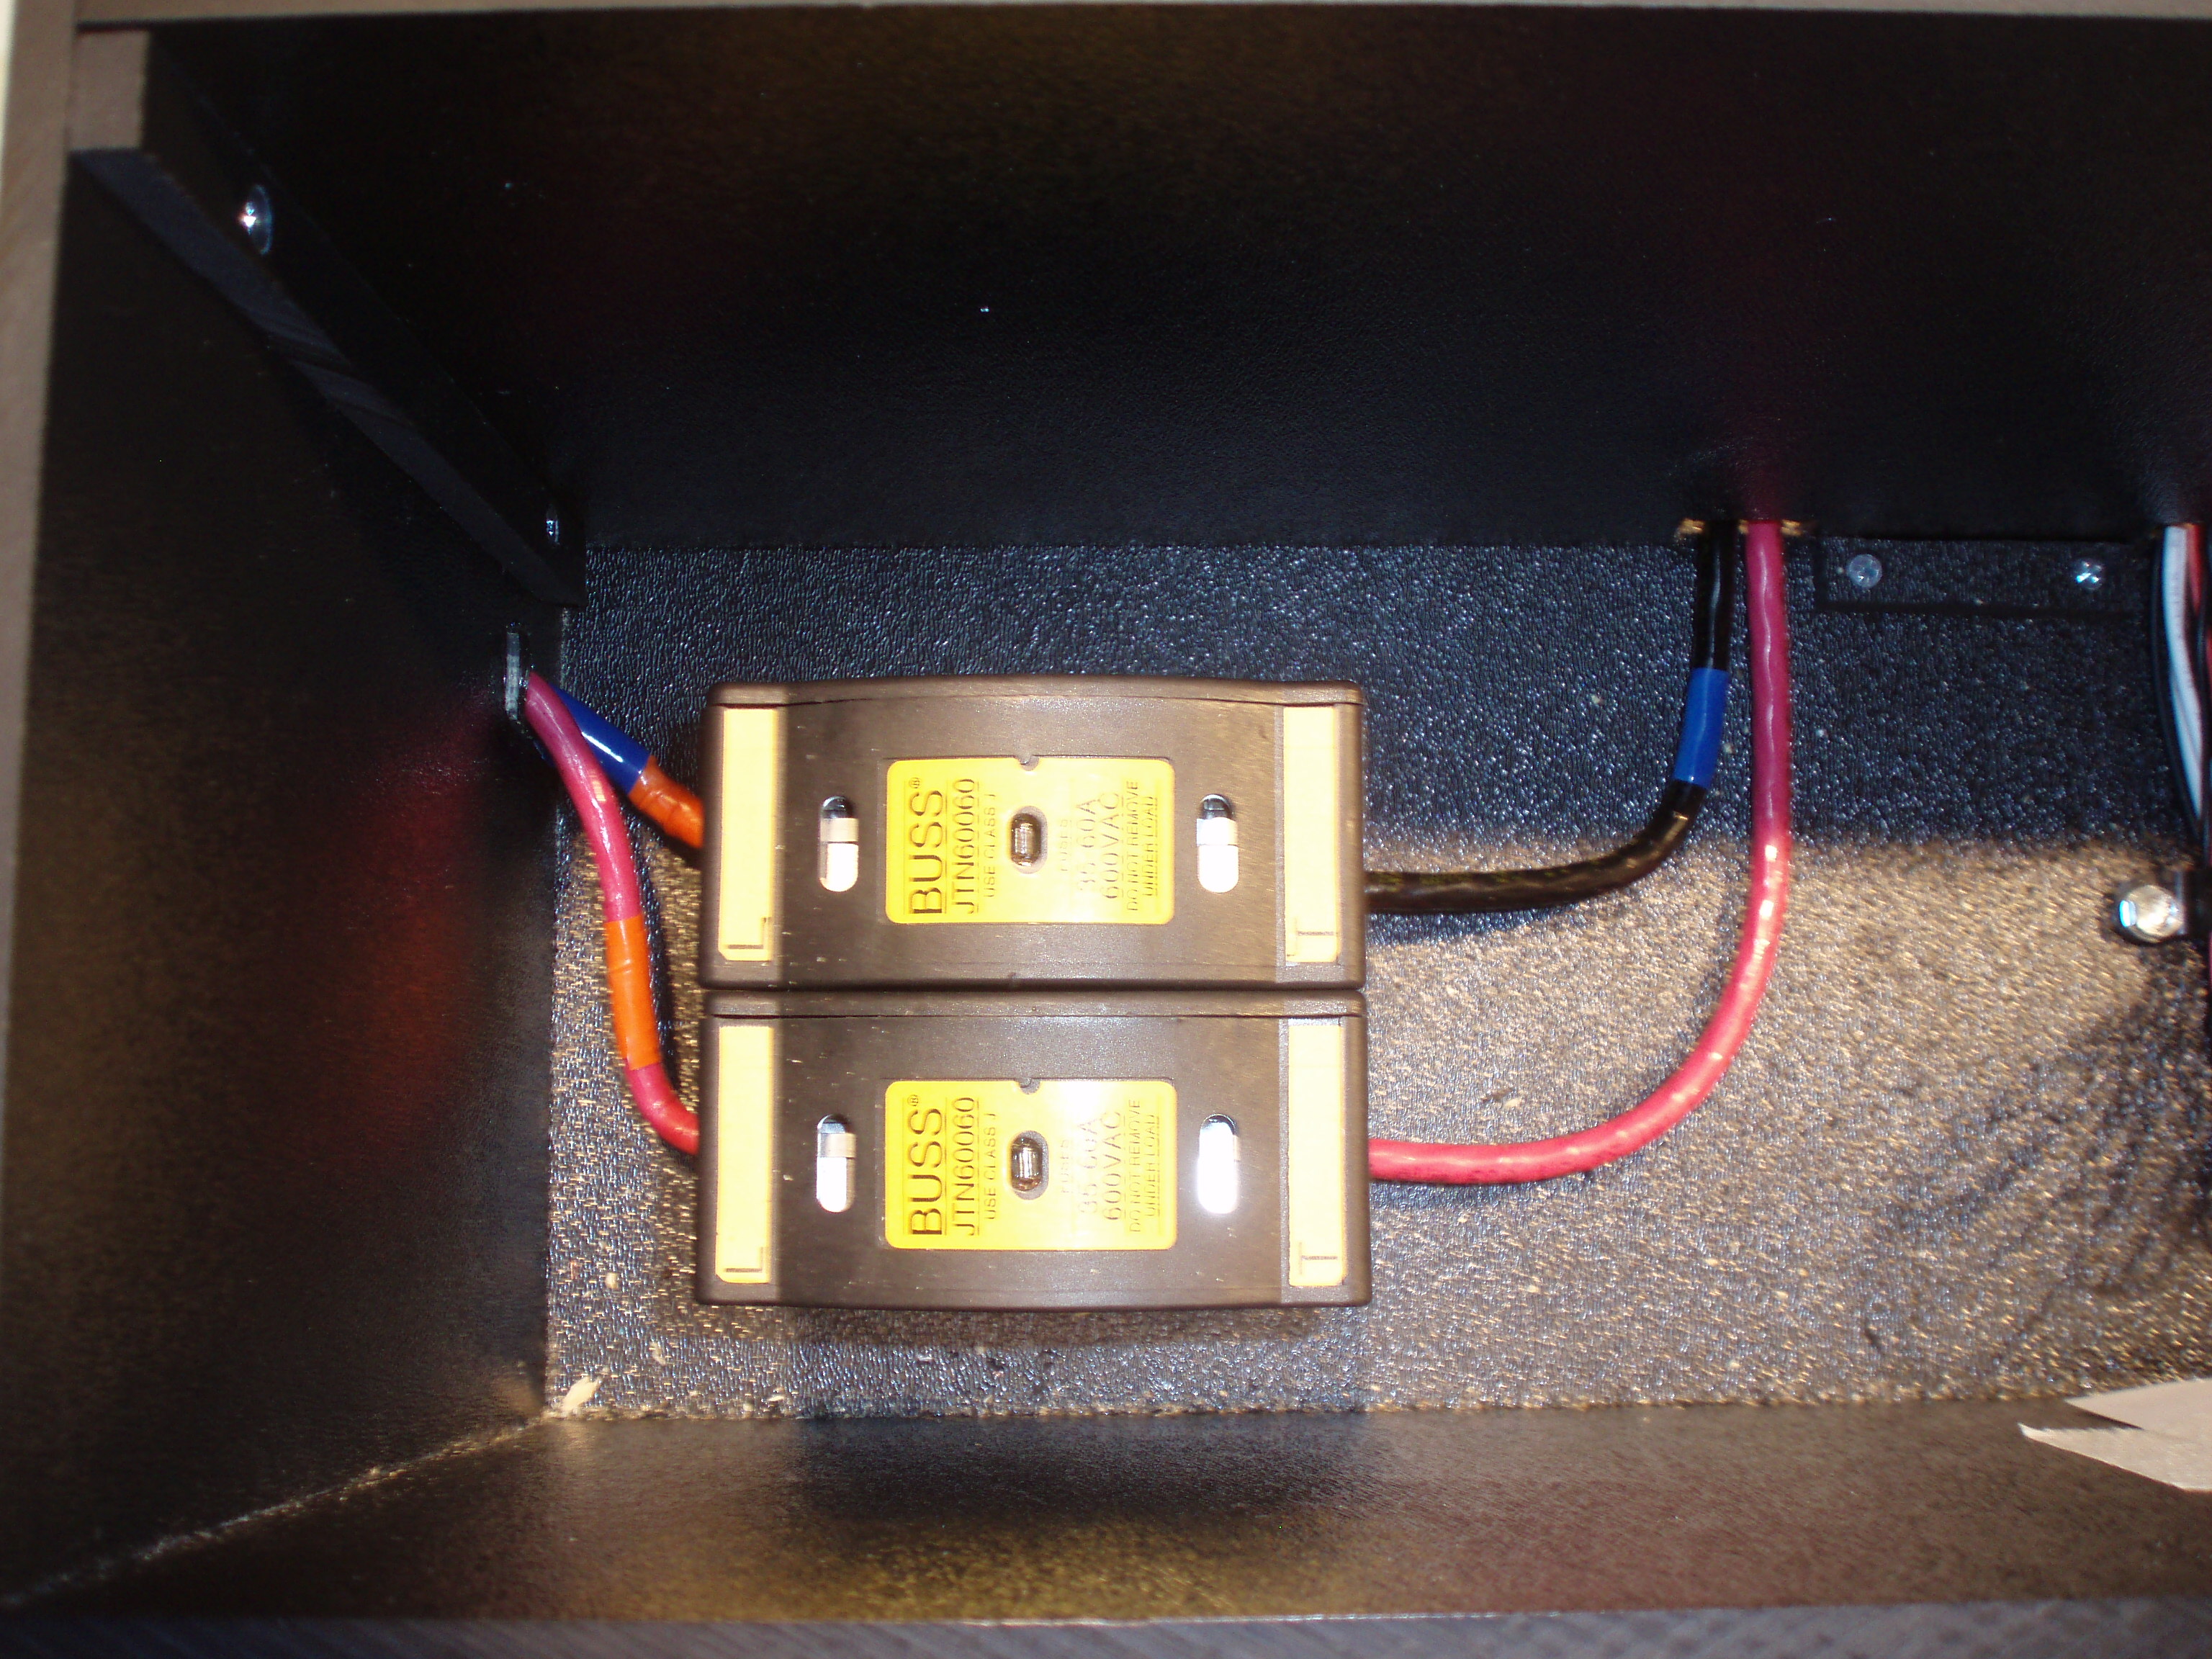
| 23:30, 26 April 2007 | Fuses in electronics box.jpg (file) |  |
1.5 MB | Fuses in the electronics box. | 1 |
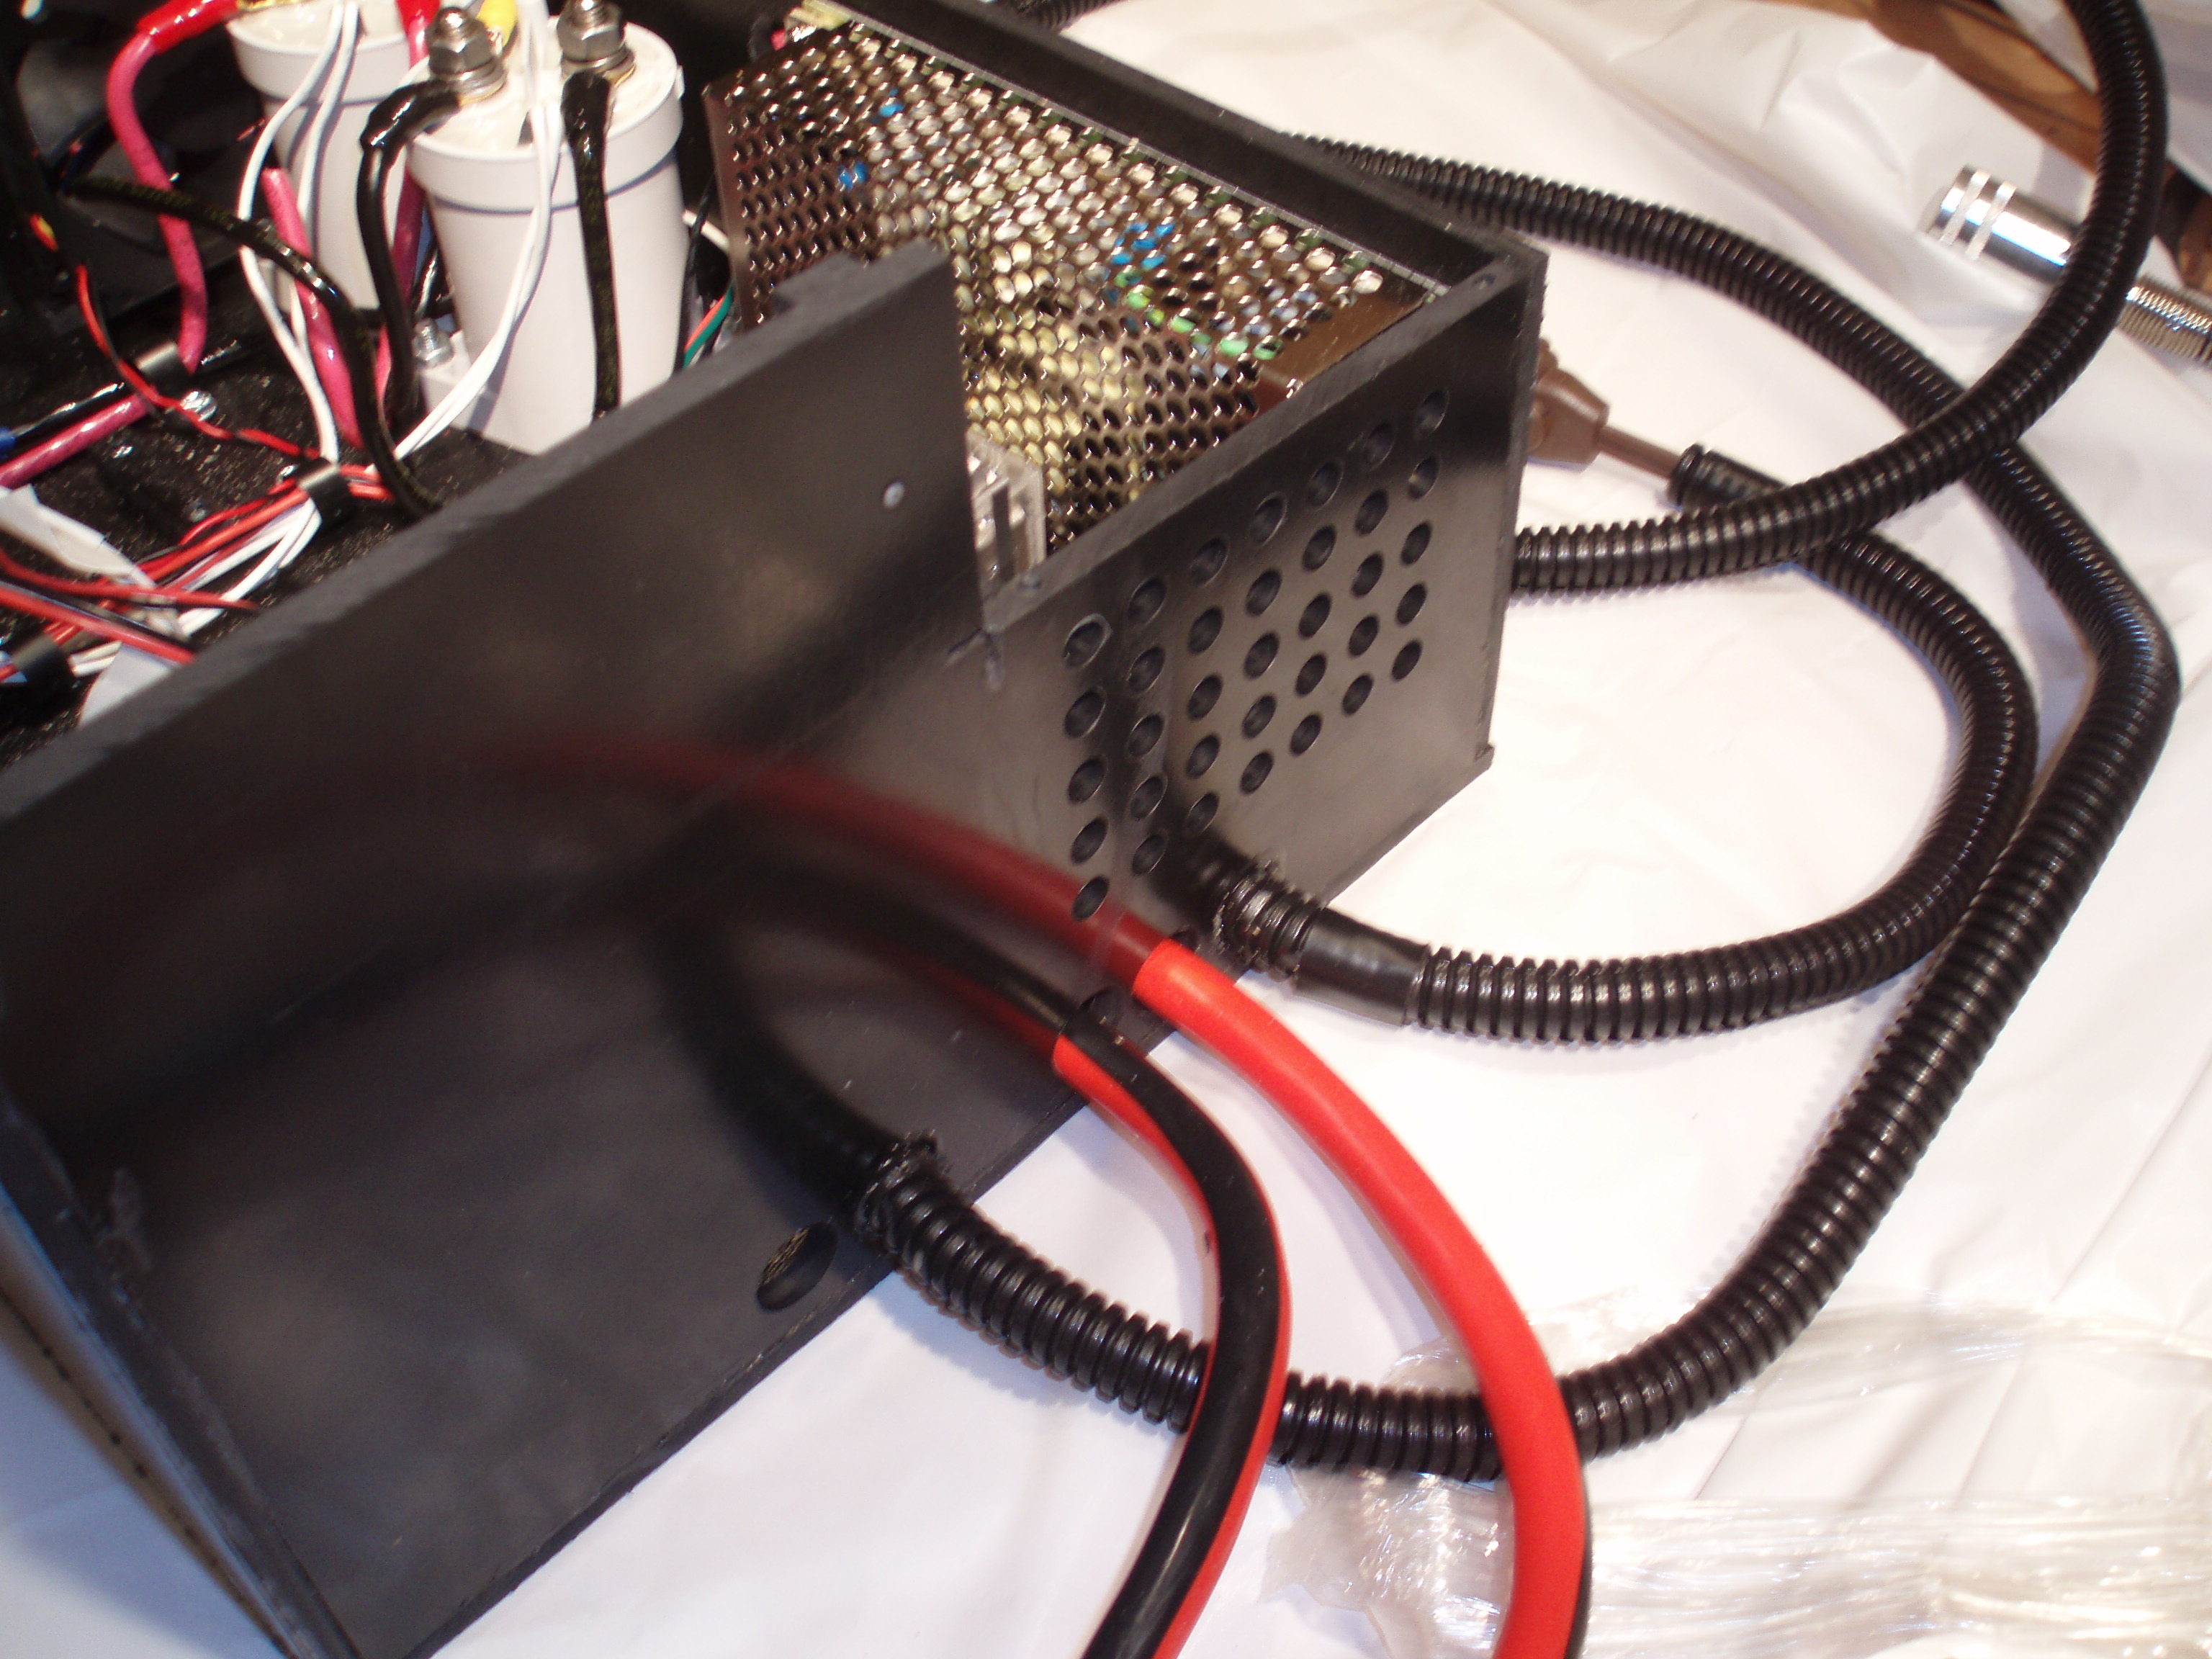
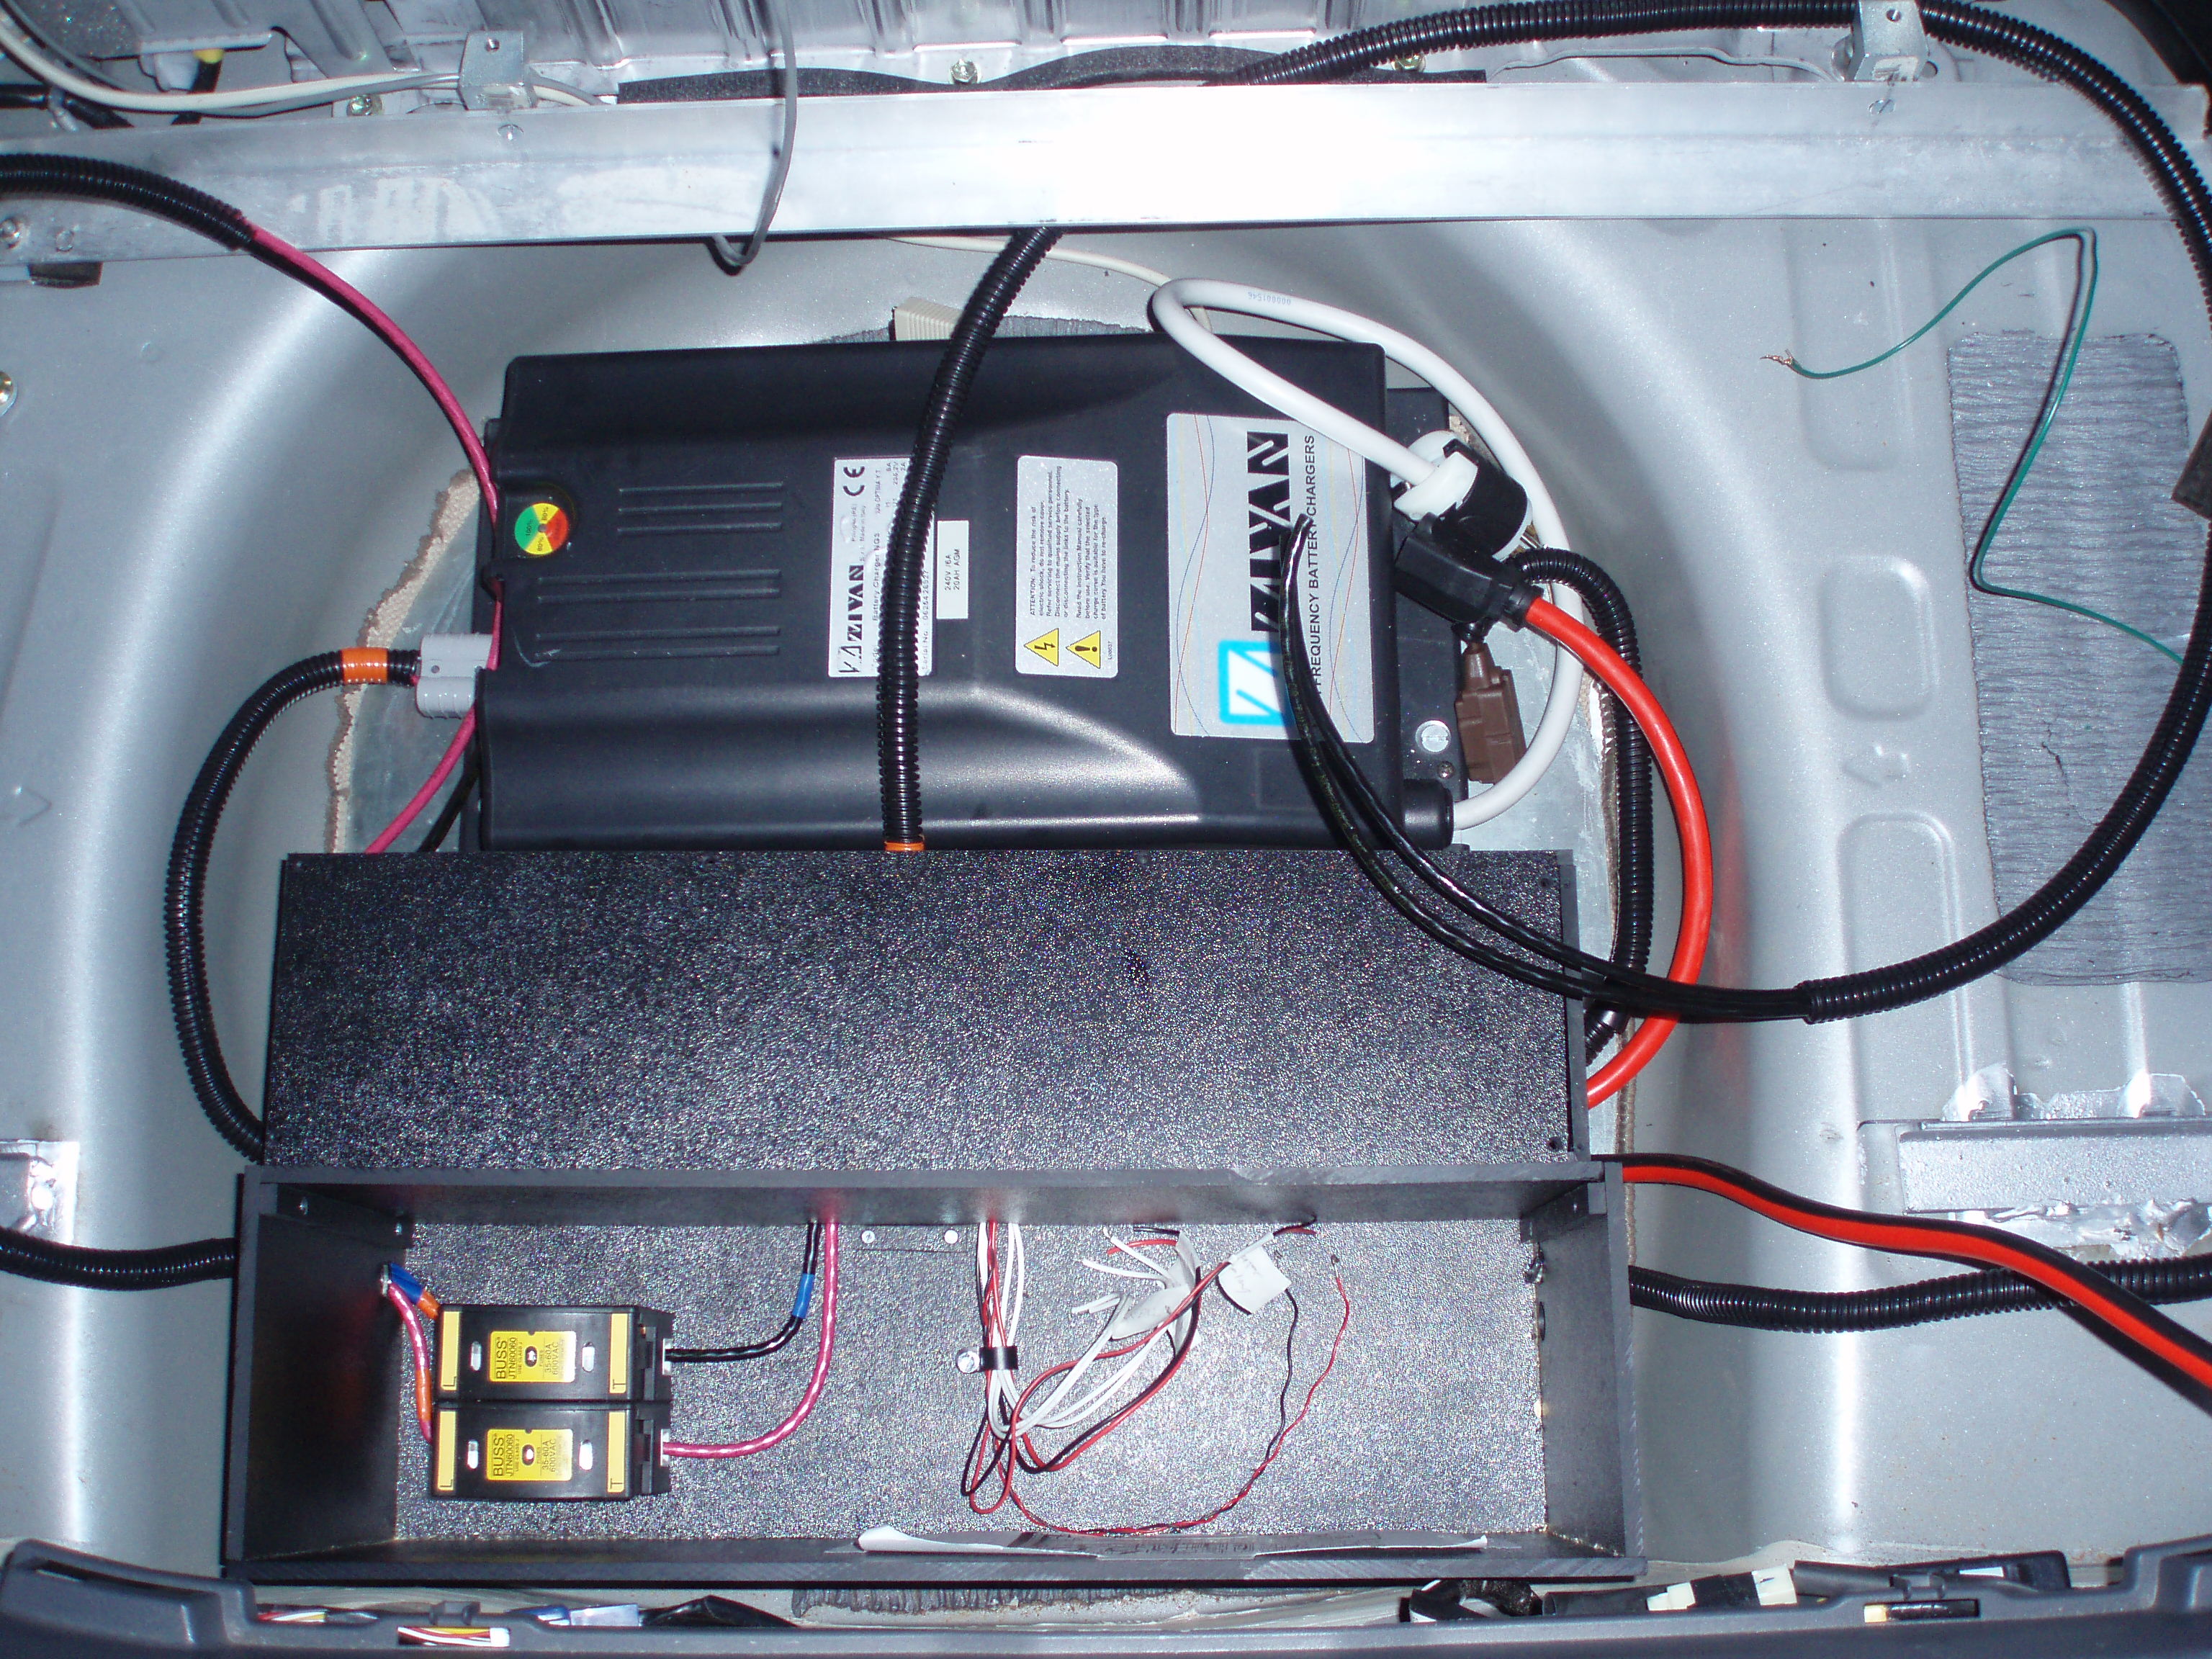
| 23:16, 26 April 2007 | Electronics Box And Charger in Tire Well 2.jpg (file) |  |
1.51 MB | Alt. mounting method, electronics box and charger in tire well with top on HV section of electronics box. | 1 |
| 23:13, 26 April 2007 | Electronics Box And Charger in Tire Well.jpg (file) |  |
1.55 MB | Alt. mounting method lower level complete. | 1 |