|
General Disclaimer: (HV) (DC) injury or death hazard, use at your own risk, may void warranty. |
Uploads by Cewert
Jump to navigation
Jump to search
This special page shows all uploaded files.
| Date | Name | Thumbnail | Size | Description | Versions |
|---|---|---|---|---|---|
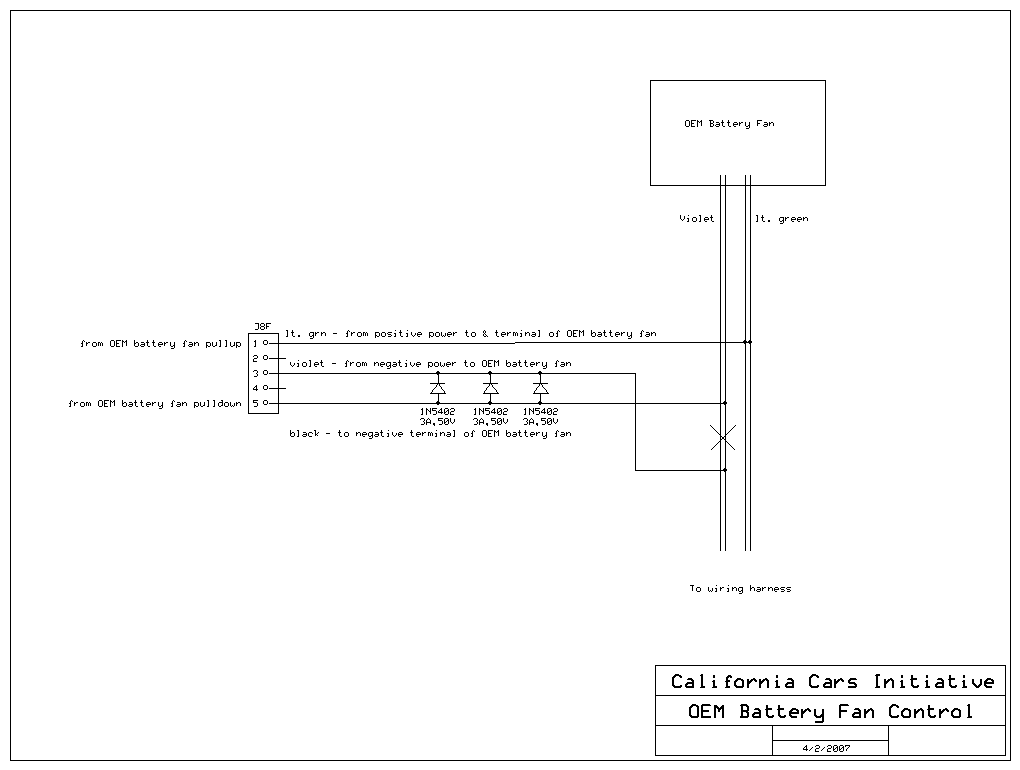
| 03:00, 25 April 2007 | EAA-PHEV-PRIUS-FanCtlSchematic.zip (file) | 3 KB | For Control Board Version V4.2_070217 | 1 | |
| 14:24, 19 January 2008 | EAA-PHEV-PRIUS-FanCtlSchematic.png (file) |  |
3 KB | 2 | |
| 17:50, 14 September 2007 | EAA-PHEV-PRIUS-HVPartsList.zip (file) | 7 KB | Electrical, Interconnects and High Voltage parts | 1 | |
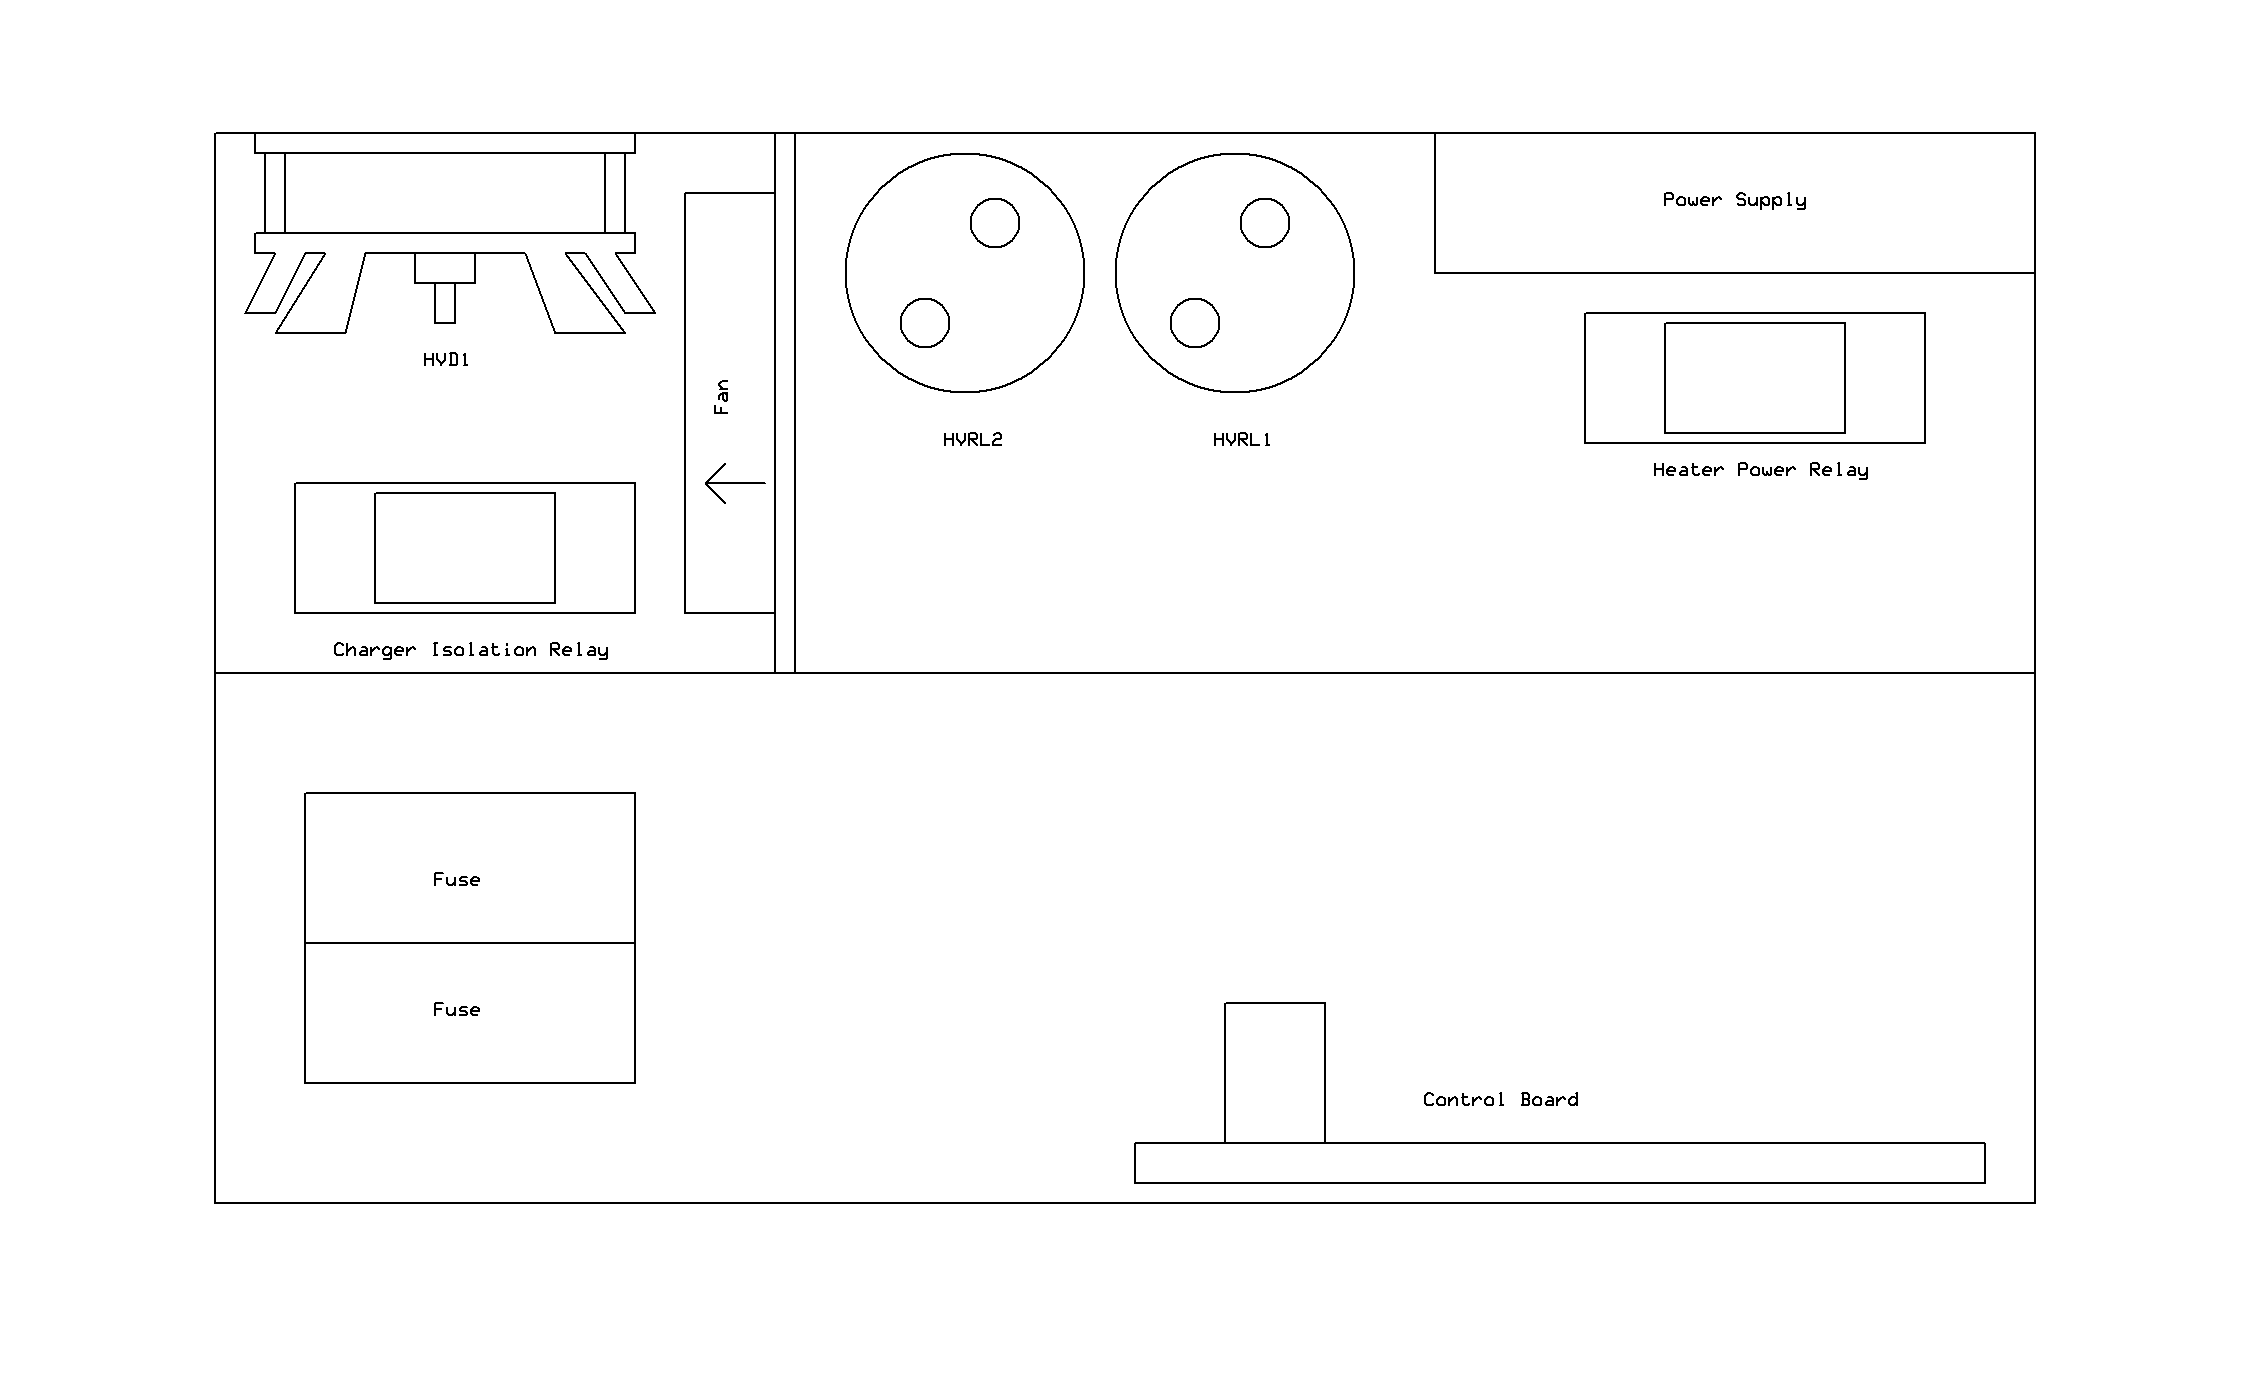
| 15:36, 16 June 2007 | Electronics Box Alternative.png (file) |  |
10 KB | First version of the electronics box layout | 1 |
| 13:01, 4 October 2007 | Control Specs.zip (file) | 16 KB | 1 | ||
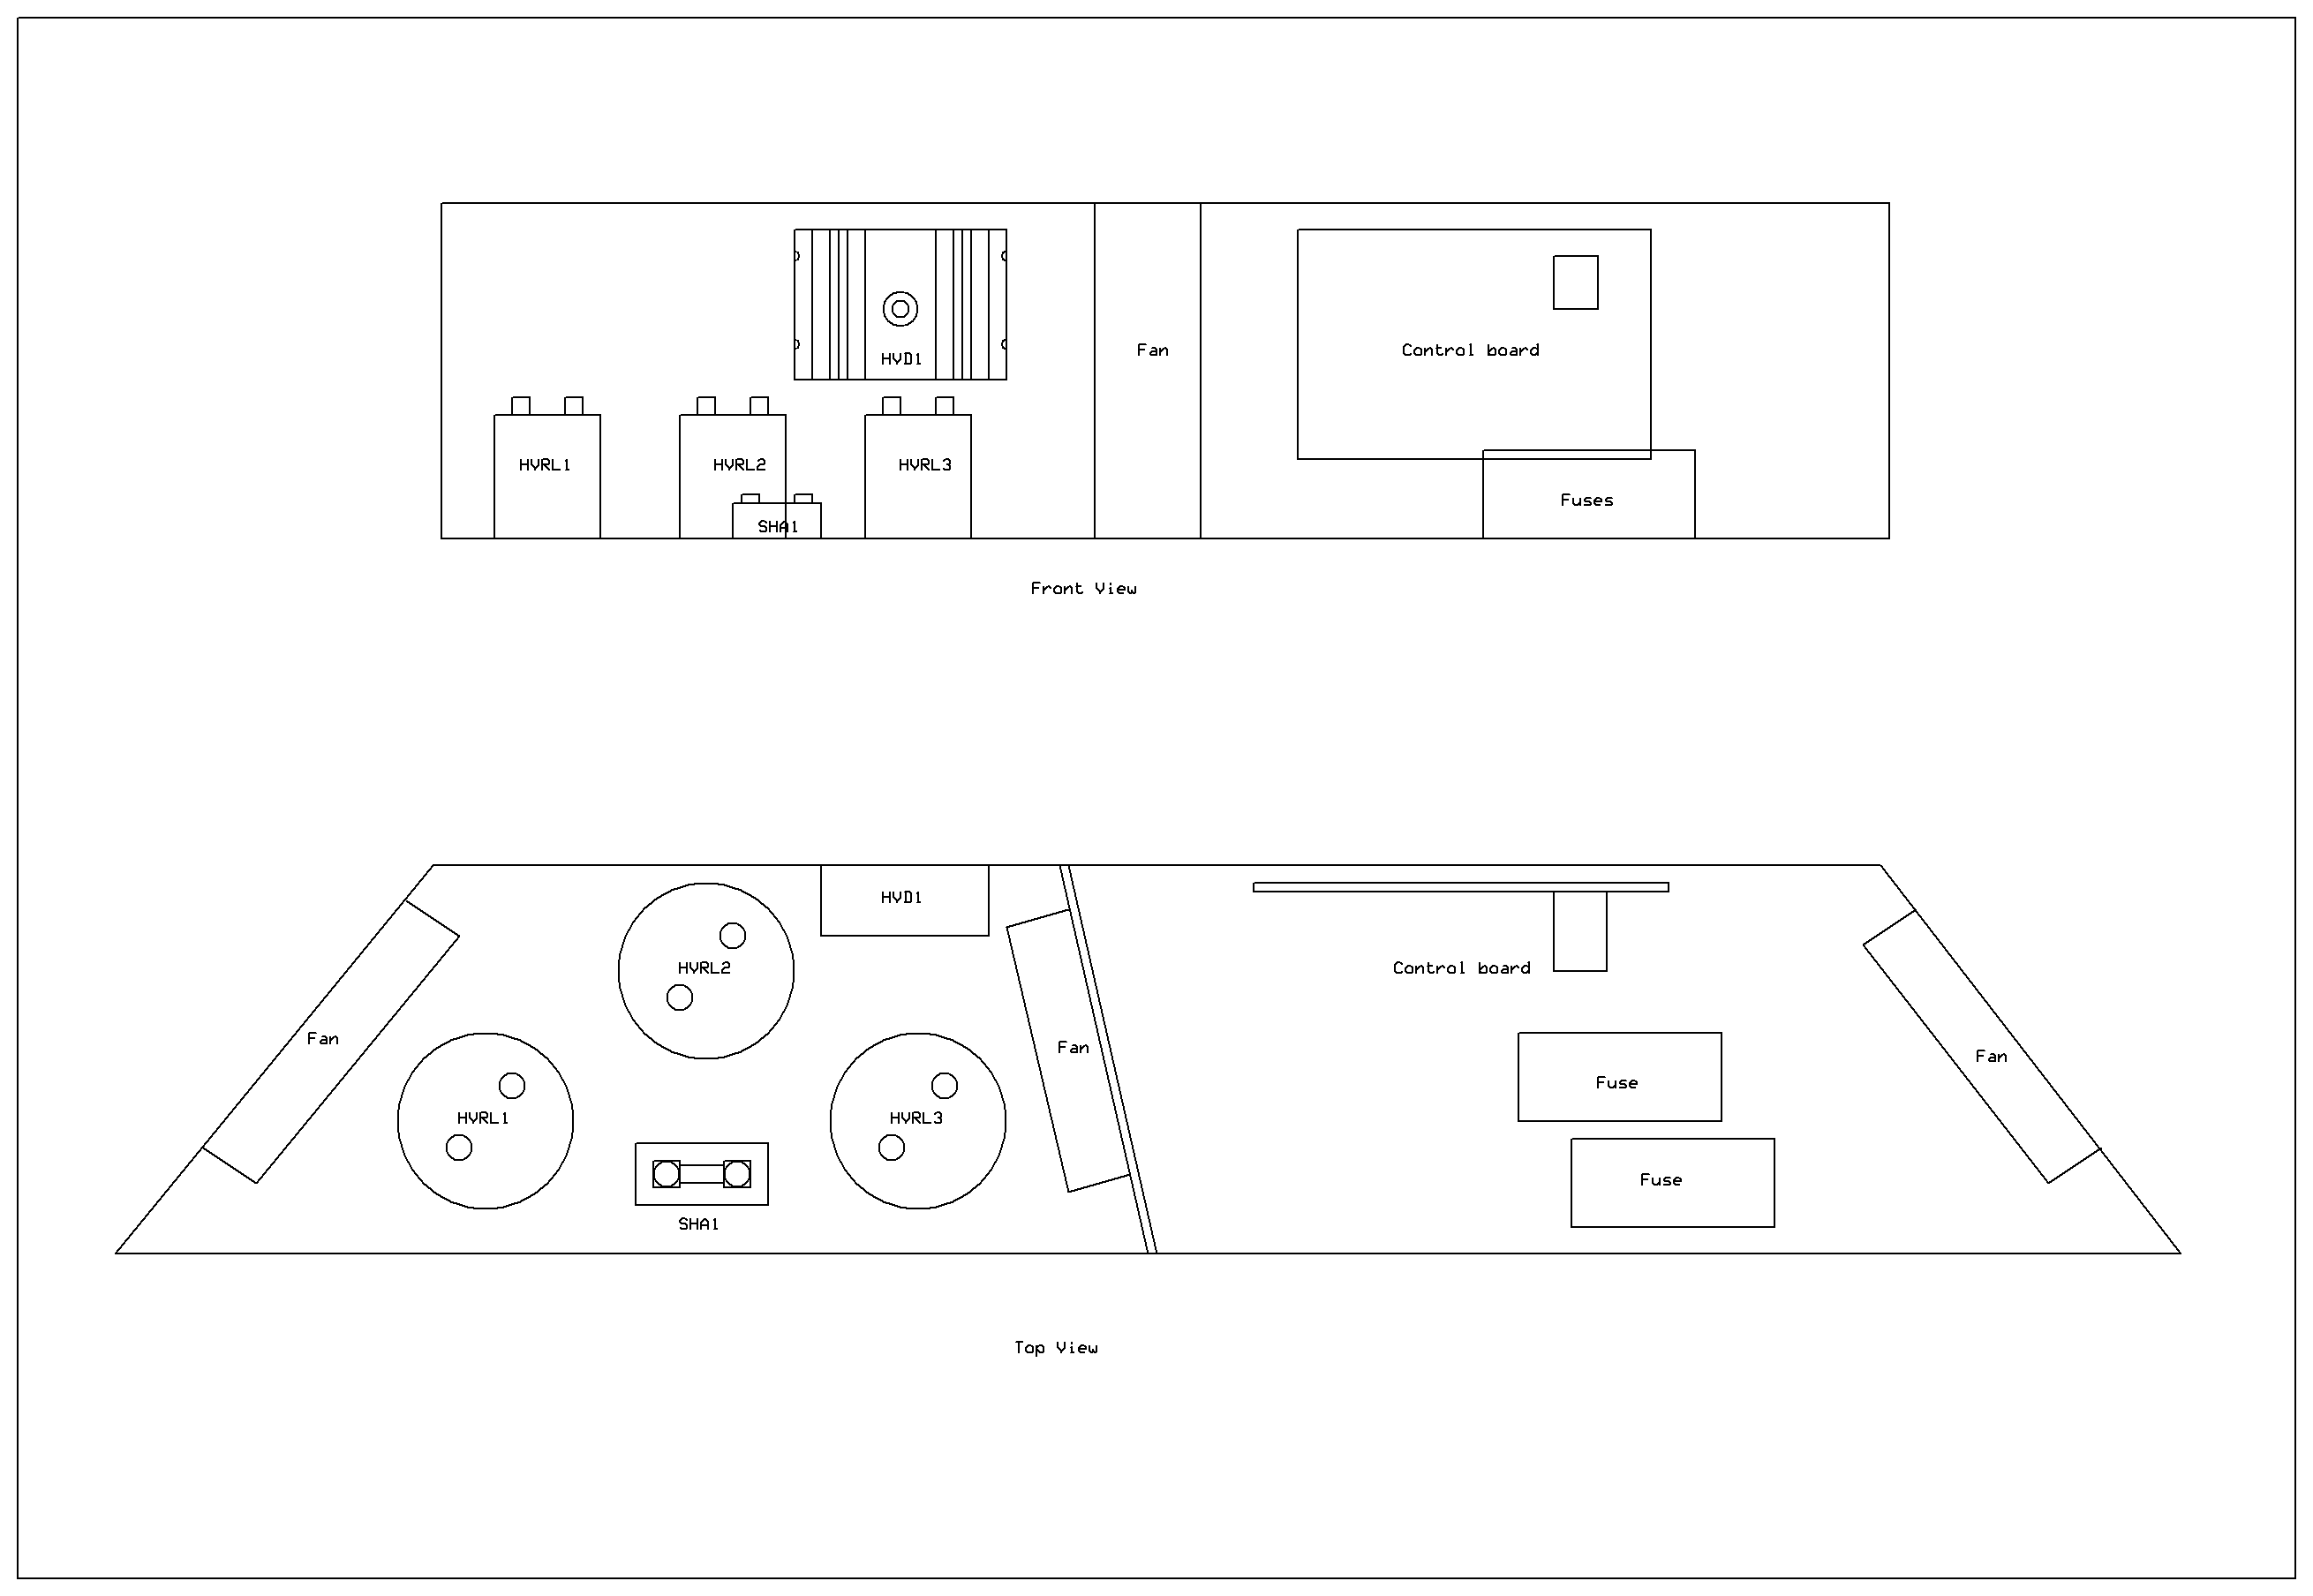
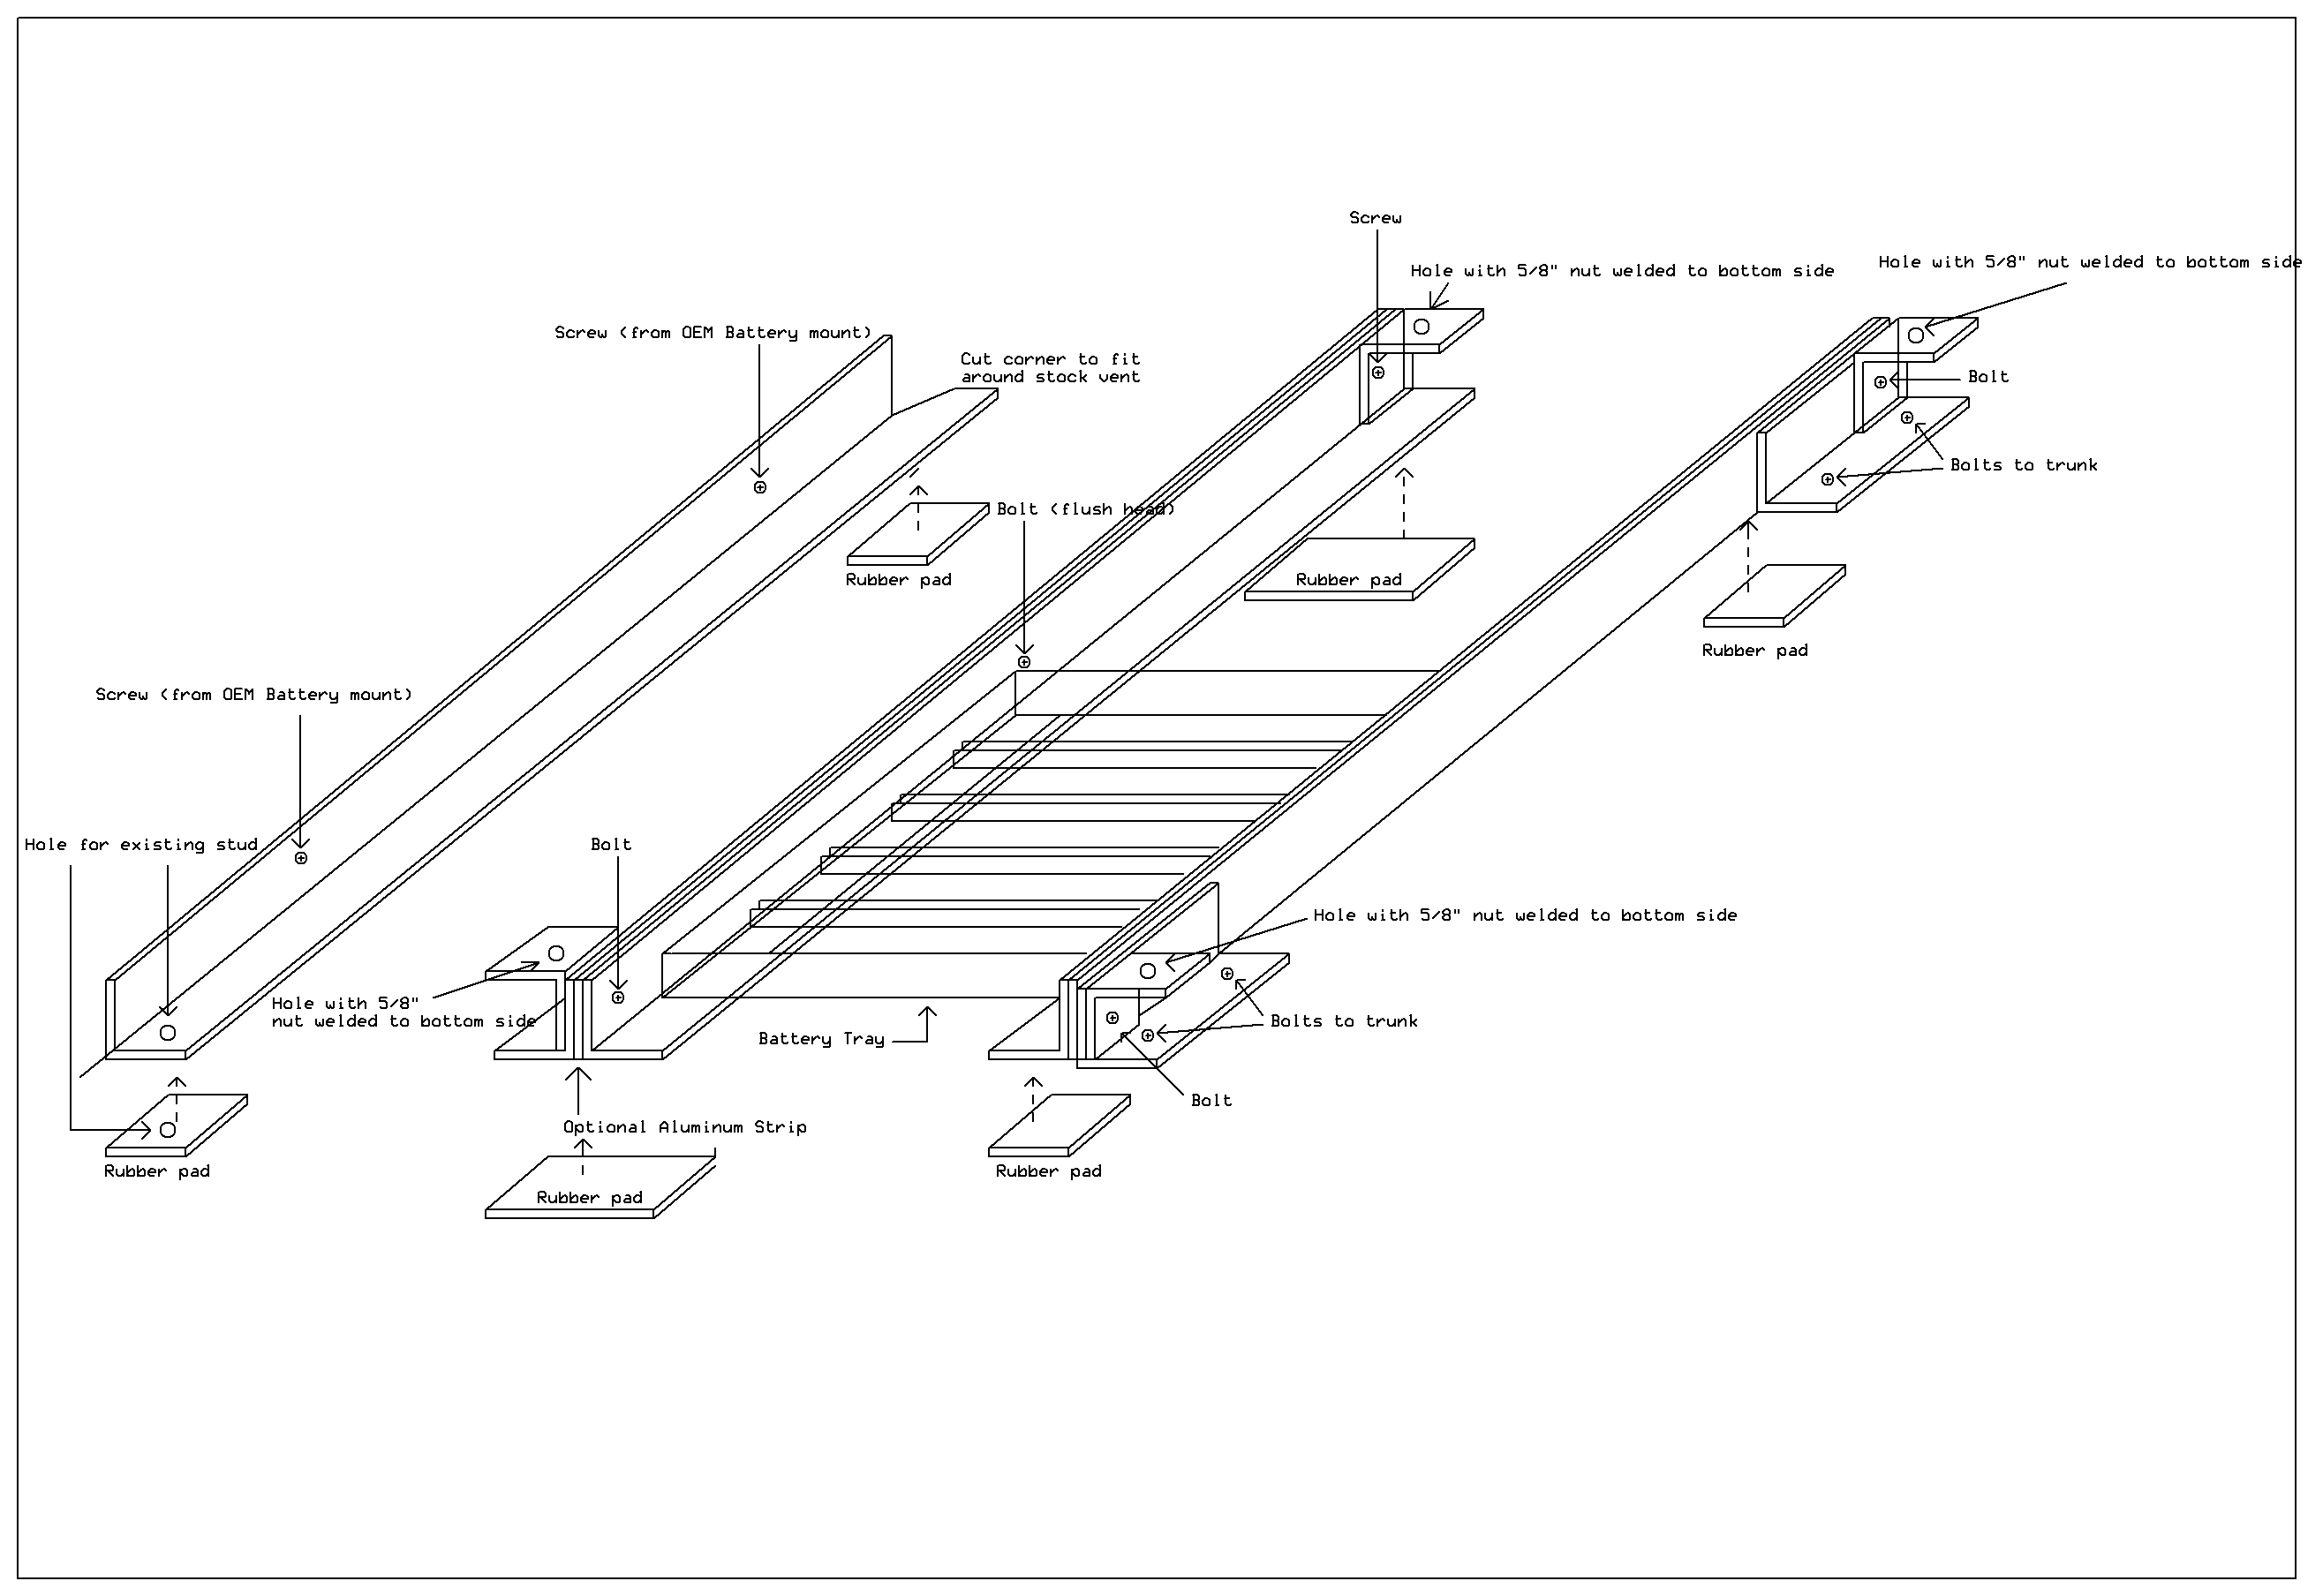
| 01:48, 10 June 2007 | Electronics Tray Classic.png (file) |  |
18 KB | Diagram of the electronics tray (Classic mouting method) | 1 |
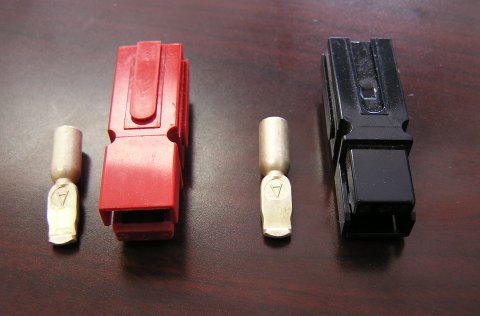
| 22:25, 28 March 2007 | PP75 Connectors.jpg (file) |  |
30 KB | PowerPole 75 amp connector housings and 8AWG crimps | 1 |
| 19:52, 28 September 2007 | 076610.1004-PP2-1.PDF (file) | 32 KB | hinged box designs | 1 | |
| 01:11, 10 June 2007 | Alt Mounting Diagram.png (file) |  |
34 KB | Small revisions | 2 |
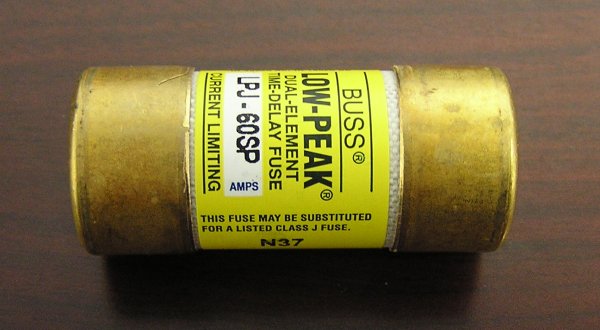
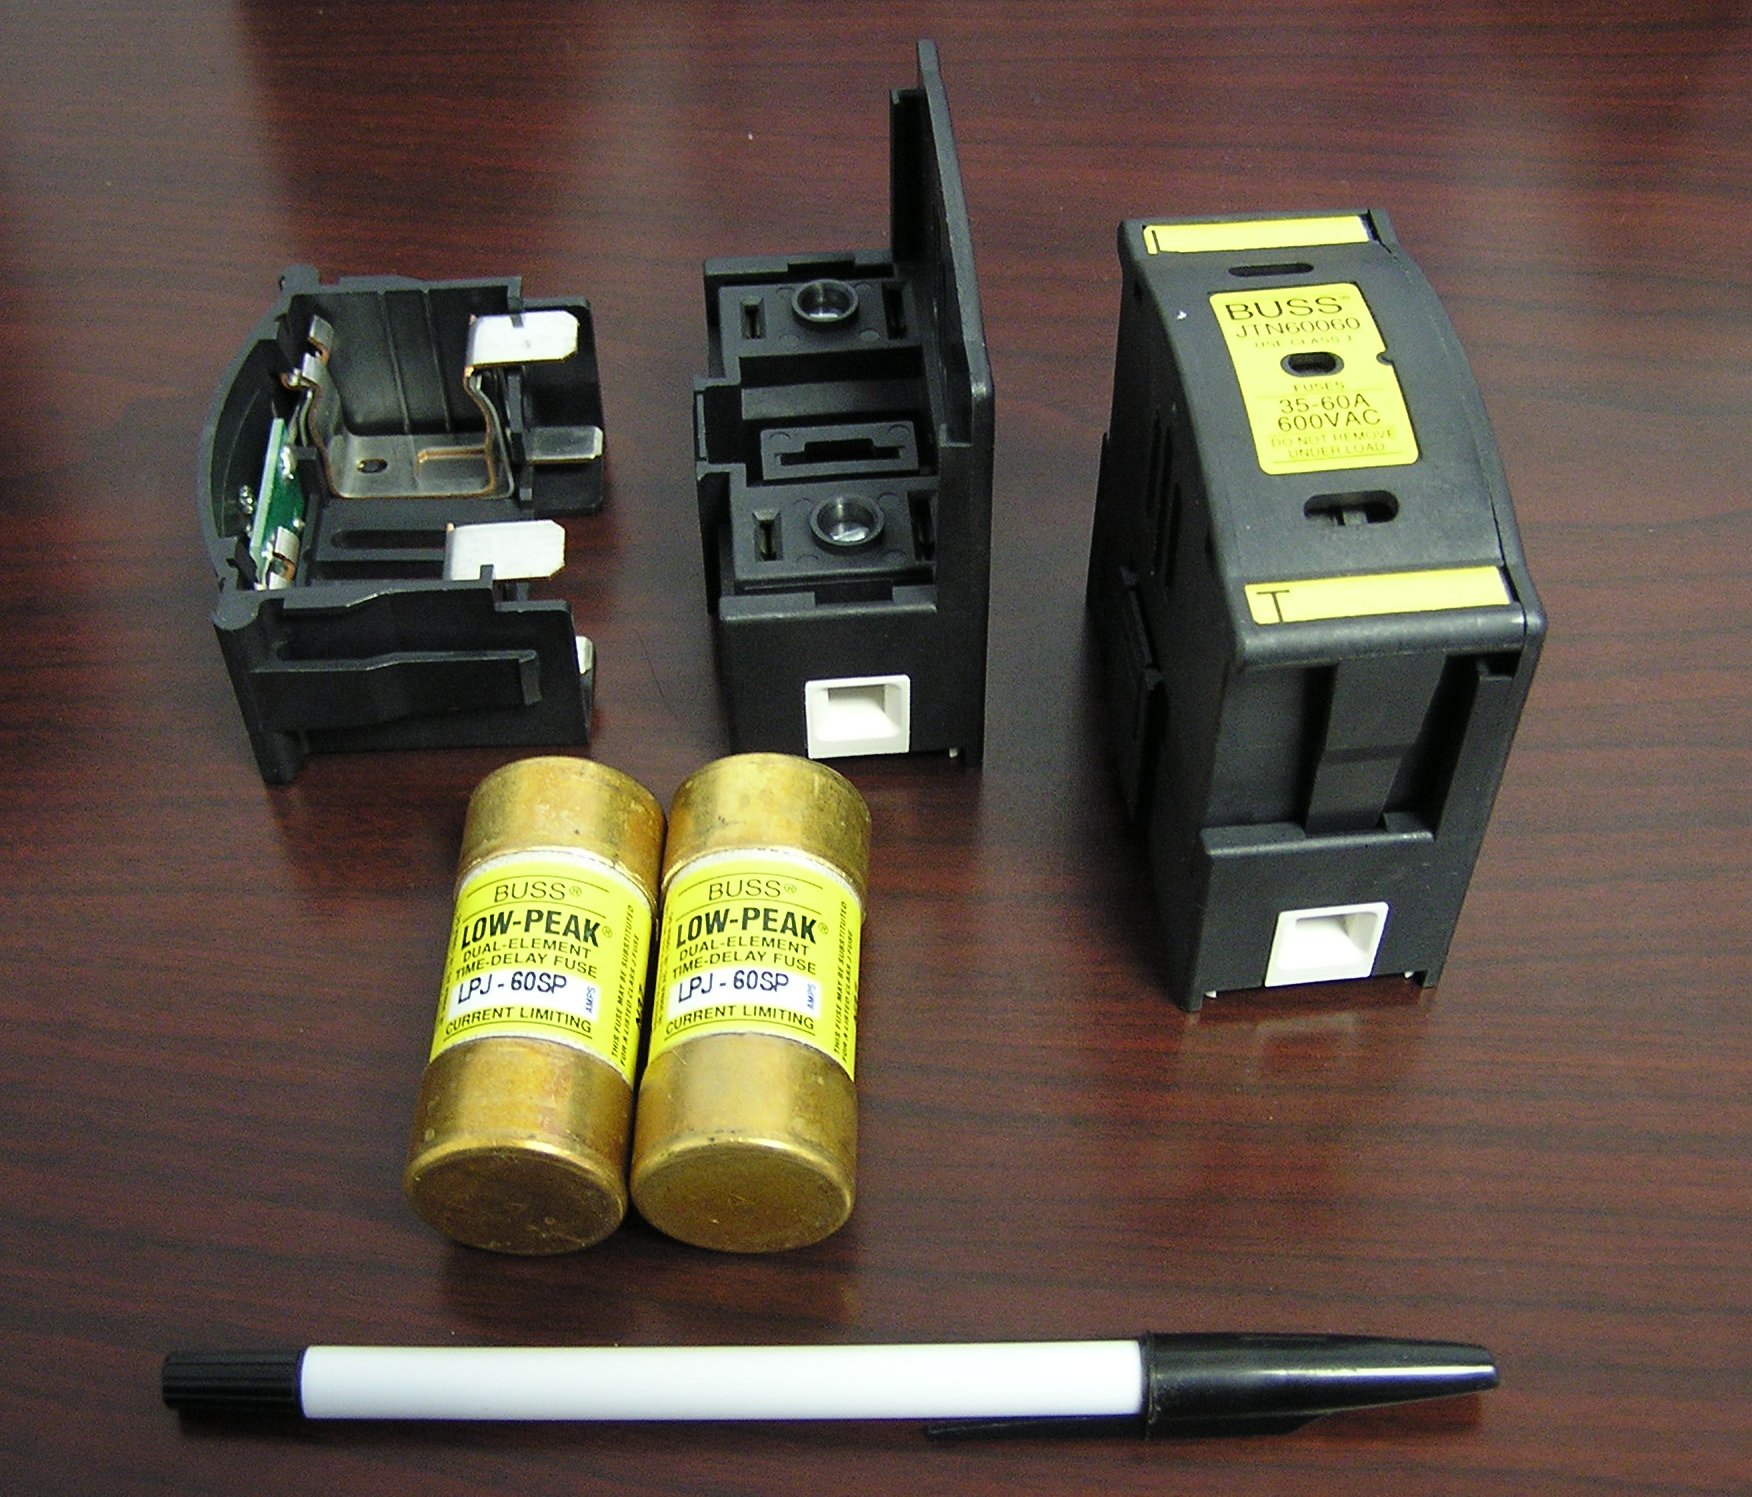
| 19:39, 12 January 2007 | LPJ-60SP.JPG (file) |  |
42 KB | The 60 amp LPJ-60SP fuse | 1 |
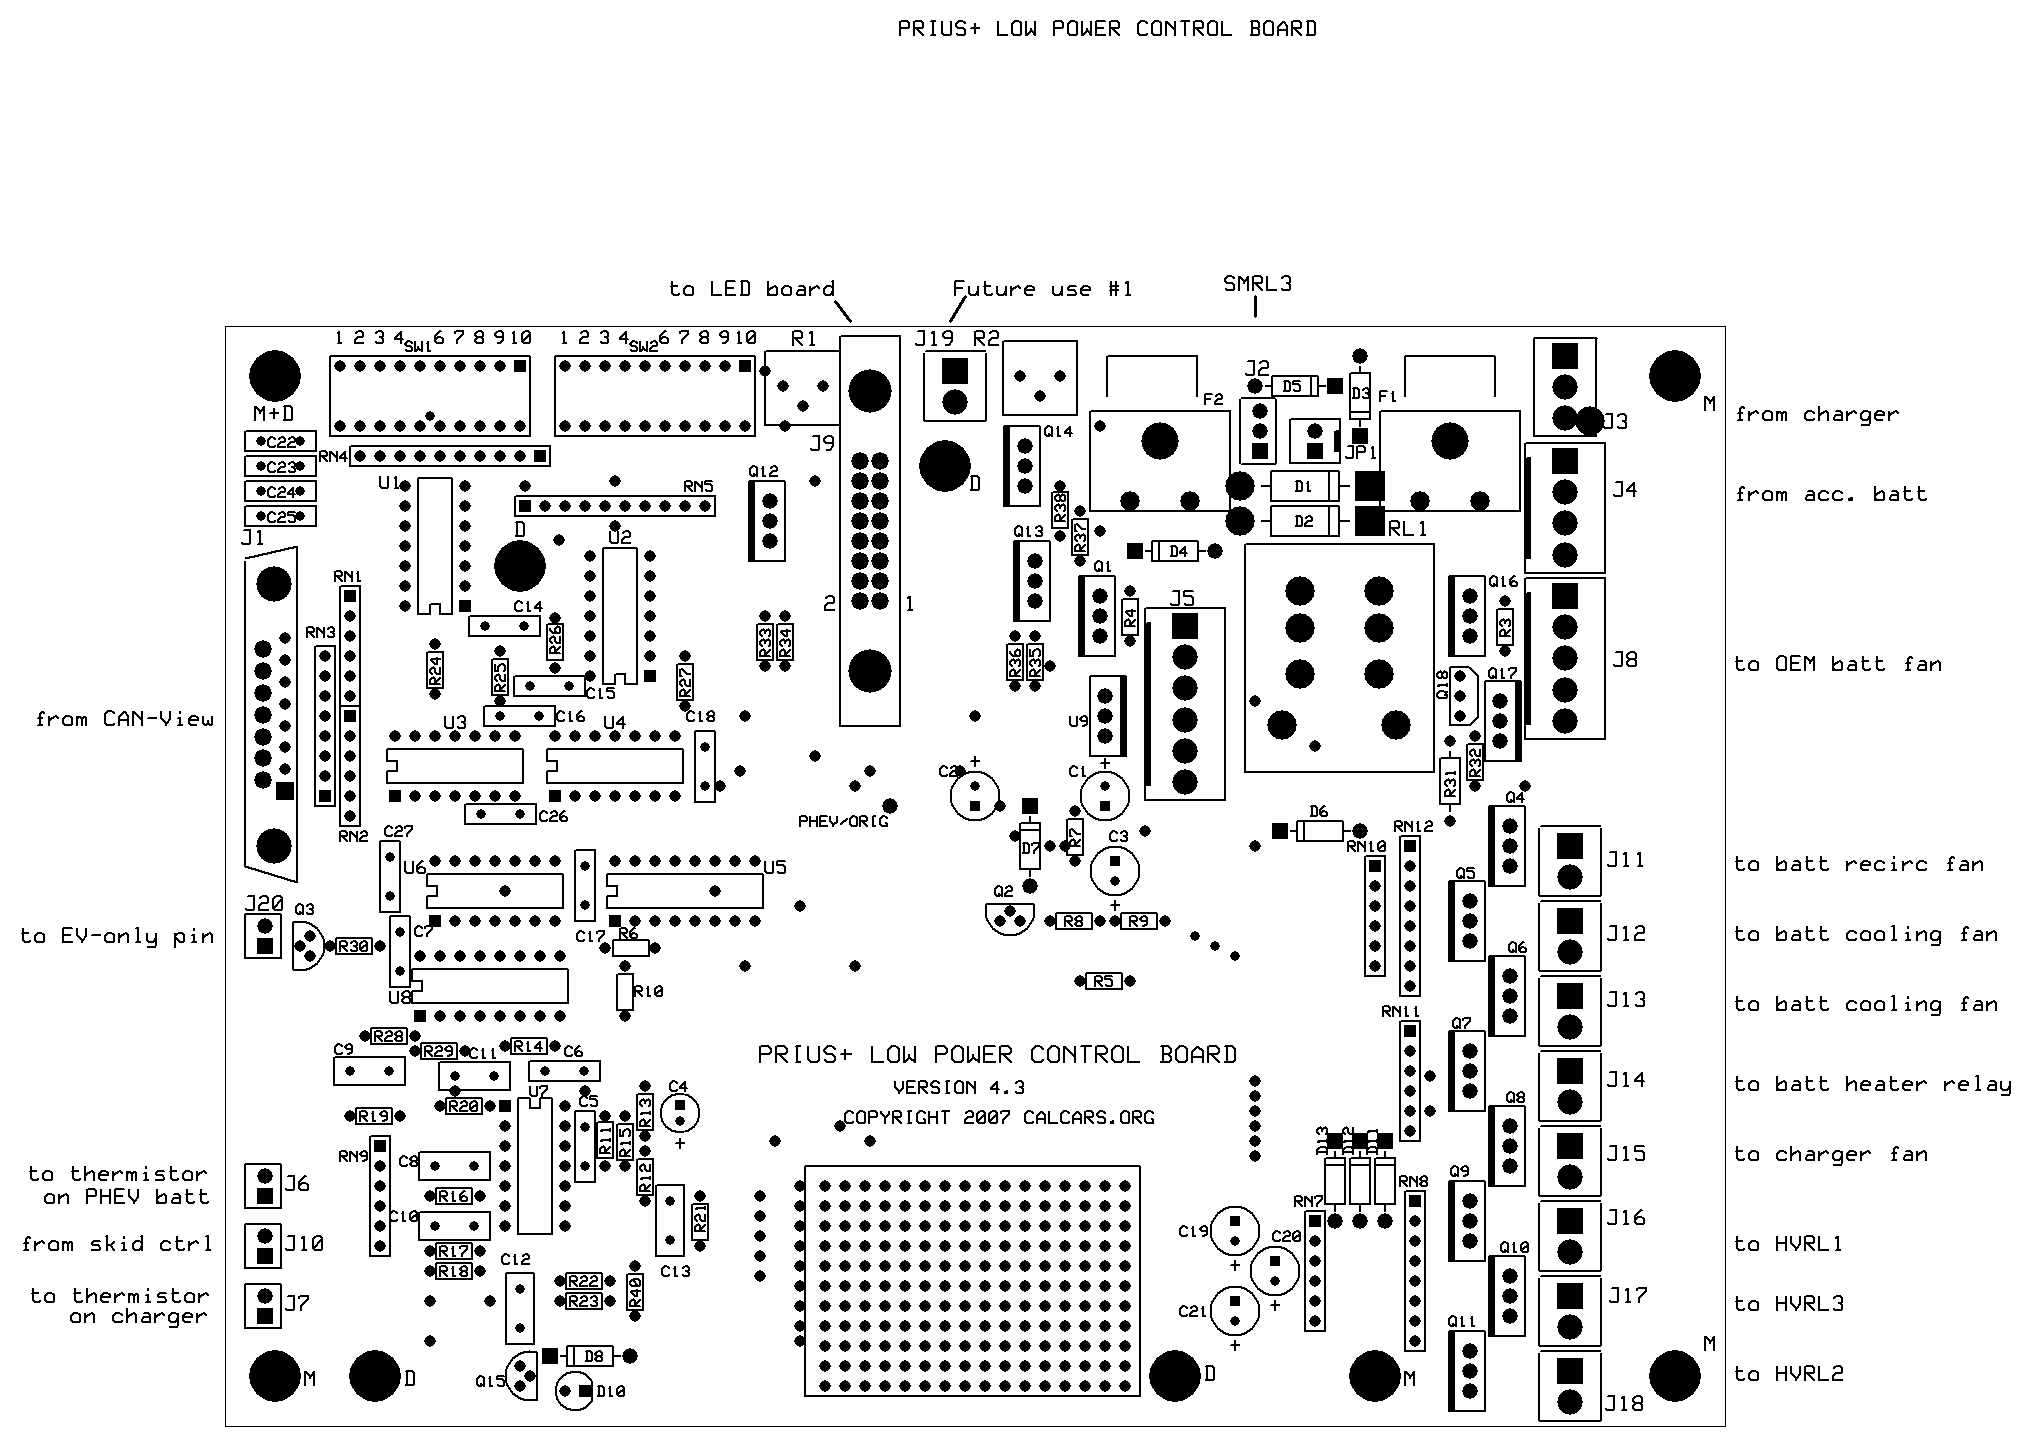
| 04:31, 28 April 2007 | EAA-PHEV-PRIUS-ControlBd layout.png (file) |  |
45 KB | V4.3_20070904 | 1 |
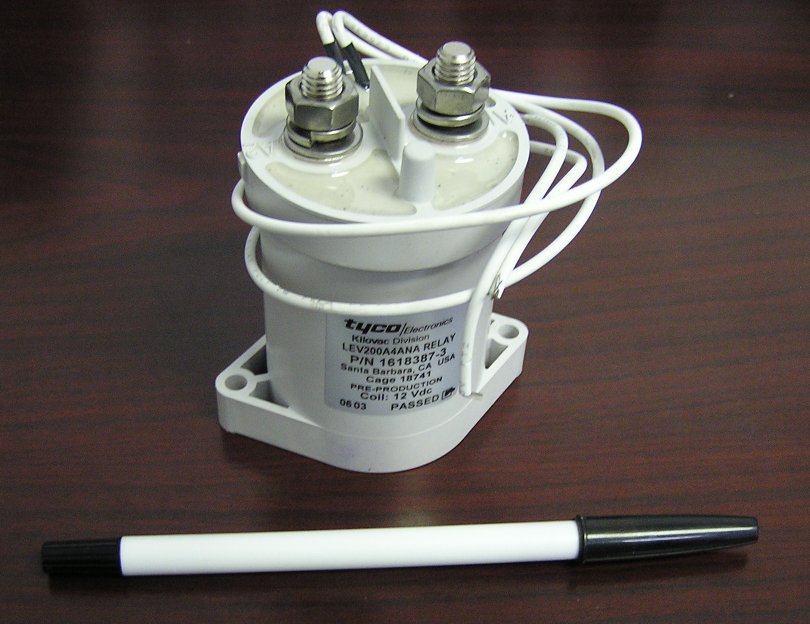
| 19:06, 12 January 2007 | EV200 Contactor.JPG (file) |  |
84 KB | The Kilovac EV200A4ANA (EV200) contactor | 1 |
| 19:53, 28 September 2007 | 076610.2041-PP2.pdf (file) | 94 KB | hinged box | 1 | |
| 19:53, 28 September 2007 | 076610.2040-PP2.pdf (file) | 94 KB | hinged box | 1 | |
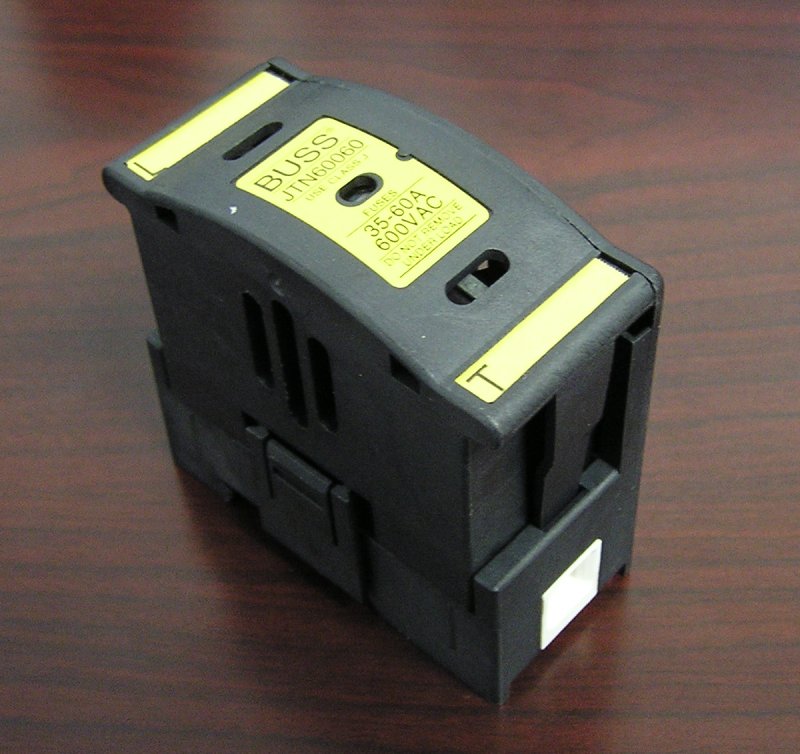
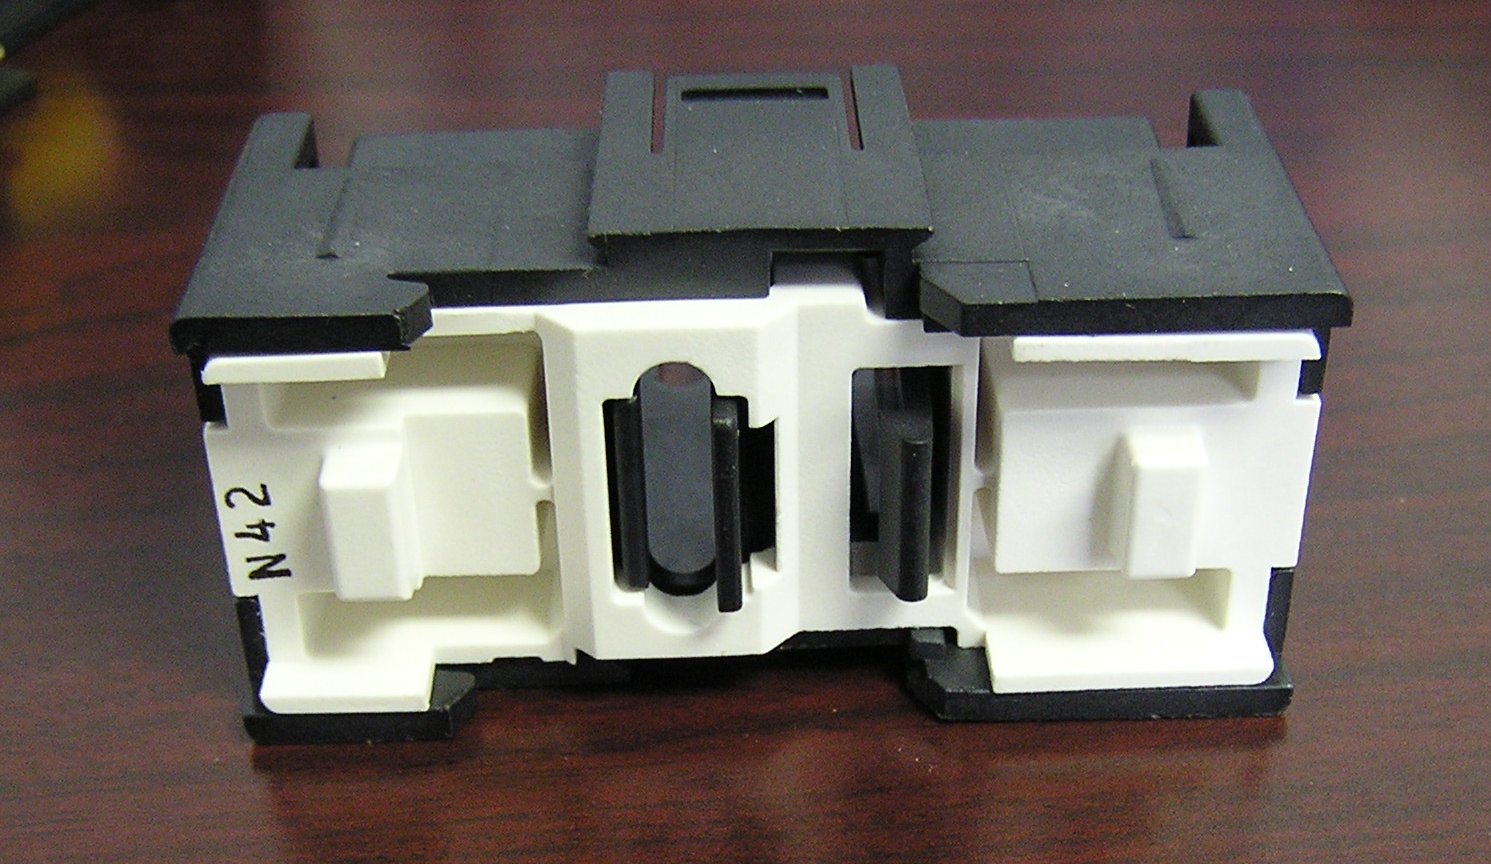
| 19:44, 12 January 2007 | JTN60060 Fuse Holder.JPG (file) |  |
97 KB | JTN60060 Fuse Holder | 2 |
| 19:53, 28 September 2007 | 076610.2042-pp2.pdf (file) | 98 KB | hinged box | 1 | |
| 19:52, 28 September 2007 | 076610.2039-pp2.pdf (file) | 100 KB | hinged box | 1 | |
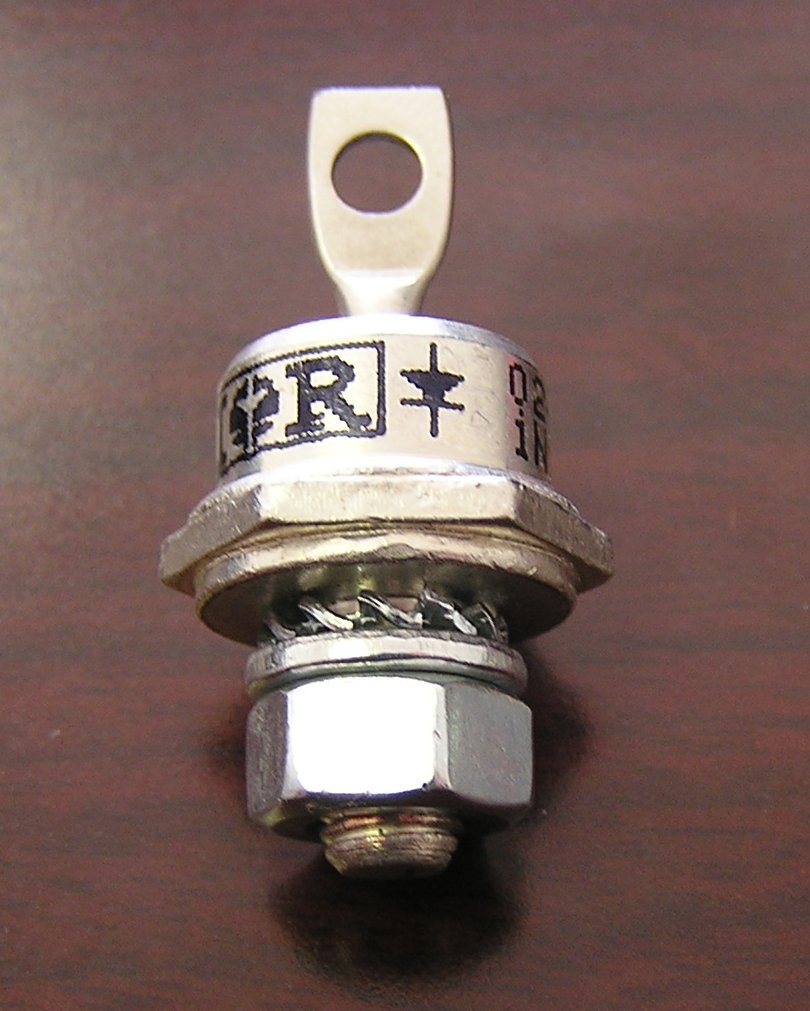
| 22:25, 28 March 2007 | DO-5 Diode.jpg (file) |  |
112 KB | The DO-5 Diode as it comes from DigiKey | 1 |
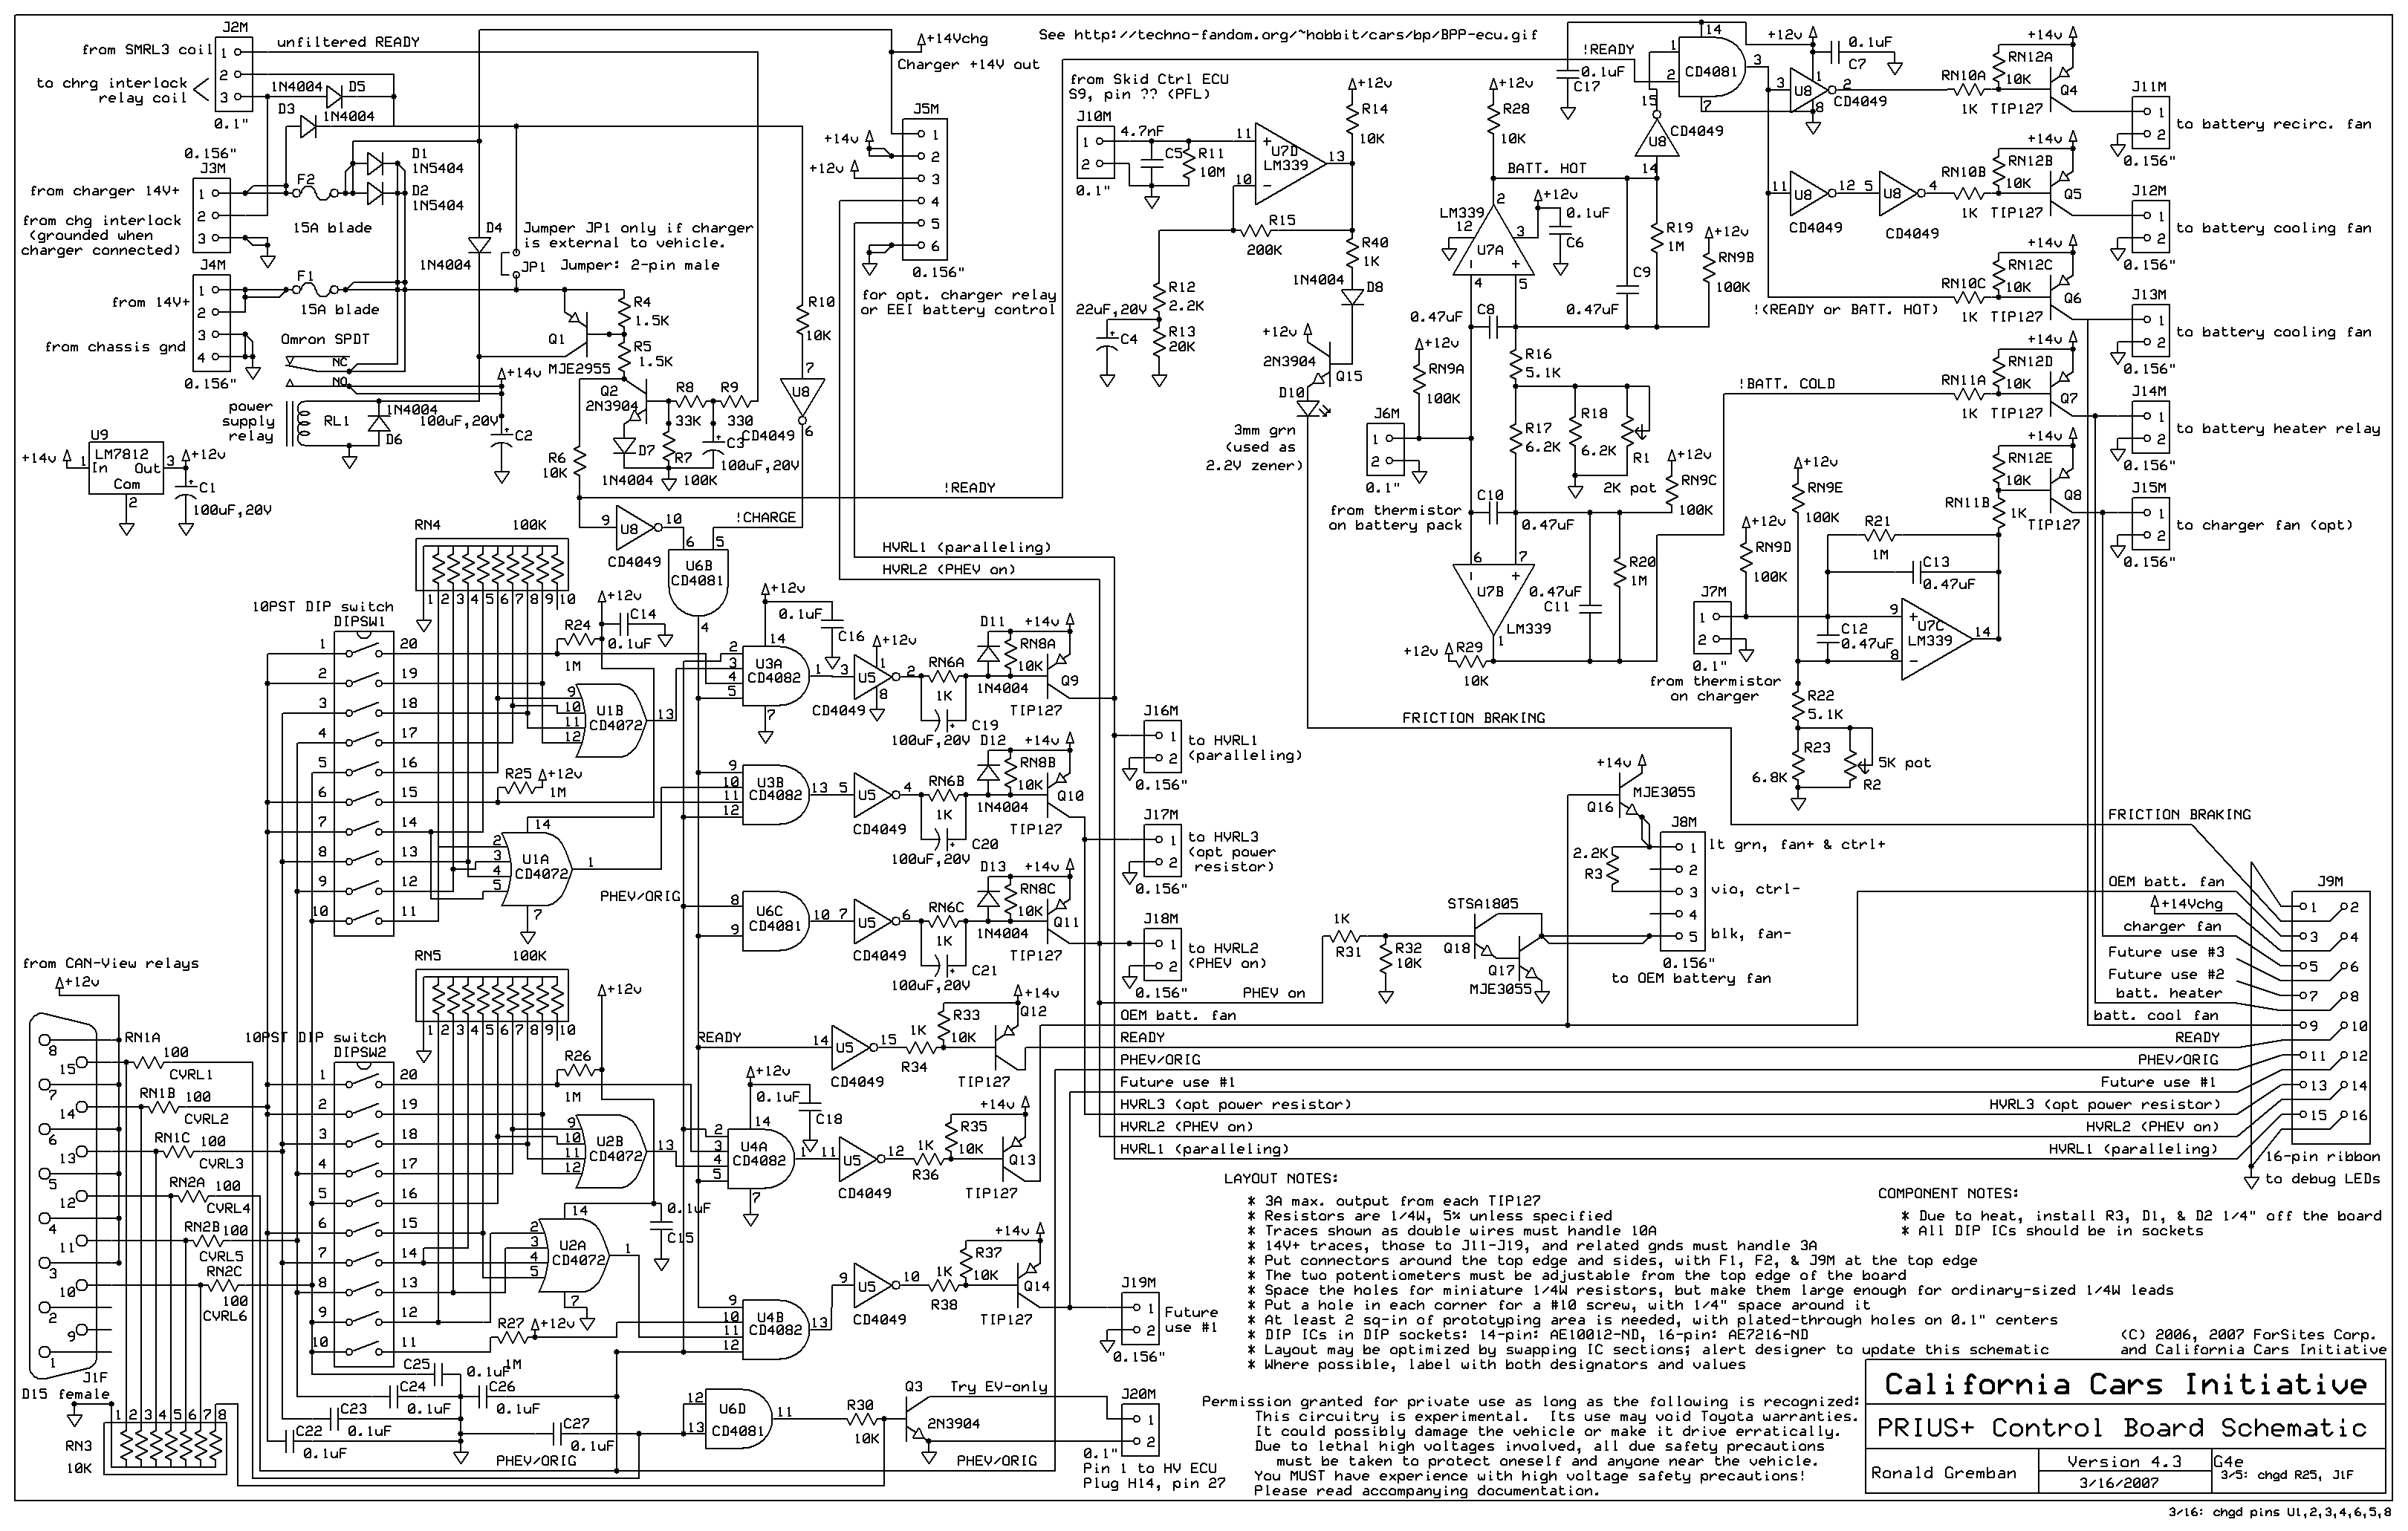
| 20:26, 15 April 2007 | EAA-PHEV-PRIUS-ControlBdSchematic.zip (file) | 123 KB | V4.3_070316 | 6 | |
| 20:23, 15 April 2007 | EAA-PHEV-PRIUS-ControlBdSchematic.png (file) |  |
137 KB | v4.3_070316 | 7 |
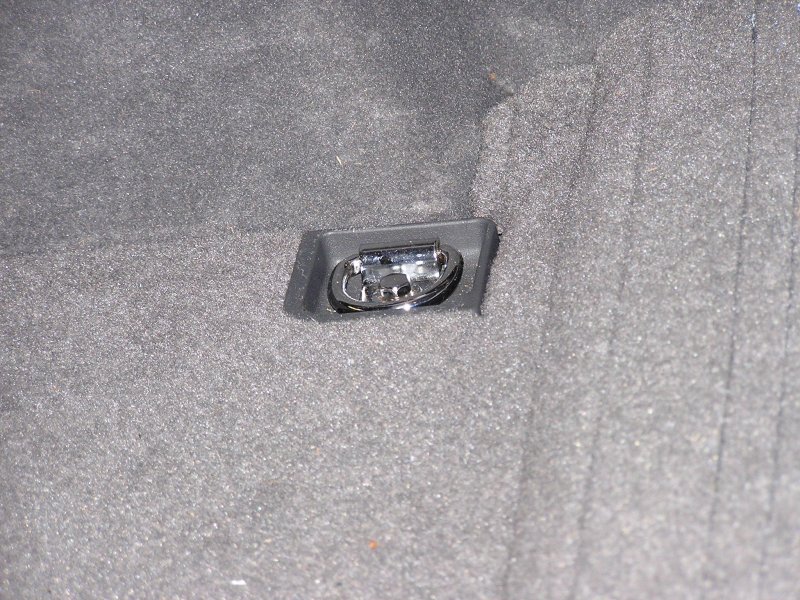
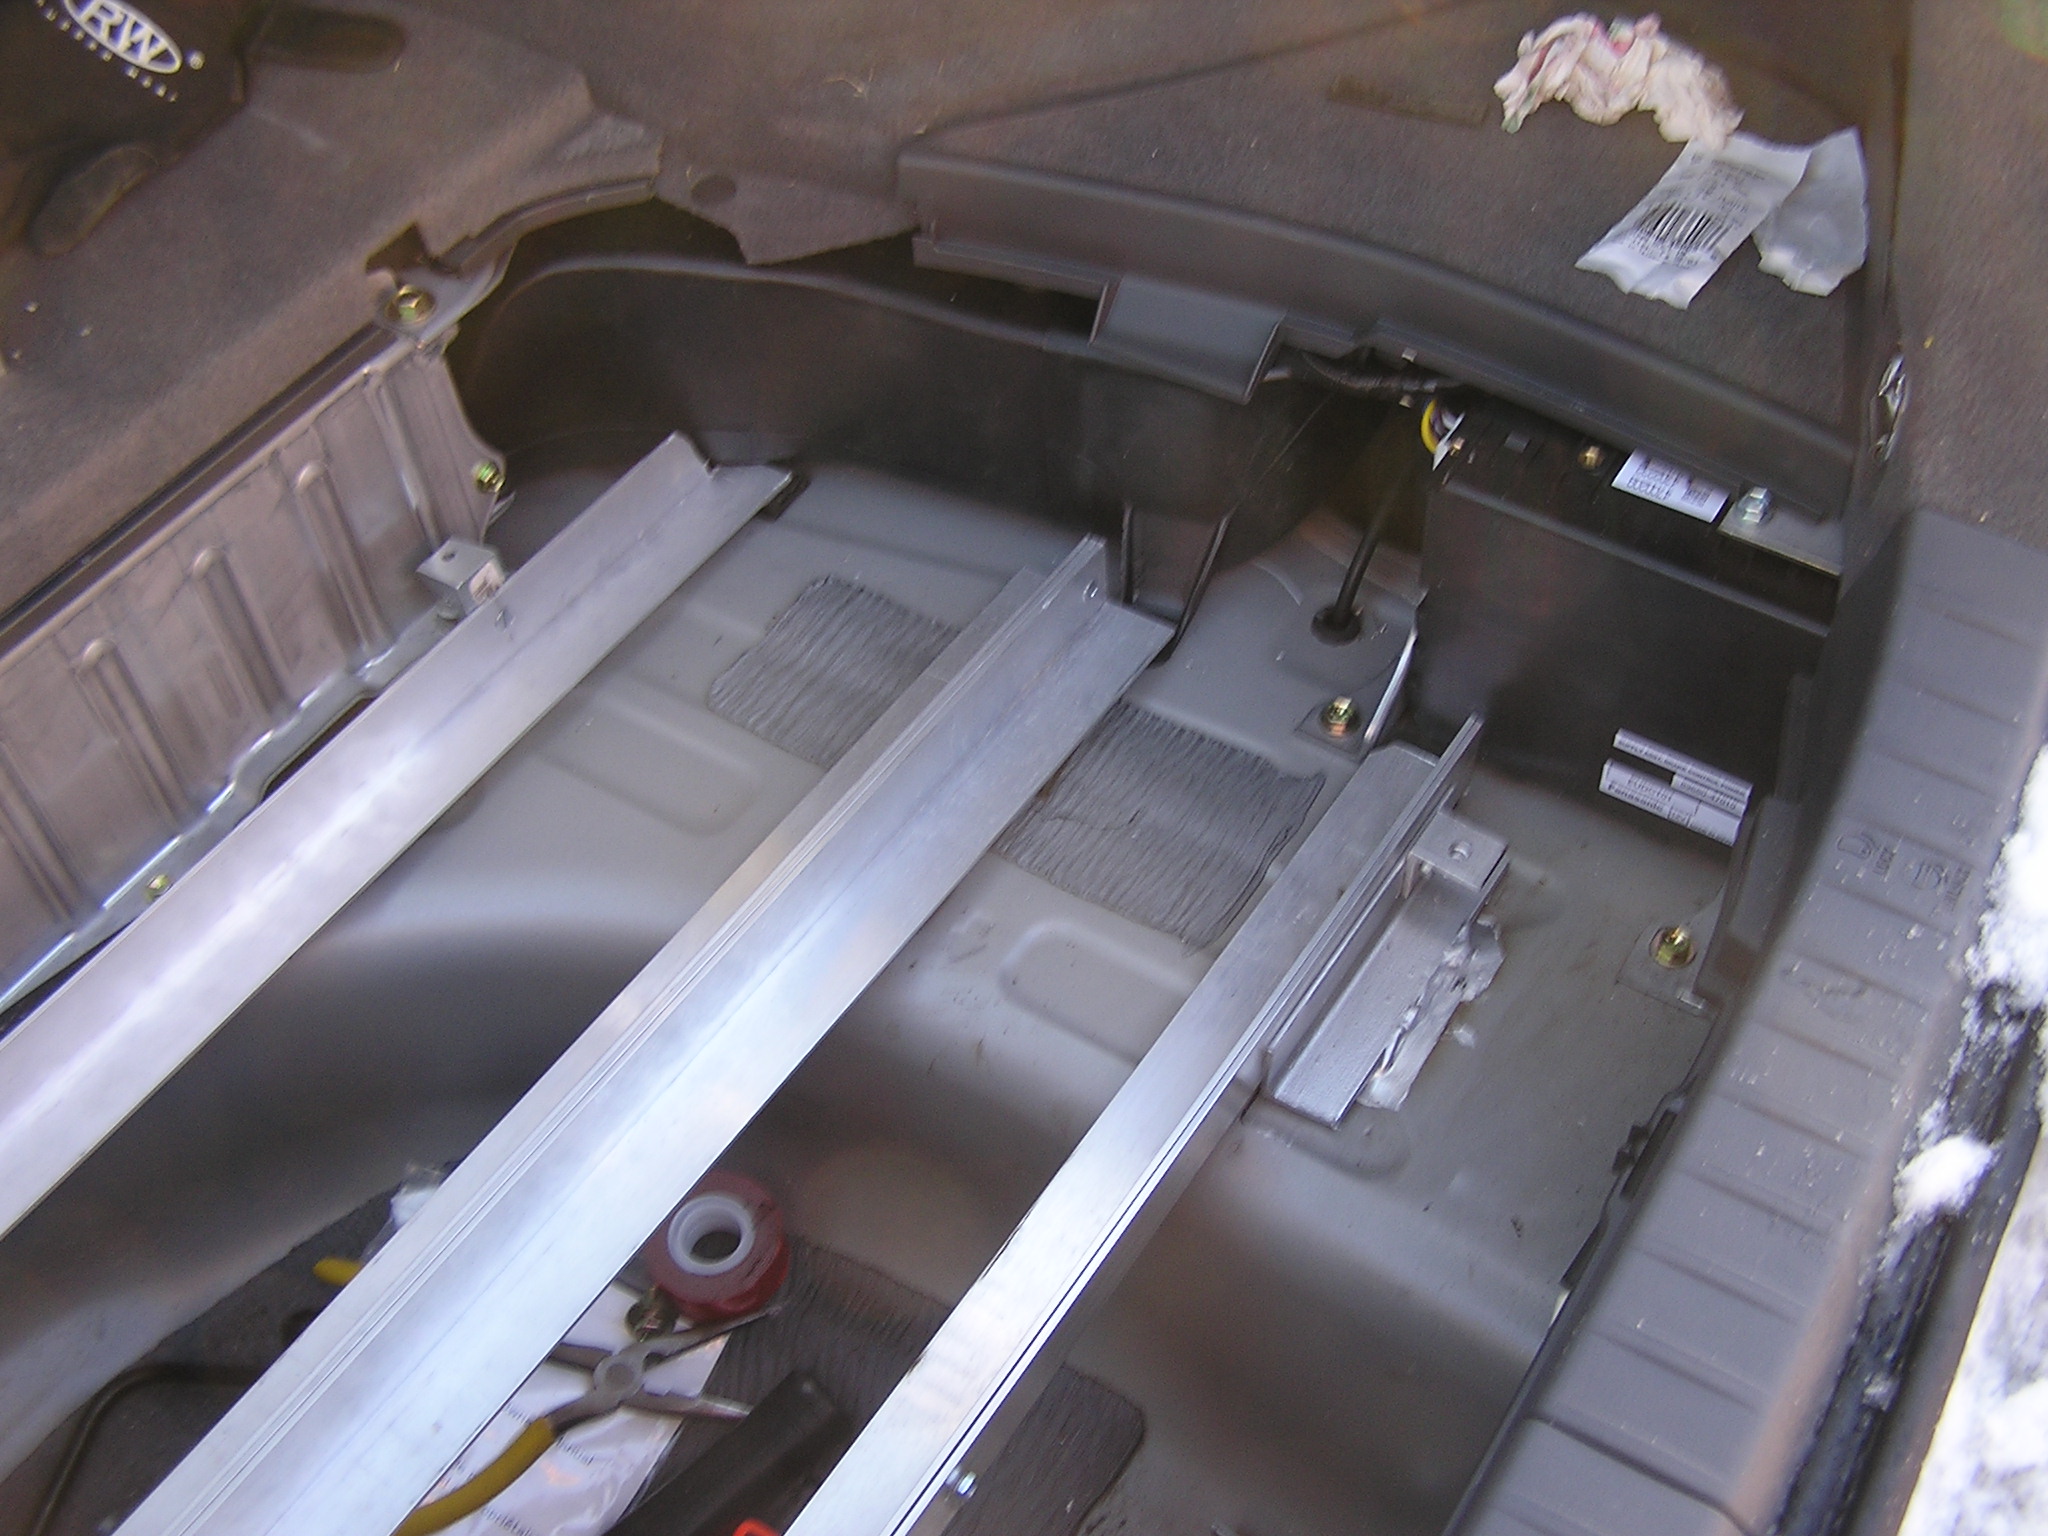
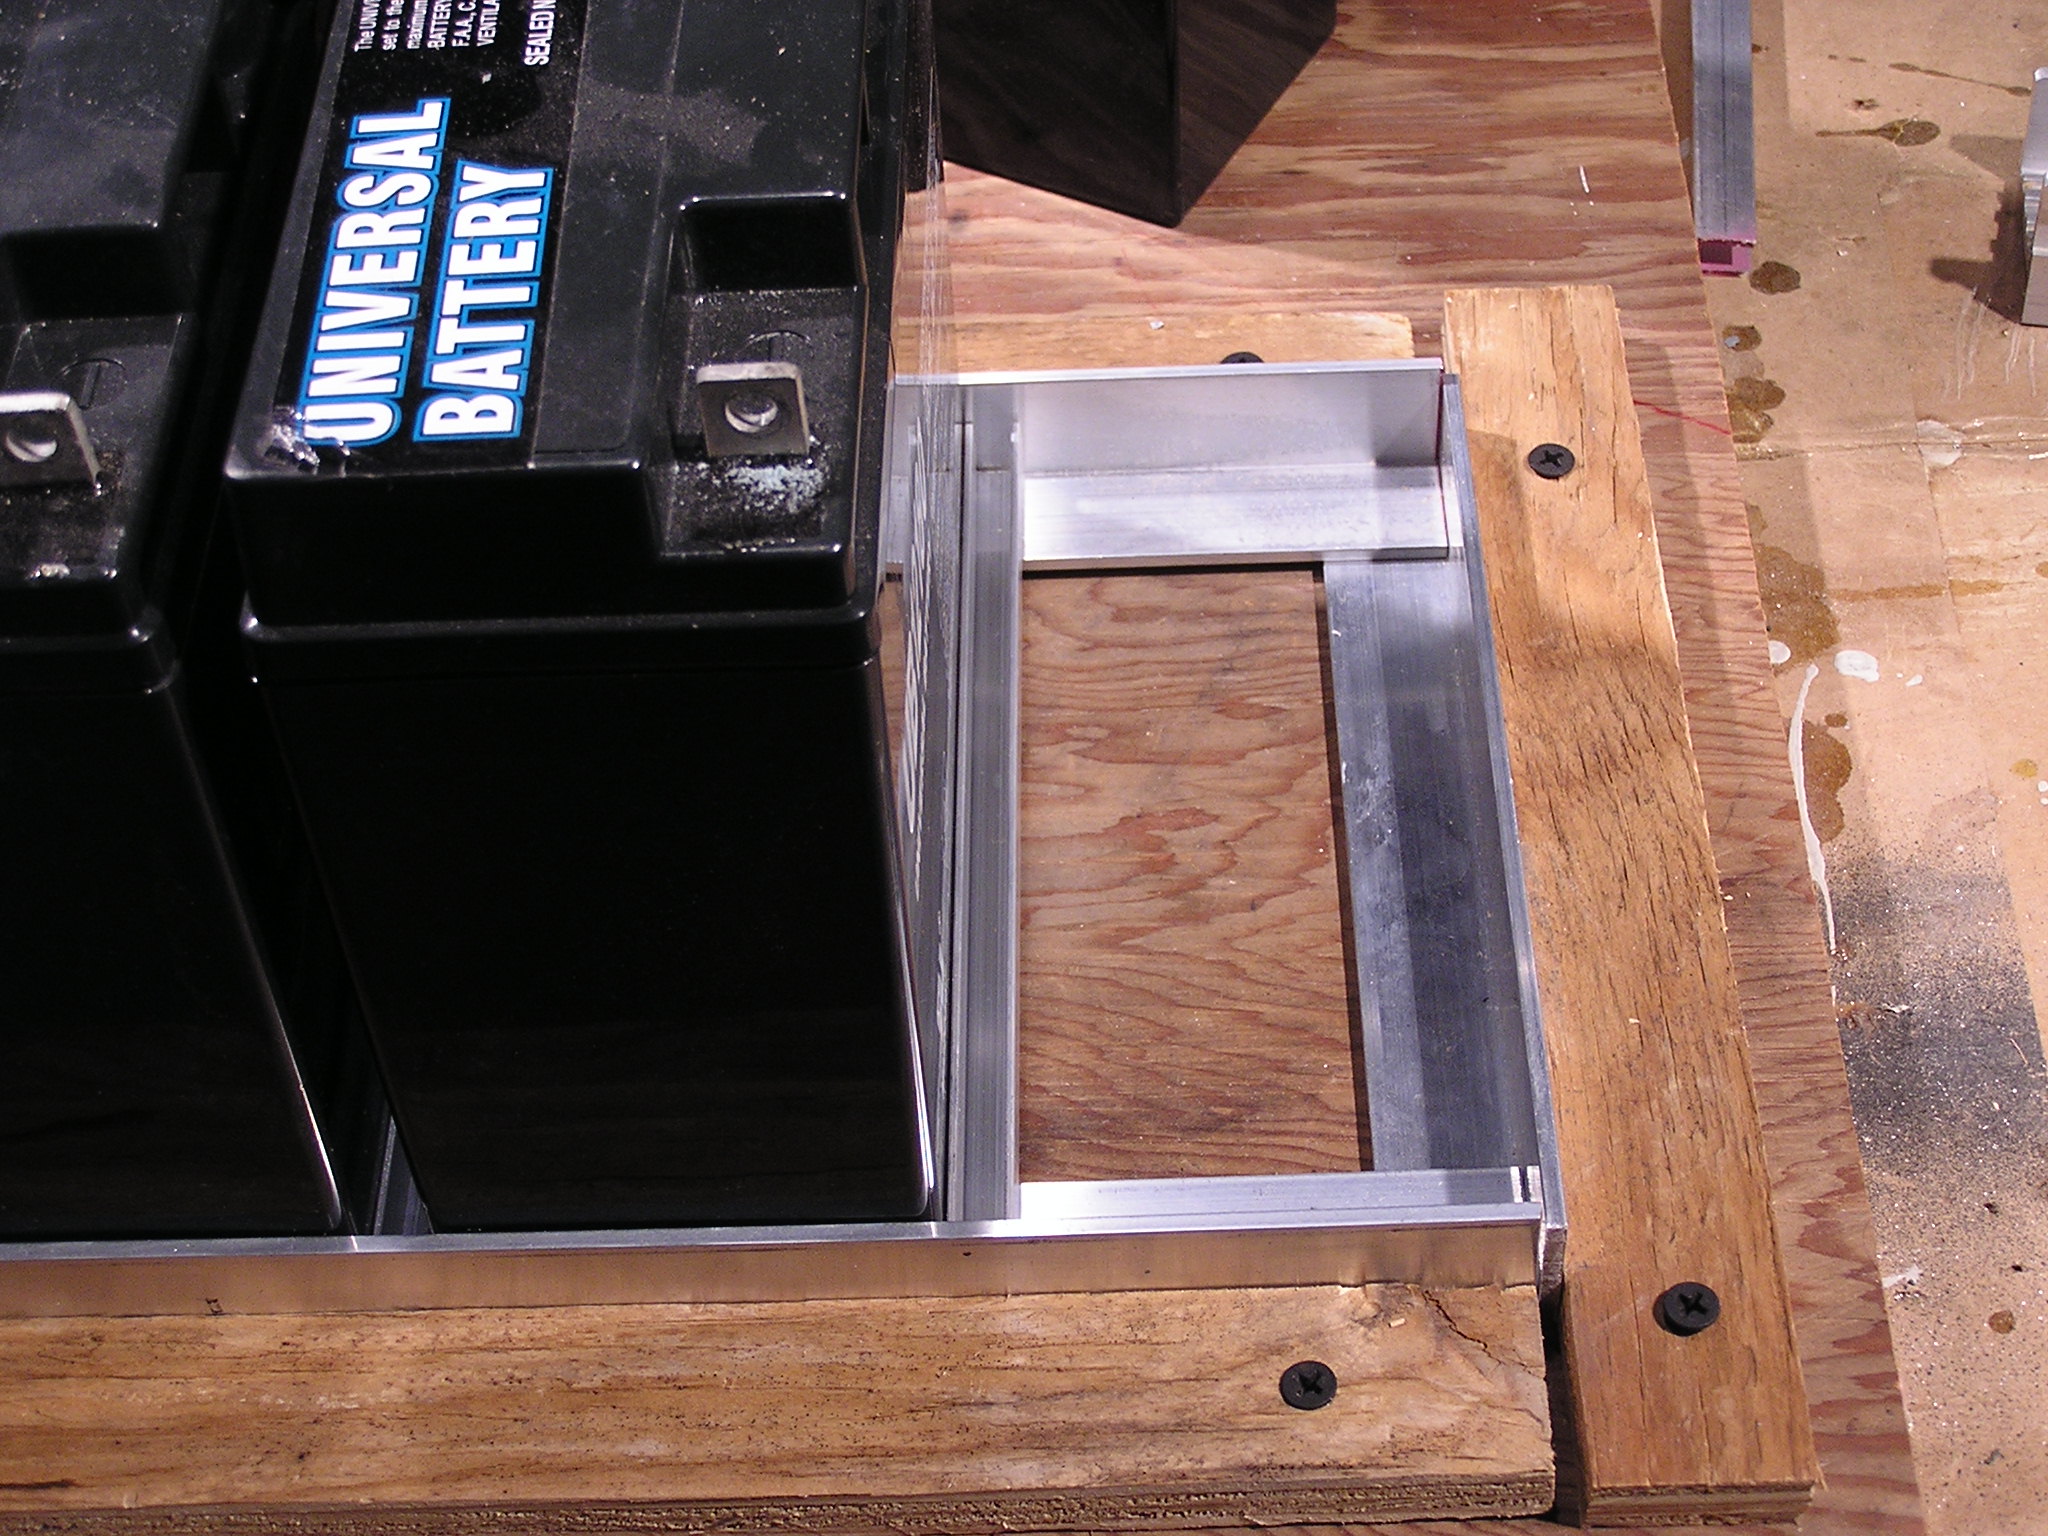
| 23:58, 26 April 2007 | OEM Battery Hold Down Screw.jpg (file) |  |
152 KB | Bolts holding down the carpeting on top of the OEM battery | 1 |
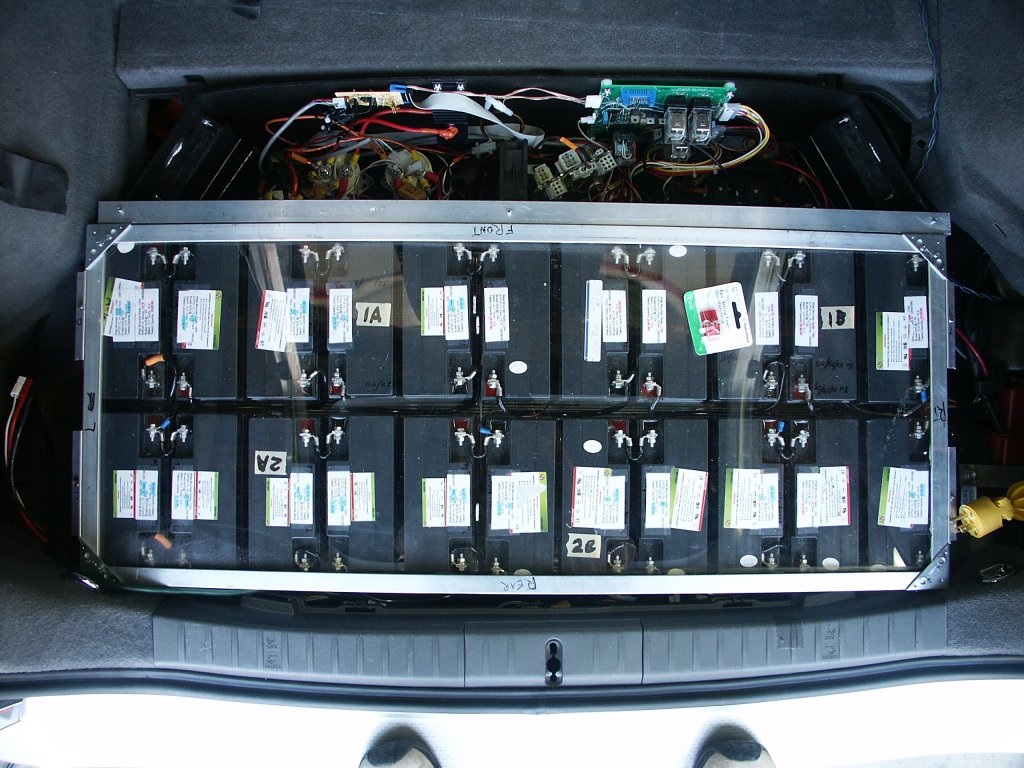
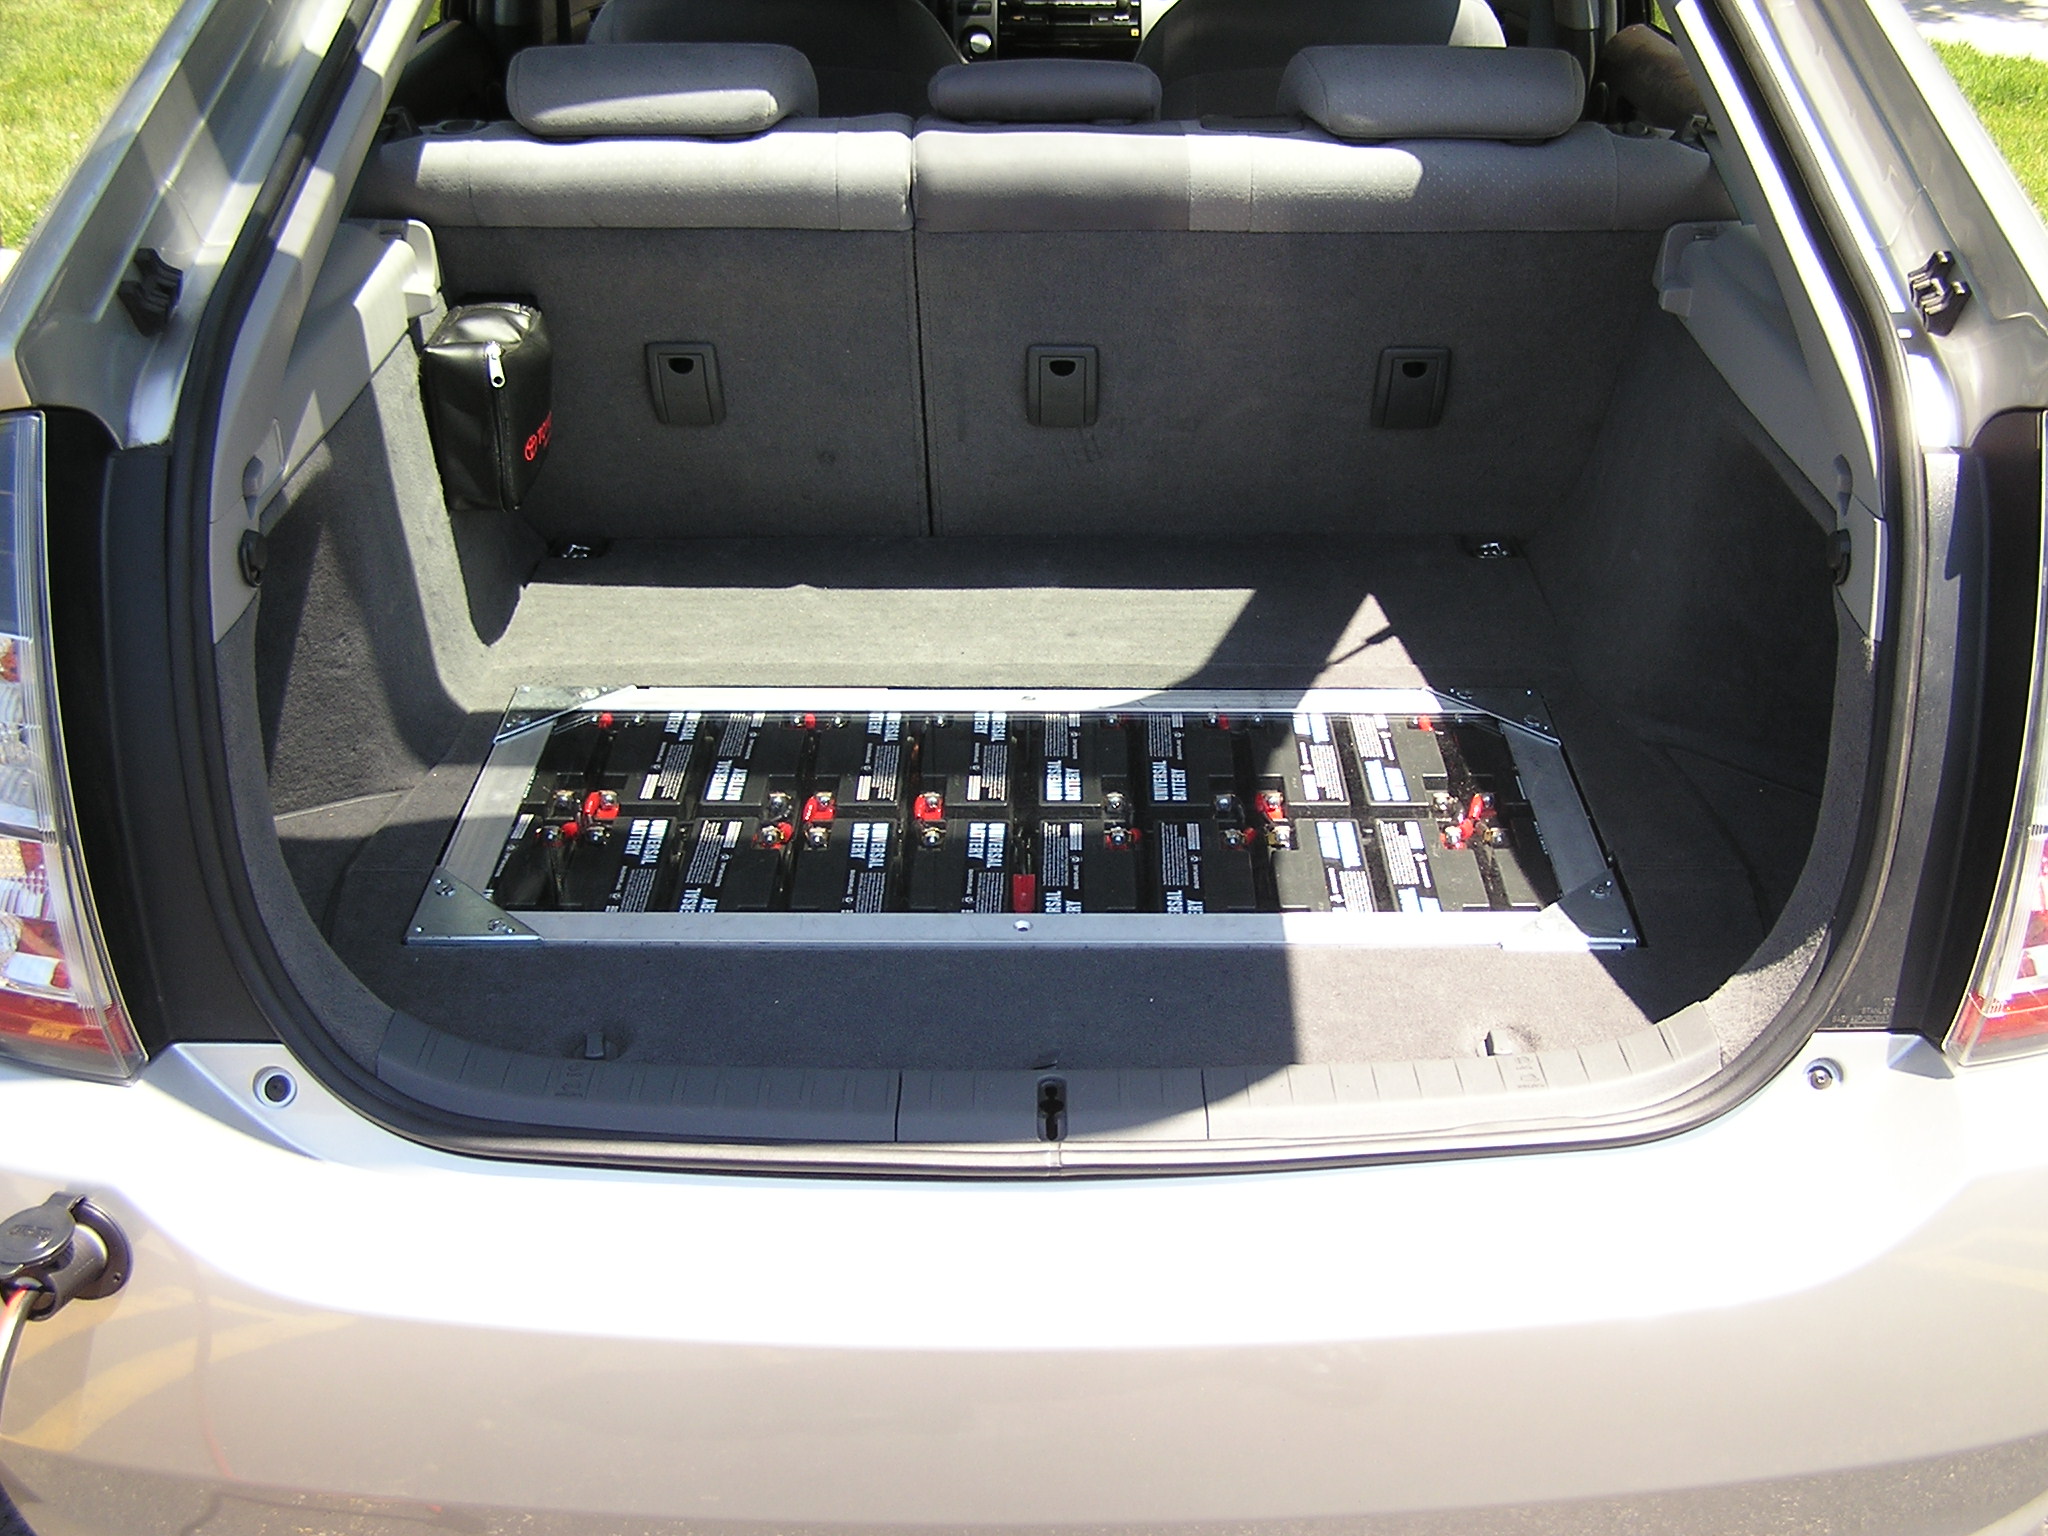
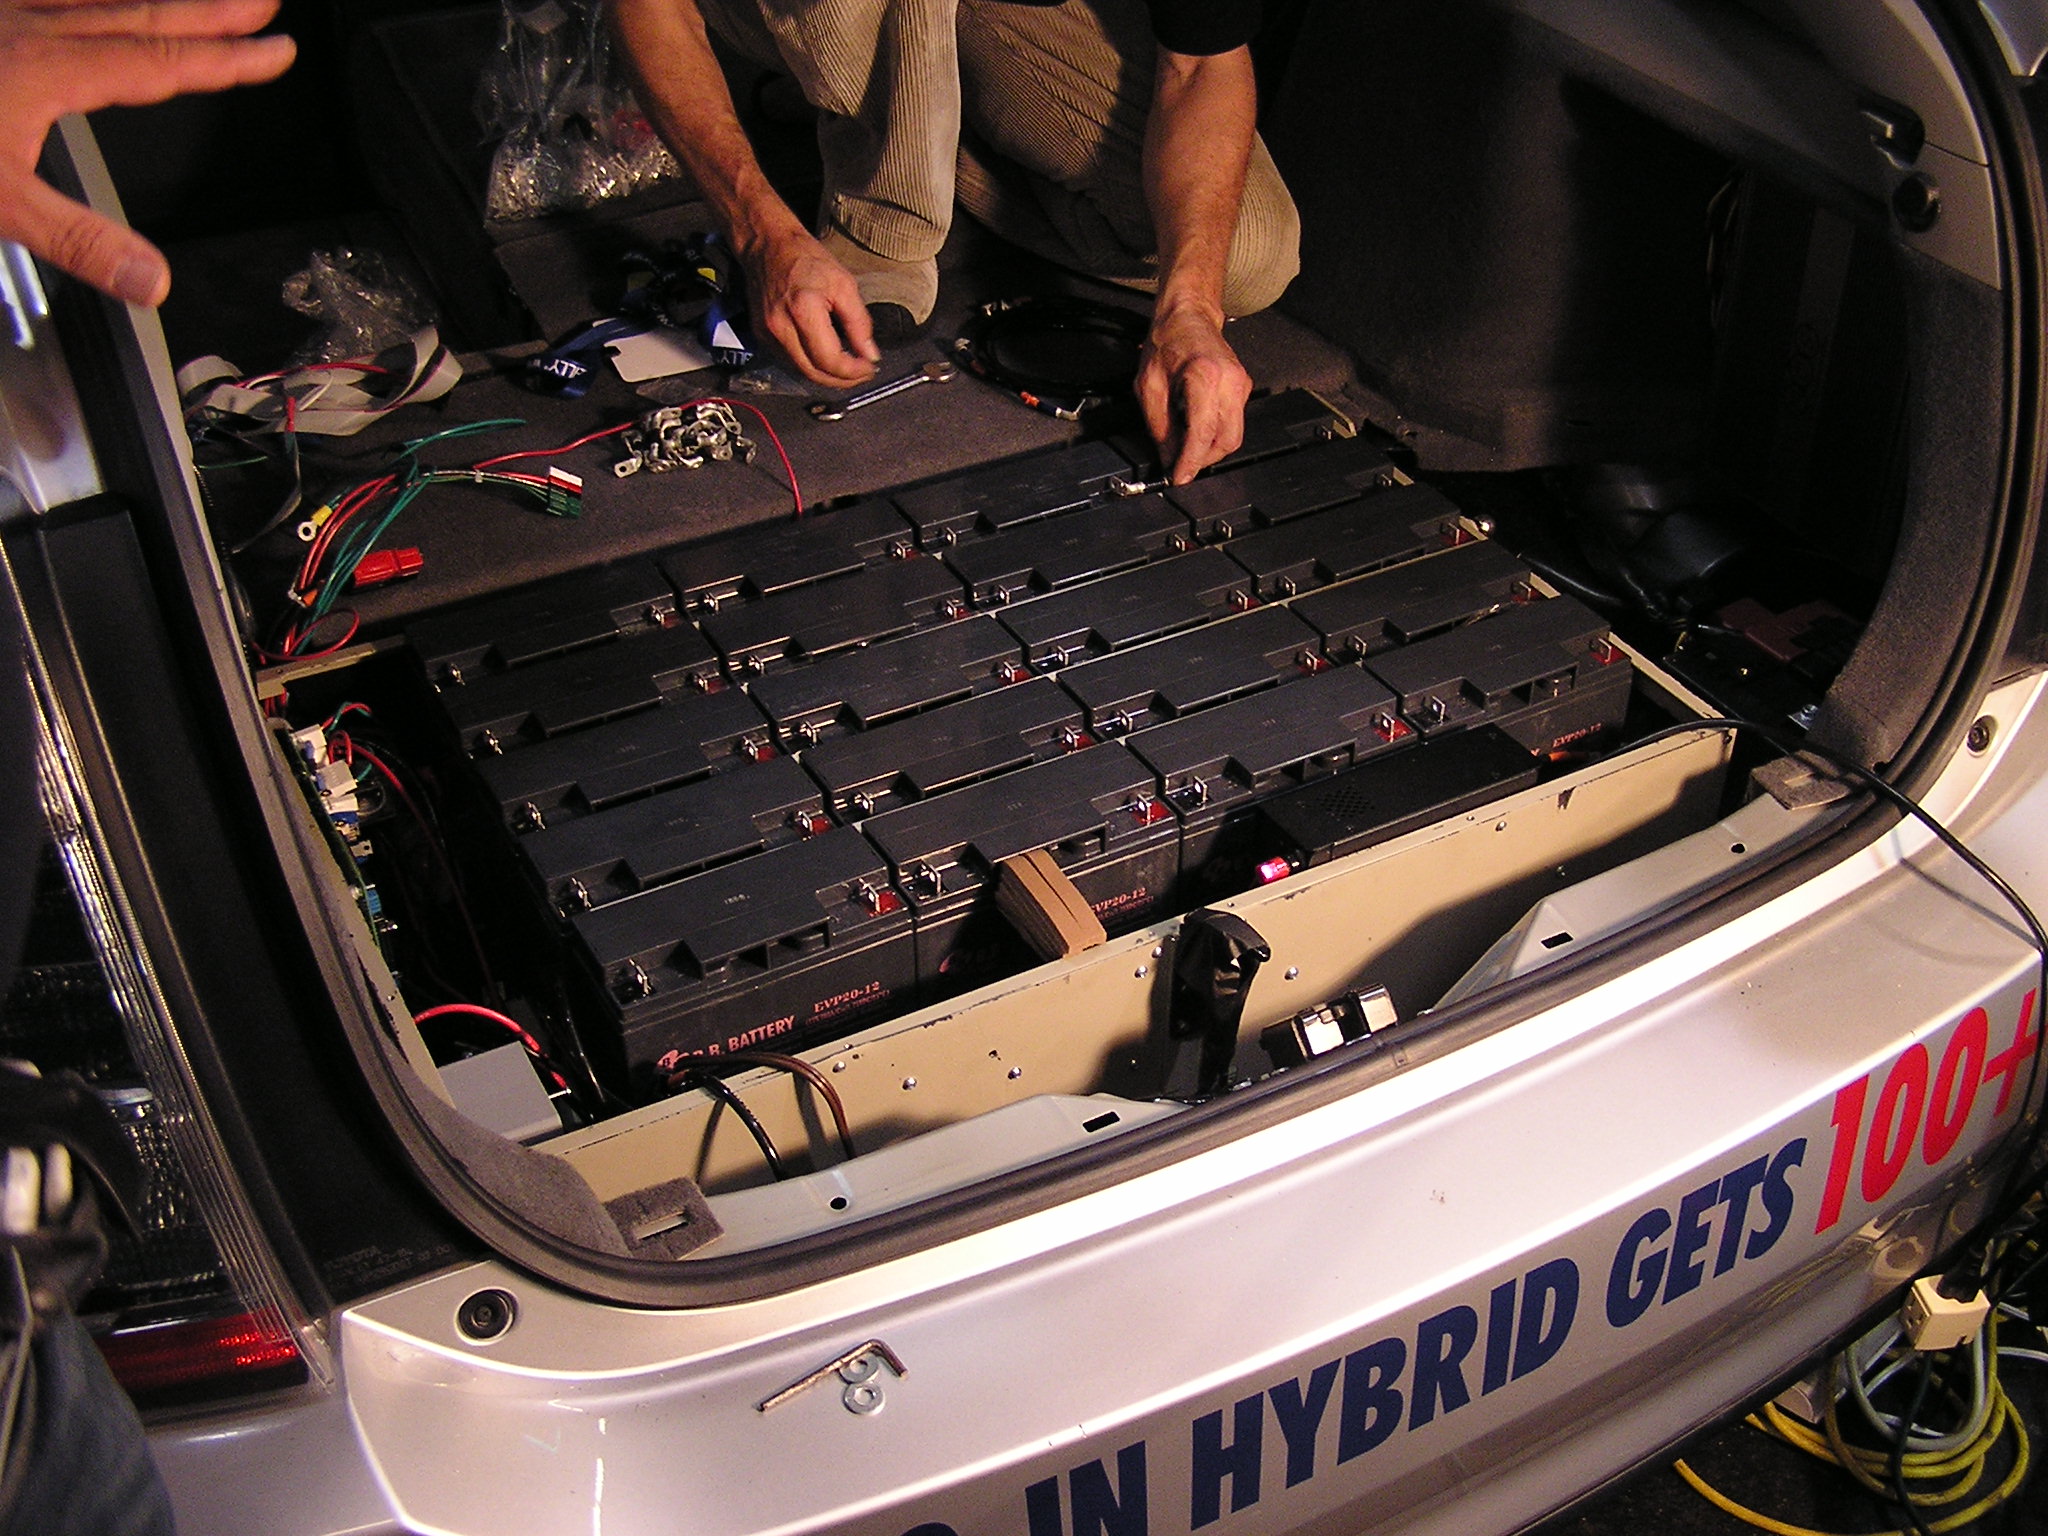
| 15:41, 23 June 2007 | Sven car finished trunk view.JPG (file) |  |
192 KB | Finished (minus plexiglass) view of classic mounting method - slightly outdated now, but pretty much accurate. | 1 |
| 19:05, 12 January 2007 | Bottom of JTN60060.JPG (file) |  |
220 KB | Bottom of the fuse holder | 1 |
| 19:01, 12 January 2007 | Fuses and Holders.JPG (file) |  |
485 KB | The fuses and holders | 1 |
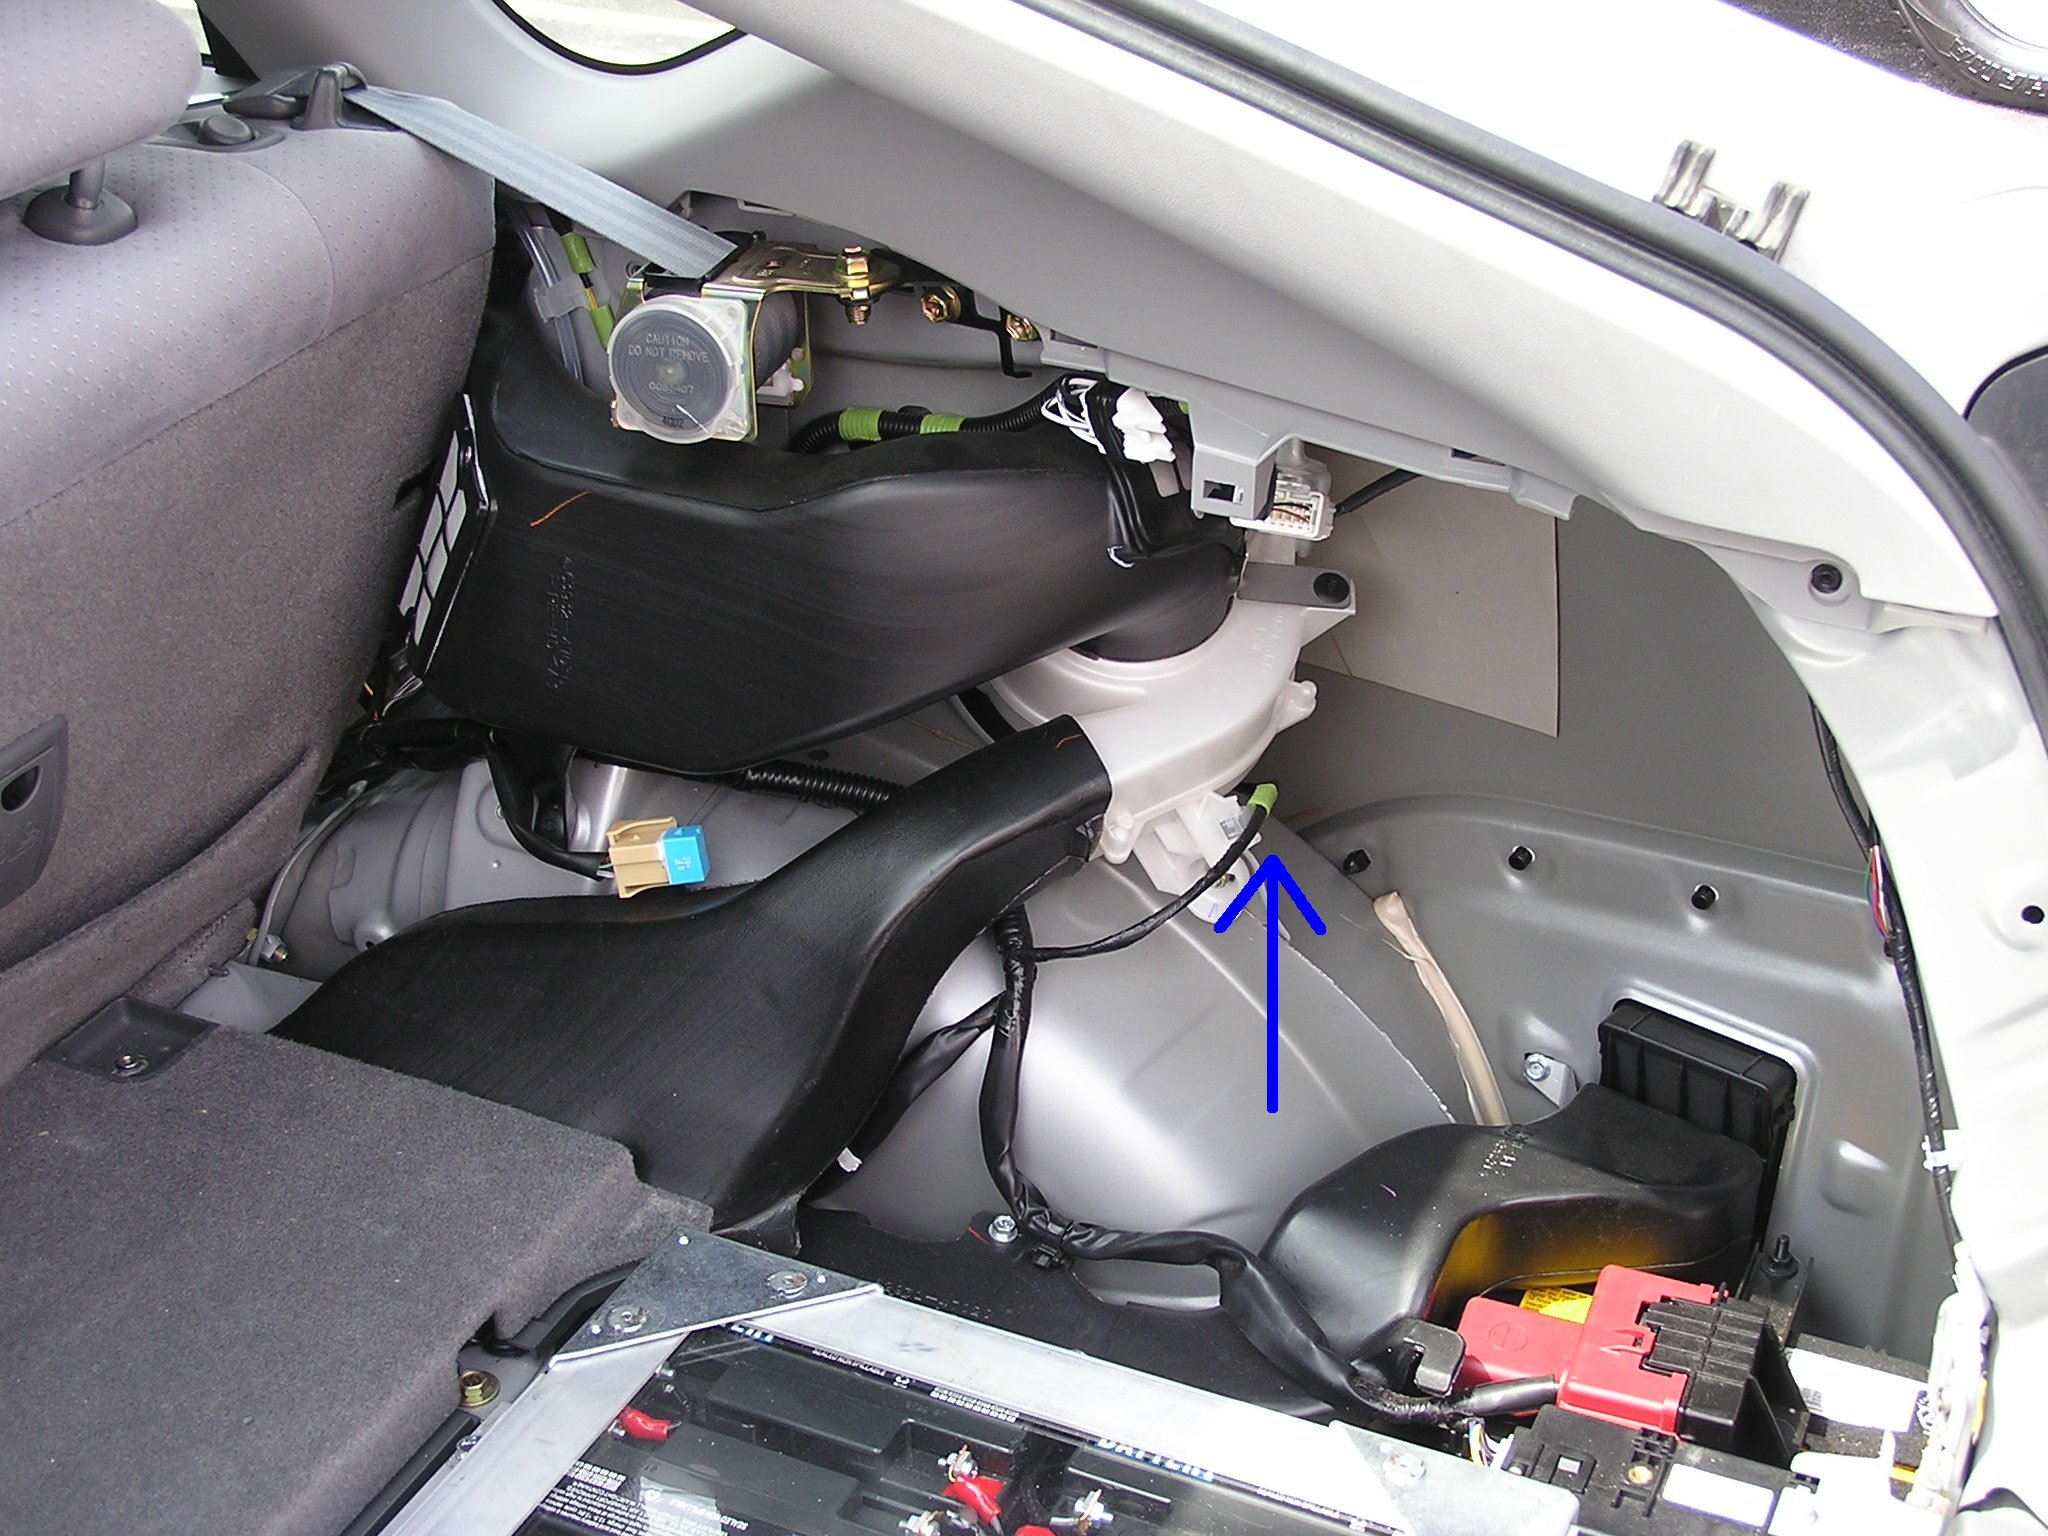
| 01:42, 25 May 2007 | OEM Battery Fan Wiring.jpg (file) |  |
530 KB | Shows the origional, unmodified OEM battery fan wiring. | 1 |
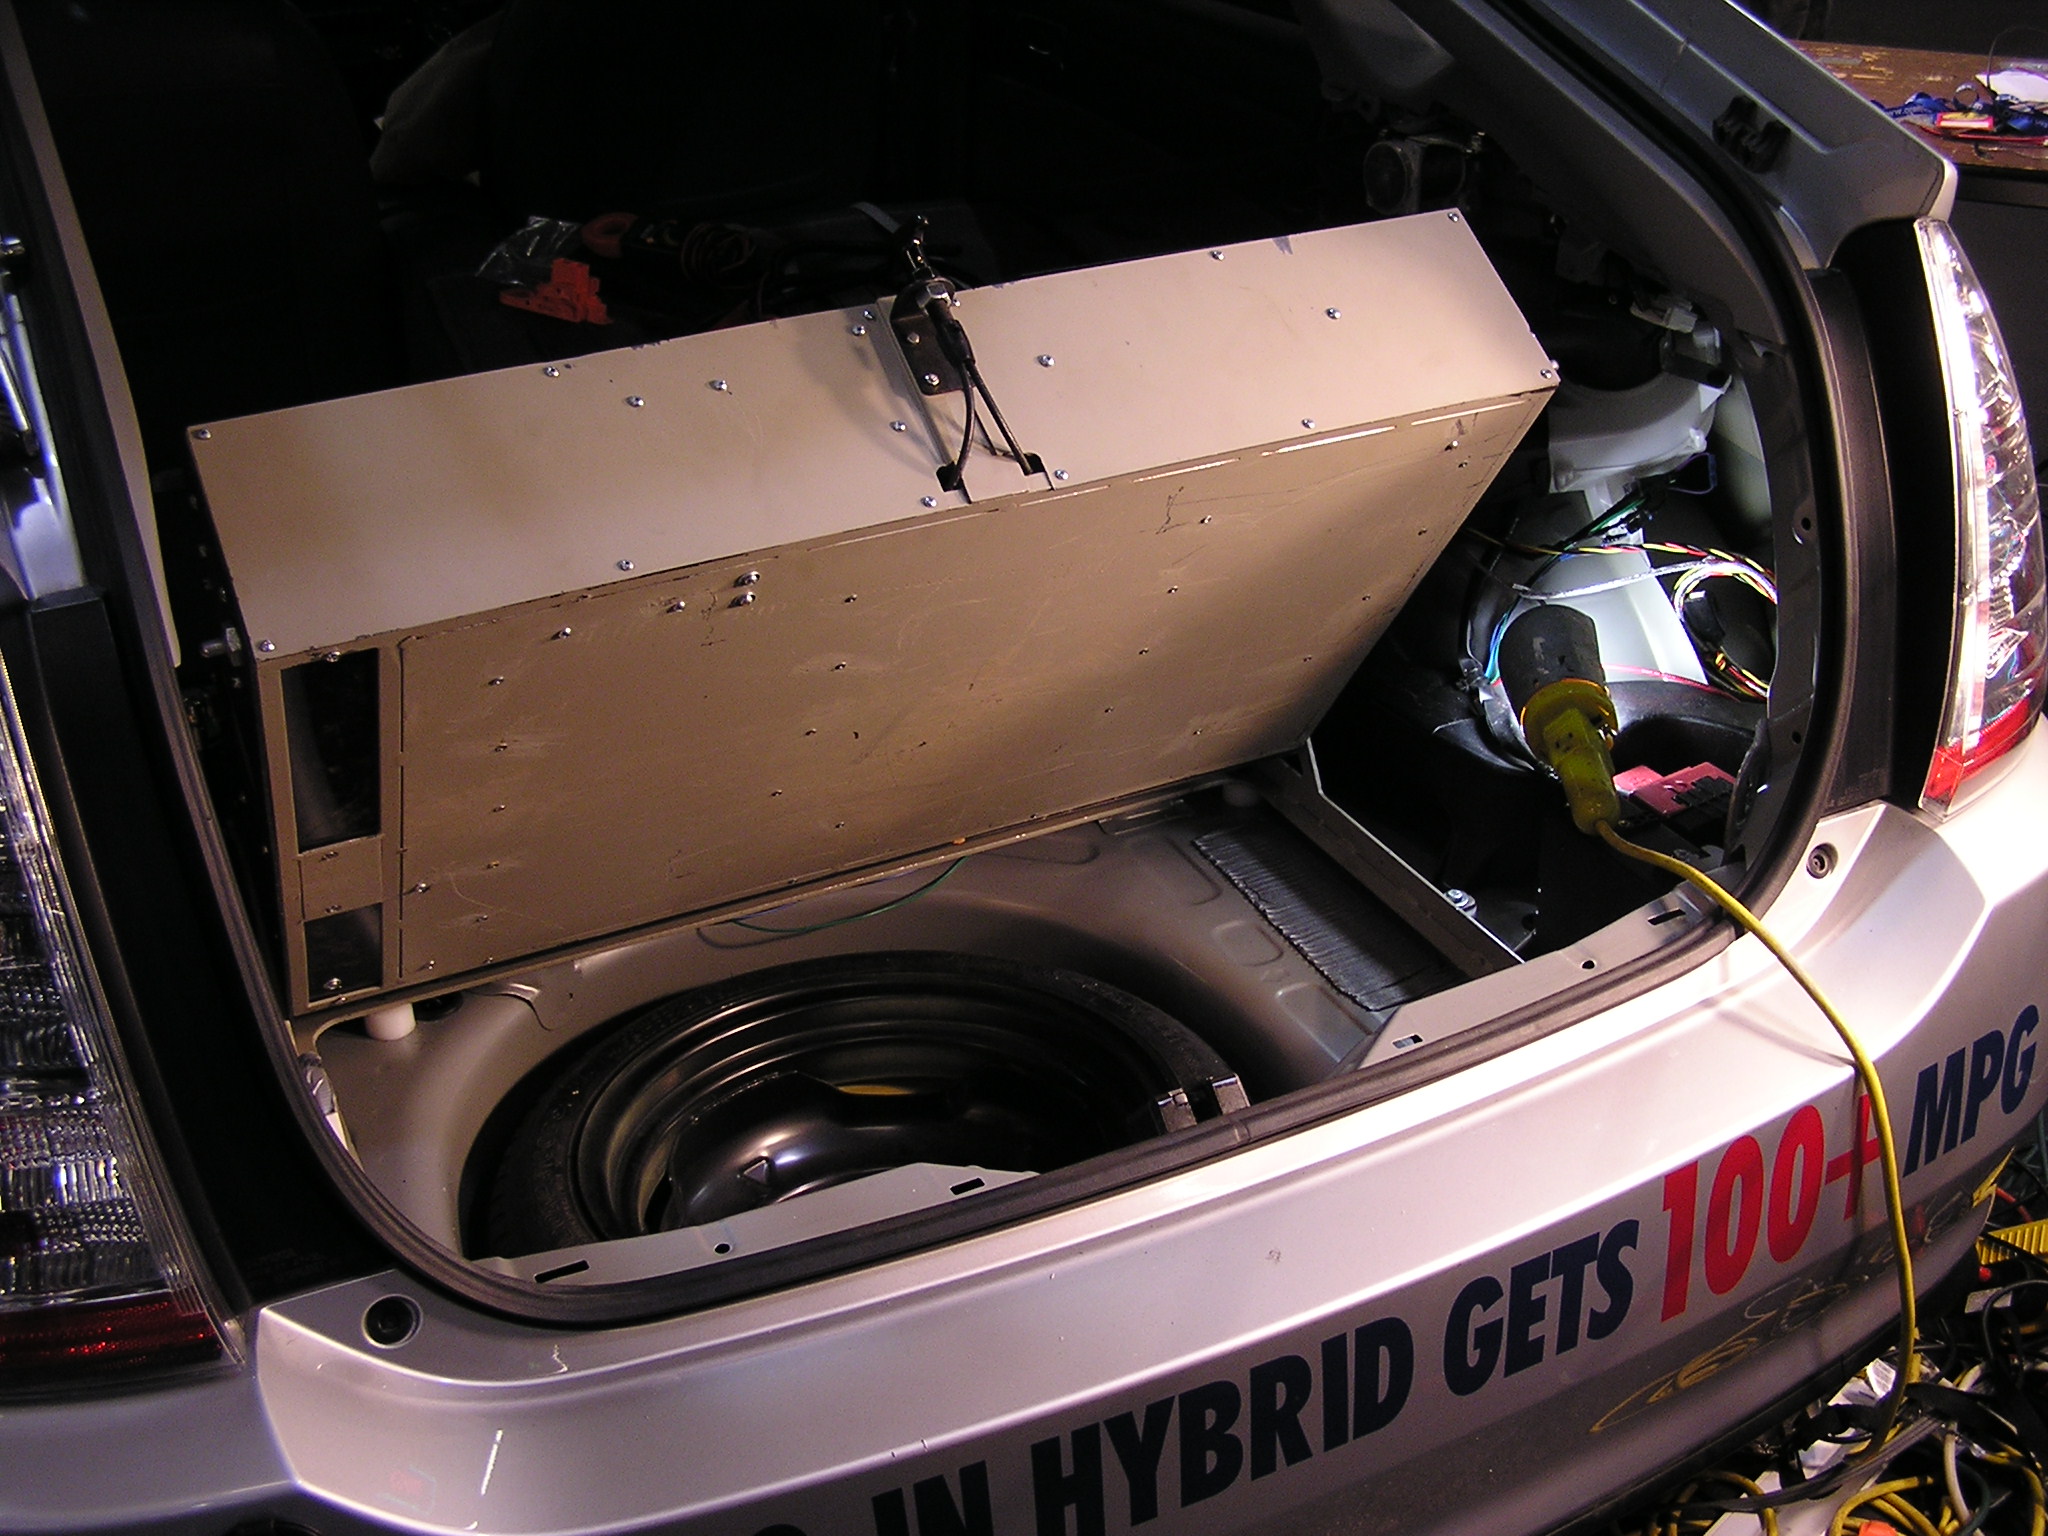
| 18:53, 9 June 2007 | Finished Alt Mounting Method.jpg (file) |  |
584 KB | Shows the Alt. mounting method trim finished with bumper inlet. | 1 |
| 16:30, 22 May 2007 | Maker Faire 2007 2.jpg (file) |  |
602 KB | From the 2007 Maker Faire | 1 |
| 05:08, 15 December 2006 | Dremel Drill Press.JPG (file) |  |
604 KB | This is the Dremel drill press I used to drill the small holes in the angle irons. | 1 |
| 16:32, 22 May 2007 | Maker Faire 2007 3.jpg (file) |  |
605 KB | From the 2007 Maker Faire | 1 |
| 21:39, 20 March 2007 | Alt method support angle irons.jpg (file) |  |
614 KB | Alt. mounting method showing all angle irons (does not have angle iron on center support yet. | 1 |
| 05:17, 15 December 2006 | Screws Sticking Through Partially Assembled Tray.JPG (file) |  |
616 KB | I used extra long, self threading screws, so they stick through. I used a hacksaw first, and then a dremel with a metal cut off attachment to cut the screws at the base. Then used a grinder to grind them perfectly flat. | 1 |
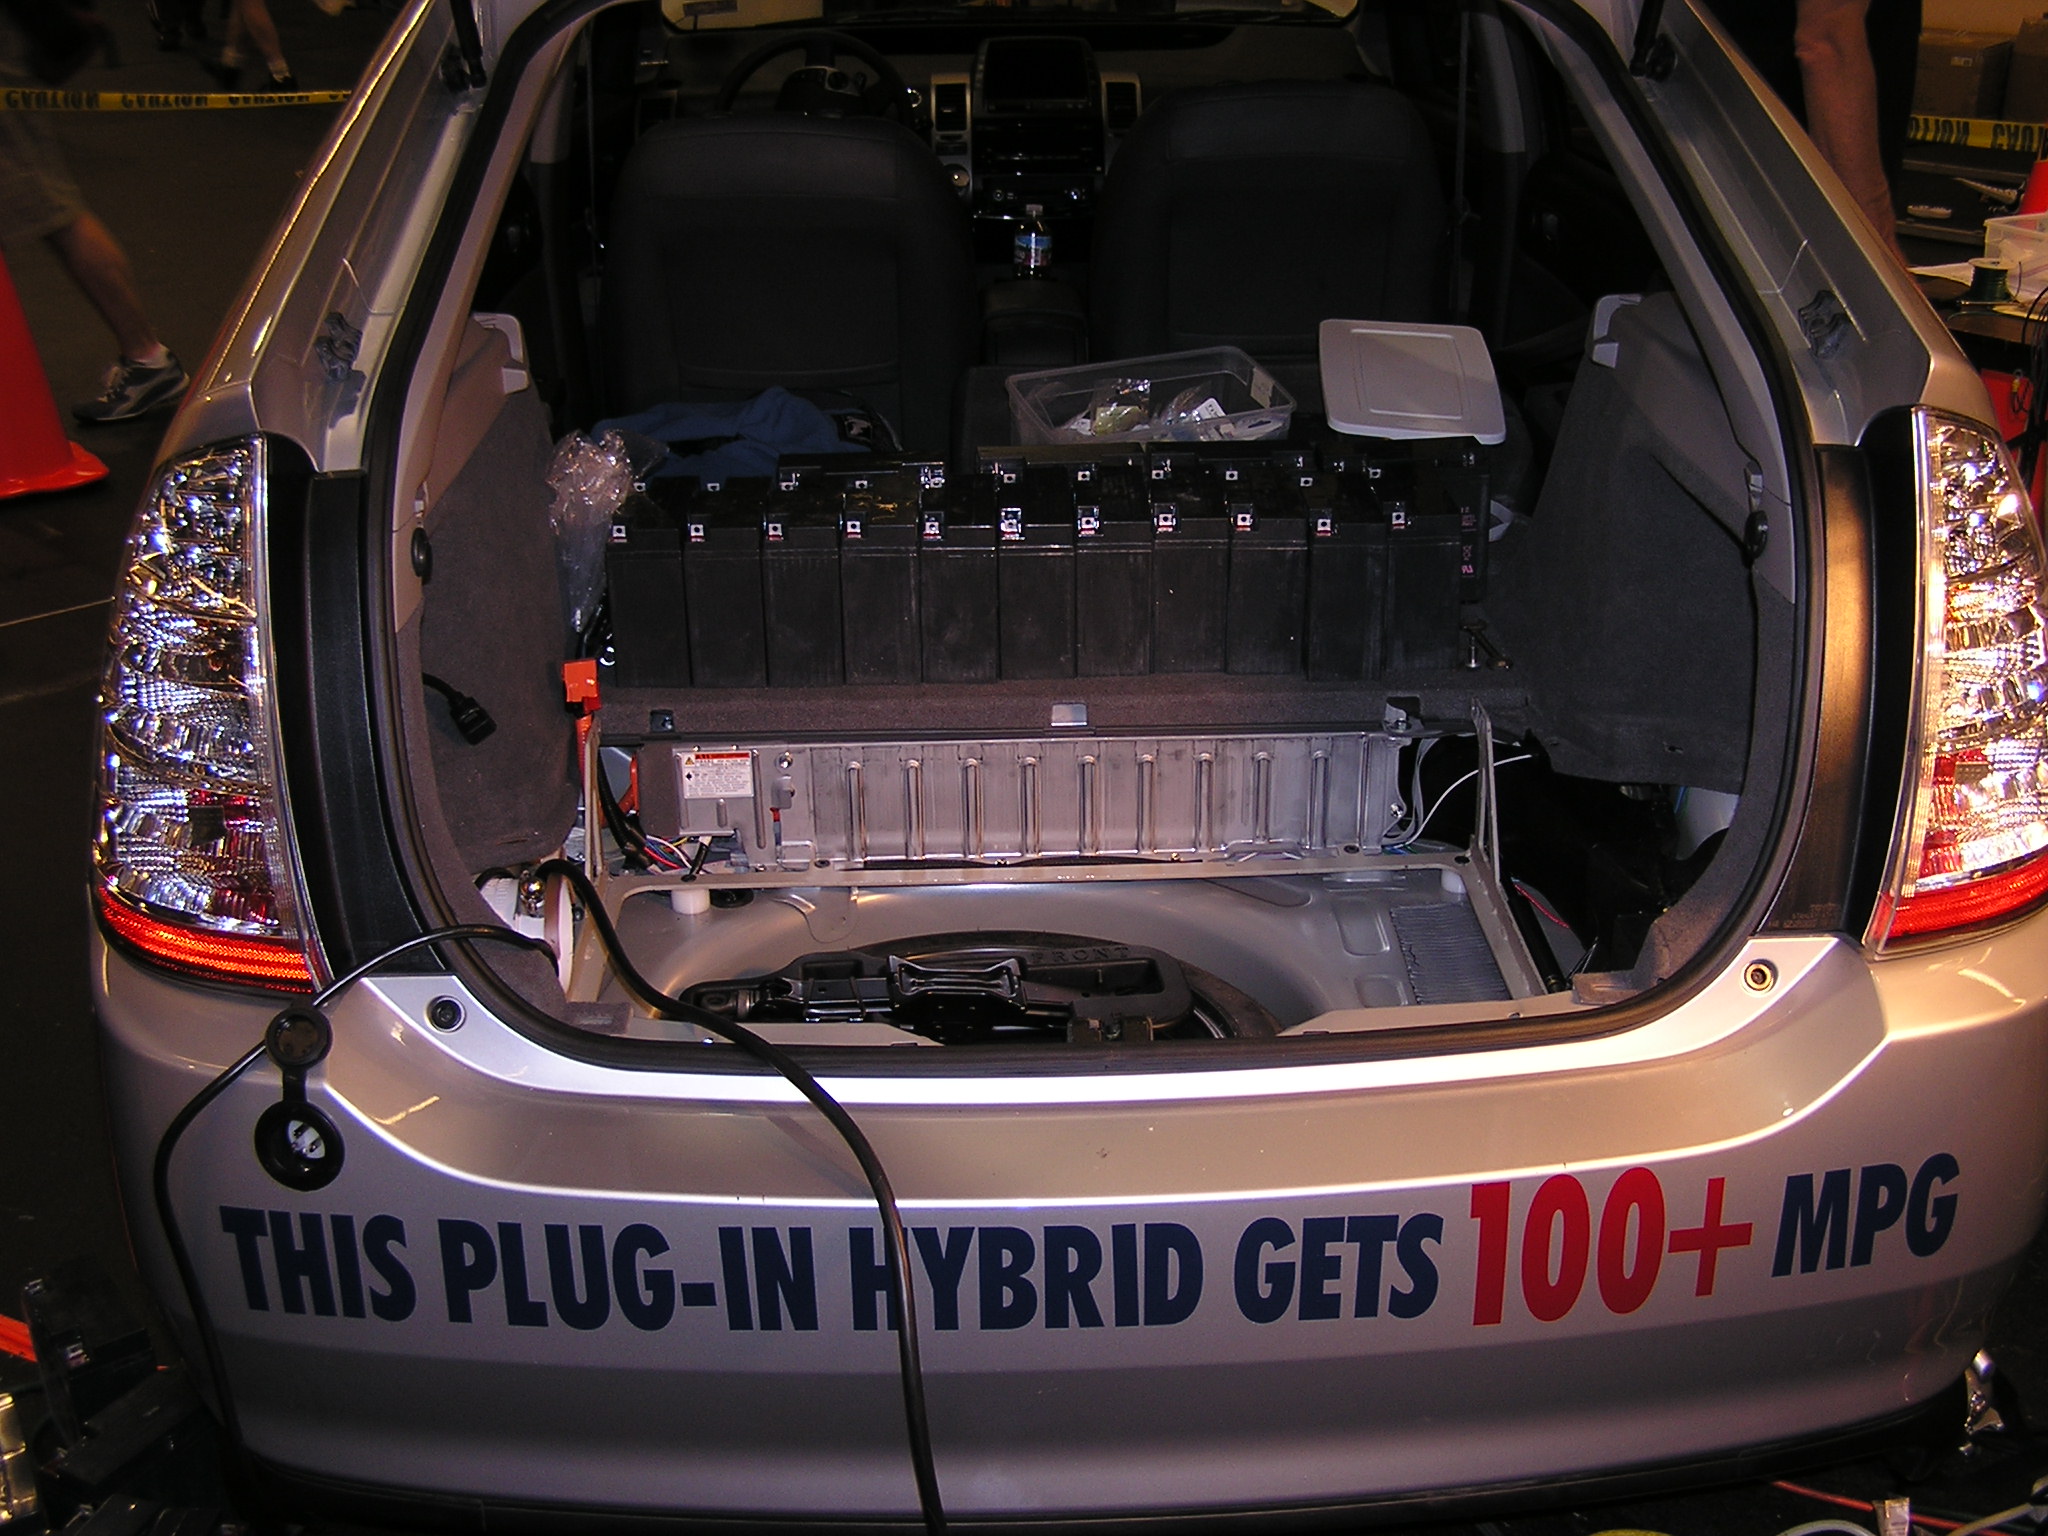
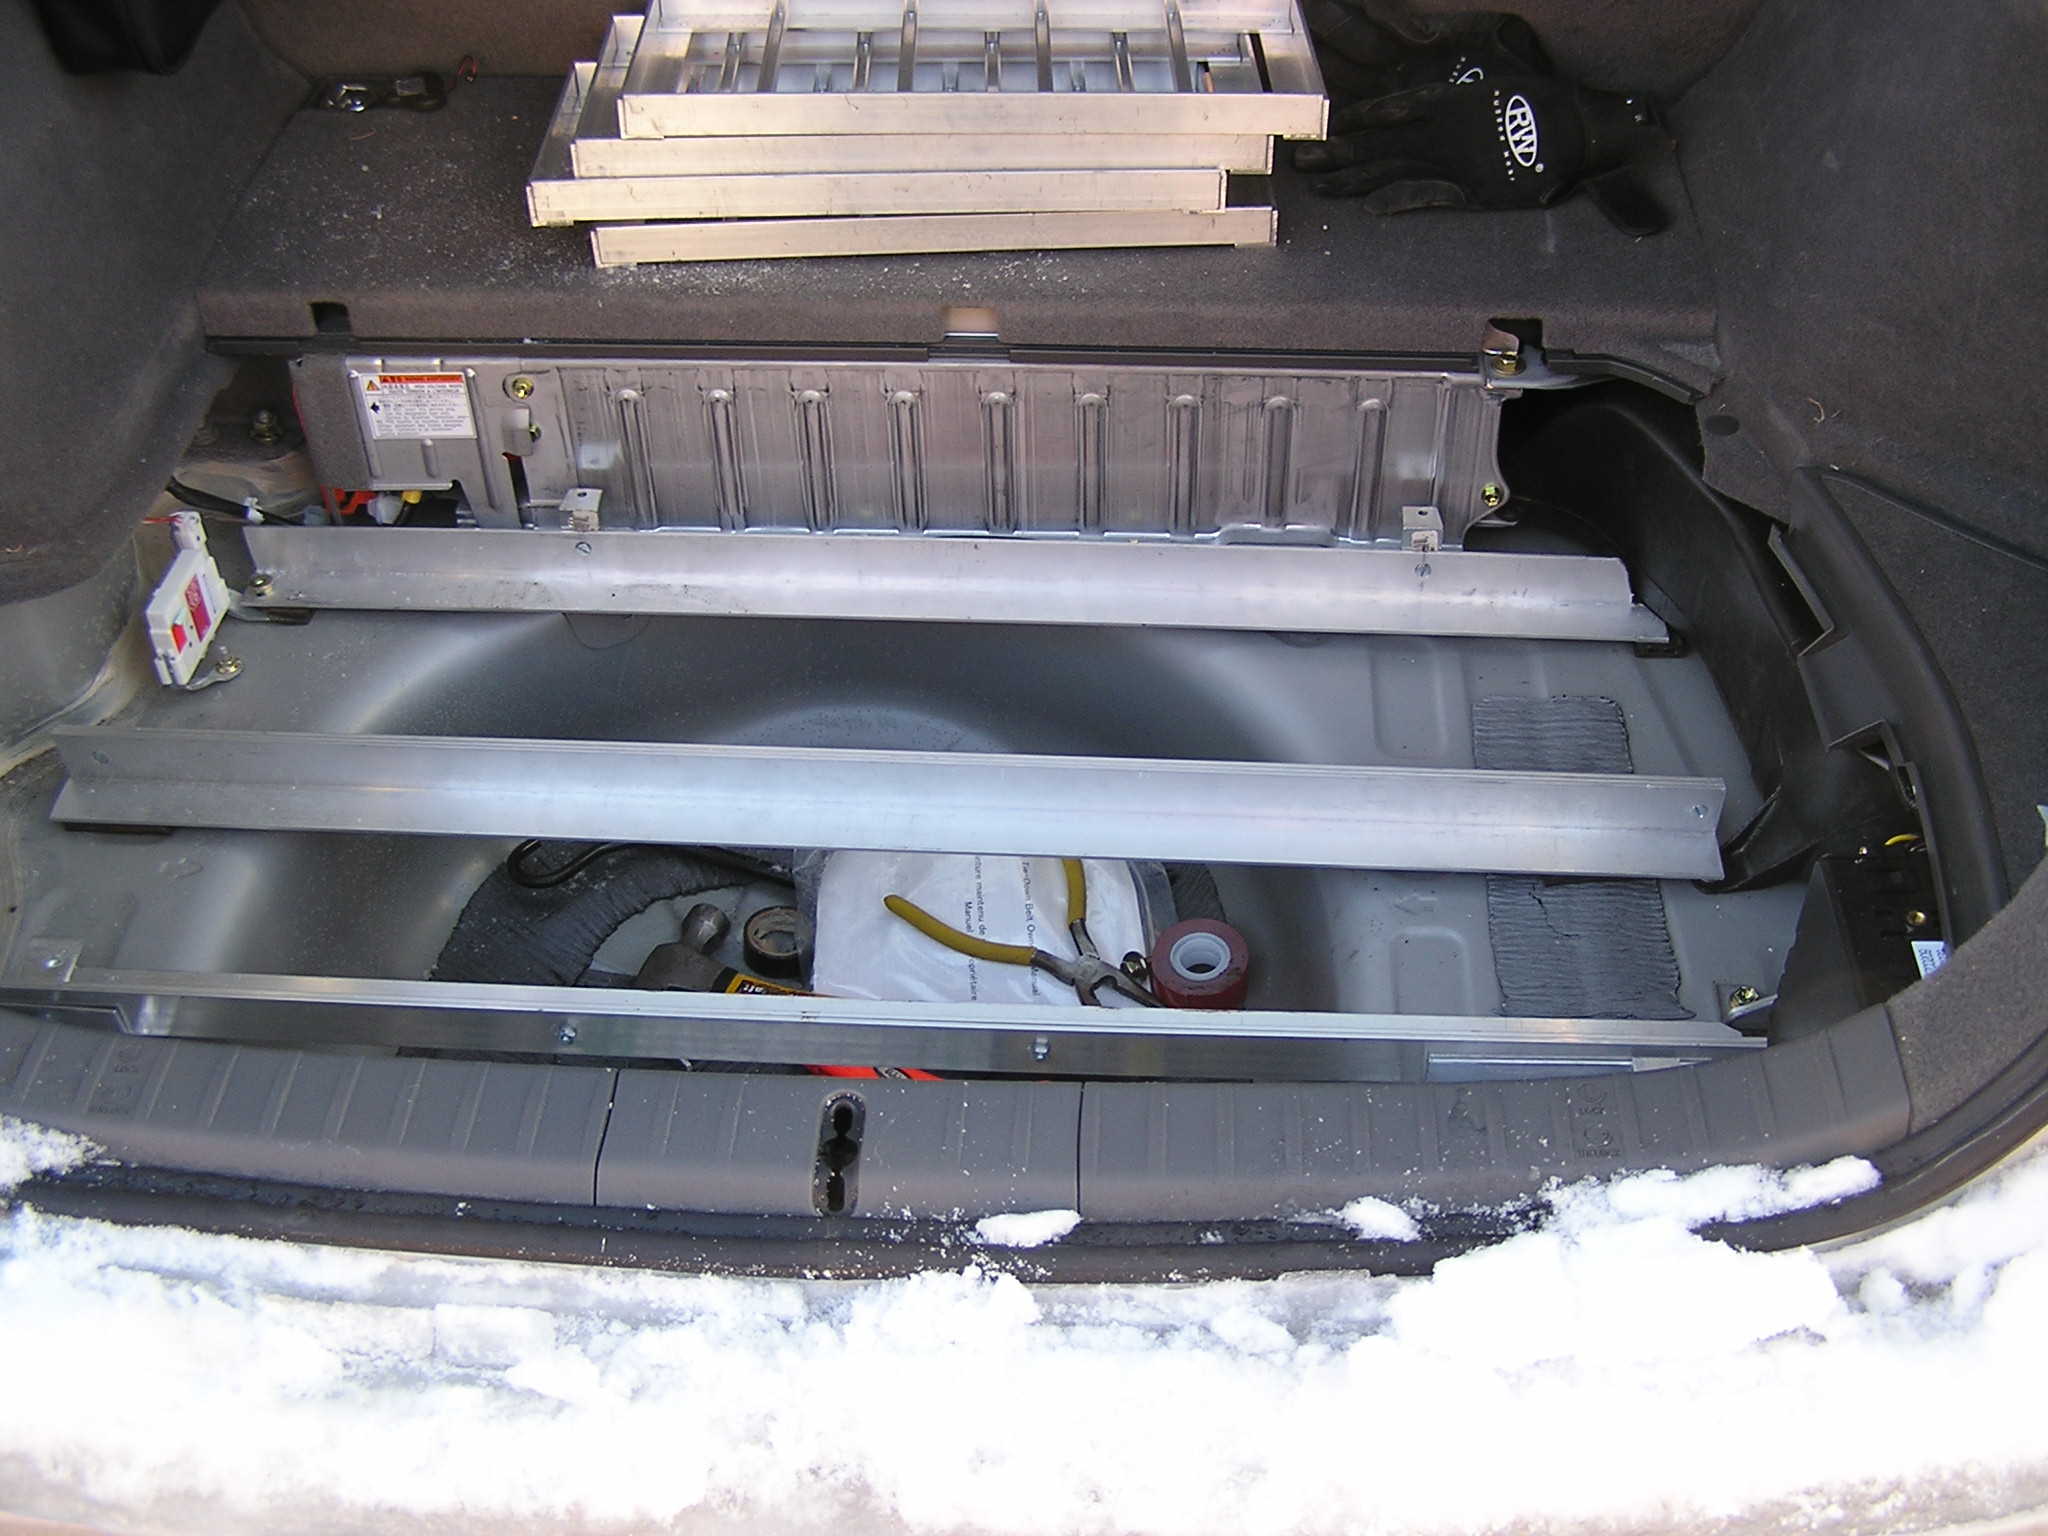
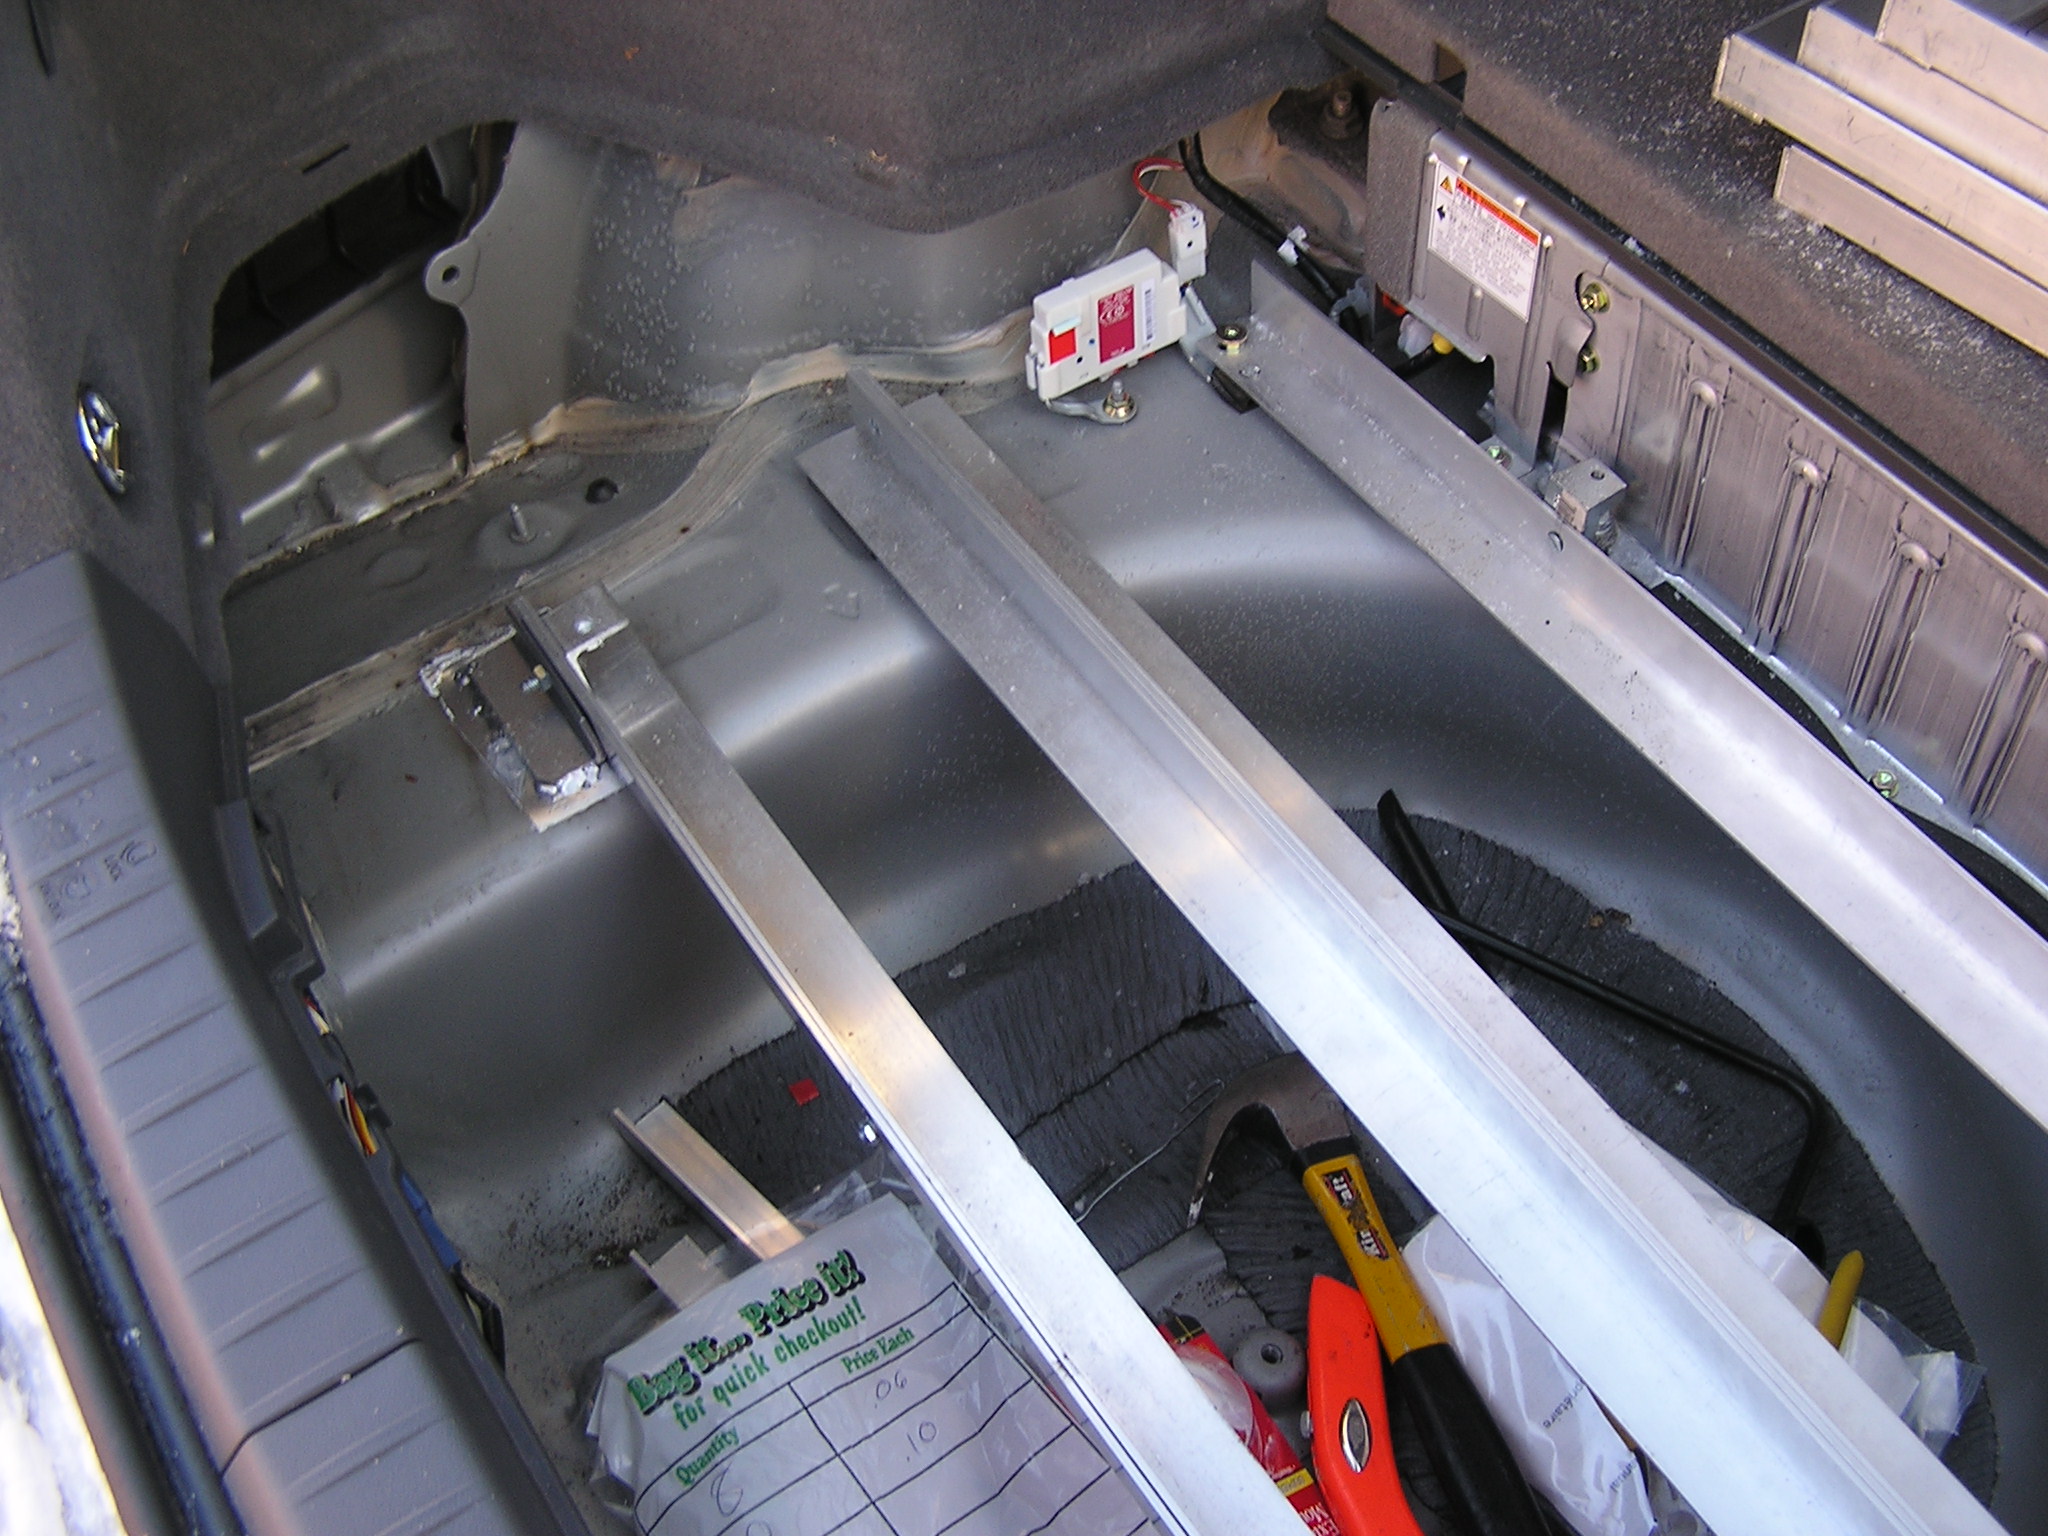
| 21:44, 20 March 2007 | Entire alt batt box mounting supports.jpg (file) |  |
622 KB | Alt. mounting method. Shows supports with trays in place. | 1 |
| 21:41, 20 March 2007 | Left side battery box supports alt method.jpg (file) |  |
622 KB | Alt mounting method. Shows left side of battery box supports | 1 |
| 05:04, 15 December 2006 | Making Tray Jig Step 3.JPG (file) |  |
623 KB | Place wood to hold the channel irons in place | 1 |
| 21:42, 20 March 2007 | Rubber on center batt box support.jpg (file) |  |
629 KB | Alt mounting method. Shows rubber pads on the battery box support. | 1 |
| 21:40, 20 March 2007 | Right side battery box supports alt method.jpg (file) |  |
633 KB | Alt. mounting method. Shows right side of supports | 1 |
| 05:06, 15 December 2006 | Almost Finished Tray Jig.JPG (file) |  |
633 KB | 1 | |
| 22:54, 17 December 2006 | Inside Corner.JPG (file) |  |
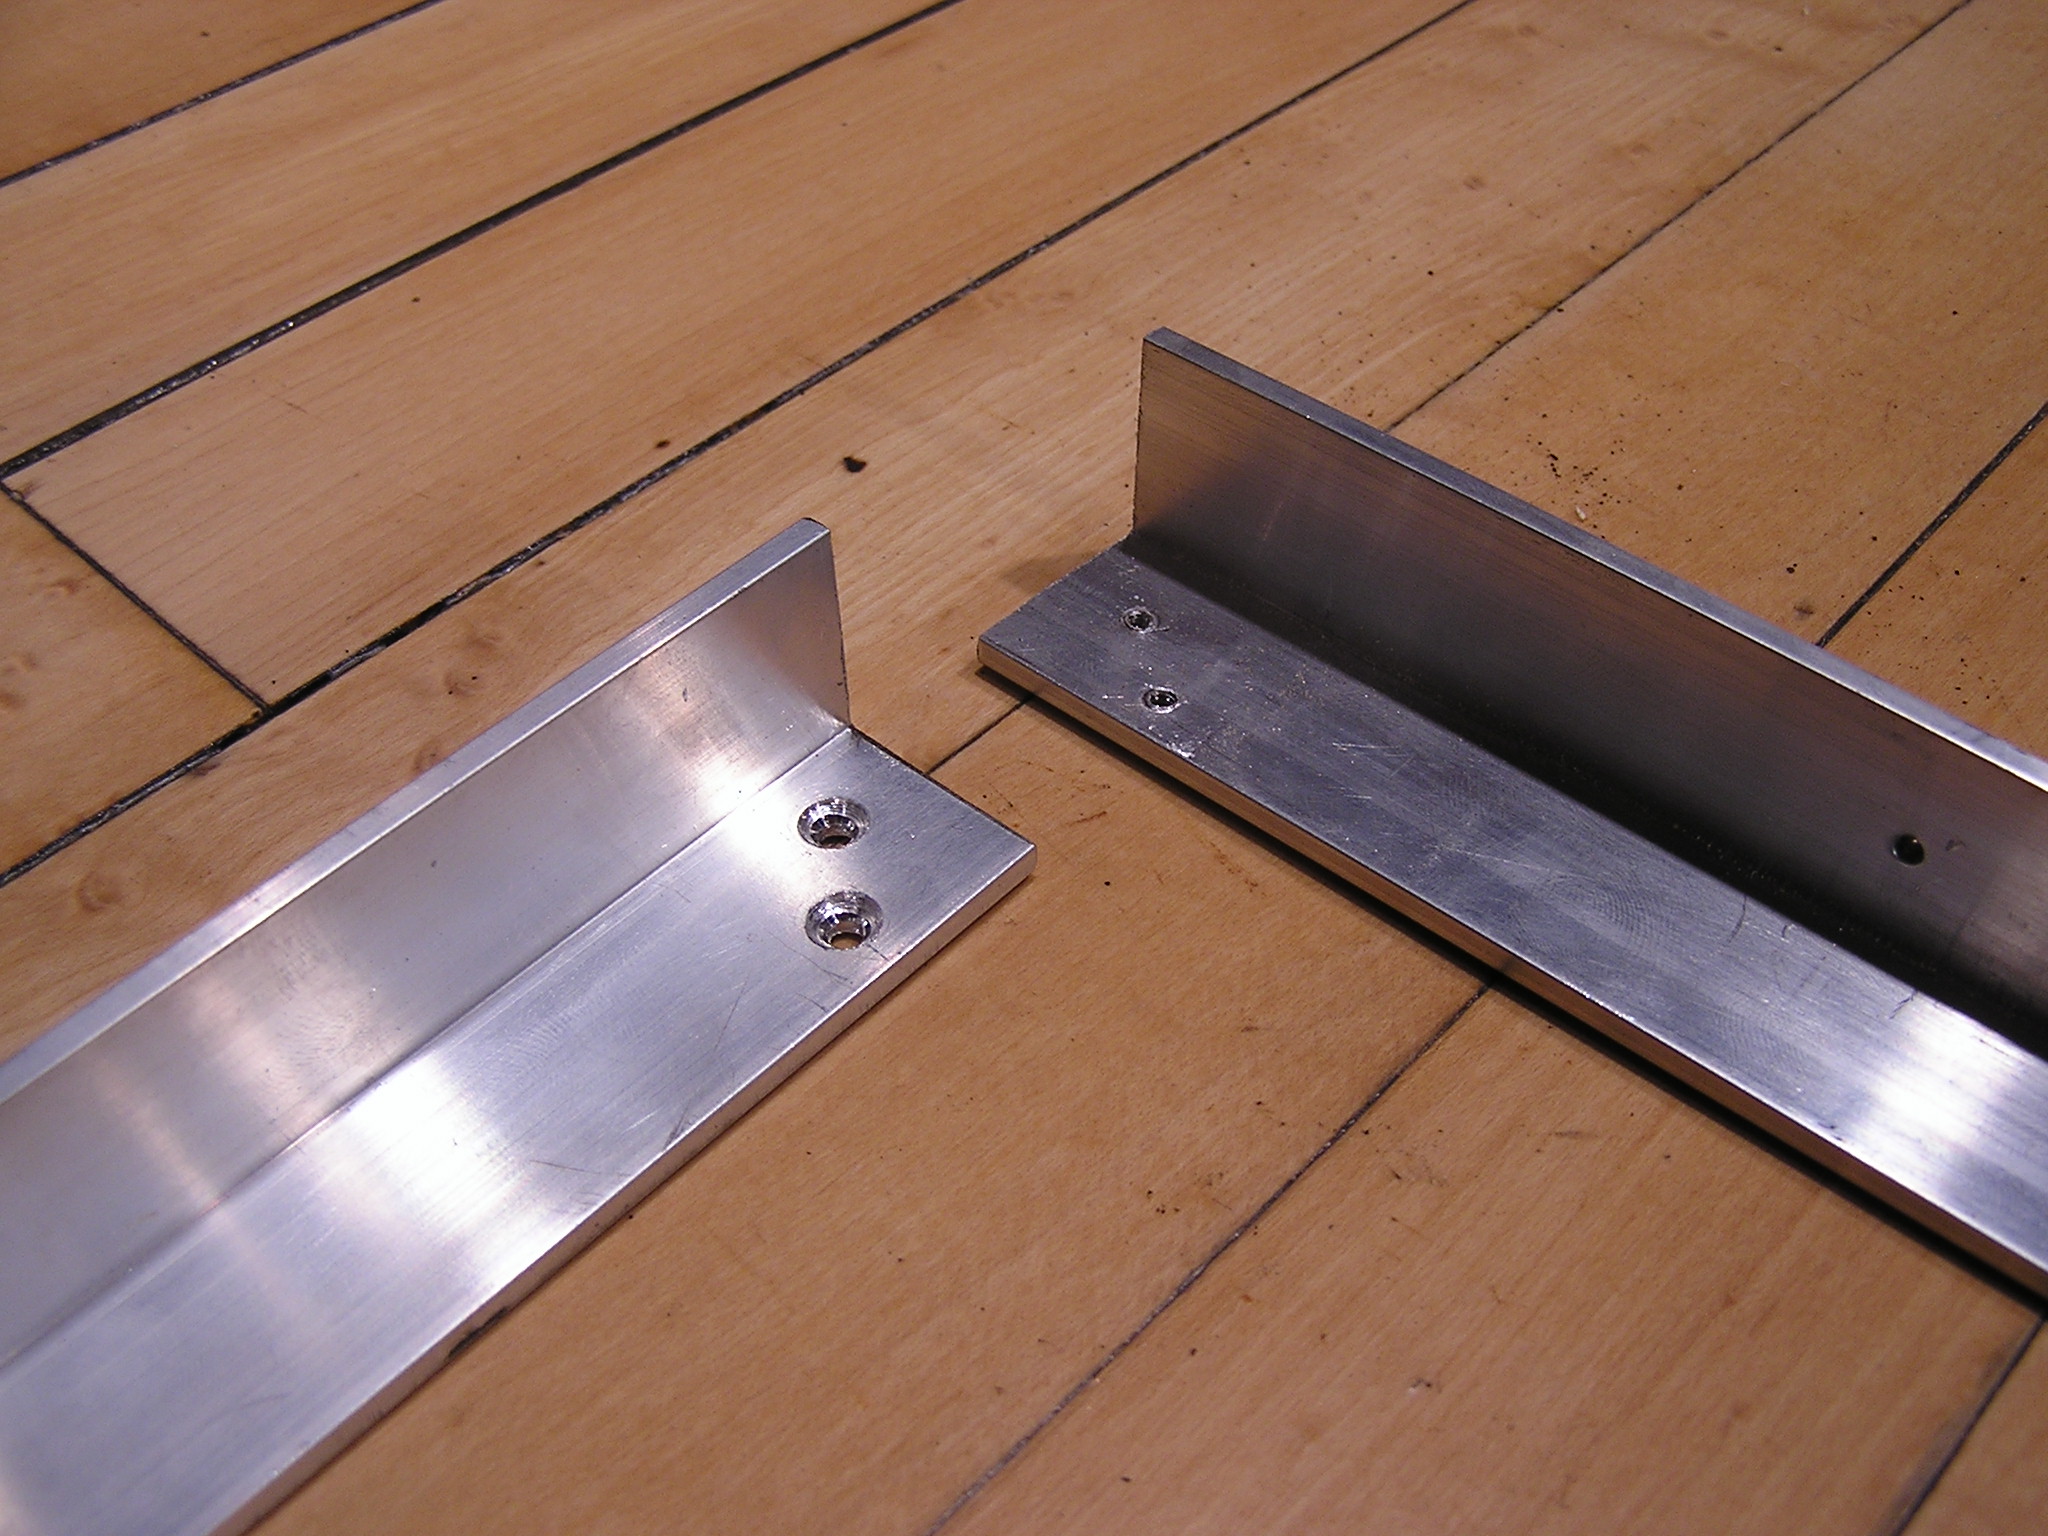
635 KB | Inside the corner bracket. The machine screws are counter sunk into the aluminum angle iron. | 1 |
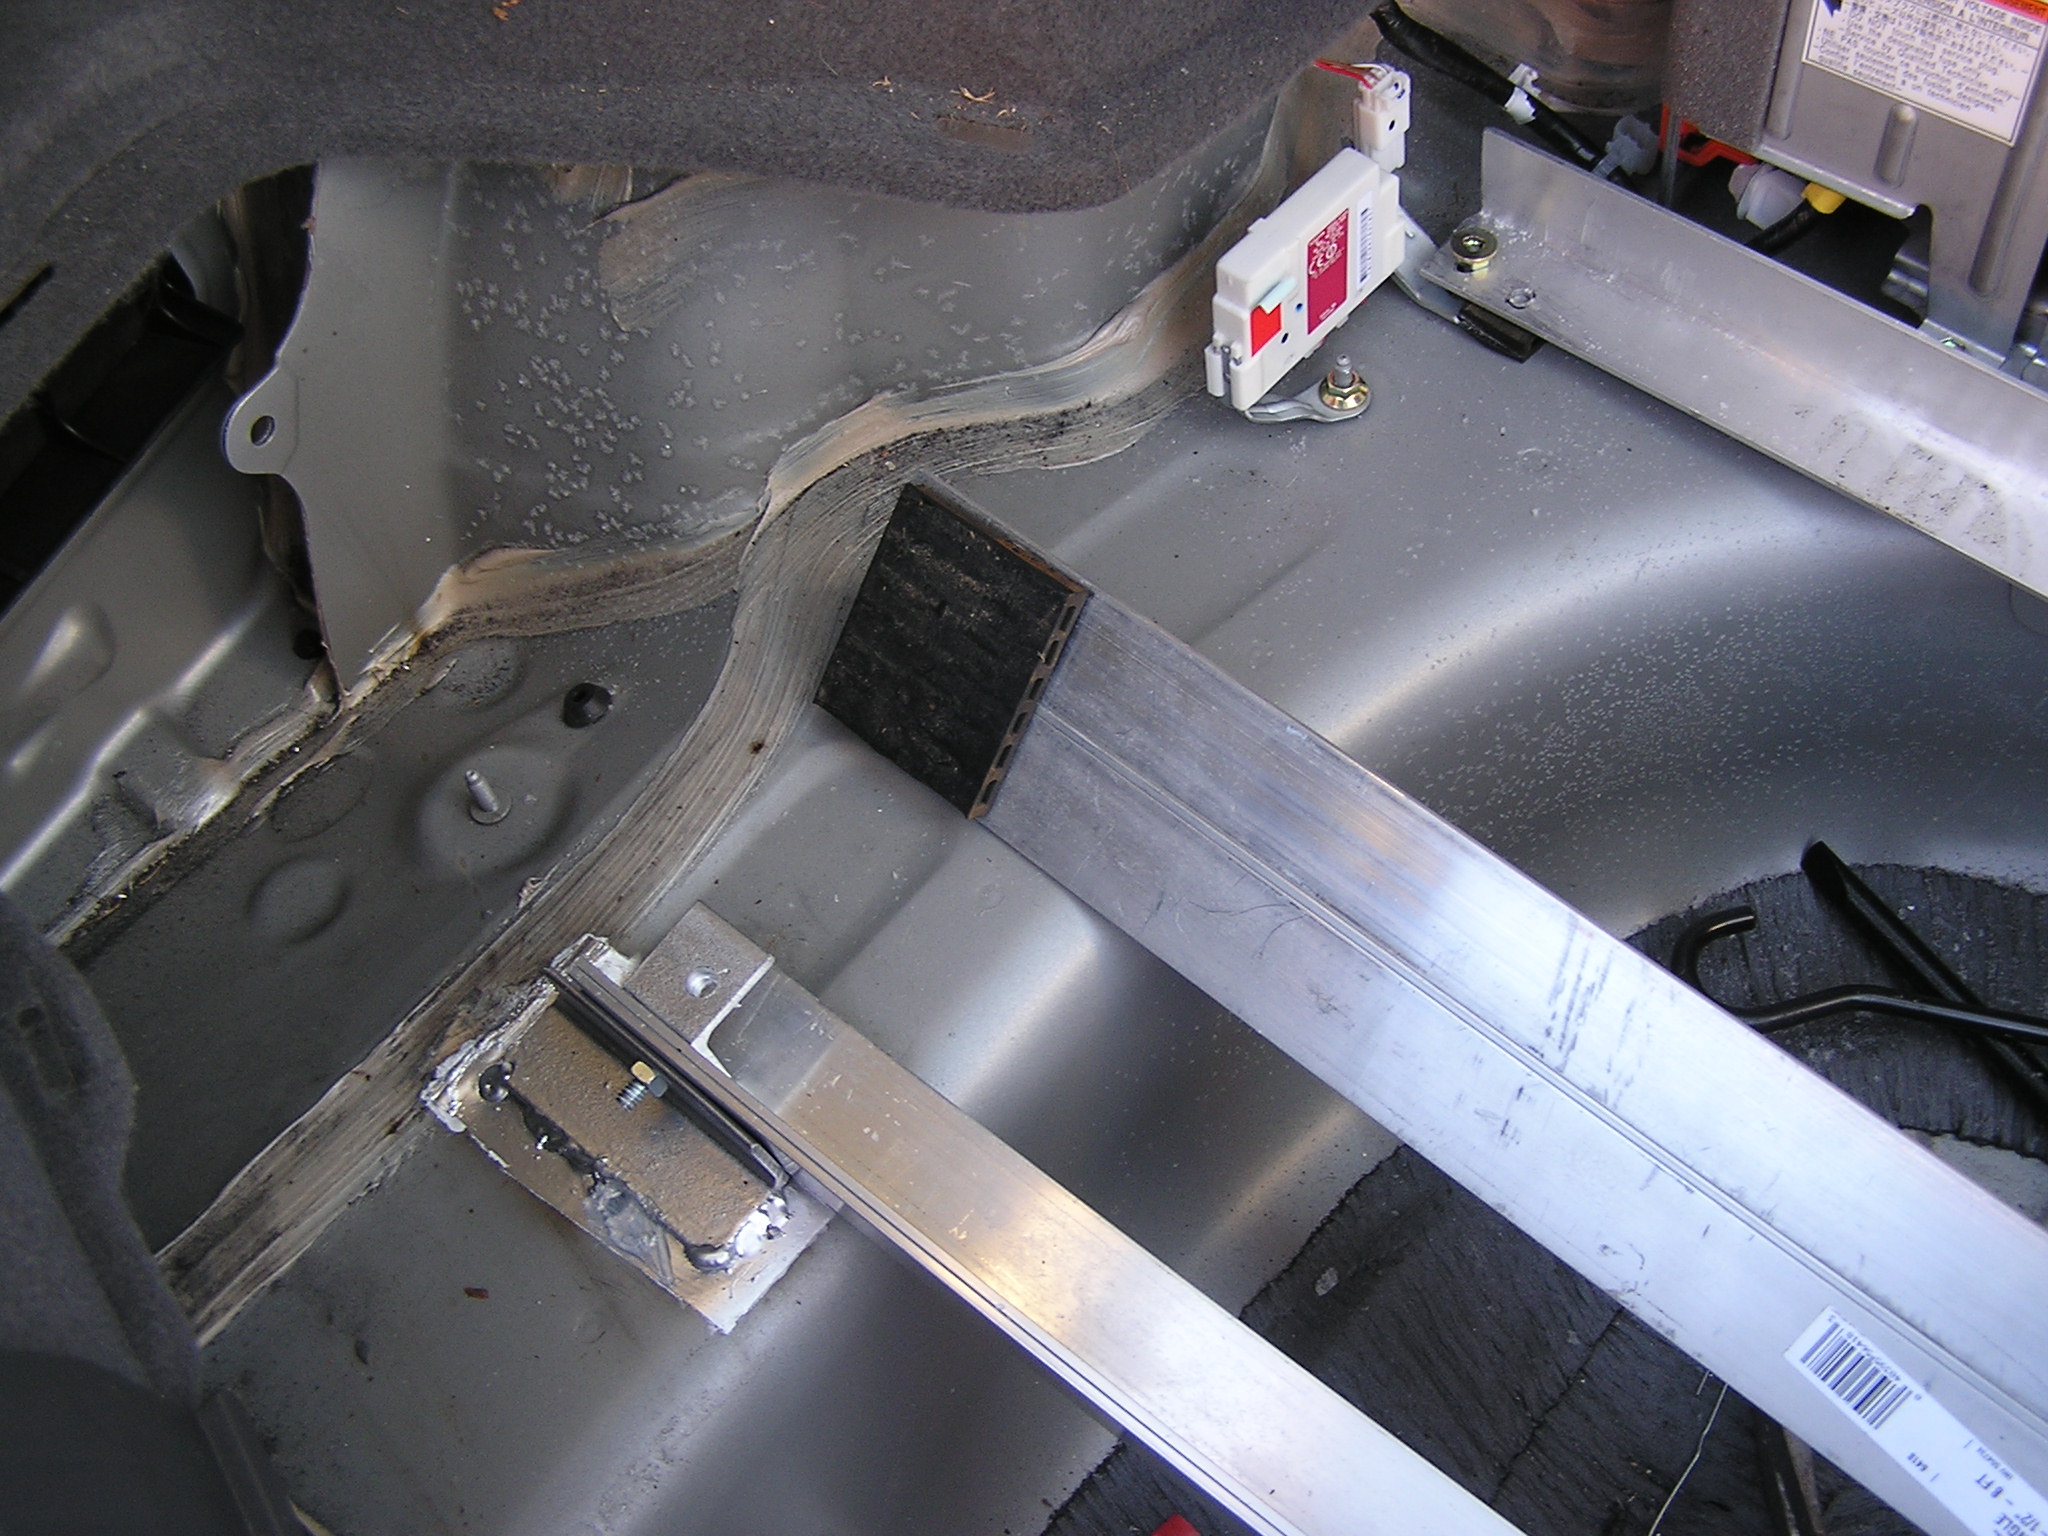
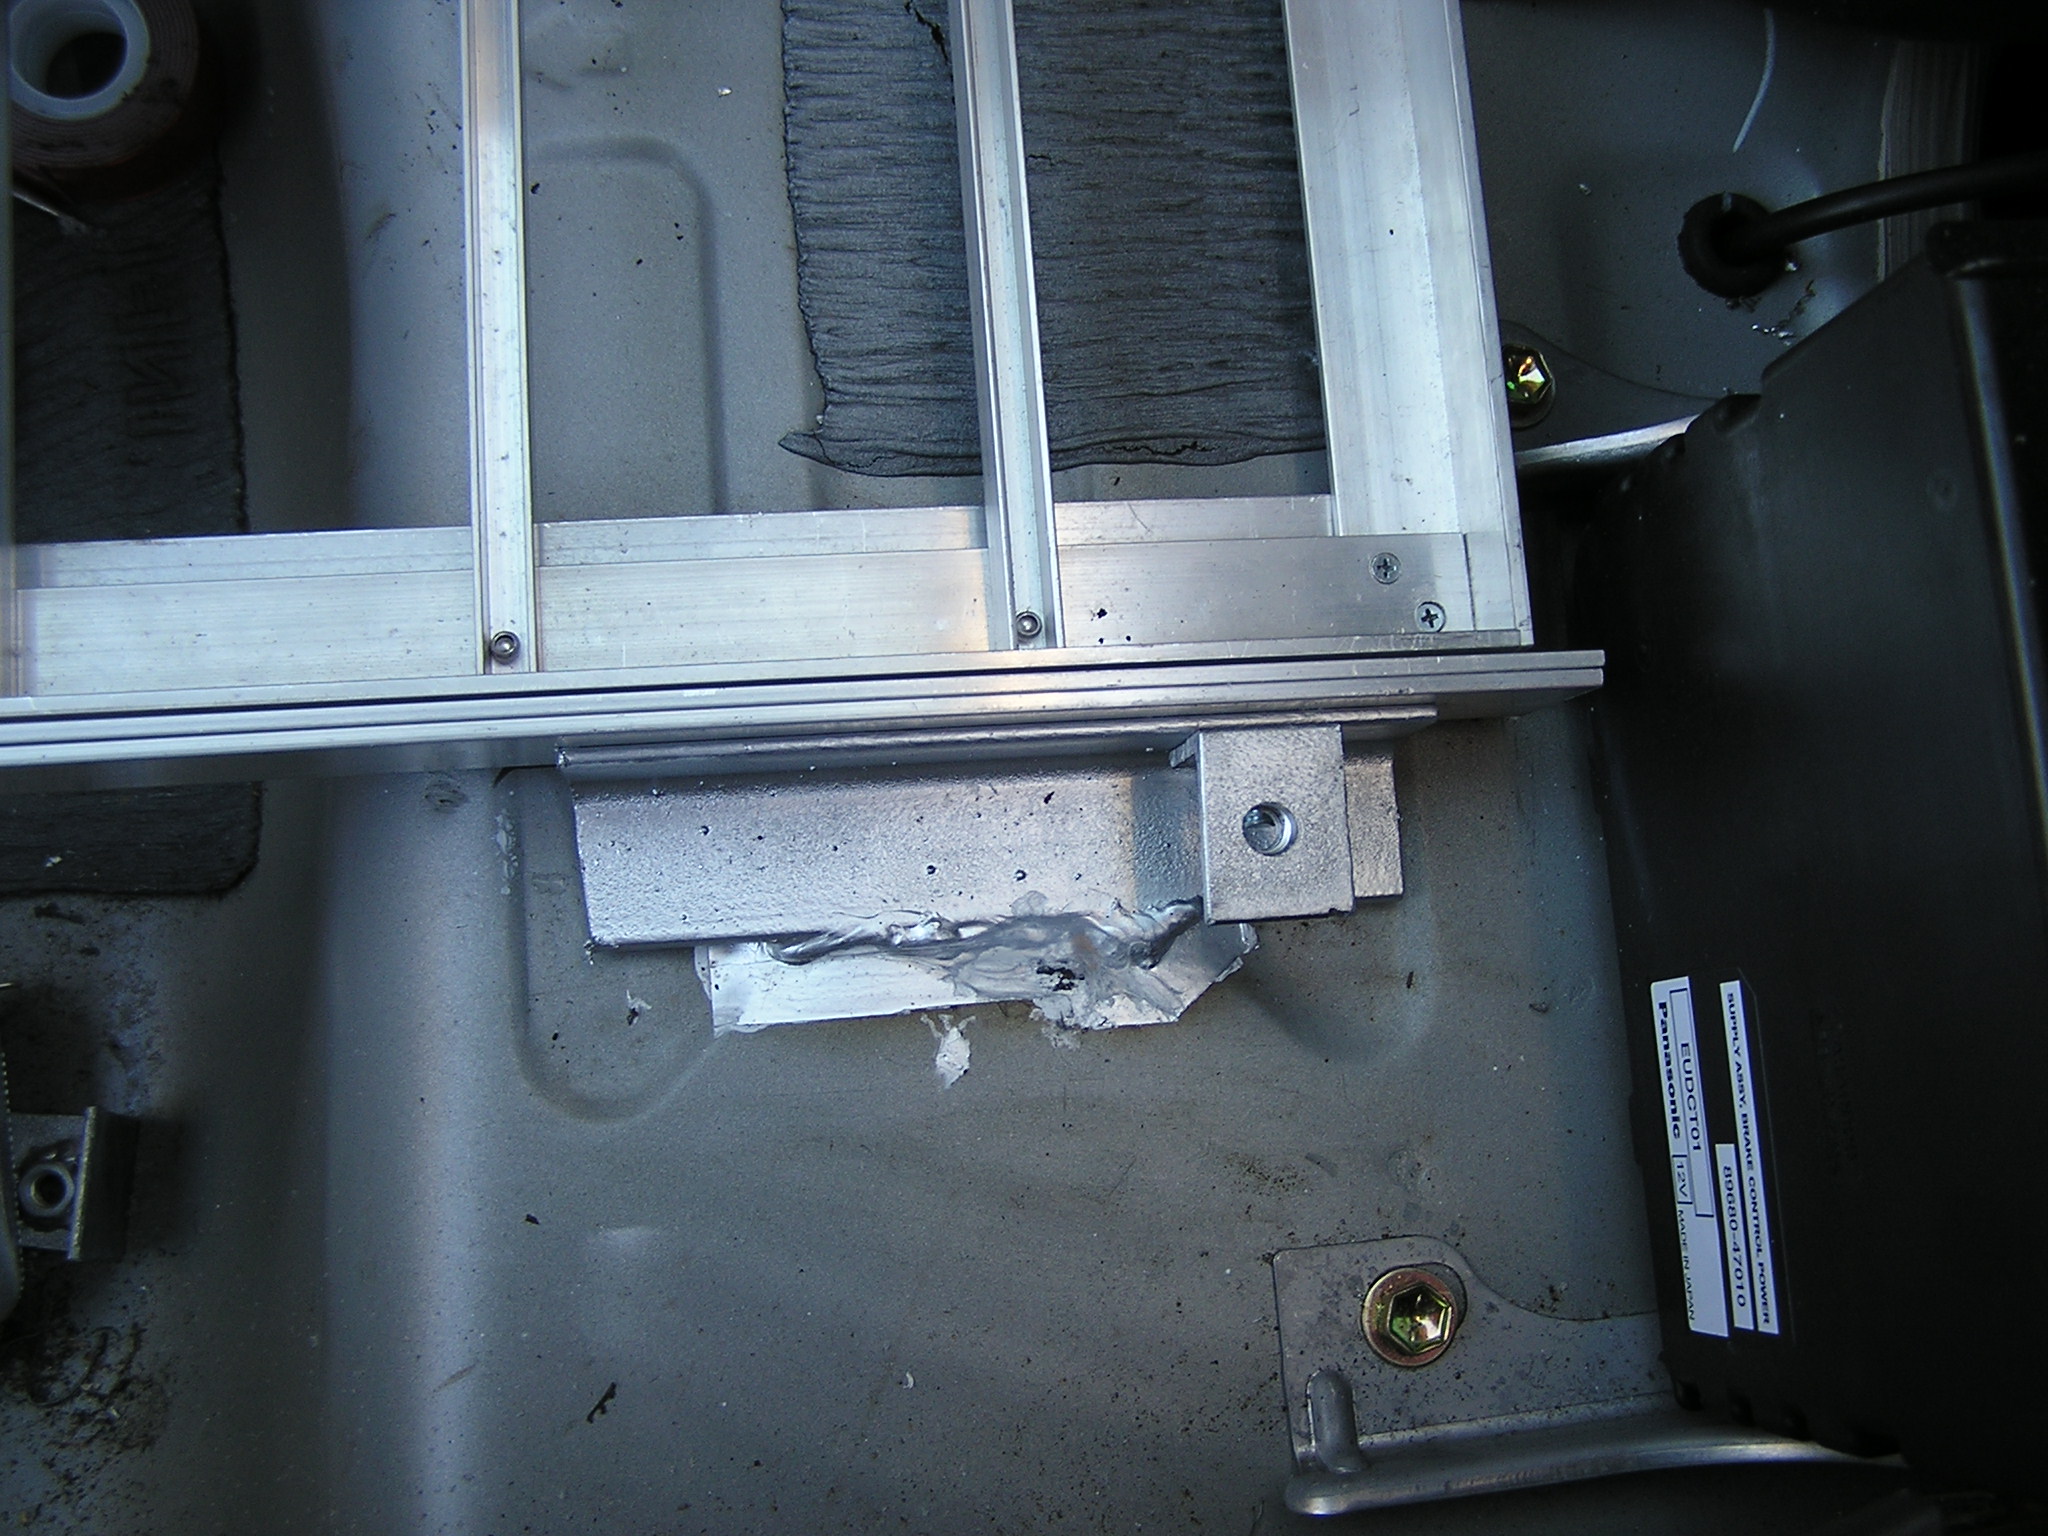
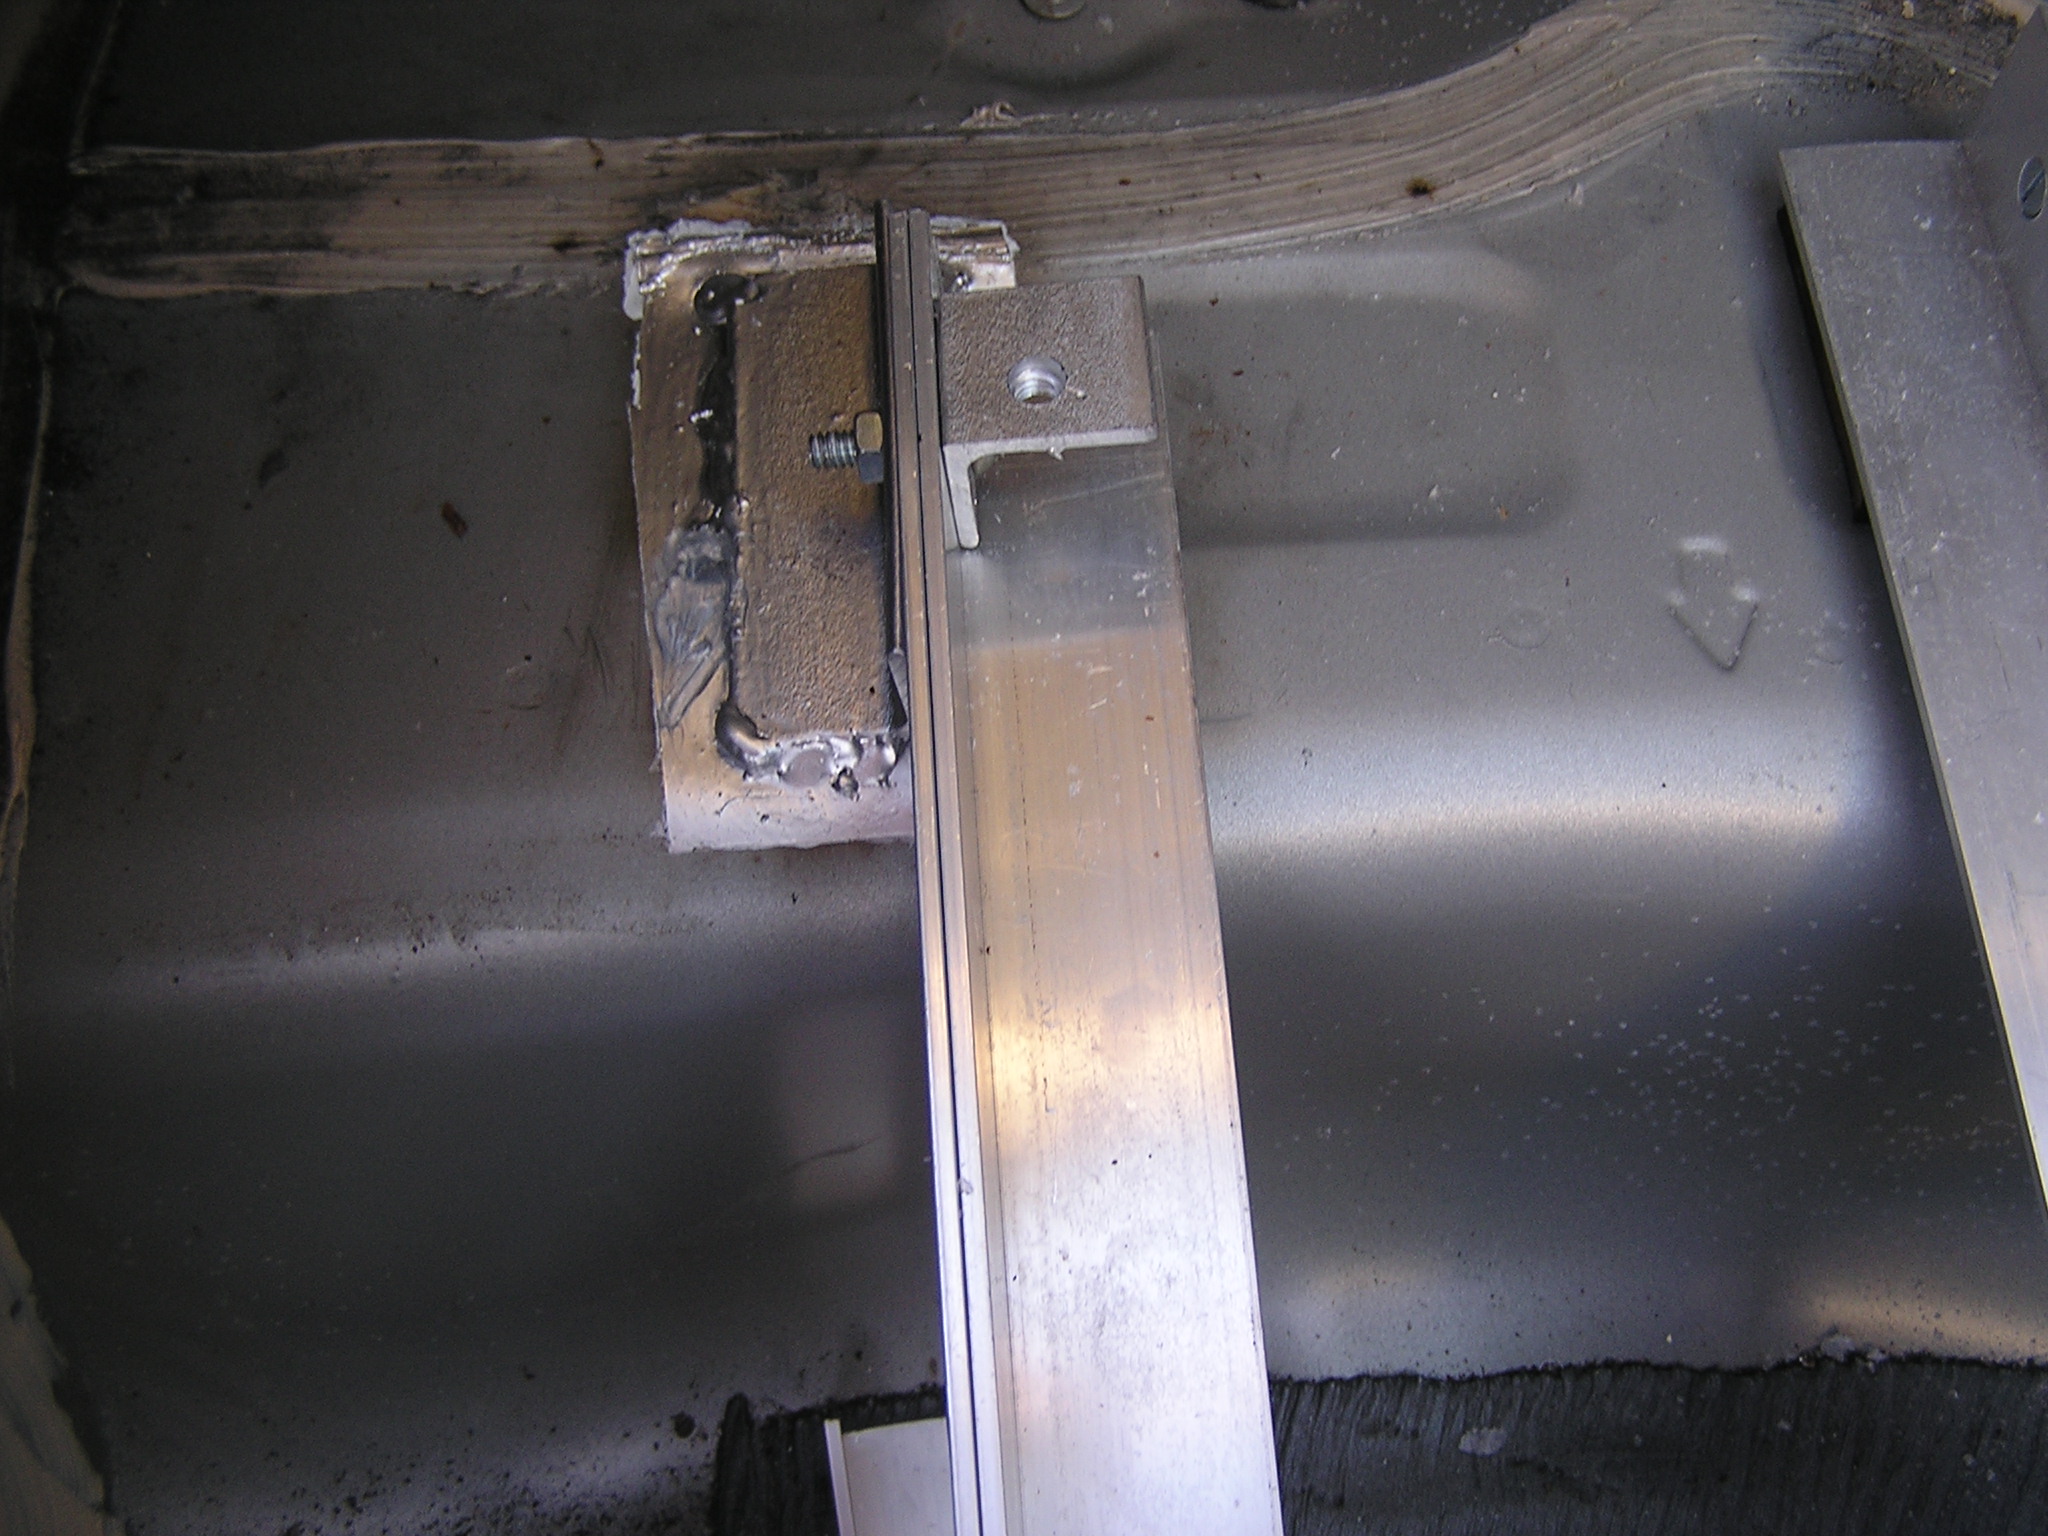
| 21:36, 20 March 2007 | Welded angle iron 1.jpg (file) |  |
637 KB | The welded steel angle iron is supporting the aluminum angle irons that support the battery box. | 1 |
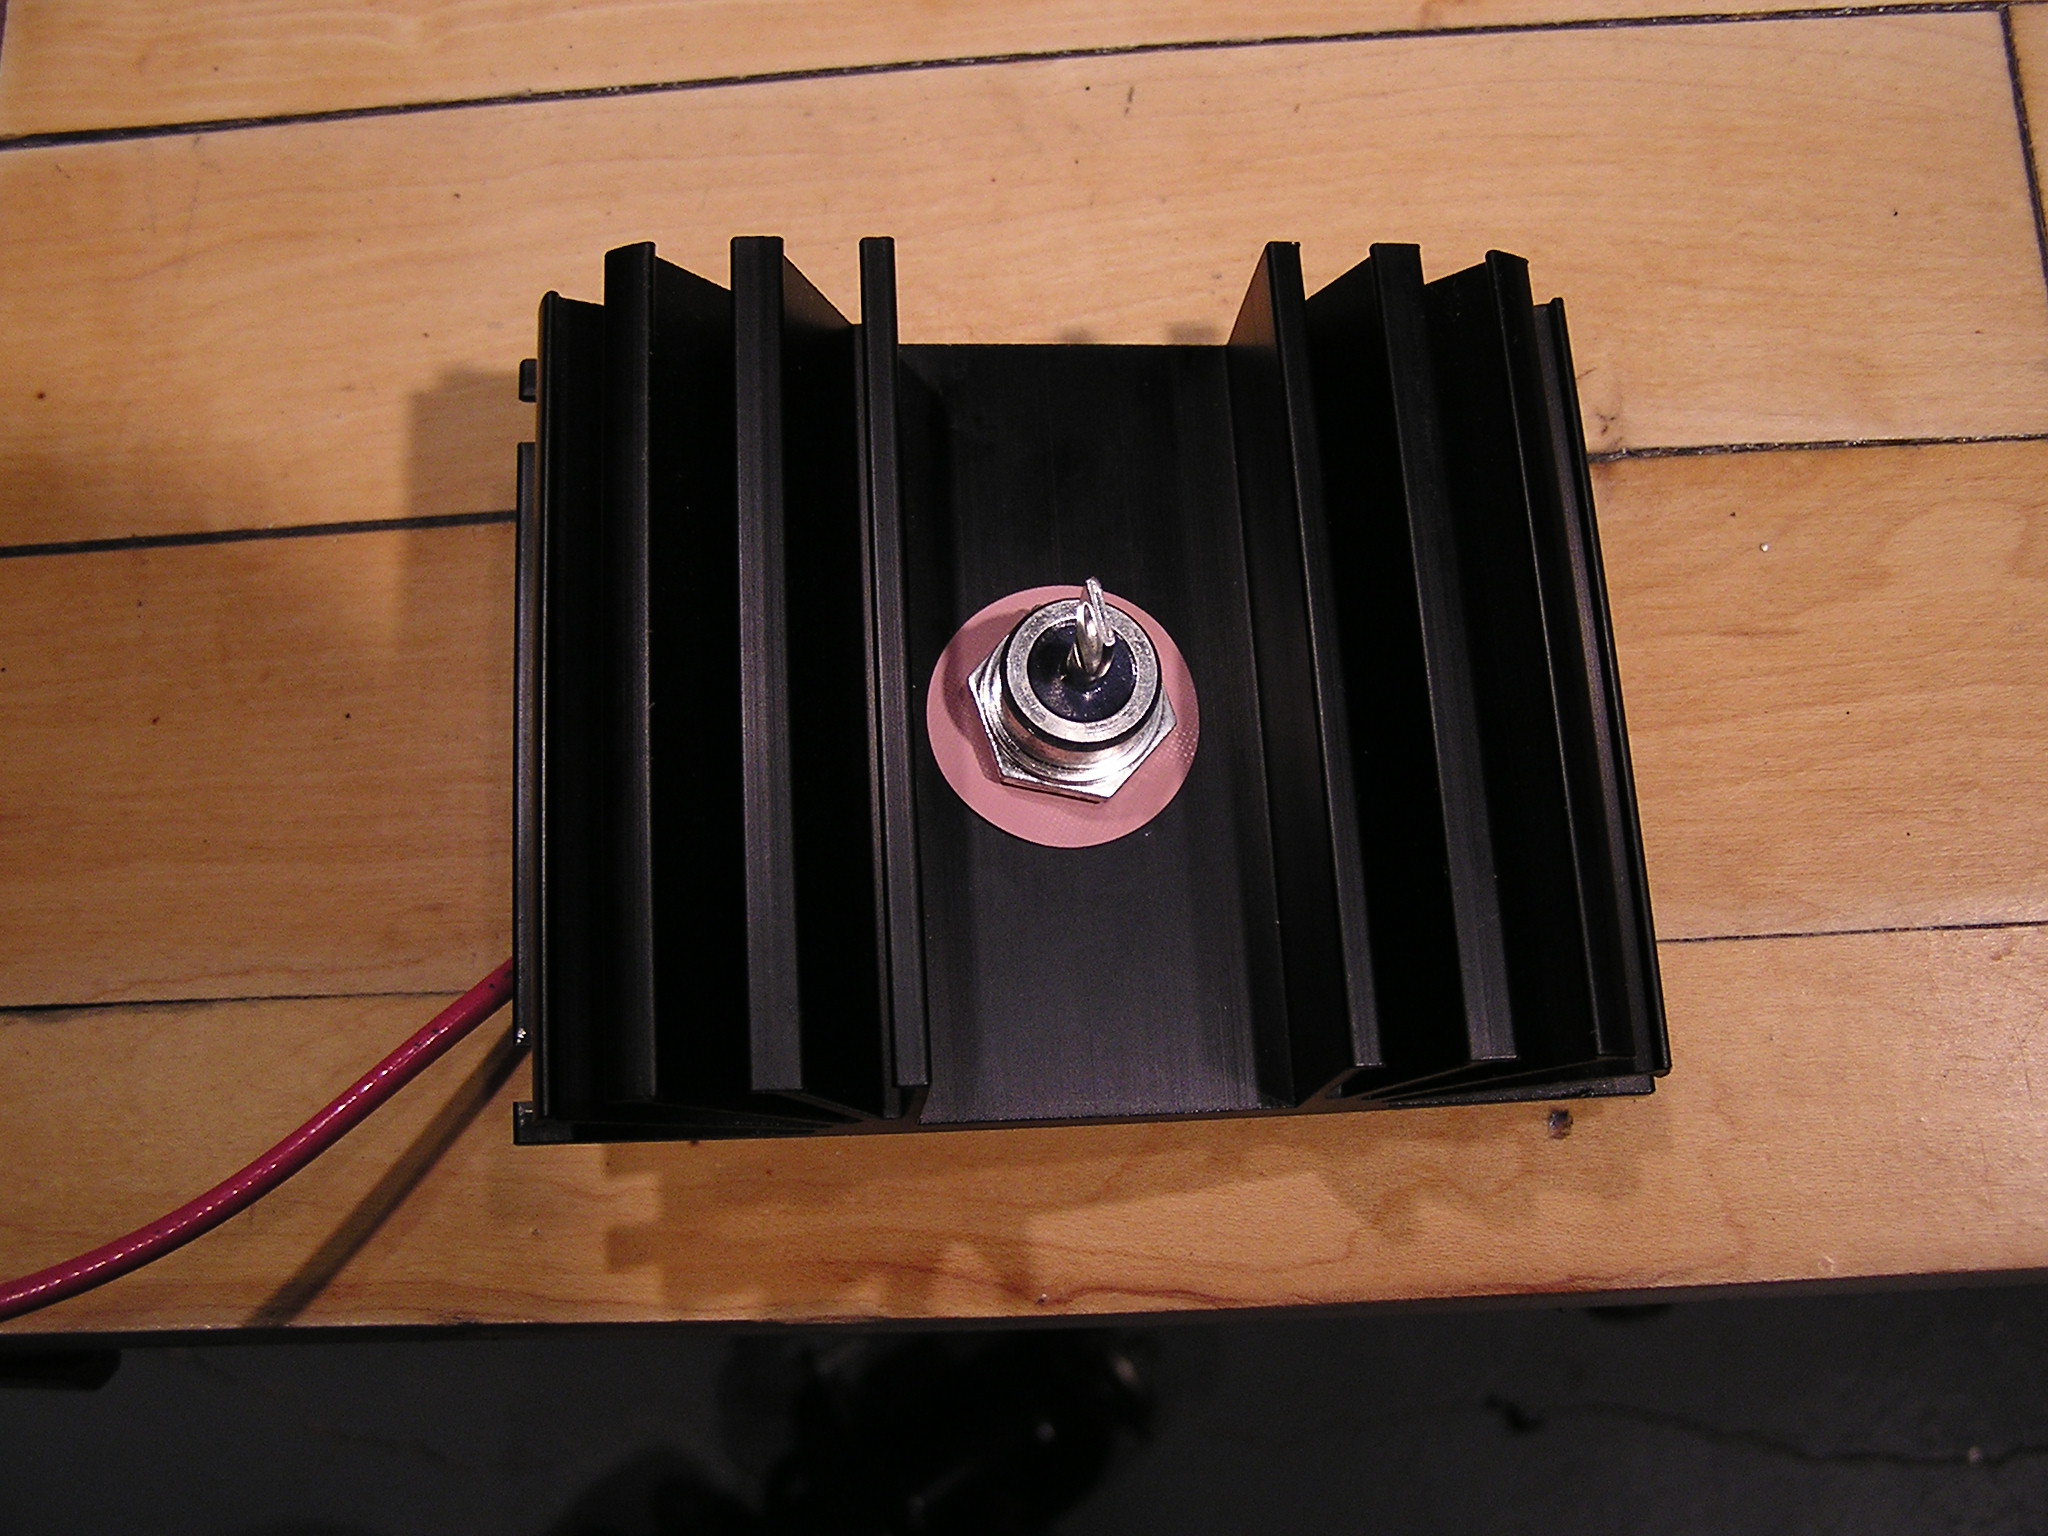
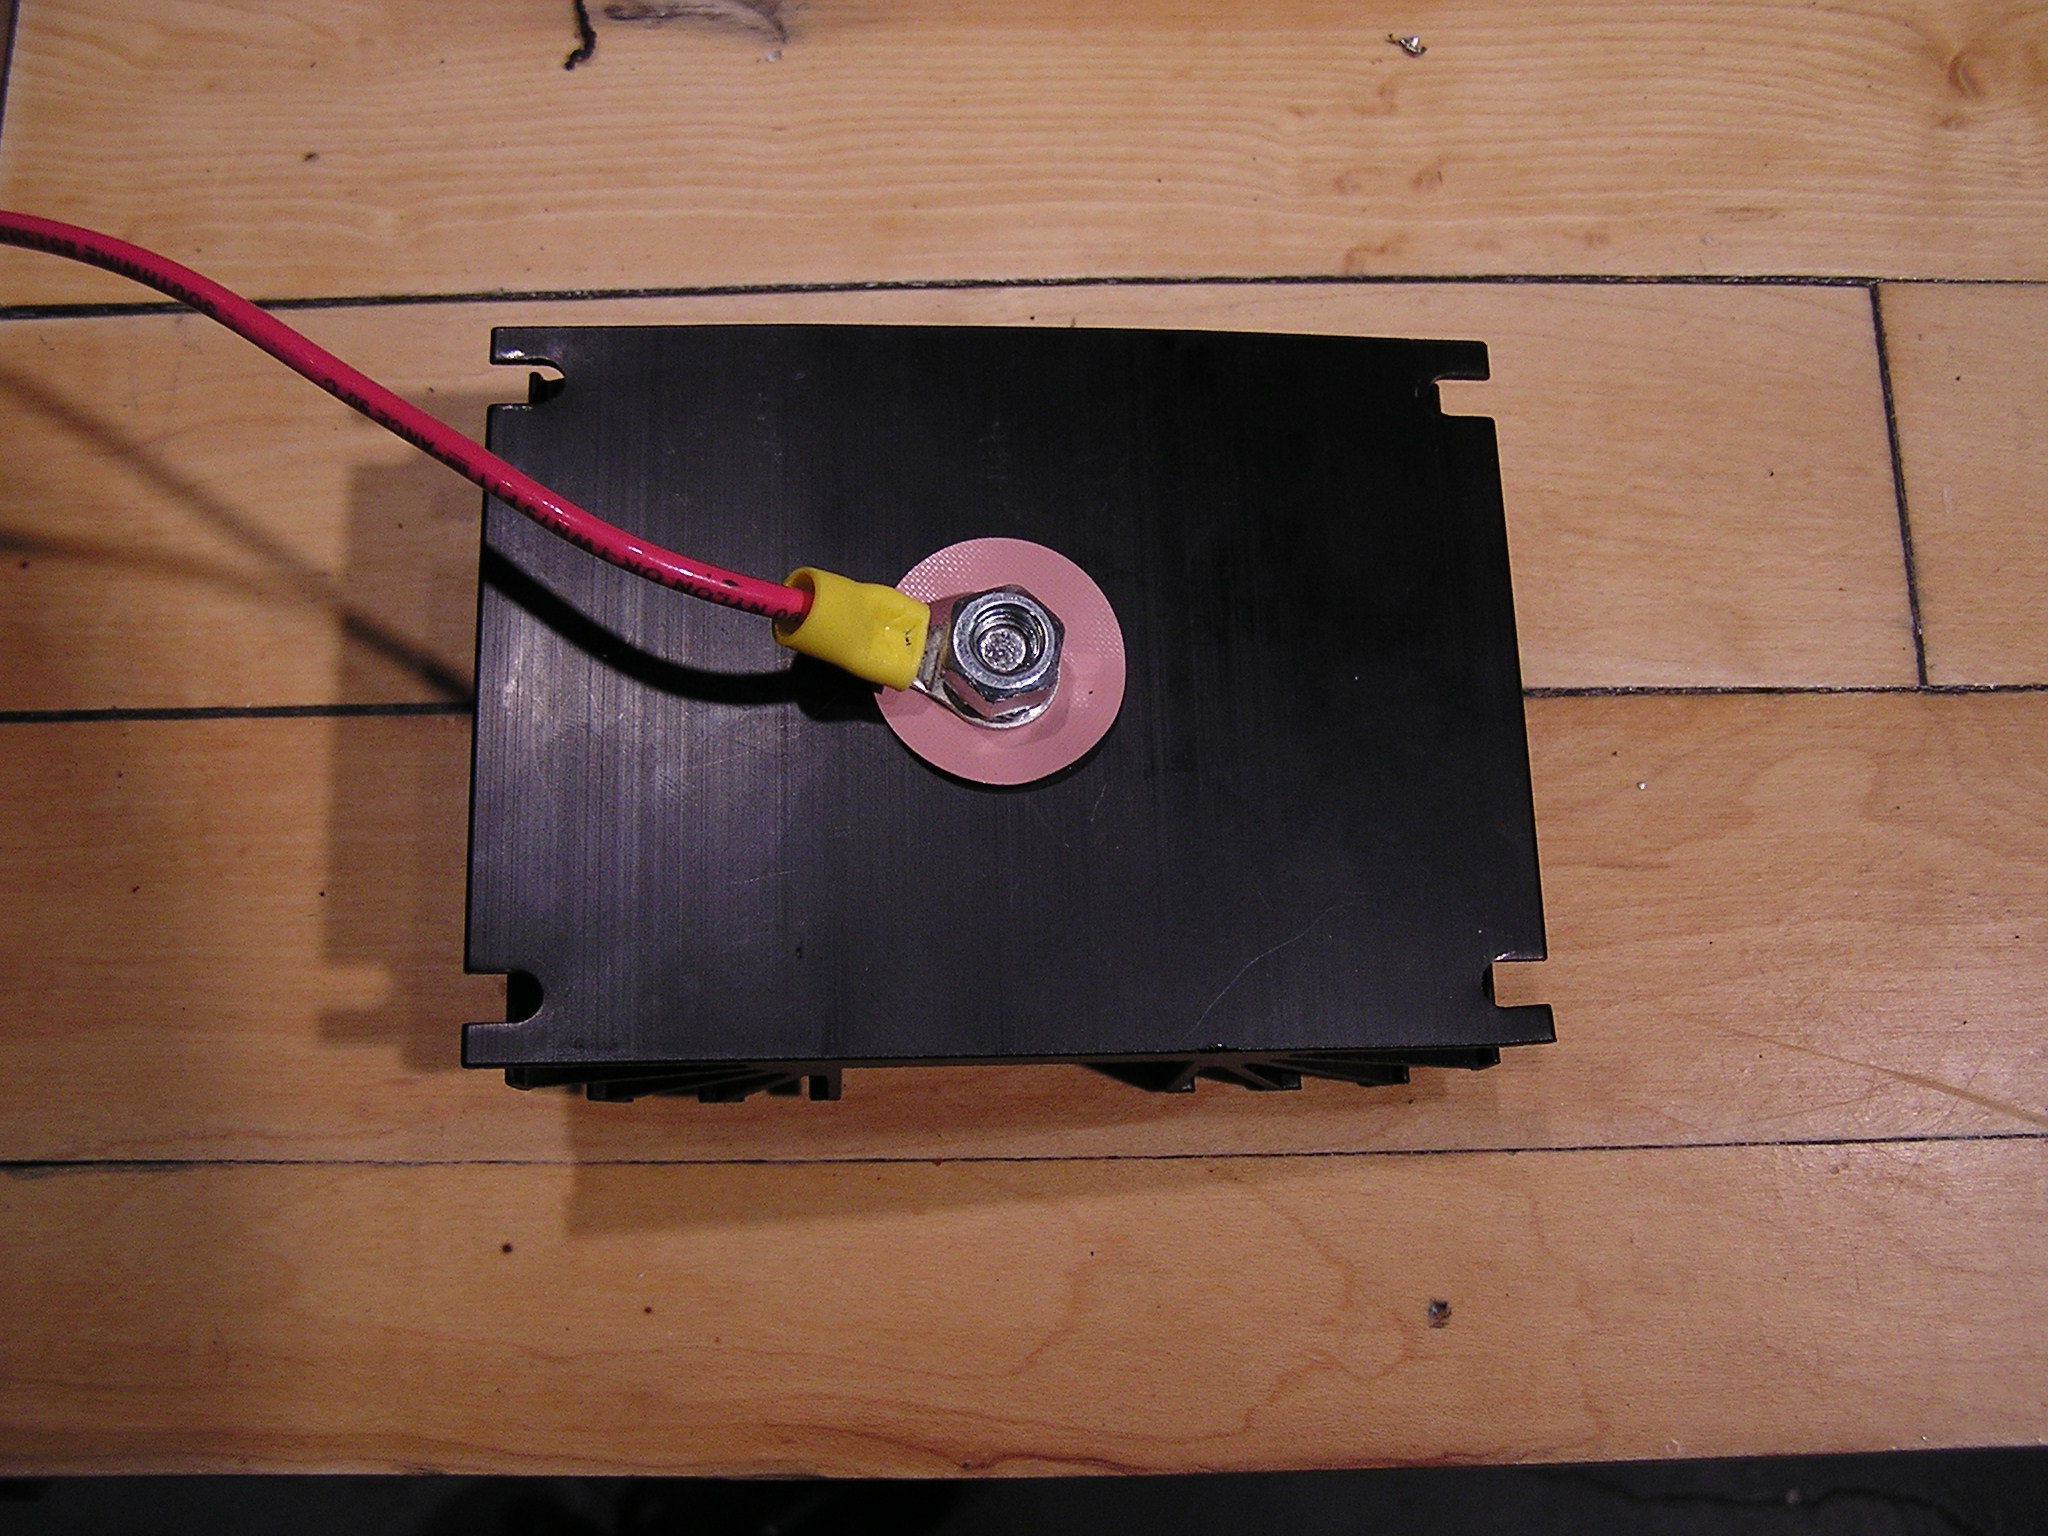
| 01:19, 25 May 2007 | Diode Mounted on Heatsink - Front.jpg (file) |  |
637 KB | Front side of the Diode mounted on the heatsink. | 1 |
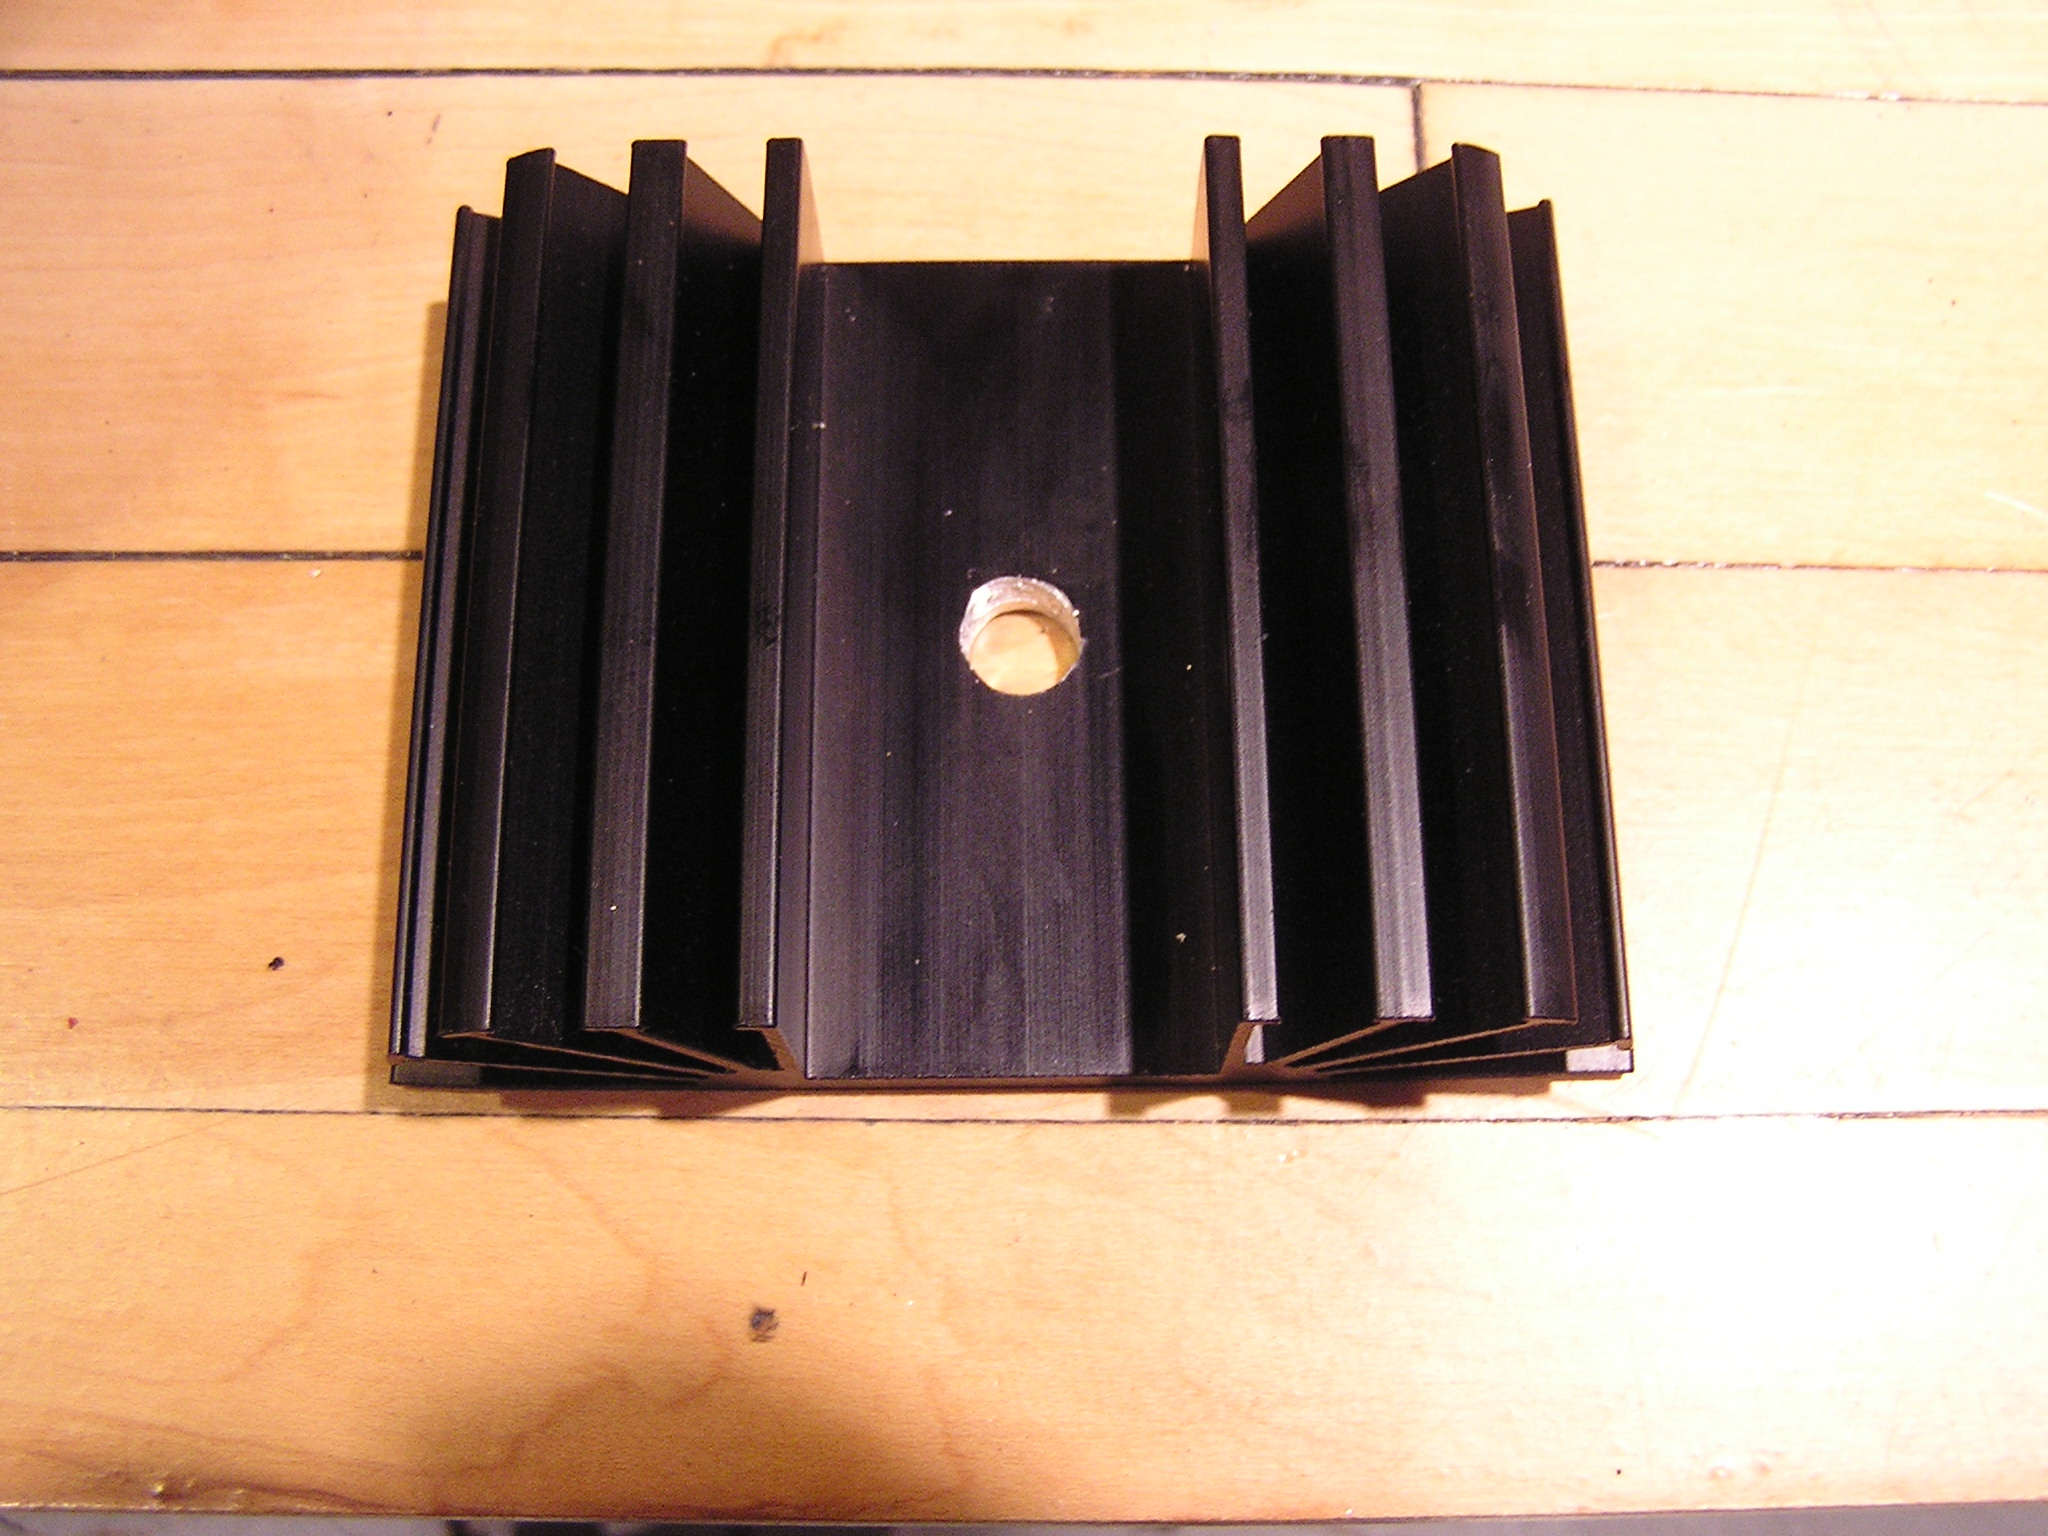
| 01:13, 25 May 2007 | Heatsink with Hole.jpg (file) |  |
646 KB | Heatsink with hole drilled in center. | 1 |
| 21:37, 20 March 2007 | Welded angle iron 2.jpg (file) |  |
647 KB | Shows just the welded angle iron for alt. mounting method | 1 |
| 16:35, 22 May 2007 | Maker Faire 2007 6.jpg (file) |  |
650 KB | From the 2007 Maker Faire | 1 |
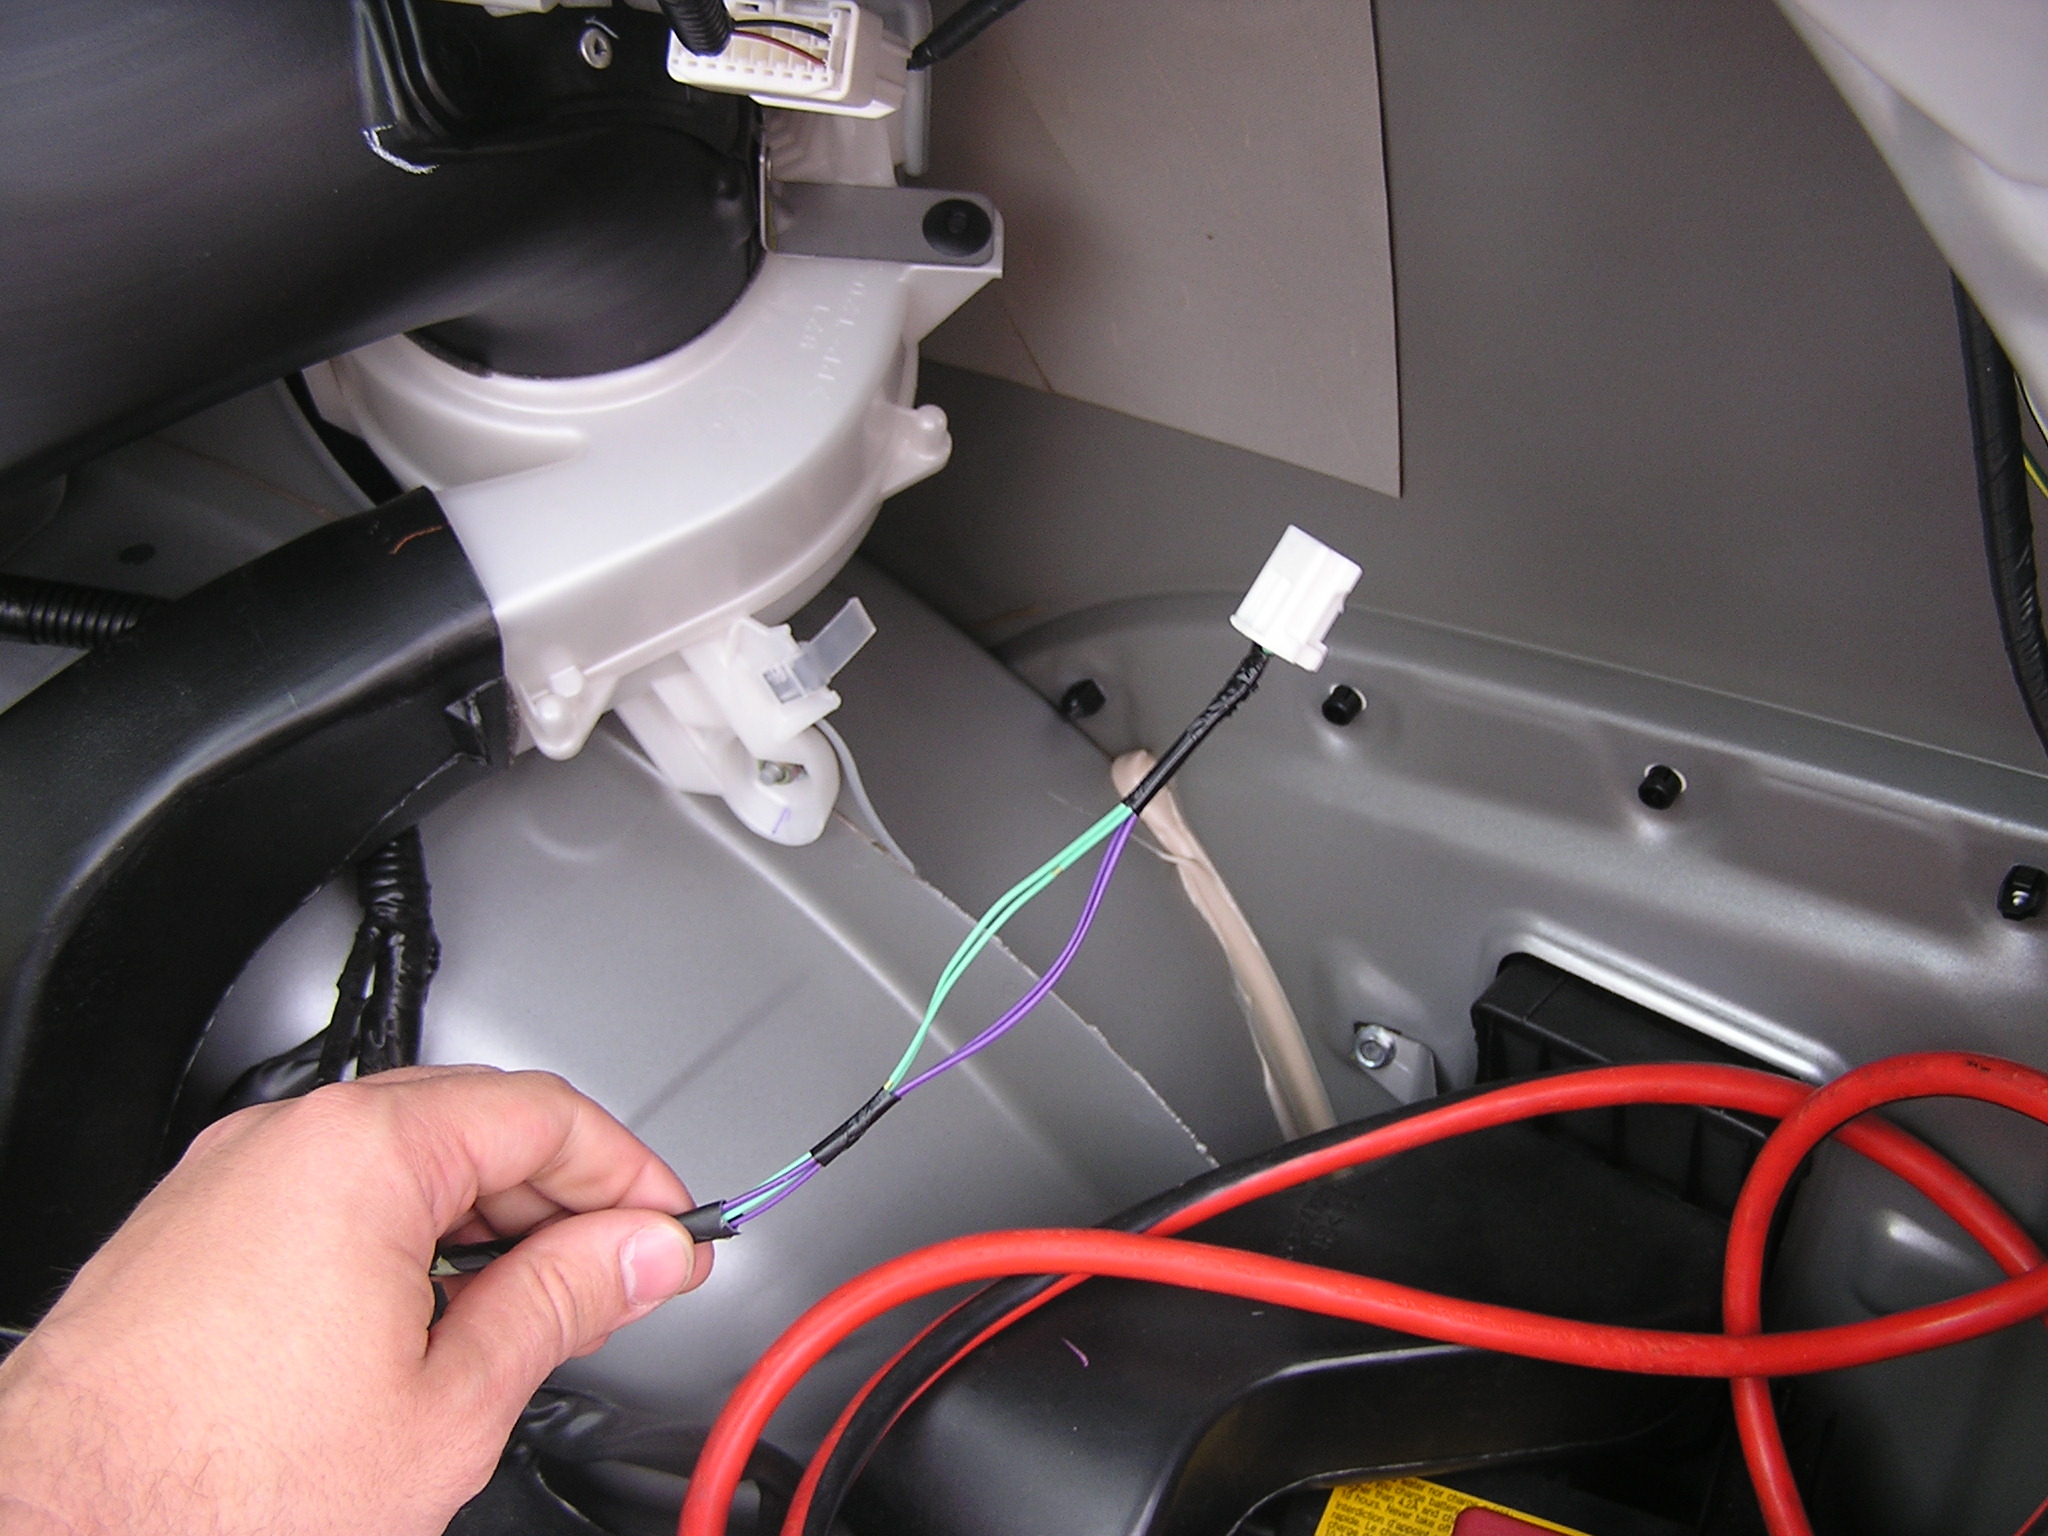
| 01:43, 25 May 2007 | OEM Battery Fan Wiring - Stripped Back.jpg (file) |  |
650 KB | The OEM battery fan wiring stripped back to expose the wires. | 1 |
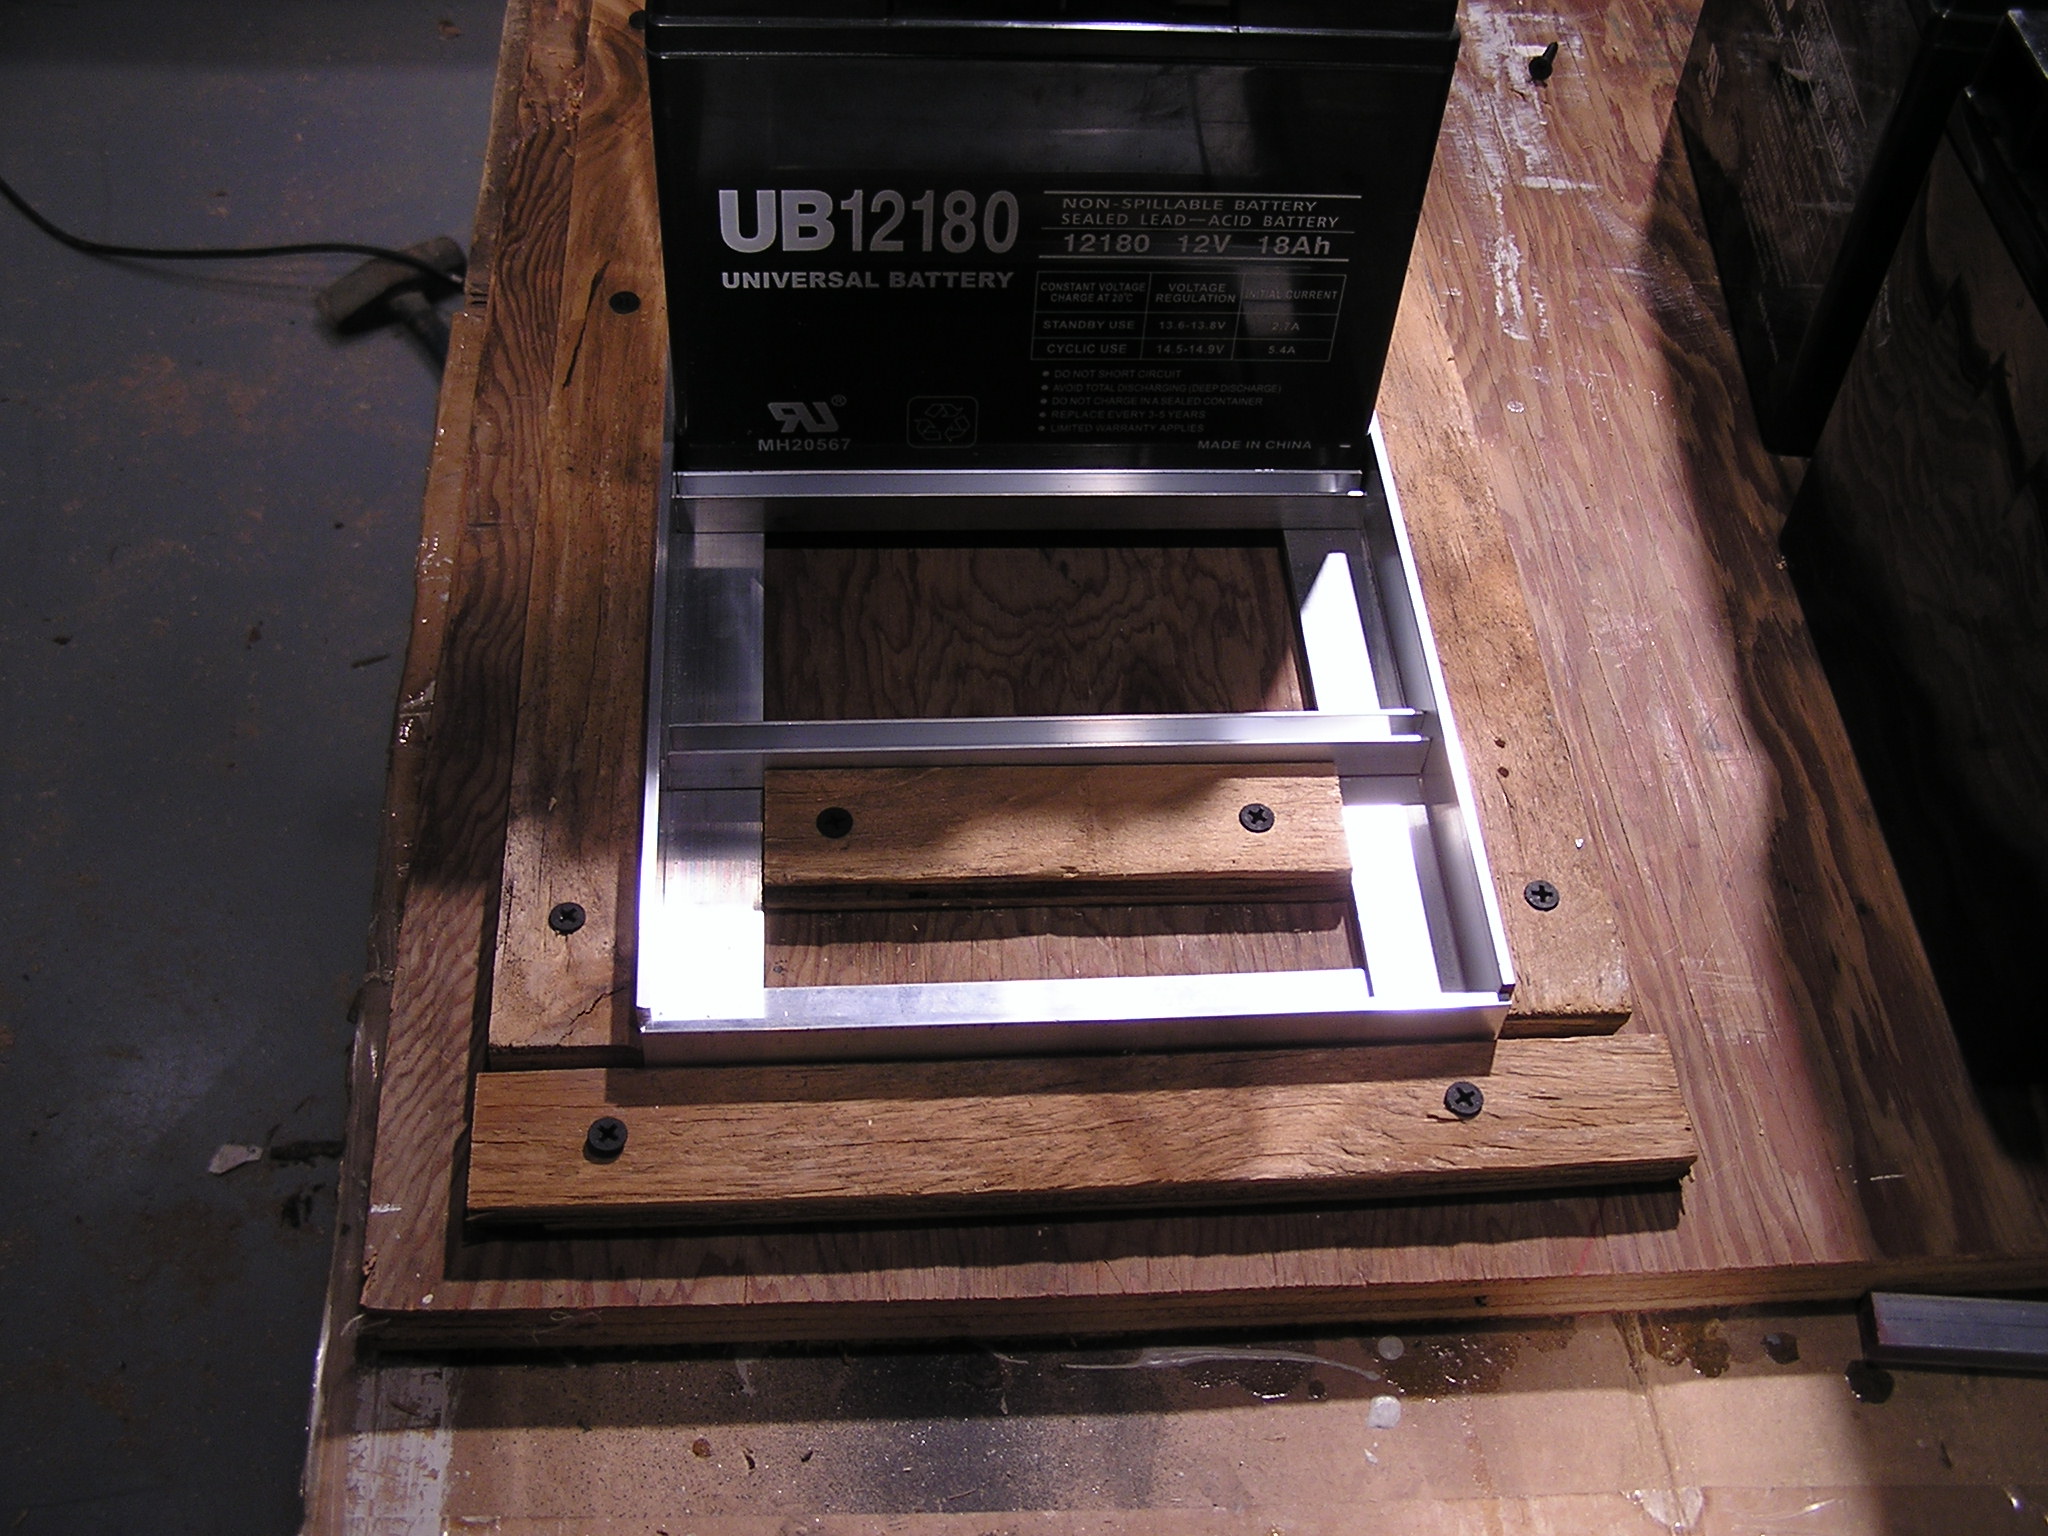
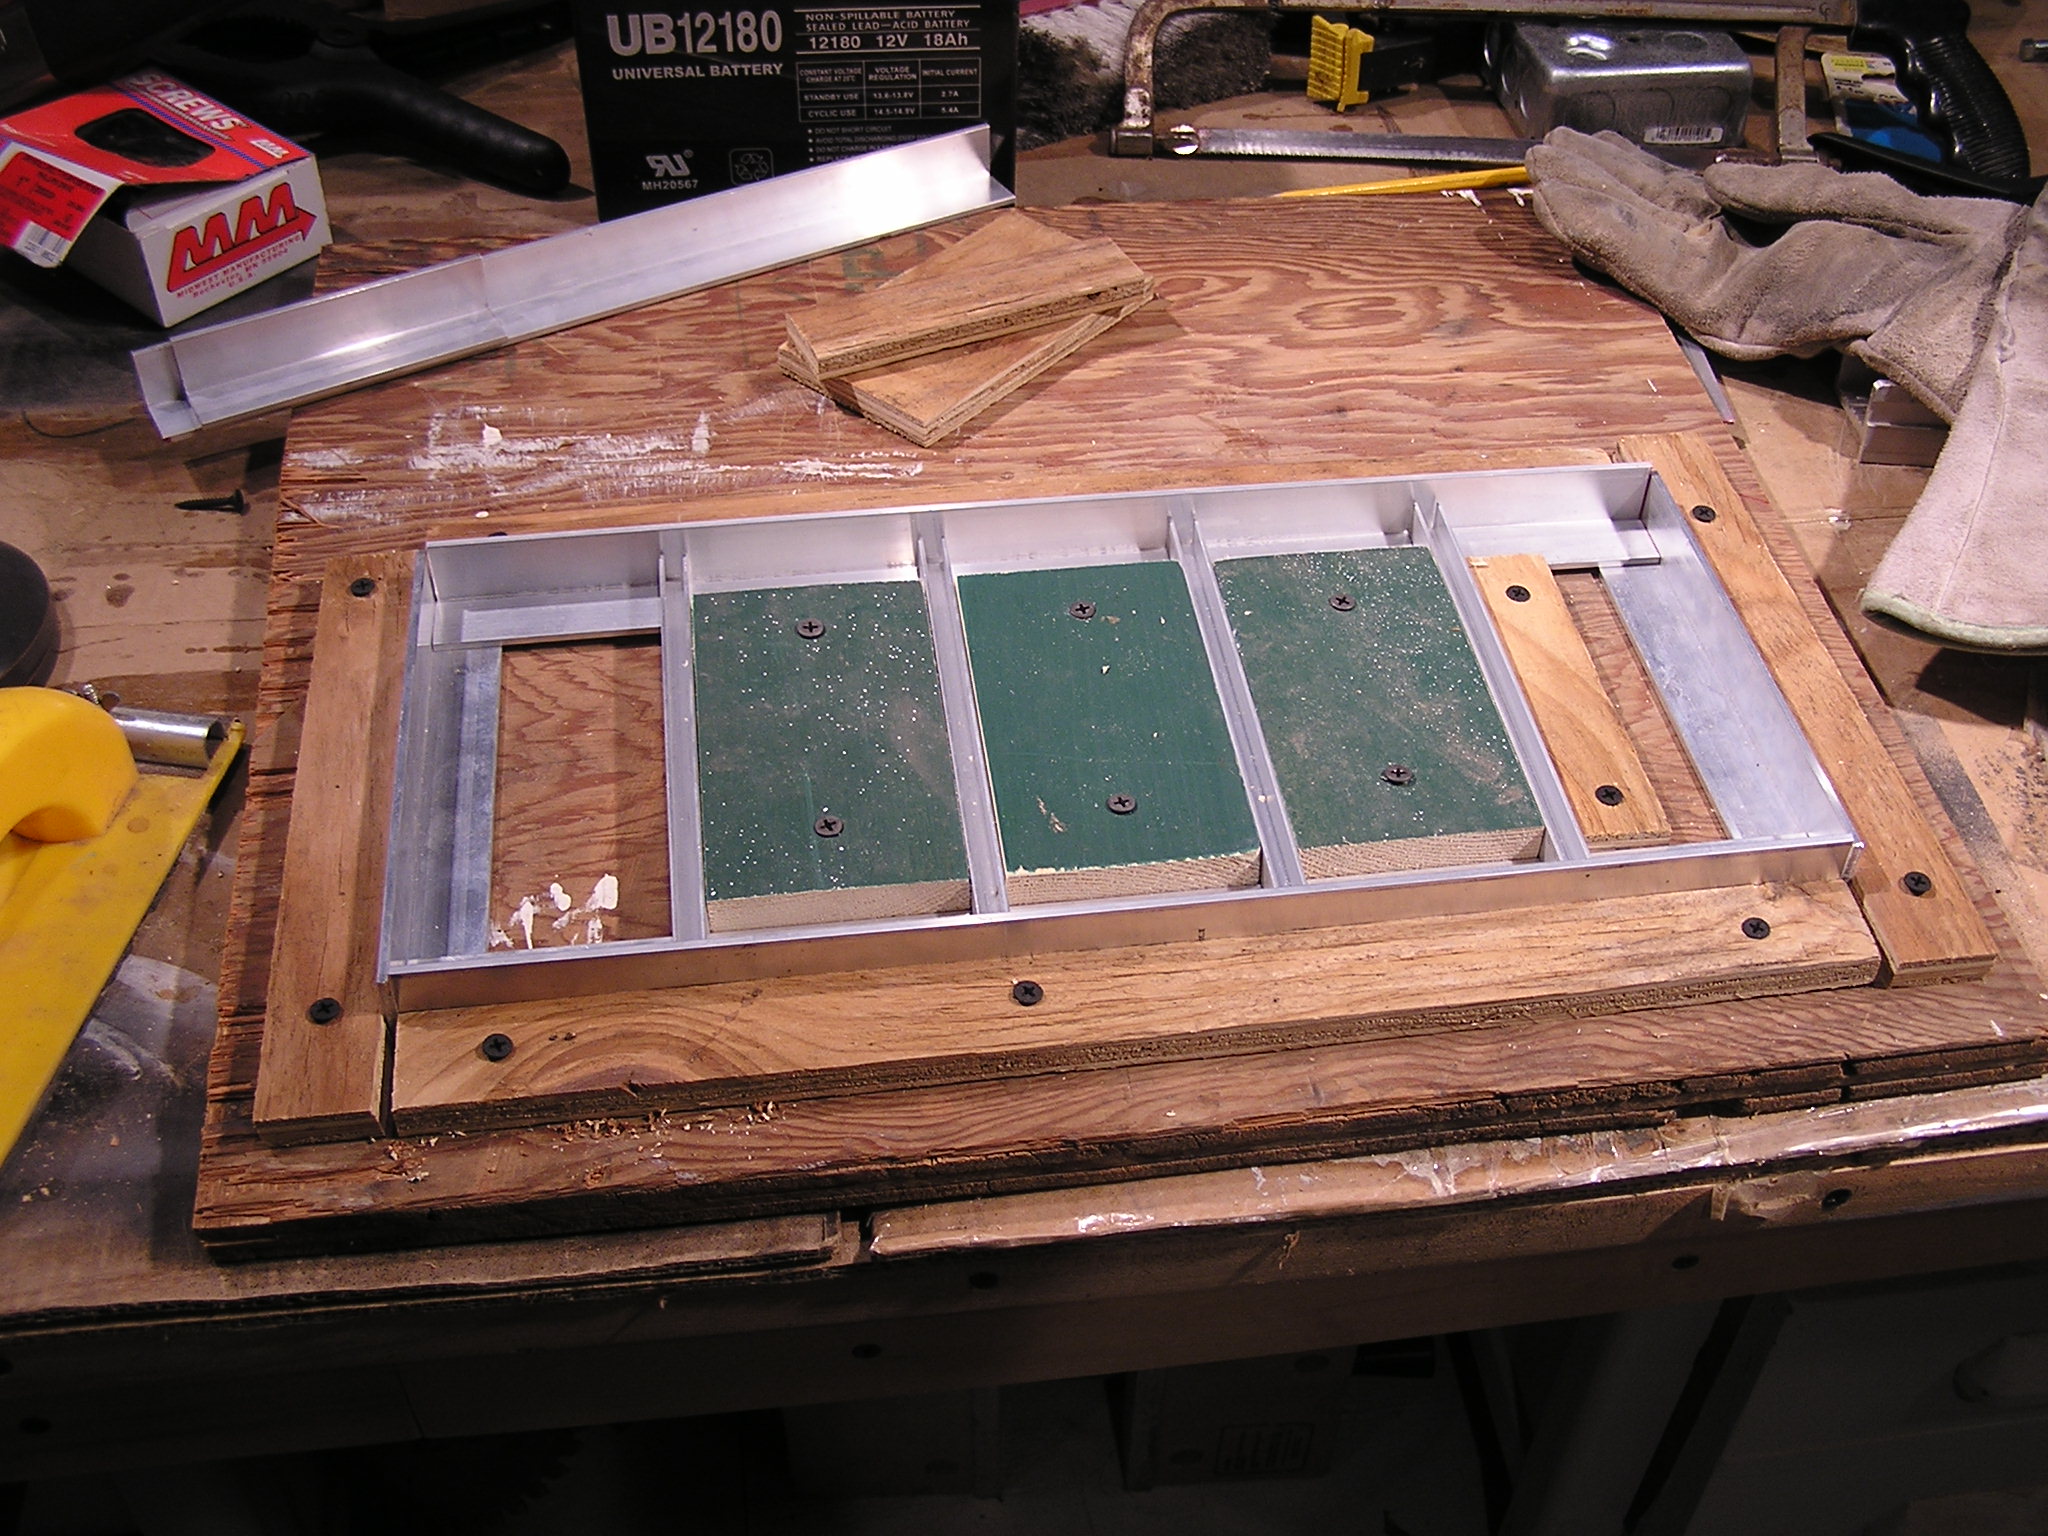
| 05:01, 15 December 2006 | Making Tray Jig Step 2.JPG (file) |  |
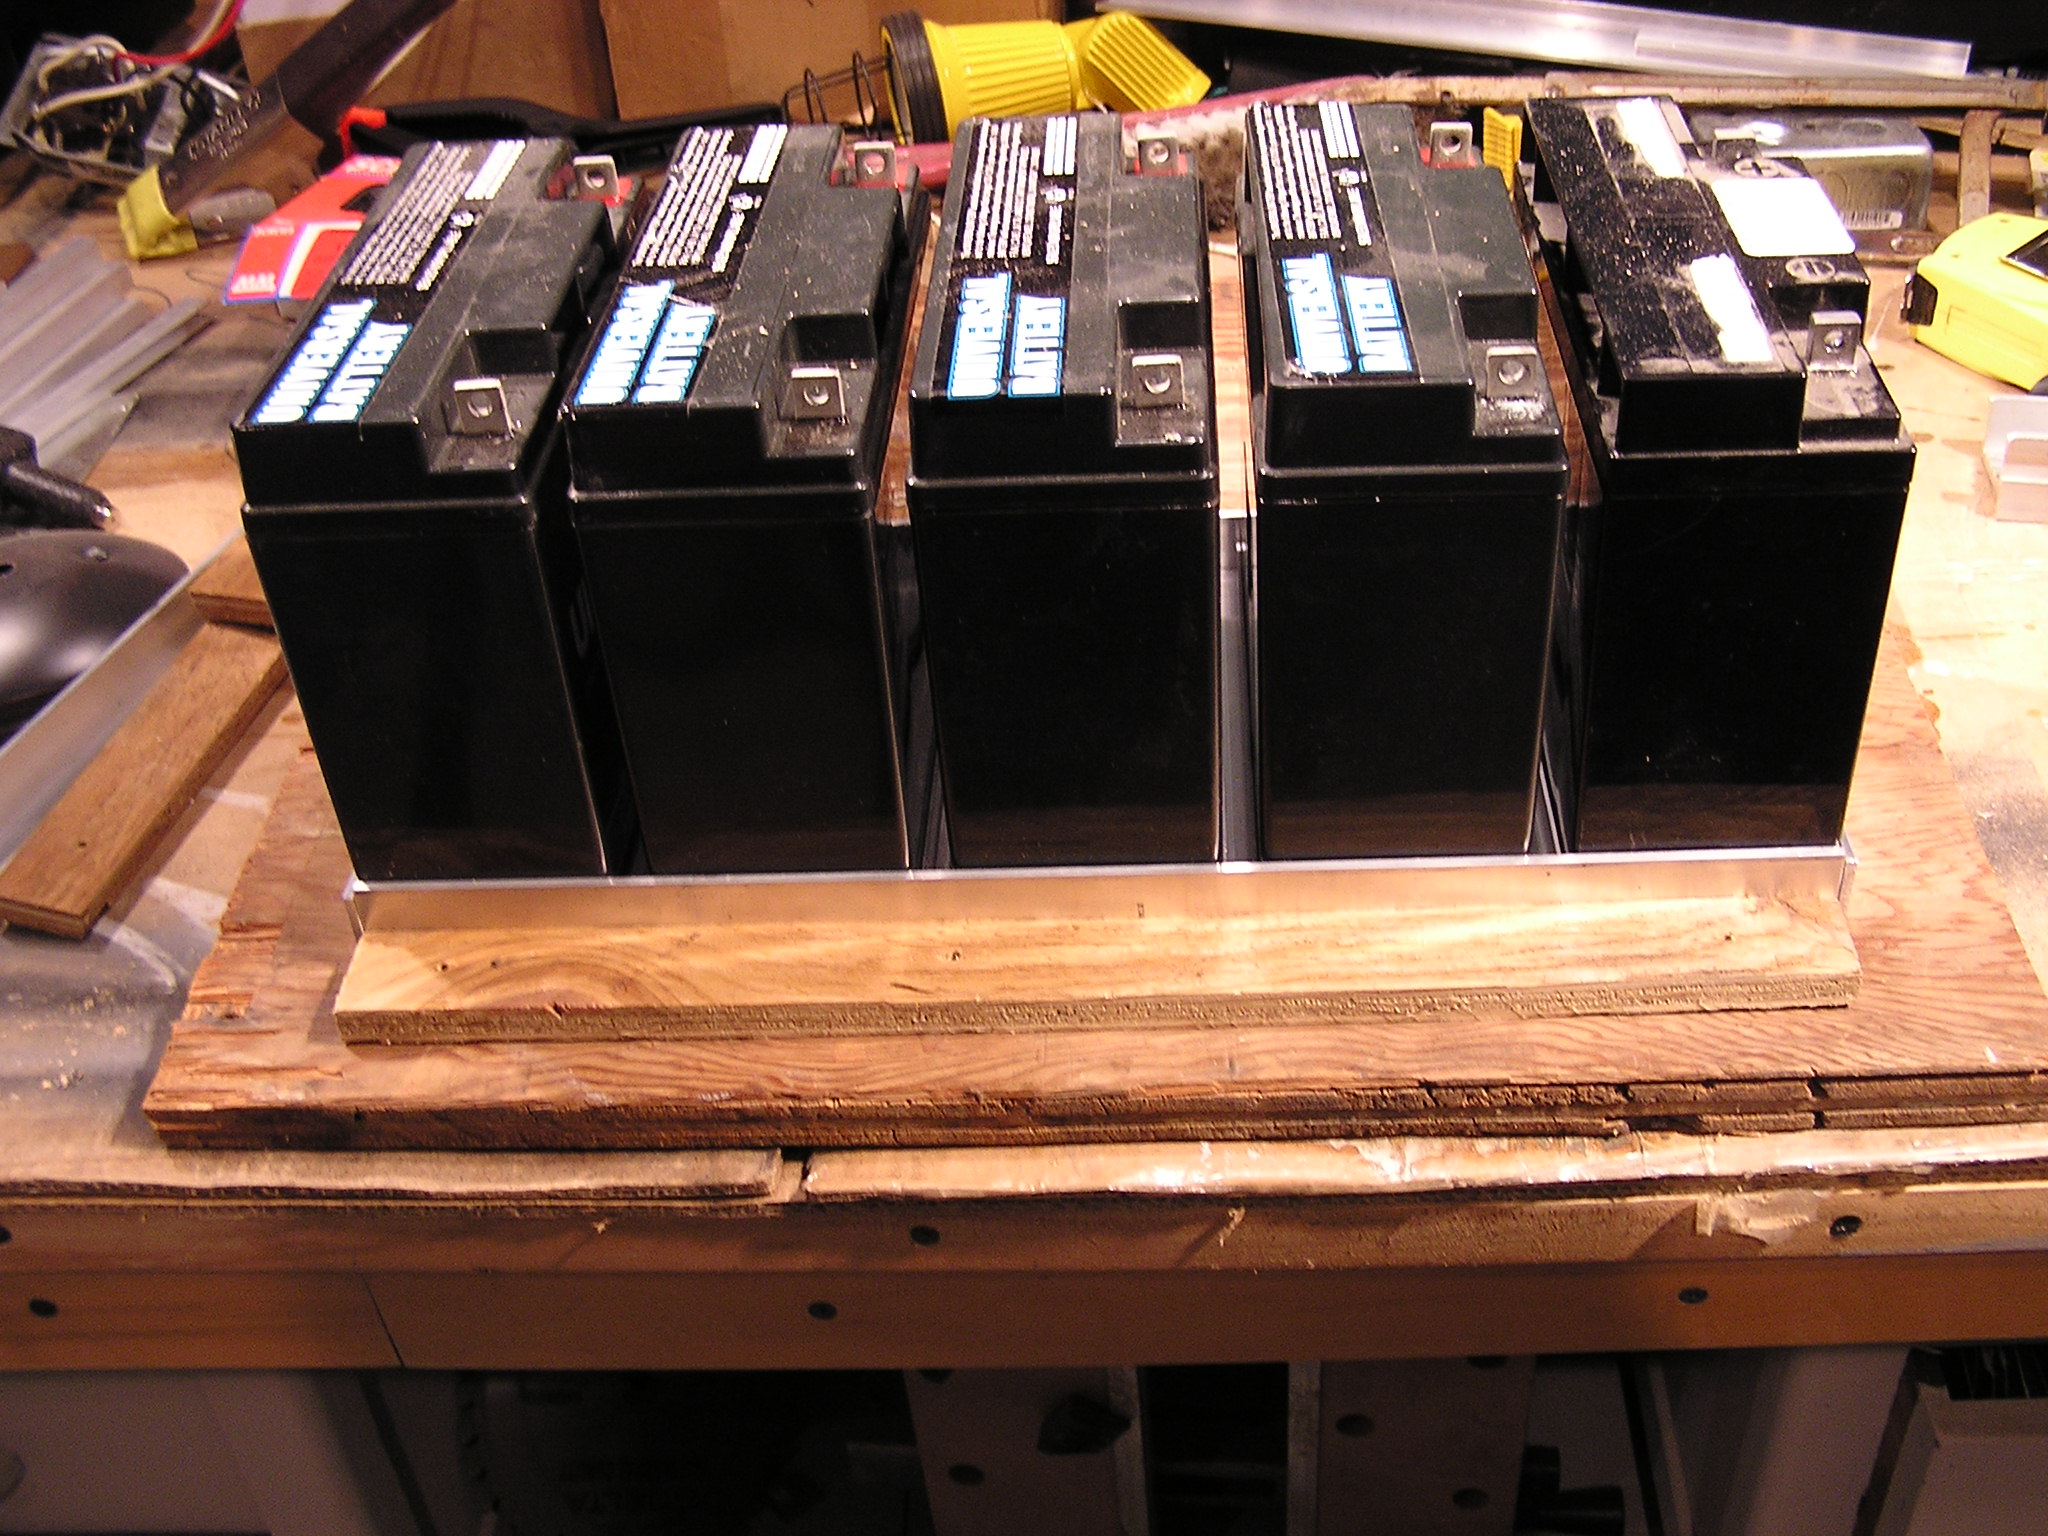
656 KB | The set together tray with batteries and wood secured in placed around the outsides to form the jig. | 1 |
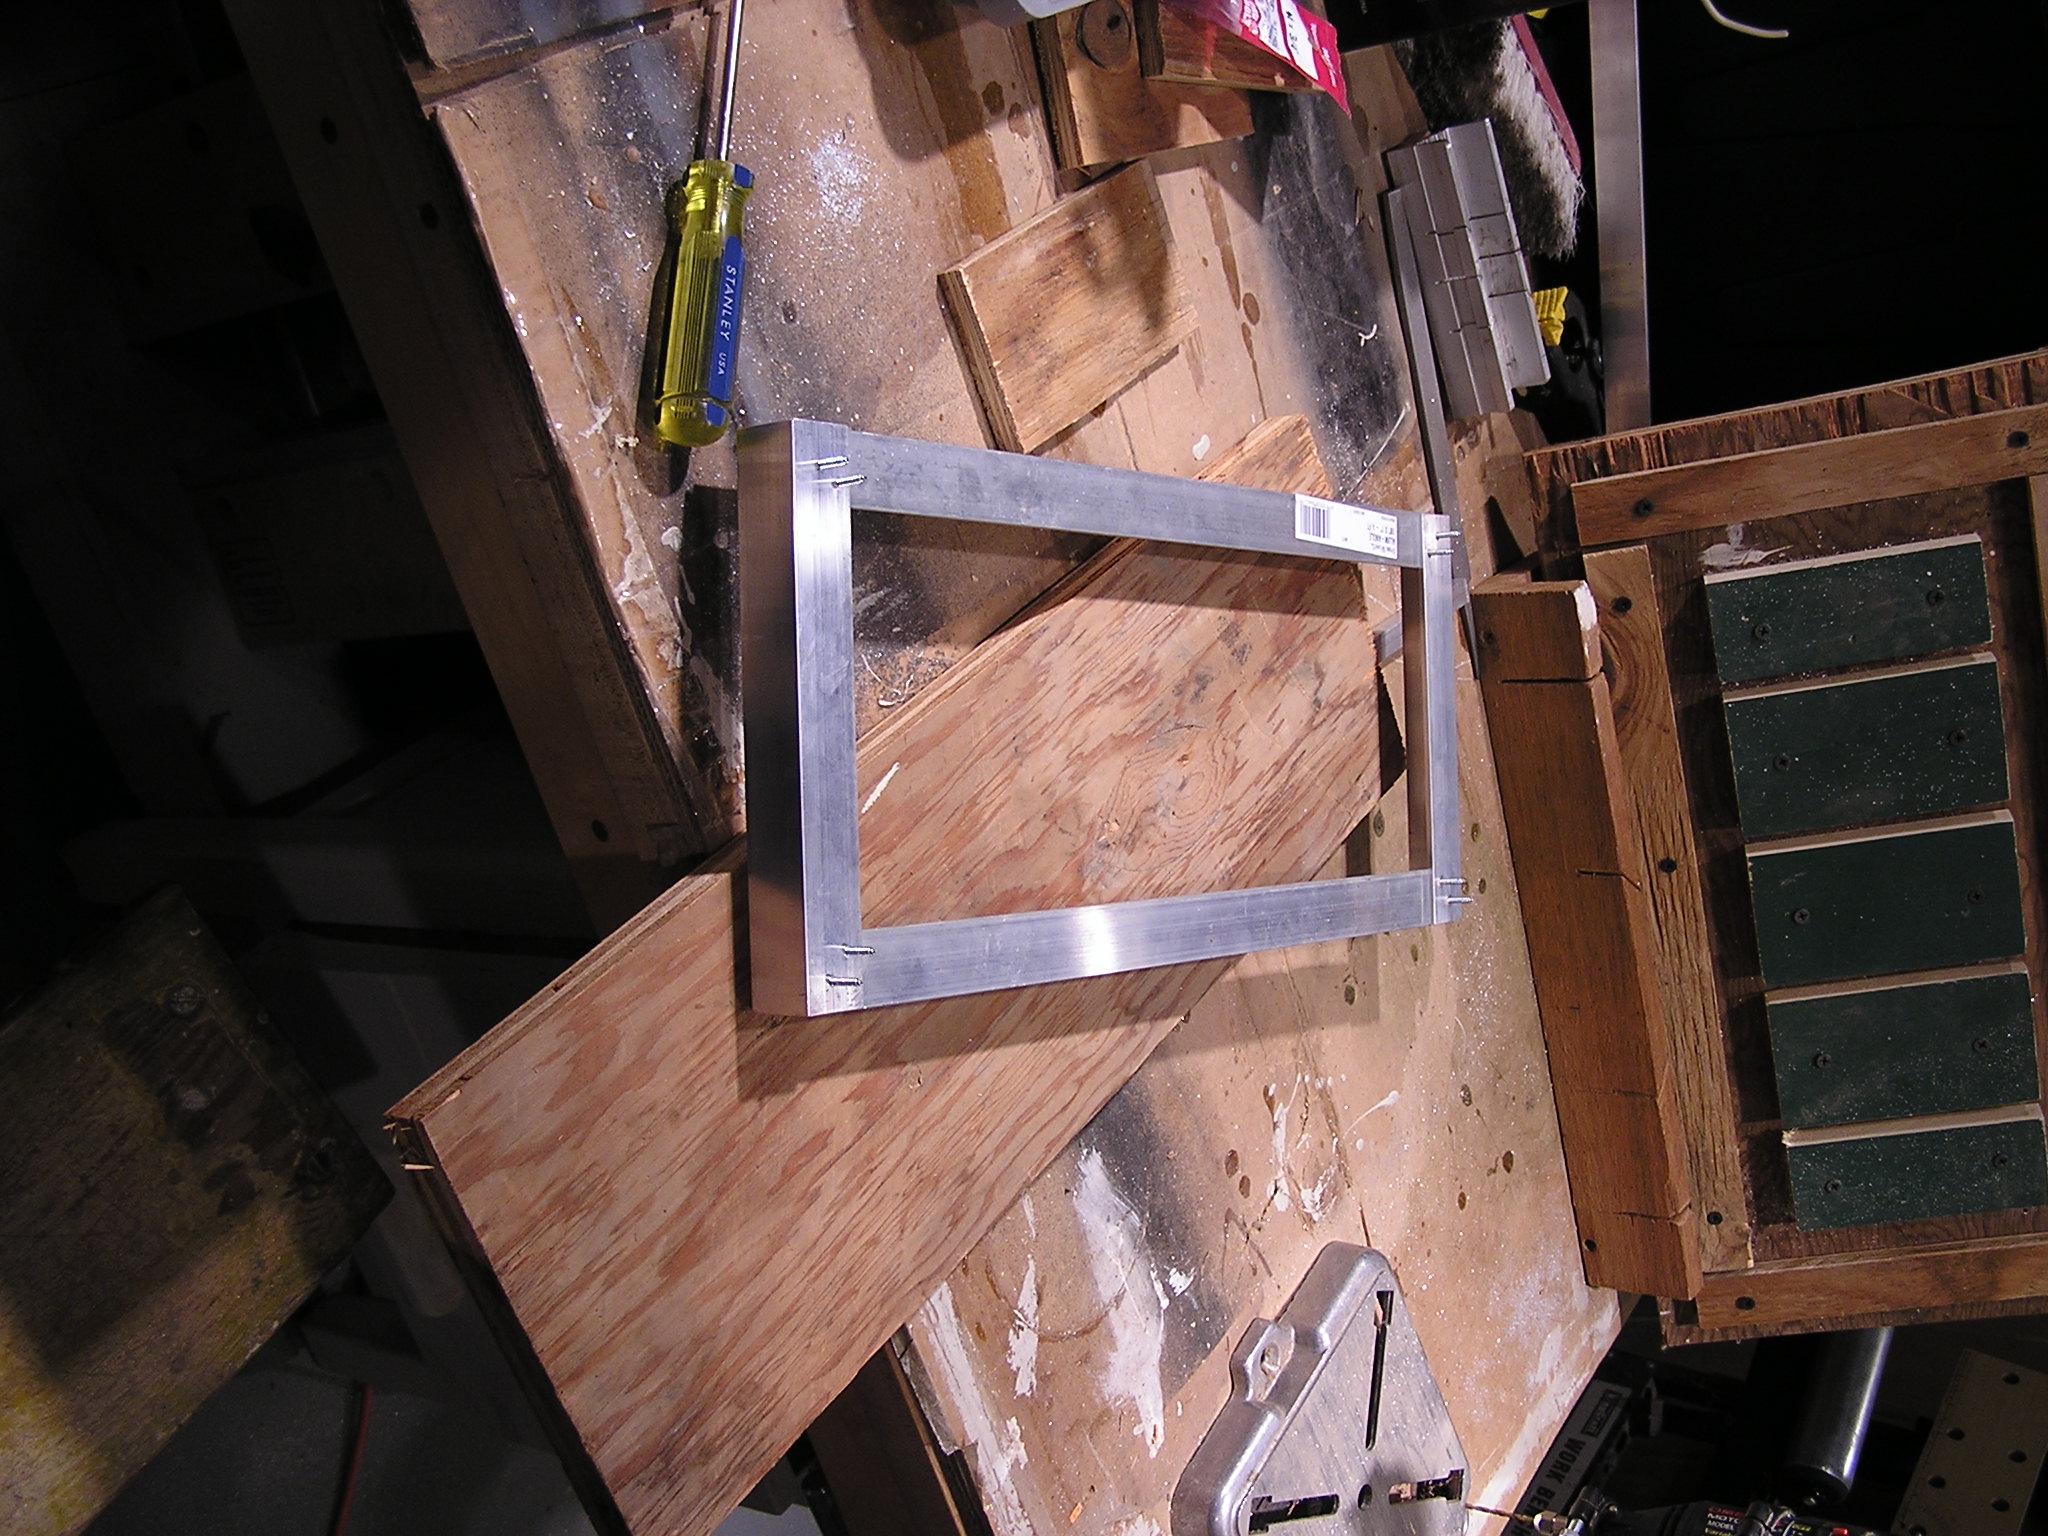
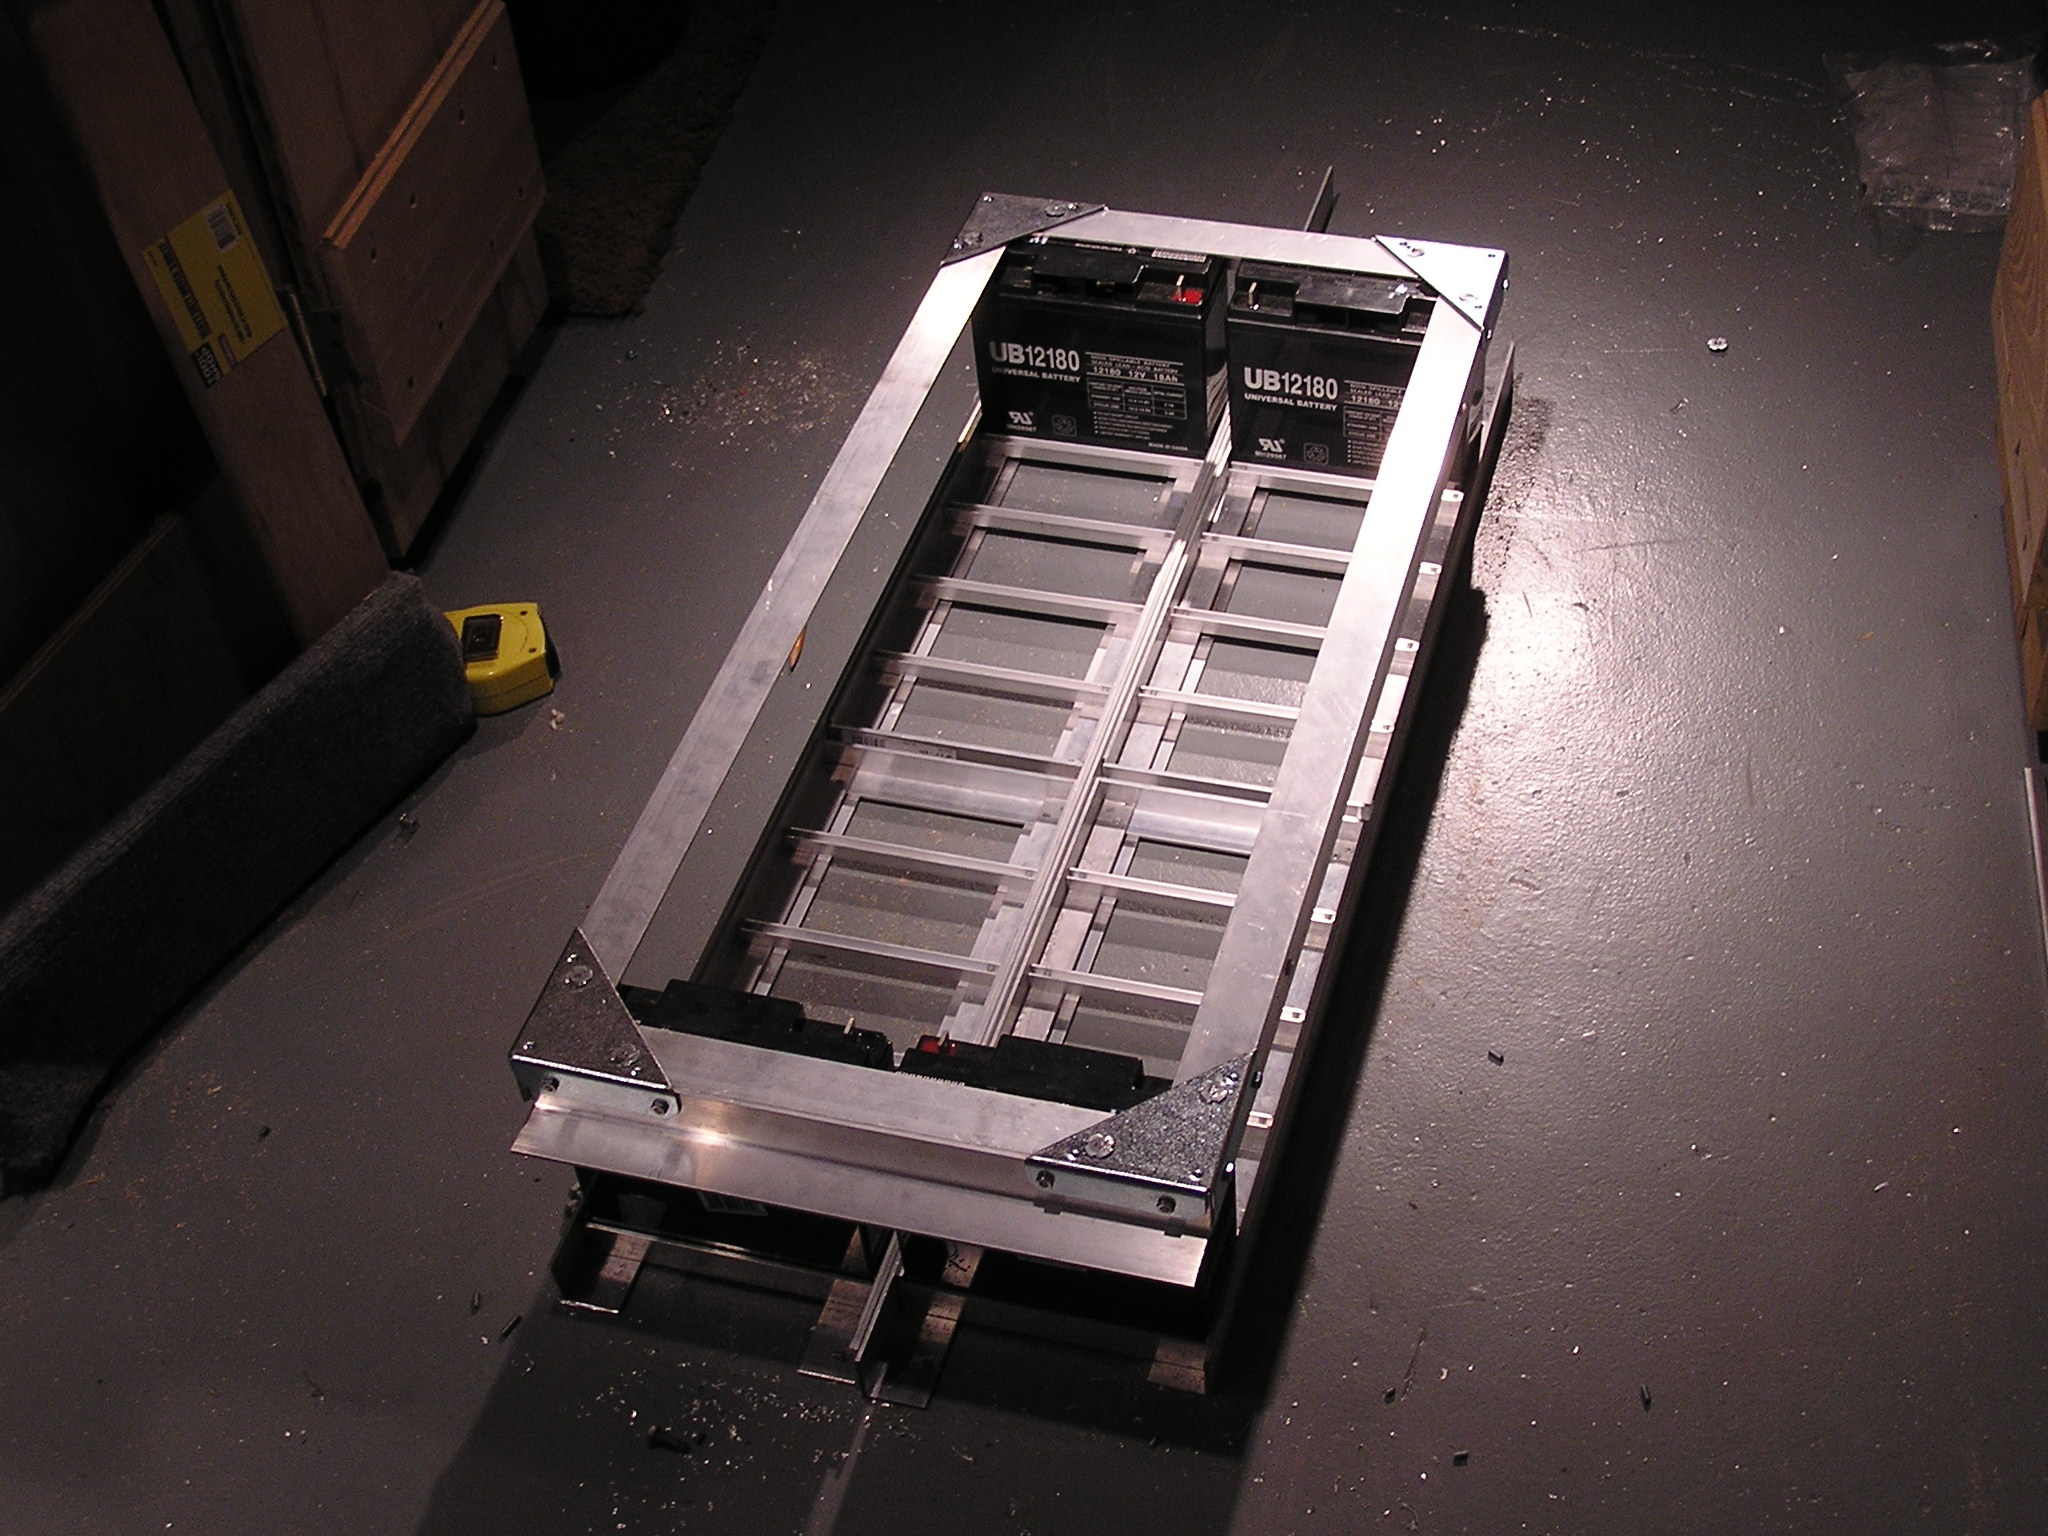
| 23:02, 17 December 2006 | Mostly Finished Batt Box.JPG (file) |  |
661 KB | Mostly finished battery box. Holes still need to be drilled into the angle irons to bolt down, and bolts will be added in the middle between the trays to bolt the top of the pack to the bottom. Also, mounting frame is not completely cut to size. | 1 |
| 01:18, 25 May 2007 | Diode Mounted on Heatsink - Rear.jpg (file) |  |
663 KB | The back of the heatsink with the diode mounted. | 1 |
| 05:02, 15 December 2006 | Making Tray Jig Step 1.JPG (file) |  |
665 KB | Step one is to place wood around the outsides of the angle iron to hold the angle irons in place. | 1 |
| 05:12, 15 December 2006 | Holes drilled in aluminum.JPG (file) |  |
665 KB | Holes drilled in the aluminum. Used the dremel to drill through both angle irons in the same place, then drilled a larger hole in the top (so the screw would go through without threading and then countersunk it with a much larger drill bit. | 1 |
| 16:34, 22 May 2007 | Maker Faire 2007 5.jpg (file) |  |
667 KB | From the 2007 Maker Faire | 1 |