|
General Disclaimer: (HV) (DC) injury or death hazard, use at your own risk, may void warranty. |
Difference between revisions of "PriusPlus-RawData"
(→Schematics: removed dead link) |
({{PriusPlus-Doc_Process|mw-collapsed}}{{TOCright}}) |
||
| (29 intermediate revisions by 5 users not shown) | |||
| Line 1: | Line 1: | ||
| − | {{PriusPlus-Doc_Process}} | + | {{PriusPlus-Doc_Process|mw-collapsed}}{{TOCright}} |
| − | + | This page houses all raw reference materials and other data which have been uploaded to incorporate into documentation on the other pages. | |
| − | {{TOCright}} | ||
| − | |||
| − | + | ==Specifications== | |
| + | The following two Excel files are specifications that I (Ron Gremban) wrote and copyrighted in early 2007, then placed into the public domain by publishing (including an appropriate copyright license message) on the eaa-phev maillist on Aug 6, 2007 ([http://autos.groups.yahoo.com/group/eaa-phev/message/1119 message 1119]). | ||
| − | + | [http://www.forsites.com/CalCars/EAA-PHEV/ControlSwSpecs_v01_20070128_rdg.xls ControlSwSpecs_v01_20070128_rdg.xls] | |
| − | + | [http://www.forsites.com/CalCars/EAA-PHEV/TestSpec_v01_20070407rdg.xls TestSpec_v01_20070407rdg.xls] | |
| − | + | The software specification is a complete specification for software to control a PRIUS+ conversion from data read from the CAN bus using the best algorithms I had developed up to January 28, 2007. Since then, Chris Ewert, myself, and others have further refined the algorithms to handle special cases such as extreme temperatures and speeds just slightly above 34 mph. | |
| − | |||
| − | + | The test specification, written April 7, 2007, is a basic ordered list of tests that would be good to follow as part of completing and validating a PRIUS+ conversion. | |
| − | + | ||
| − | + | ==Schematics== | |
| − | + | These are preview images of various schematics, click on the thumbnails for a larger preview and to download the full sized images. You will also find links to .zips of the original [http://www.expresspcb.com ExpressSCH] schematics from which these images were produced. | |
| − | + | ||
| − | + | [[Image:EAA-PHEV-PRIUS-HighPowerSchematic.png|thumb|left|400px|Preview of High Power Schematics]] | |
| − | * | + | |
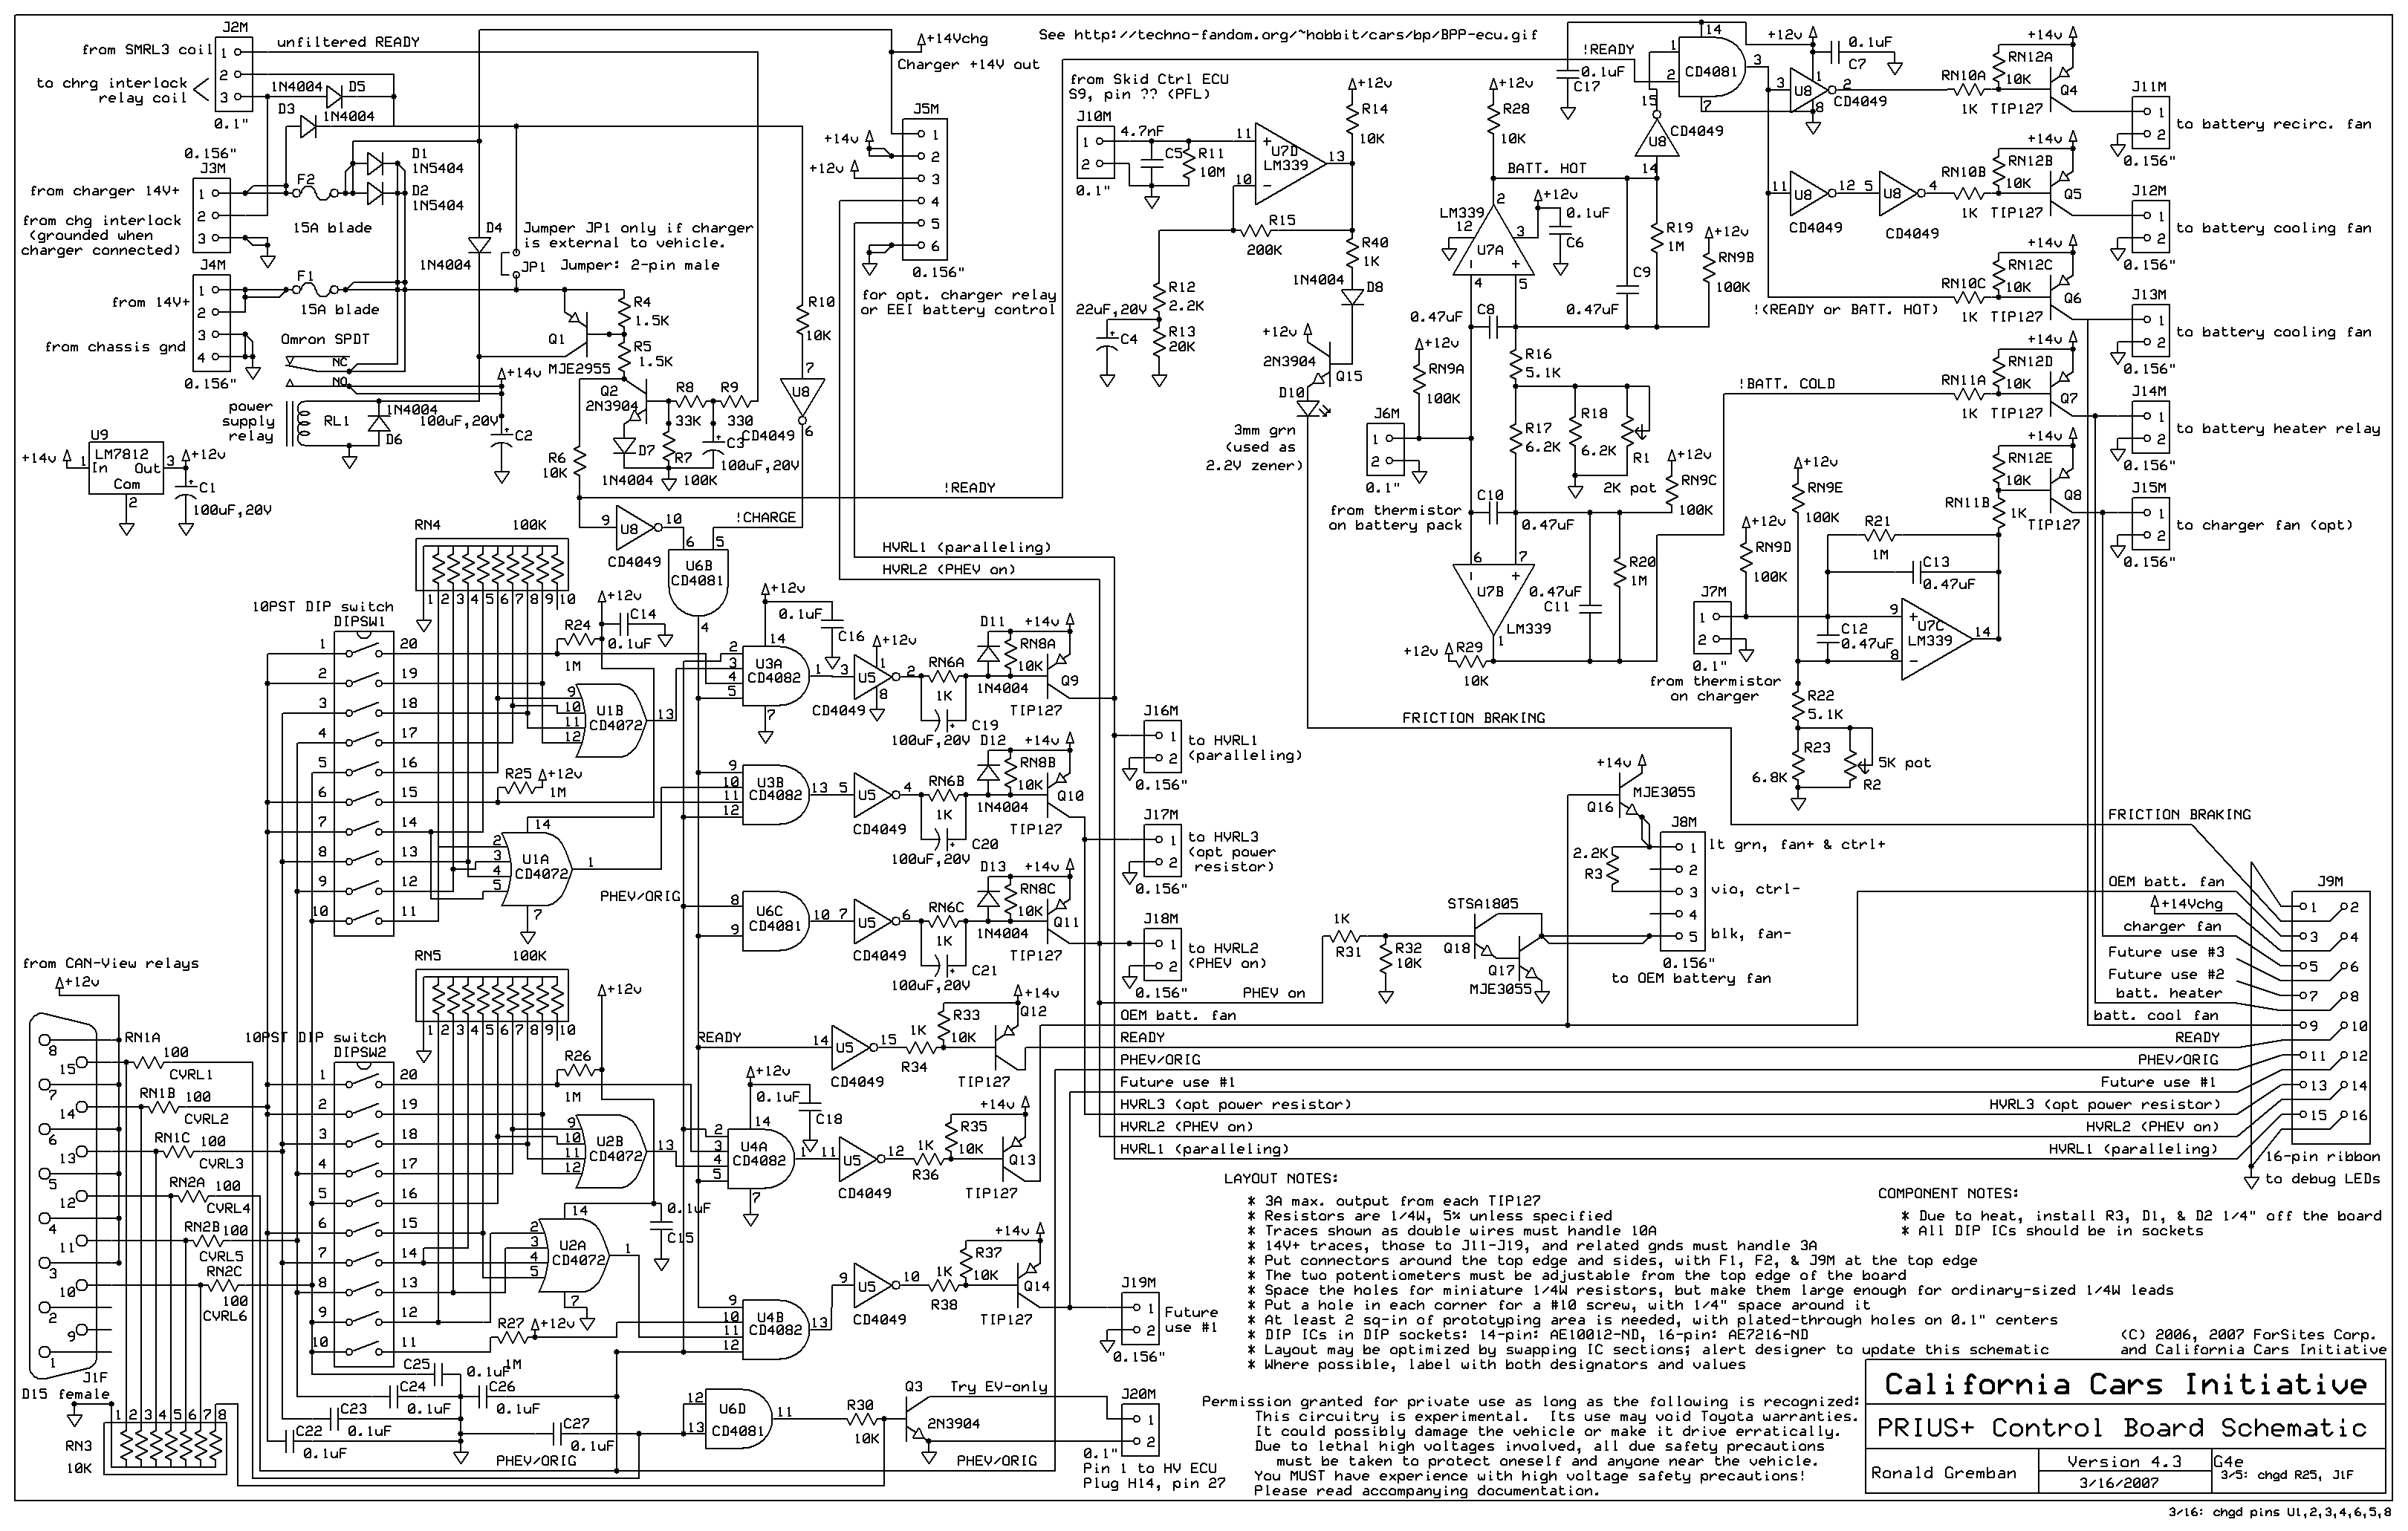
| − | * | + | [[Image:EAA-PHEV-PRIUS-ControlBdSchematic.png|thumb|left|400px|Preview of Control Board Schematics [[:Image:EAA-PHEV-PRIUS-ControlBdSchematic.zip|EAA-PHEV-PRIUS-ControlBdSchematic.zip]] schematic created in [http://www.expresspcb.com ExpressSCH].]] |
| − | * | + | |
| + | [[Image:EAA-PHEV-PRIUS-LEDBdSchematic.png|thumb|left|400px|Preview of LED Board Schematics [[:Image:EAA-PHEV-PRIUS-LEDBdSchematic.zip|EAA-PHEV-PRIUS-LEDBdSchematic.zip]] schematic created in [http://www.expresspcb.com ExpressSCH].]] | ||
| + | {{Clear}} | ||
| + | |||
| + | ===Battery Box Designs=== | ||
| + | See the following for designs for a hinged battery box: | ||
| + | |||
| + | * [[Image:076610.1004-PP2-1.PDF]] - assembled view | ||
| + | * [[Image:076610.2039-pp2.pdf]] - Bottom Plate | ||
| + | * [[Image:076610.2040-PP2.pdf]] - Side Panel, Right | ||
| + | * [[Image:076610.2041-PP2.pdf]] - Side Panel, Left | ||
| + | * [[Image:076610.2042-pp2.pdf]] - Top Cover | ||
===Photos=== | ===Photos=== | ||
| − | You can browse the [http://www.eaa-phev.org/index.php?title=Special:Newimages entire gallery] of images here at the eaa-phev site, or visit some other galleries with potentially applicable photos: | + | You can browse the [http://www.eaa-phev.org/index.php?title=Special:Newimages entire gallery] of images here at the eaa-phev site,<br> |
| − | * [[Maker_Faire_Photos]] | + | or visit some other galleries with potentially applicable photos: |
| + | * [[2007_Maker_Faire#Photos]] | ||
| + | * Inaugural [[Maker_Faire_Photos]] | ||
* [[PiPrius#Photos]] | * [[PiPrius#Photos]] | ||
** [[WhiteBird#Photos]] | ** [[WhiteBird#Photos]] | ||
| Line 56: | Line 67: | ||
Image:P10386.JPG|Electronics housing semi-populated. | Image:P10386.JPG|Electronics housing semi-populated. | ||
Image:P10387.JPG|Electronics housing semi-populated. | Image:P10387.JPG|Electronics housing semi-populated. | ||
| − | Image:P10393.JPG|Wire Taps into OEM | + | Image:P10393.JPG|Wire Taps into OEM battery fan controls. |
| − | Image:P10394.JPG|Wire Taps into OEM | + | Image:P10394.JPG|Wire Taps into OEM battery fan controls. |
Image:P10380.JPG|Electronics housing (front). | Image:P10380.JPG|Electronics housing (front). | ||
| Line 84: | Line 95: | ||
Image:P10402.JPG|Ah Meter. | Image:P10402.JPG|Ah Meter. | ||
| − | Image:P10405.JPG|Electronics Board. | + | Image:P10405.JPG|Old Electronics Board. |
| − | Image:P10406.JPG|Electronics Board. | + | Image:P10406.JPG|Old Electronics Board. |
| − | Image:P10407.JPG|Electronics Board. | + | Image:P10407.JPG|Old Electronics Board. |
| − | Image:P10408.JPG|Electronics Board. | + | Image:P10408.JPG|Old Electronics Board. |
Image:P10404.JPG|Inside corner of battery box top. | Image:P10404.JPG|Inside corner of battery box top. | ||
| Line 94: | Line 105: | ||
====Photos from Chris Ewert's Conversion==== | ====Photos from Chris Ewert's Conversion==== | ||
| + | These are photos that [[User:Cewert]] has shared with us of his conversion via the CalCars [[PriusPlus]] method. | ||
<gallery> | <gallery> | ||
Image:Cutting Aluminum.JPG|Cutting the aluminum with a hacksaw | Image:Cutting Aluminum.JPG|Cutting the aluminum with a hacksaw | ||
| Line 139: | Line 151: | ||
Image:Rubber on center batt box support.jpg|Rubber pad under support angle irons | Image:Rubber on center batt box support.jpg|Rubber pad under support angle irons | ||
Image:Entire alt batt box mounting supports.jpg|Entire battery box mounting supports | Image:Entire alt batt box mounting supports.jpg|Entire battery box mounting supports | ||
| + | Image:Electronics box being assembled.jpg|Electronics box being assembled | ||
Image:Electronics Box Partial 1.jpg|Mostly completed electronics box | Image:Electronics Box Partial 1.jpg|Mostly completed electronics box | ||
Image:Electronics Box Partial 2.jpg|Mostly completed electronics box | Image:Electronics Box Partial 2.jpg|Mostly completed electronics box | ||
| + | Image:Electronics Box And Charger in Tire Well.jpg|Installed electronics box and charger | ||
| + | Image:Electronics Box And Charger in Tire Well 2.jpg|Installed electronics box with top on | ||
| + | Image:HVD1 in electronics box.jpg|Close up of HVD1 installed | ||
| + | Image:Contactors in electronics box.jpg|Close up of contactors installed | ||
| + | Image:Left side of electronics box.jpg|Left side of electronics box | ||
| + | Image:Right side of electronics box.jpg|Right side of electronics box | ||
| + | Image:Fuses in electronics box.jpg|Close up of fuses in electronics box | ||
| + | Image:Zivan NG3 Charger connected.jpg|Close up of ZiVan NG3 charger | ||
| + | Image:PriusPlus control board unstuffed front.jpg|Unstuffed control board - front | ||
| + | Image:PriusPlus control board unstuffed back.jpg|Unstuffed control board - back | ||
| + | Image:Batteries being installed 1.jpg|Batteries being installed | ||
| + | Image:Batteries being installed 2.jpg|More batteries | ||
| + | Image:Batt box top modified for alt mounting method.jpg|Battery box top (modified for alt. mounting) | ||
| + | Image:OEM Battery Hold Down Screw.jpg|Bolt on top of OEM battery | ||
| + | Image:Removing carpeting from top of OEM battery.jpg|Removing carpeting from on top of OEM battery | ||
| + | Image:Removing rear drivers side seat top.jpg|Removing the upright part of the rear seat | ||
| + | Image:OEM battery exposed.jpg|The OEM battery exposed | ||
| + | Image:Opening OEM battery.jpg|Opening the OEM battery lid | ||
| + | Image:Inside OEM battery from back of car.jpg|Inside the OEM battery (unmodified) from rear of car | ||
| + | Image:Inside OEM battery after tie in.jpg|Inside the OEM battery after HV tie-in | ||
| + | Image:Low voltage wiring inside OEM Battery.jpg|Unmodified OEM battery low voltage wiring | ||
| + | Image:Low voltage wiring inside OEM Battery modified.jpg|Modified OEM battery low voltage wiring (for charge interlock) | ||
| + | |||
| + | <!-- not sure these images are from this conversion --> | ||
| + | Image:DO-5 Diode.jpg|The DO-5 Diode as it arrives from DigiKey | ||
| + | Image:Nylon Spacer.jpg|The nylon spacer shown next to what it was made from | ||
| + | Image:Heatsink with Hole.jpg|The heatsink with a hole drilled for the spacer | ||
| + | Image:Heatsink with Hole and Spacer.jpg|Nylon spacer inserted into the hole in the heatsink | ||
| + | Image:Diode Mounted on Heatsink - Rear.jpg|Back side - Diode mounted on heatsink | ||
| + | Image:Diode_Mounted_on_Heatsink_-_Front.jpg|Front side - Diode mounted on heatsink | ||
| + | Image:OEM Battery Fan Wiring.jpg|The unmodified wiring | ||
| + | Image:OEM Battery Fan Wiring - Stripped Back.jpg|Unplugged and rubber casing stripped back | ||
| + | Image:OEM Battery Fan Modification - Diode Mounting 2.jpg|Ladder of diodes | ||
| + | Image:OEM Battery Fan Modification - New Wiring.jpg|Finished wiring modification | ||
</gallery> | </gallery> | ||
| − | ==== | + | ====Photos from 2007 Maker Faire==== |
| − | + | Some photos from the [[2007 Maker Faire]] conversion. | |
| + | <gallery> | ||
| + | <!-- Images from Chris --> | ||
| + | Image:Maker Faire 2007 1.jpg| | ||
| + | Image:Maker Faire 2007 2.jpg| | ||
| + | Image:Maker Faire 2007 3.jpg| | ||
| + | Image:Maker Faire 2007 4.jpg| | ||
| + | Image:Maker Faire 2007 5.jpg| | ||
| + | Image:Maker Faire 2007 6.jpg| | ||
| − | The battery box | + | <!-- These are photos provided by Felix of [http://www.calcars.org CalCars.org]. --> |
| + | Image:IMG 1171.jpg|The Make Faire team: left to right, Ron Gremban, Jim Bernard, Carolyn Coquillete, Chris Ewert, Walt Ferris , Nick Rothman, Cody Jackson, Robb Protheroe, Tom Driscoll, Felix Kramer, Jim Philippi. Not shown: Randy Reisinger, Ailian Chong, Amanda Kovattana, Marc Geller, Fraser Smith. | ||
| + | Image:IMG 1179.jpg|Outside the building, at the main entrance to Maker Faire, the team posed Ron's car (world's first Prius conversion) and Felix's car (with Valence lithium-ion batteries) | ||
| + | Image:IMG 1154 2.jpg|Applying the vinyl lettering to Jim's car. | ||
| + | Image:IMG 1186.jpg|Securing the battery box frame to the body of the car. | ||
| + | Image:IMG 1187.jpg|The battery box fits above the battery and tilts up to allow access to the spare tire. | ||
| + | Image:IMG 1188.jpg|Last-minute wiring diagrams. | ||
| + | Image:IMG 1190.jpg|Our work-site had crowds all day Saturday and Sunday. | ||
| + | Image:IMG 1205.jpg|Installing components inside the battery box. | ||
| + | Image:IMG 1208.jpg|Custom-made circuit boards included. | ||
| + | Image:IMG 1215.jpg|The team worked late Sunday night to wrap up the project. | ||
| − | + | </gallery> | |
| − | |||
| − | |||
| − | |||
| − | |||
| − | |||
| − | |||
| − | |||
| − | |||
| − | |||
| − | |||
| − | |||
===General Reference Materials=== | ===General Reference Materials=== | ||
These are some other General Reference Materials we use elsewhere on the site. This is also an example of how to use references within the page text. See [[PiPrius conversion process]] for another example of a page with multiple reference tages. | These are some other General Reference Materials we use elsewhere on the site. This is also an example of how to use references within the page text. See [[PiPrius conversion process]] for another example of a page with multiple reference tages. | ||
| − | * Prius Dismantle Manual <ref>[[ | + | * Prius Dismantle Manual <ref>[[Image:Priusdisman.pdf]] from http://www.airlabcorp.com/Prius/priusdisman.pdf</ref> |
| − | * Stereo Installation, Dash Dismantle <ref>[[ | + | * Stereo Installation, Dash Dismantle <ref>[[Image:Stereo Accessory Install Guide 04 Prius v1.03.pdf]] from [http://web.archive.org/web/*/http://www.chrisdragon.com/downloads/Stereo%2520Accessory%2520Install%2520Guide,%252004%2520Prius,%2520v1.03.pdf http://www.chrisdragon.com]</ref> |
| − | * Stereo Installation, Dash Dismantle <ref>[[ | + | * Stereo Installation, Dash Dismantle <ref>[[Image:PriusXMradio3.2.pdf]] from https://www.metrotpn.com/documents/PDF%20Files/Prius/Eddie's%20XMRadio%20Install/PriusXMradio3.2.pdf</ref> |
| − | * [[CAN-View]] install without Nav <ref>[[ | + | * [[CAN-View]] install without Nav <ref>[[Image:CAN-View installNONAVwt.pdf]] Adapted from http://www.hybridinterfaces.ca/installNONAV.html</ref> |
| − | * [[CAN-View]] install with Nav <ref>[[ | + | * [[CAN-View]] install with Nav <ref>[[Image:CAN-View installWNAVwt.pdf]] Adapted from http://www.hybridinterfaces.ca/installWNAV.html</ref> |
| − | * [[Prius EV Mode Button]] Installation <ref>[[ | + | * [[Prius EV Mode Button]] Installation <ref>[[Image:Prius-evbutton-install.pdf]] from http://www.calcars.org/prius-evbutton-install.pdf</ref> |
| − | * Factory EV Mode Button <ref>[[ | + | * Factory EV Mode Button <ref>[[Image:FactoryEV.pdf]] from http://www.scubadivervideo.com/Files/factoryEV.pdf</ref> |
You should be familiar with these reference materials and standard operating procedures around high voltages. | You should be familiar with these reference materials and standard operating procedures around high voltages. | ||
<references/> | <references/> | ||
| − | |||
| − | |||
| − | |||
==Intro Editing Help== | ==Intro Editing Help== | ||
| Line 223: | Line 274: | ||
{{Clear}} | {{Clear}} | ||
| − | |||
| − | |||
| − | |||
| − | |||
| − | |||
| − | |||
| − | |||
| − | |||
| − | |||
| − | |||
| − | |||
| − | |||
| − | |||
| − | |||
| − | |||
| − | |||
| − | |||
| − | |||
==References== | ==References== | ||
<references/> | <references/> | ||
| + | |||
| + | [[Category:PHEV]] | ||
| + | [[Category:Prius]] | ||
| + | [[Category:PriusPlus]] | ||
| + | [[Category:CalCars]] | ||
Latest revision as of 12:06, 14 June 2020
| Click show for a short list of the current PHEV conversion and kit options for the Toyota Prius. |
|---|
|
For Prius conversion details see the Prius PHEV article and comparisons table.
|
|
--={ Project Overview
}={ 2007 Maker Faire
}={ Theory
}={ Instructions
}={ Parts List
}={ RawData
}={ Latest News
}=--
|
|---|
|
--={ Historic }={ Battery }={ Schematics }={ PseudoCode }={ Photos }=-- |
 Team Photo from the PriusPlus conversion of Sven's Prius from Nov 2006. This is the home of the PRIUS+ PHEV DIY (Do-it-Yourself) documentation. These pages are currently anonymously editable, which may change in the future. Please feel free to use the Discussion page for general discussion and commentary on the main article. If you would like to add to an existing section use the "edit" link near that topic's heading. Don't forget to use the Summary field to describe your changes. While editing use the "Show Preview" button to make sure your changes look like you expect them to, before you click "Save Page". |
This page houses all raw reference materials and other data which have been uploaded to incorporate into documentation on the other pages.
Specifications
The following two Excel files are specifications that I (Ron Gremban) wrote and copyrighted in early 2007, then placed into the public domain by publishing (including an appropriate copyright license message) on the eaa-phev maillist on Aug 6, 2007 (message 1119).
ControlSwSpecs_v01_20070128_rdg.xls
The software specification is a complete specification for software to control a PRIUS+ conversion from data read from the CAN bus using the best algorithms I had developed up to January 28, 2007. Since then, Chris Ewert, myself, and others have further refined the algorithms to handle special cases such as extreme temperatures and speeds just slightly above 34 mph.
The test specification, written April 7, 2007, is a basic ordered list of tests that would be good to follow as part of completing and validating a PRIUS+ conversion.
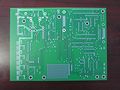
Schematics
These are preview images of various schematics, click on the thumbnails for a larger preview and to download the full sized images. You will also find links to .zips of the original ExpressSCH schematics from which these images were produced.


Battery Box Designs
See the following for designs for a hinged battery box:
- File:076610.1004-PP2-1.PDF - assembled view
- File:076610.2039-pp2.pdf - Bottom Plate
- File:076610.2040-PP2.pdf - Side Panel, Right
- File:076610.2041-PP2.pdf - Side Panel, Left
- File:076610.2042-pp2.pdf - Top Cover
Photos
You can browse the entire gallery of images here at the eaa-phev site,
or visit some other galleries with potentially applicable photos:
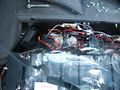
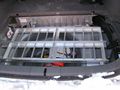
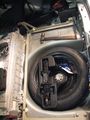
 Photo of OEM NiMH battery with case fully removed during Maker Faire, which is no longer necessary during current conversions. |
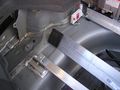
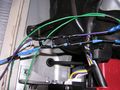
 Photo of the PriusBlue HV Tie in at the time of the Maker Faire, routed out of OEM battery case near service plug. |

Rons Images

Build Team Photo with labels

Team Photo around Rons Prius.
Team Photo around Rons Prius.
Team Photo around Rons Prius.
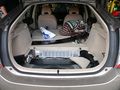
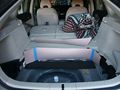
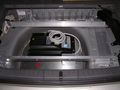
The unmodified trunk area.
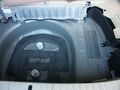
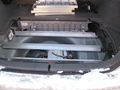
Pair of PVC air vents installed in spare tire well.
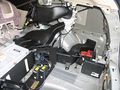
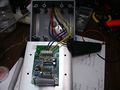
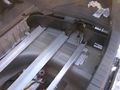
Mockup of the Electronics housing for wiring and circuit boards.
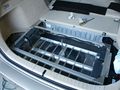
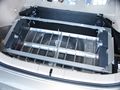
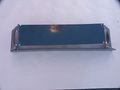
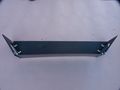
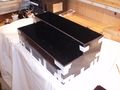
The empty new battery box.
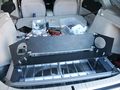
Electronics housing and misc parts on top of new battery box, ready for installation.
Electronics housing and battery box fitting mockup.
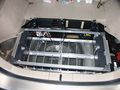
Electronics housing semi-populated and battery box fitting mockup.
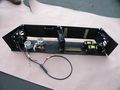
Electronics housing semi-populated.
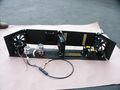
Electronics housing semi-populated.
Electronics housing semi-populated.
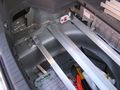
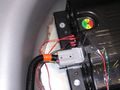
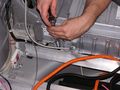
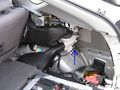
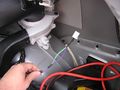
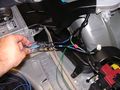
Wire Taps into OEM battery fan controls.
Wire Taps into OEM battery fan controls.
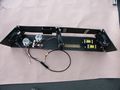
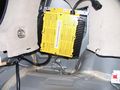
Electronics housing (front).
Electronics housing (bottom).
Electronics housing (back).
Electronics housing (top).
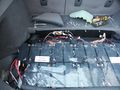
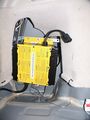
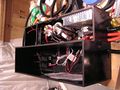
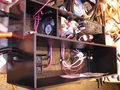
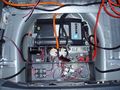
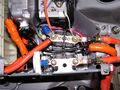
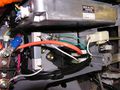
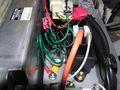
Electronics in Rons Prius.
Electronics in Rons Prius.
Electronics in Rons Prius.

Electronics in Rons Prius.
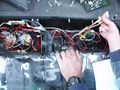
Working on Circuit boards.
Populating Electronics housing.
Populating Electronics housing.
Electronics housing cooling fan flaps.
Bracket for ABS control.
Bracket for ABS control.
Bracket for ABS control.
Bracket for ABS control.
Delta-Q Charger installed.
Delta-Q Charger installed.
110v breakout quad and 110 to 12v power supply.
Ah Meter.
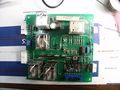
Old Electronics Board.
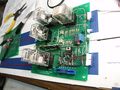
Old Electronics Board.
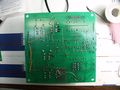
Old Electronics Board.
Old Electronics Board.
Inside corner of battery box top.
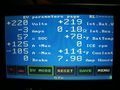
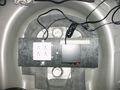
CAN-View screen.


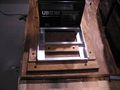
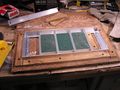
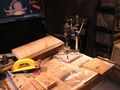
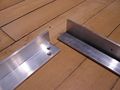
Photos from Chris Ewert's Conversion
These are photos that User:Cewert has shared with us of his conversion via the CalCars PriusPlus method.
Cutting the aluminum with a hacksaw
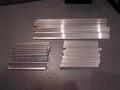
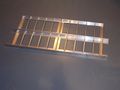
All the pieces necessary for the battery trays

All the parts from the tray laid out
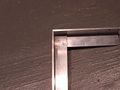
Battery tray just set together
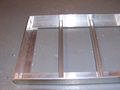
Close up of the battery tray just set together
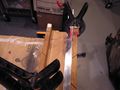
Tray set together, ready for creating "jig"

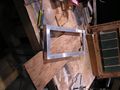
Starting to assemble the jig
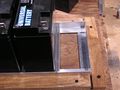
More assembling the jig
Getting the jig assembled
Mostly finished tray jig
Dremel drill press used for drilling holes in angle irons
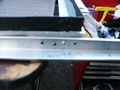
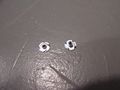
Holes drilled in the aluminum, then countersunk
Sample corner finished (done on scrap aluminum)
Shows the self threading screws sticking out

The finished tray
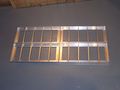
All 4 finished trays laid out like they will be
Experimenting with the support angle irons
Starting on the top of the battery box
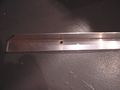
45 degree angles cut in angle irons
Corner bracket just set on the top

3 angle irons cut and just sitting on the box
Shows the Plexiglass "shield" on the inside of the angle irons
Partially assembled battery box - bolted on top, but not the sides
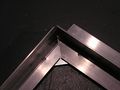
Inside of the corner of the battery box top
Binding posts that I choose to use. They worked, but they aren't part of the official conversion method
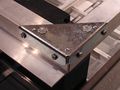
A completed corner, bolts in and have been ground off.
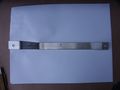
Shows the angle iron that will be used to bolt down the top
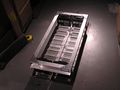
Mostly finished battery box. Still lacking the bolts in the center of the pack, holes for bolting the top down and holes in the frame
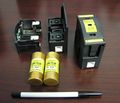
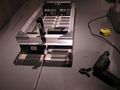
Fuses and holders
A fuse in it's holder

Bottom of the fuse holder (for DIN rail mounting)
The Kilovac EV200 contactor
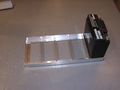
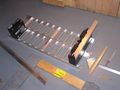
Battery Box sitting on steel tube

Battery box sitting on steel tube with second tube for screw lift support
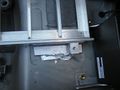
Alt mounting method: modified hanger bolted into battery box mount
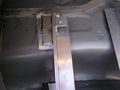
Alt mounting method: Test fit of unfinished battery box top in forward location
Charger in tirewell
Welded support connected to support angle irons
Welded support connected to support angle irons
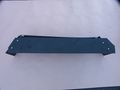
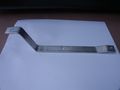
Support angle irons
Right side battery box supports
Left side battery box supports
Rubber pad under support angle irons
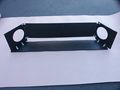
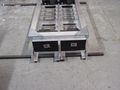
Entire battery box mounting supports
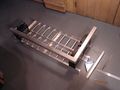
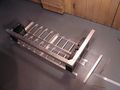
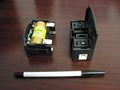
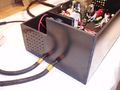
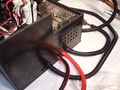
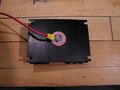
Electronics box being assembled
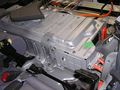
Mostly completed electronics box
Mostly completed electronics box
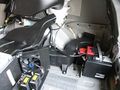
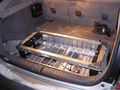
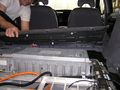
Installed electronics box and charger
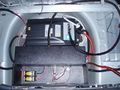
Installed electronics box with top on
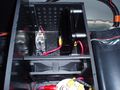
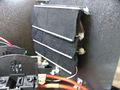
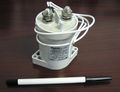
Close up of HVD1 installed
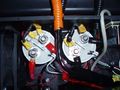
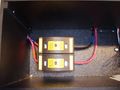
Close up of contactors installed
Left side of electronics box
Right side of electronics box
Close up of fuses in electronics box
Close up of ZiVan NG3 charger
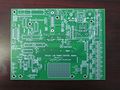
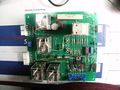
Unstuffed control board - front
Unstuffed control board - back
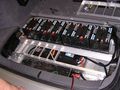
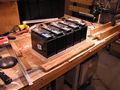
Batteries being installed
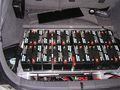
More batteries
Battery box top (modified for alt. mounting)
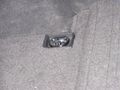
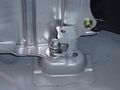
Bolt on top of OEM battery
Removing carpeting from on top of OEM battery
Removing the upright part of the rear seat
The OEM battery exposed
Opening the OEM battery lid

Inside the OEM battery (unmodified) from rear of car
Inside the OEM battery after HV tie-in
Unmodified OEM battery low voltage wiring
Modified OEM battery low voltage wiring (for charge interlock)
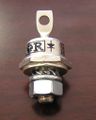
The DO-5 Diode as it arrives from DigiKey
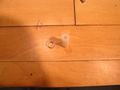
The nylon spacer shown next to what it was made from
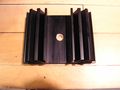
The heatsink with a hole drilled for the spacer
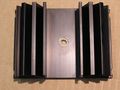
Nylon spacer inserted into the hole in the heatsink
Back side - Diode mounted on heatsink
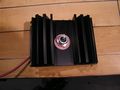
Front side - Diode mounted on heatsink
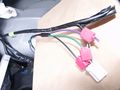
The unmodified wiring
Unplugged and rubber casing stripped back
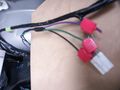
Ladder of diodes
Finished wiring modification


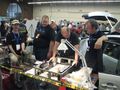
Photos from 2007 Maker Faire
Some photos from the 2007 Maker Faire conversion.
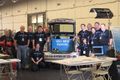
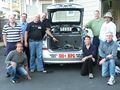
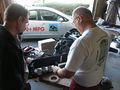
The Make Faire team: left to right, Ron Gremban, Jim Bernard, Carolyn Coquillete, Chris Ewert, Walt Ferris , Nick Rothman, Cody Jackson, Robb Protheroe, Tom Driscoll, Felix Kramer, Jim Philippi. Not shown: Randy Reisinger, Ailian Chong, Amanda Kovattana, Marc Geller, Fraser Smith.

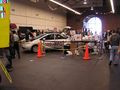
Outside the building, at the main entrance to Maker Faire, the team posed Ron's car (world's first Prius conversion) and Felix's car (with Valence lithium-ion batteries)

Applying the vinyl lettering to Jim's car.
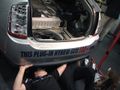
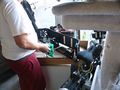
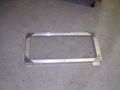
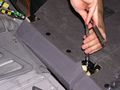
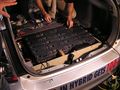
Securing the battery box frame to the body of the car.
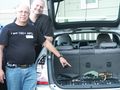
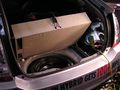
The battery box fits above the battery and tilts up to allow access to the spare tire.
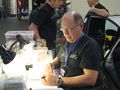
Last-minute wiring diagrams.
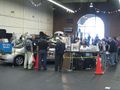
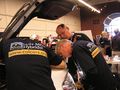
Our work-site had crowds all day Saturday and Sunday.
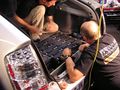
Installing components inside the battery box.
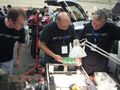
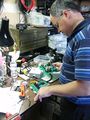
Custom-made circuit boards included.
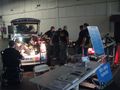
The team worked late Sunday night to wrap up the project.


General Reference Materials
These are some other General Reference Materials we use elsewhere on the site. This is also an example of how to use references within the page text. See PiPrius conversion process for another example of a page with multiple reference tages.
- Prius Dismantle Manual <ref>File:Priusdisman.pdf from http://www.airlabcorp.com/Prius/priusdisman.pdf</ref>
- Stereo Installation, Dash Dismantle <ref>File:Stereo Accessory Install Guide 04 Prius v1.03.pdf from http://www.chrisdragon.com</ref>
- Stereo Installation, Dash Dismantle <ref>File:PriusXMradio3.2.pdf from https://www.metrotpn.com/documents/PDF%20Files/Prius/Eddie's%20XMRadio%20Install/PriusXMradio3.2.pdf</ref>
- CAN-View install without Nav <ref>File:CAN-View installNONAVwt.pdf Adapted from http://www.hybridinterfaces.ca/installNONAV.html</ref>
- CAN-View install with Nav <ref>File:CAN-View installWNAVwt.pdf Adapted from http://www.hybridinterfaces.ca/installWNAV.html</ref>
- Prius EV Mode Button Installation <ref>File:Prius-evbutton-install.pdf from http://www.calcars.org/prius-evbutton-install.pdf</ref>
- Factory EV Mode Button <ref>File:FactoryEV.pdf from http://www.scubadivervideo.com/Files/factoryEV.pdf</ref>
You should be familiar with these reference materials and standard operating procedures around high voltages. <references/>
Intro Editing Help
File Specific Help
File link Examples, click the edit button for this section to see how it works.
Text Links:
- Using :Image takes you to the Images description page:
- Using Media takes you directly to the file:
- You can use a | to change the text of the link to something more descriptive.
Inline resized images:
25px![]() , 50px
, 50px![]() , 150px,
, 150px,
300px
Thumbnails:
- Thumbnail tag will embed the image inline such that text will wrap arround the image. The image will be alligened to the right by default or can be forced with a "|center" or "|left" tag. Thumbnails should also include some caption as their last "|caption element". Notice that the image code is placed above this text so that the text and image begin at the same place.
The {{Clear}} template can be used to force empty white space after a thumbnail before continuing with the next block of text.
- A Second Example...
Thumbnail tag will embed the image inline such that text will wrap arround the image. The image will be alligened to the right by default or can be forced with a "|center" or "|left" tag. Thumbnails should also include some caption as their last "|caption element". Notice that the image code is placed above this text so that the text and image begin at the same place. Thumbnail tag will embed the image inline such that text will wrap arround the image. The image will be alligened to the right by default or can be forced with a "|center" or "|left" tag. Thumbnails should also include some caption as their last "|caption element". Notice that the image code is placed above this text so that the text and image begin at the same place. Thumbnail tag will embed the image inline such that text will wrap arround the image. The image will be alligened to the right by default or can be forced with a "|center" or "|left" tag. Thumbnails should also include some caption as their last "|caption element". Notice that the image code is placed above this text so that the text and image begin at the same place.
References
<references/>